Power Apps and APIM
The premier Star Wars Fan club is growing and the club officers would like to upgrade from their existing member tracking worksheet to a mobile application that would be available to their members all over the world. The members would also like to see information about their favorite Star Wars movies and characters in the application that would update as new shows and movies are released.
In this exercise, you will be using Star Wars API with Azure API Management instance that you created in part three of this lab. The Excel worksheet of member profiles will serve as the primary backing data source and will be used to generate a base application. You will export the Star Wars API from Azure API Management as a Power Platform Custom Connector so that the Canvas App can access real-time Star Wars character information. For each of the Fan Club members, you can then search the Star Wars API character data and show information about their favorite character in the Canvas App.
Note: This exercise requires access to Power Apps Premium connectors. Sign up for a free Developer Plan.
Update CORS policy
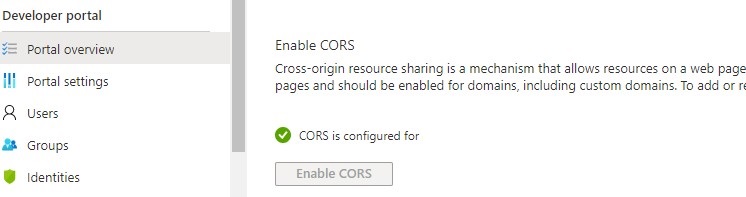
Check Azure API Management -> Developer Portal -> Portal overview to see if CORS has been enabled globally. If it has been enabled, go to All APIs and add https://flow.microsoft.com and https://make.powerapps.com as allowed origins. Here’s what the Portal overview will look like if CORS has been enabled:
Create a custom connector
From the existing Star Wars API Api in Azure API Management, click the ellipsis … and select the Create Power Connector option to generate a custom connector in your Power Platform environment.

If you are unable to create a Power Connector from Azure API Management, you can also export an OpenAPI v2 (JSON) file that can be imported as a Custom Connector within Power Platform. You can find a sample here.
View your custom connector in Power Platform
- Go to https://make.powerapps.com and sign in with your organizational account.
- Select Data from the left pane, and then select Custom Connectors to see your generated custom connector to your Azure API Management API.

- From here, select the pencil icon to edit the custom connector.
- On the Definition screen, we need to define a search query string for people so that the Power App can search for character records by name. Select the
GetPeopleaction, and in the Request section, select + Import from sample. Enter a sample request URL with the search query string:
https://apim-star-wars-xxxx.azure-api.net/sw/people?search=Luke

- In the Response section of the
getpeopleaction, select the200response and then select + Import from sample. Copy and paste a sample JSON response into theBodysection of the response. Close the import panel and select Update connector.

- Repeat this import for the
getpeoplebyidaction. - In the Policies section select + New policy.
- Fill out the new policy with the following information:
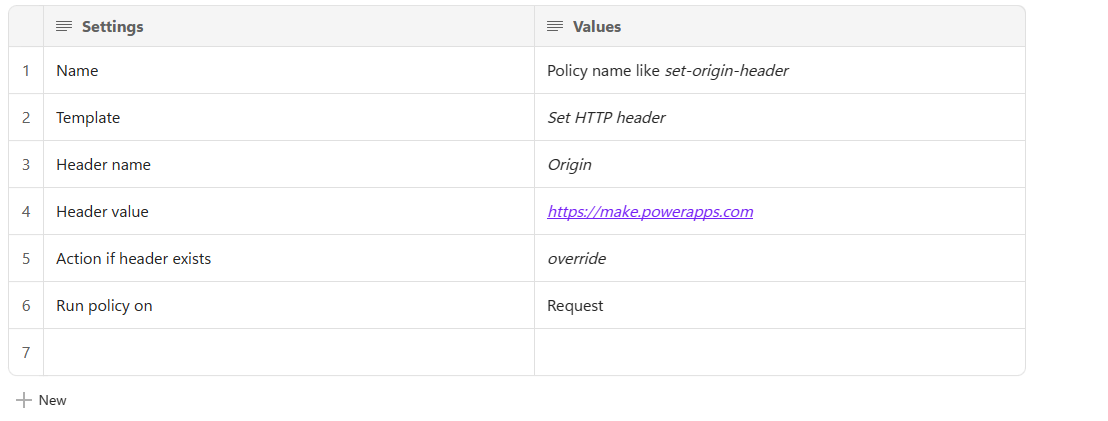
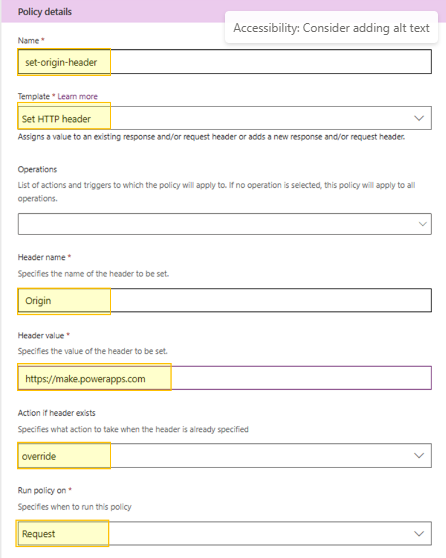
-
Next, Update connector.
-
On the Test screen, create a new connection instance in the Connections section. You will then be redirected to the Connections area in Power Platform where your connection was created. Navigate back to the Custom Connectors page and edit the Star Wars API again. Return to the Test page and test each of the API actions.

Generate the Star Wars Fan Club Application
Connect to the backing data source
- Download the FanClubMembers.xlsx workbook and save it to your OneDrive for Business account.
- Back in the Power Apps Editor, in the left pane, select Home.
- Under Start from data , select Other data sources and then select New from the left pane.
- Select OneDrive for Business data source, and then Phone layout.
- Under OneDrive for Business , select Create.
- Under Connections , select OneDrive for Business and browse to the file location. You might need to select New Connection to see the OneDrive for Business connection.
- Under Choose an Excel file , select the FanClubMembers.xlsx file.
- Under Choose a table , select the Members table.
- Select Connect on the bottom right.
- Power Apps will generate the app by inspecting your data and matching it with Power Apps screens.
Add Favorite Character information
Your generated app will now be in edit mode in the Power Apps Studio.
Add the Star Wars API Data Source
- Select Data from the left pane and then select + Add data from the drop-down menu.
- Search for Star Wars in the search field and choose the connection to the Star Wars API.

Customize the generated app
Your generated app will now be in edit mode in the Power Apps Studio.
You can customize your app theme using the Theme drop-down menu and selecting an option. You can change or format the fields that are shown in the Gallery by selecting Tree view in the left pane, clicking on the BrowseGallery1, and making edits in the right formatting pane.

Add controls to the View Detail screen
- In the Tree view, select DetailScreen1.
- Select the + icon on the left side of the screen to bring up the Insert panel.
- Select Text Label and add labels for the Favorite Character section header and for each one of the character description fields.
- For each label control, change the Text property in the right-side Properties panel to describe each field.
- Drag the controls on the screen so they are below the header and are aligned with the center of the screen.

Connect the Detail Screen to the Star Wars API
- In the left pane, select the Tree view and then the BrowseGallery1 on Browsescreen1.
- Using the drop-down menu, select the OnSelect action that will be executed when a user selects a Fan Club member from the gallery.
- In the OnSelect function, we will navigate to DetailScreen1 and call the Star Wars API to get the character details for the member's favorite character.
Navigate(DetailScreen1, ScreenTransition.None);

ClearCollect(characterCollection, StarWarsAPI.getpeople({search: ThisItem.MemberFavoriteCharacter}).results);

Show the Star Wars character information on the Detail Screen
- For each of the description labels on DetailScreen1 , change the Text property in the right-side Properties panel to include the data from the API. For example, for the Name: label:
"Name:" & " " & First(characterCollection).name
- Select Play in the upper-right corner to practice using the app.

