API Proxy to Serverless
Azure Serverless (Functions and Logic Apps) can be configured to benefit from the advantages of Azure API Management.
Azure Functions
In this section, we will create a simple HTTP Triggered Azure Function which runs on the Flex Consumption plan. Flex Consumption is a Linux-based Azure Functions hosting plan that uses a serverless billing model and provides private networking, flexible memory size allocation and fast scale-out capabilities.
- Create a simple function that is Triggered by an HTTP Request. Navigate to the Azure Functions portal and click Create.

- In the Create Azure Function screen, select Flex Consumption.
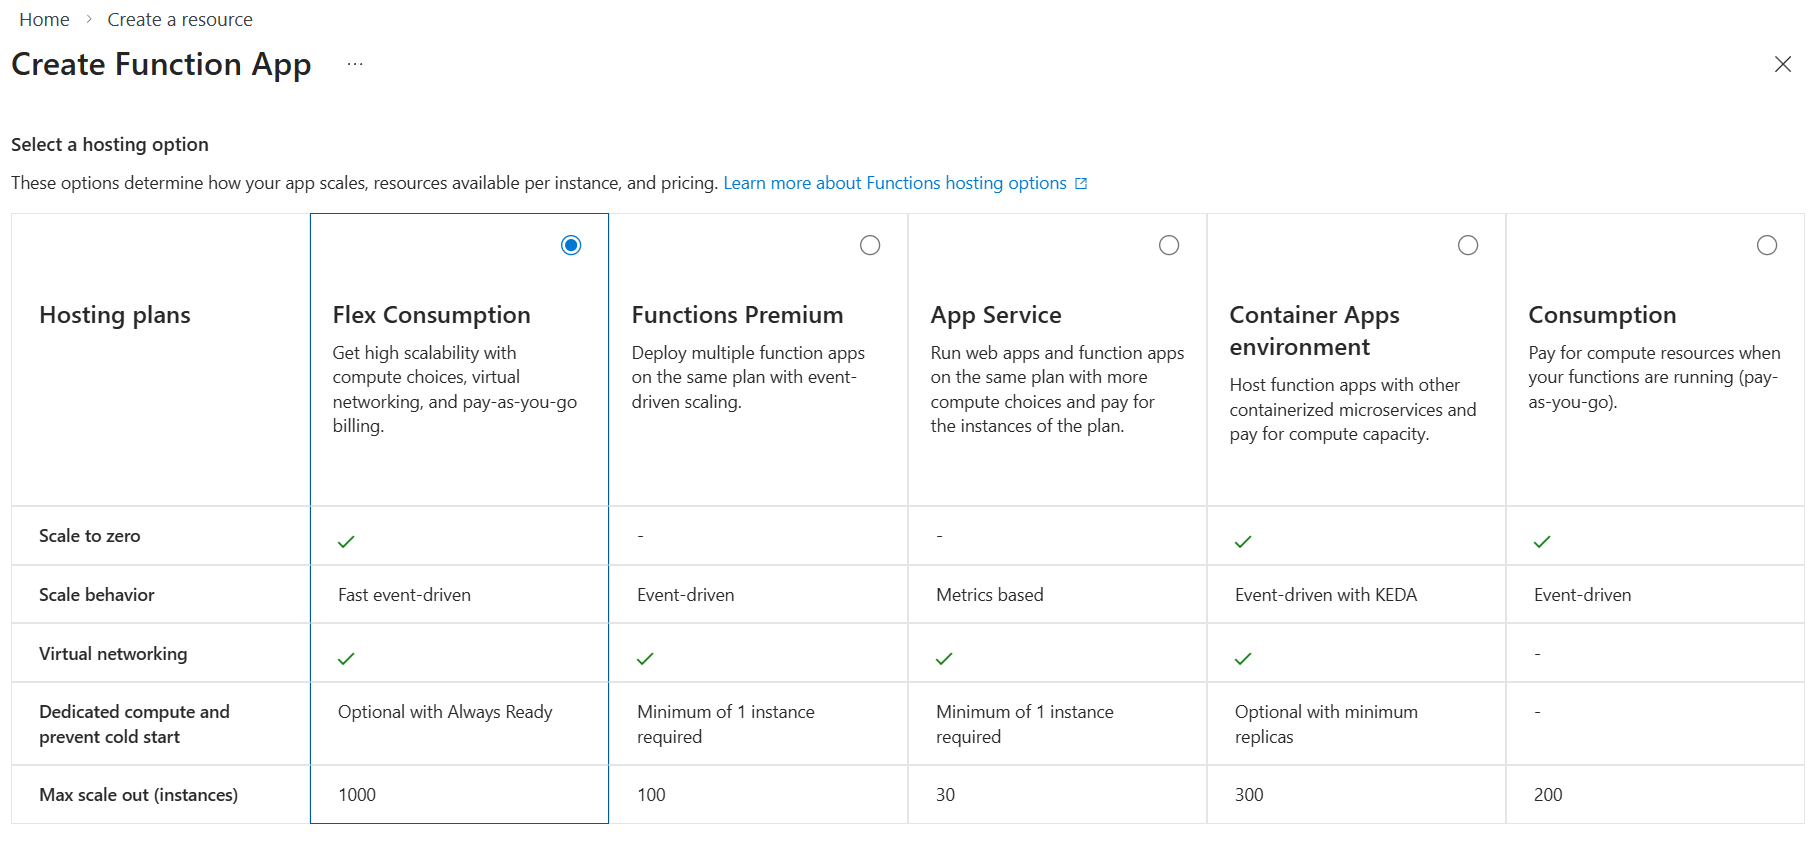
-
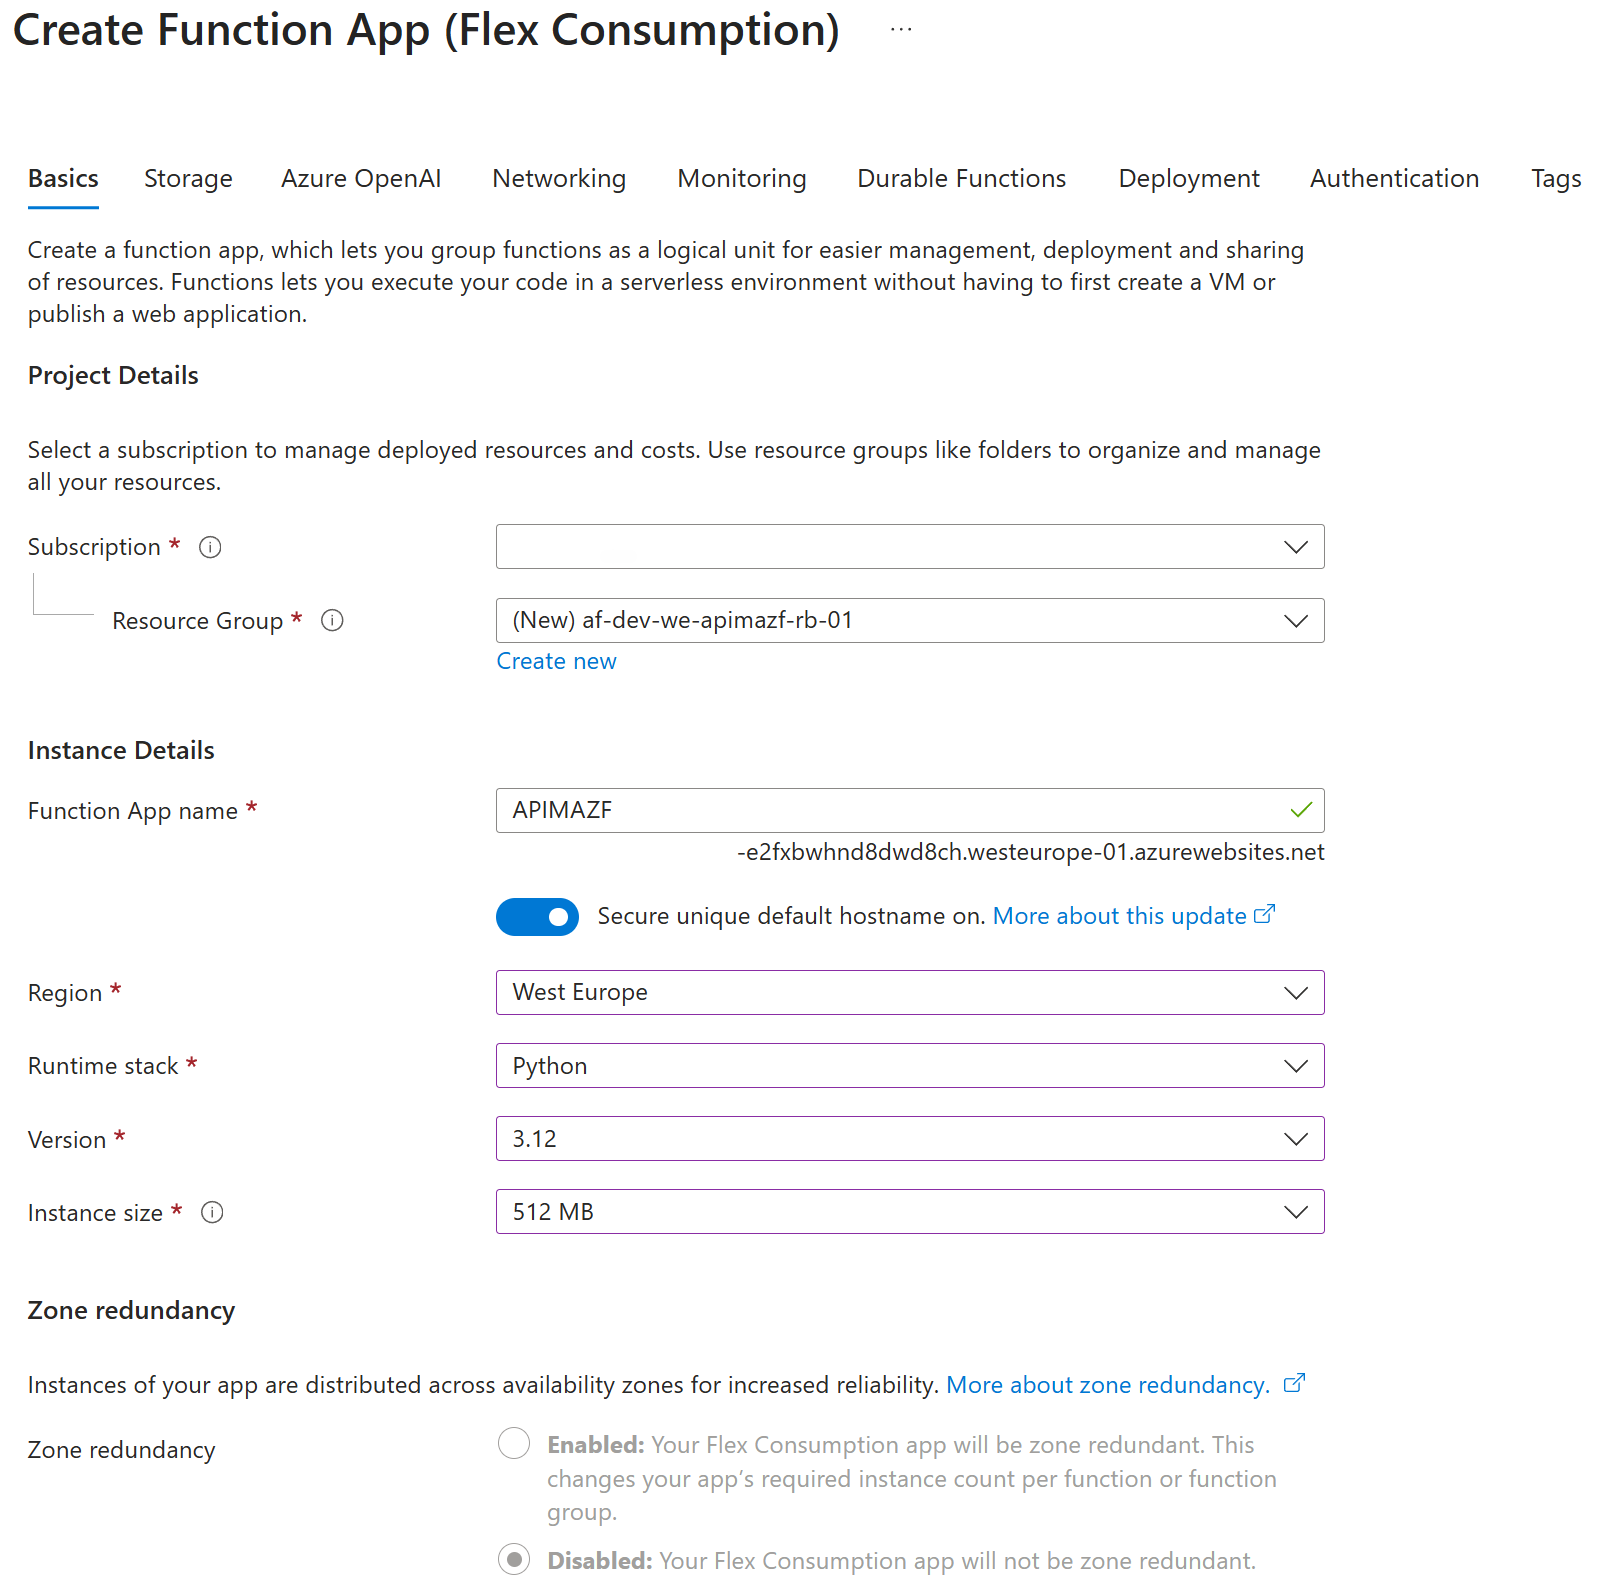
On the Basics properties screen, fill in the details as follows:
- Resource Group (create new):
af-dev-we-apimazf-[your-initials]-01 - Function App Name:
APIMAZF - Region:
West Europe - Runtime stack:
3.12 - Instance size:
512MB
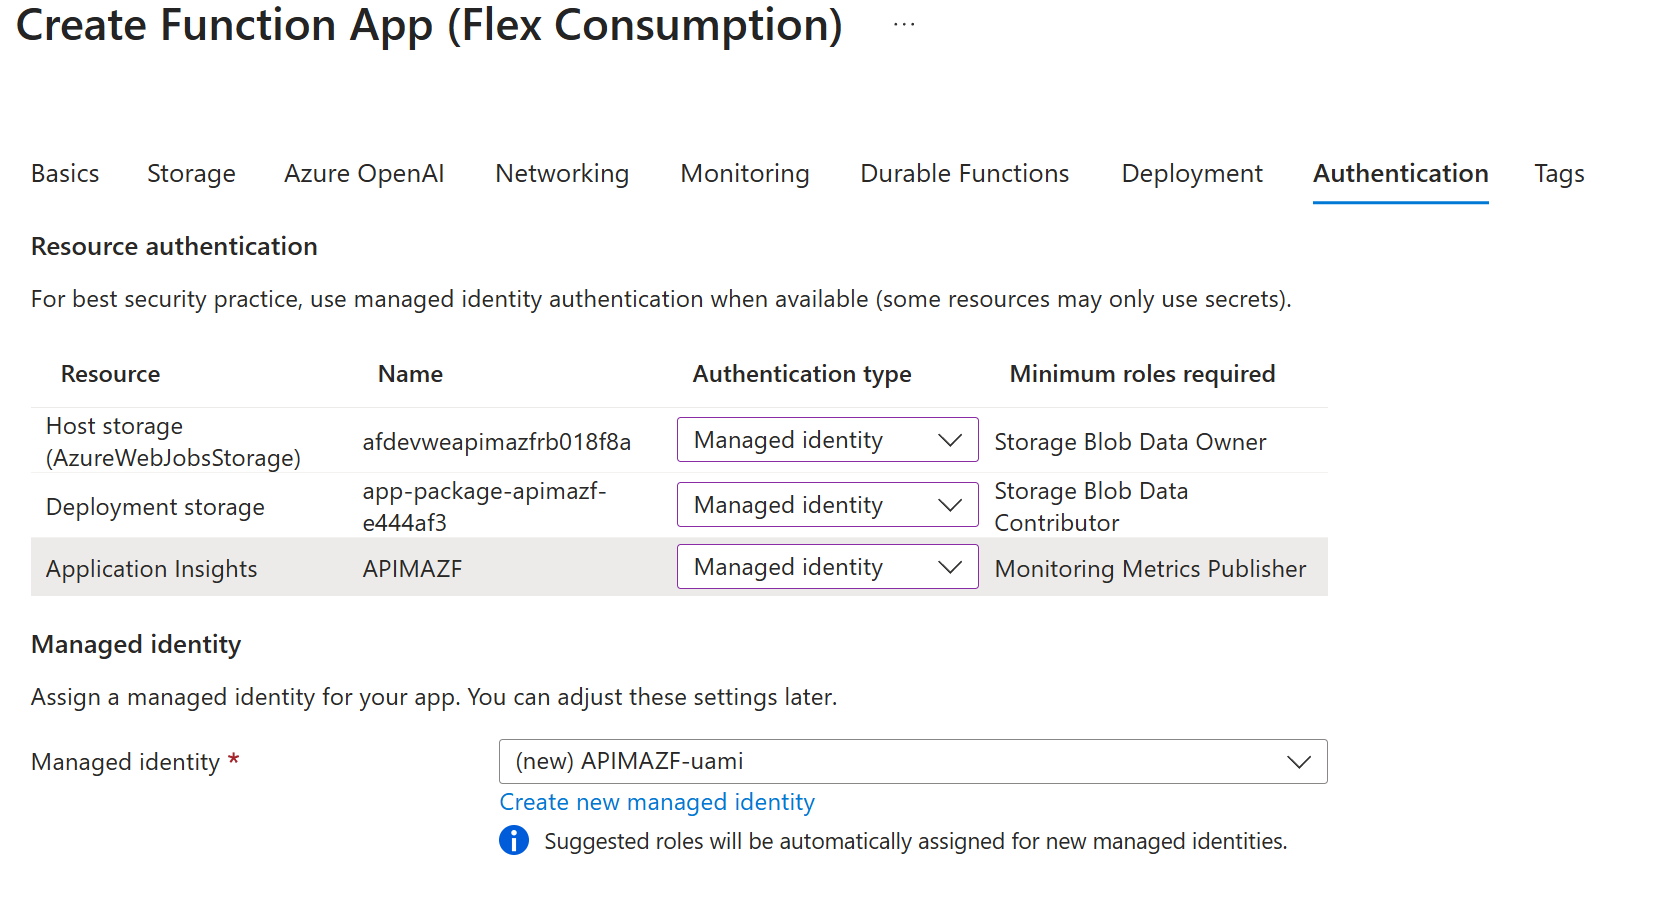
- On the Authentication section, select Managed Identities for all of the options as shown below.
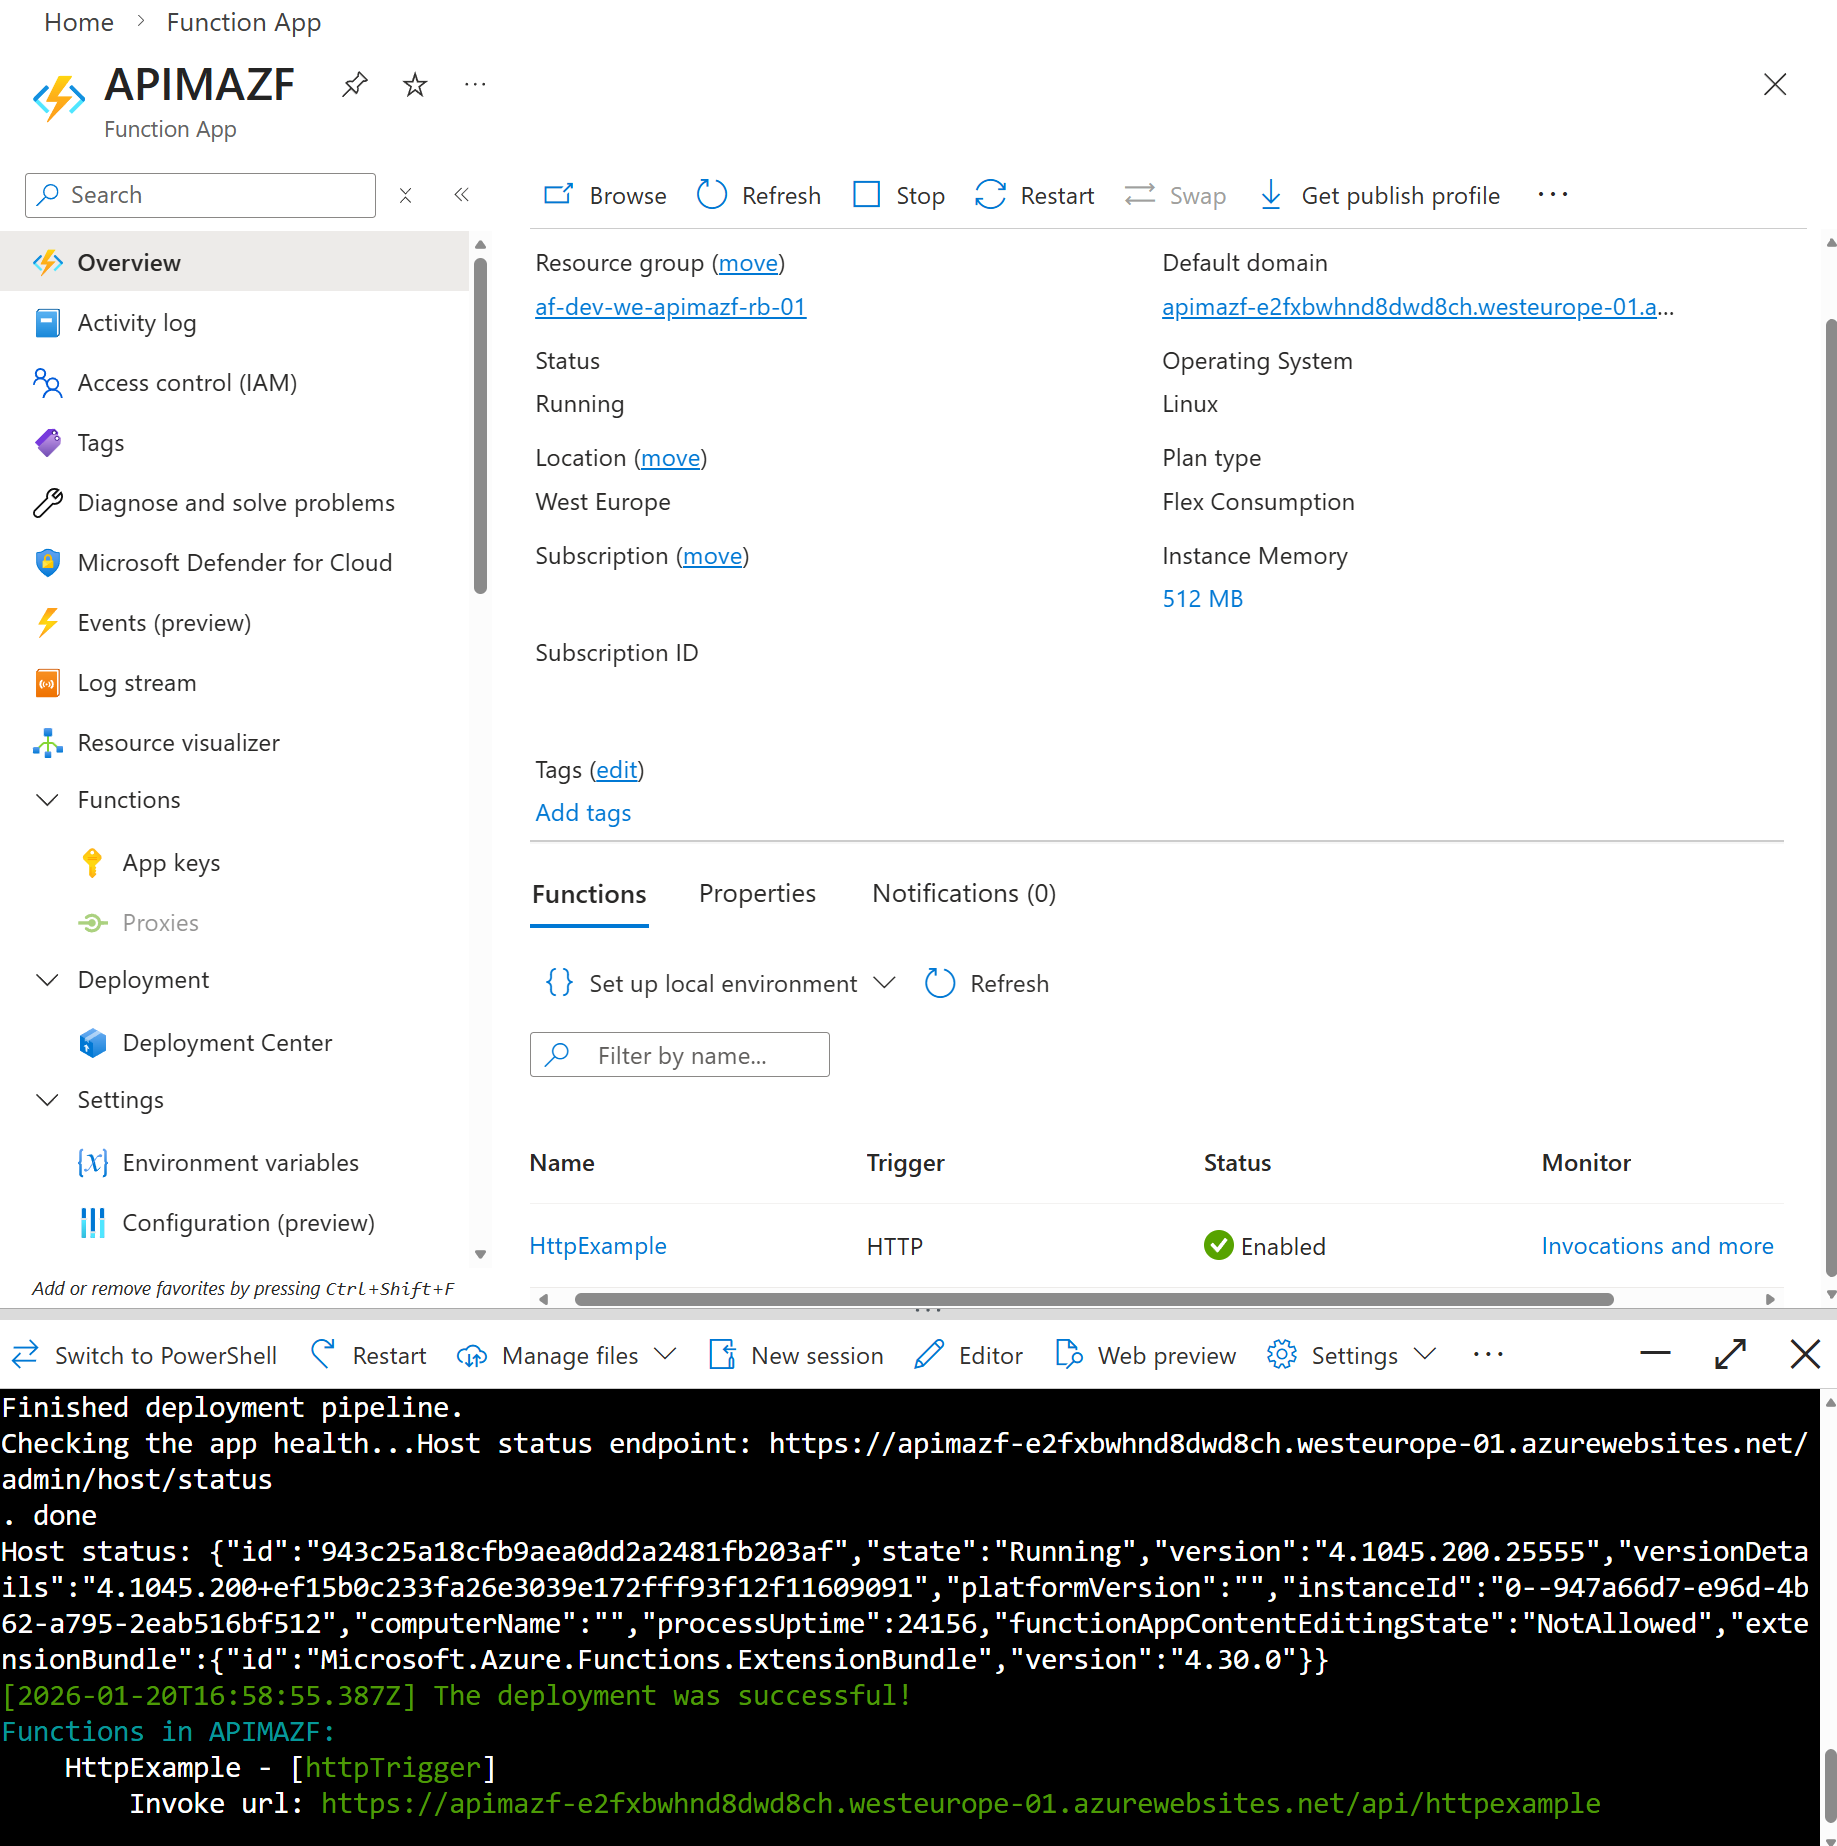
- Wait for the Azure Function to be created and deployed and then go to resource. You should see your new Azure Function App. It’s empty at the moment, we’ll need to add a function handler.

- You can add a function handler to your Azure Function in a variety of ways, through the command line, VS Code and so on. We’ll keep it simple and use the CLI. Open a Cloud Shell (not Powershell) on this page. Run the following commands in this cloudshell. These commands will populate the directory with a simple Python function handler that is triggered by HTTP:
func init --worker-runtime pythonfunc new --name HttpExample --template "HTTP trigger" --authlevel "function"
-
Finally, run the following command to publish your local function to your Azure Function App:
func azure functionapp publish APIMAZF
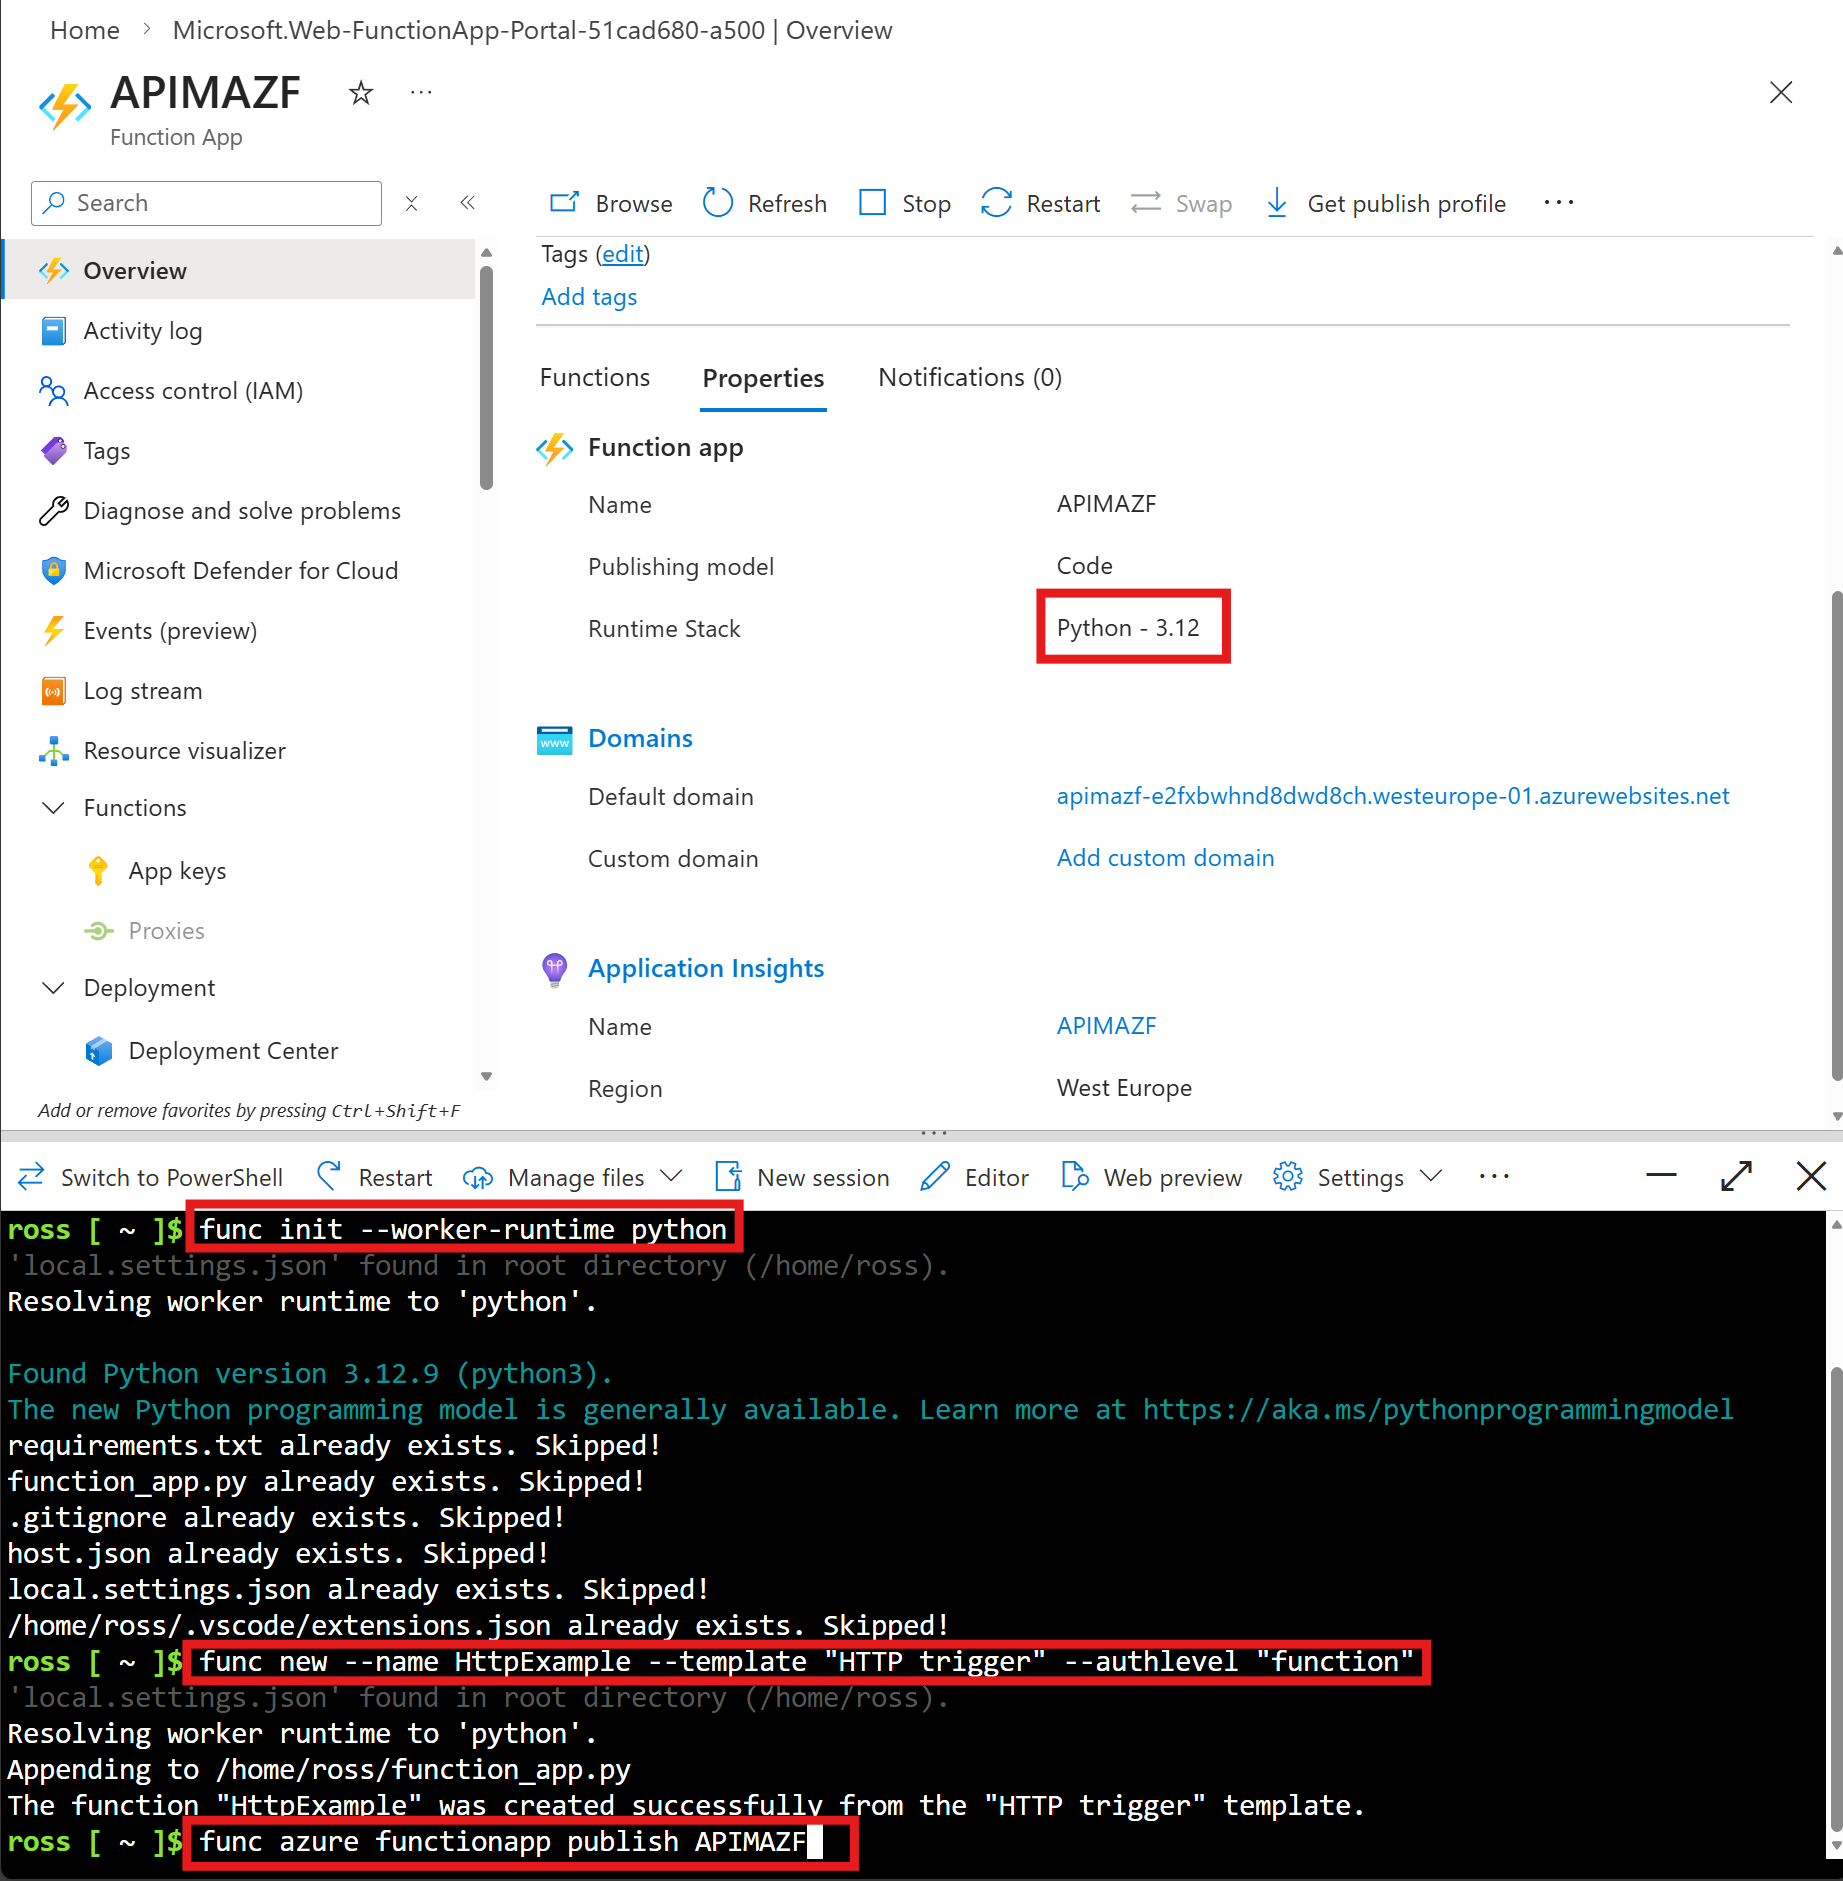
- The function will take a while to deploy to your function app but once complete, you should see a green success message in the cloud shell terminal and a new HTTPExample function listed in the Functions section of the Overview blade.
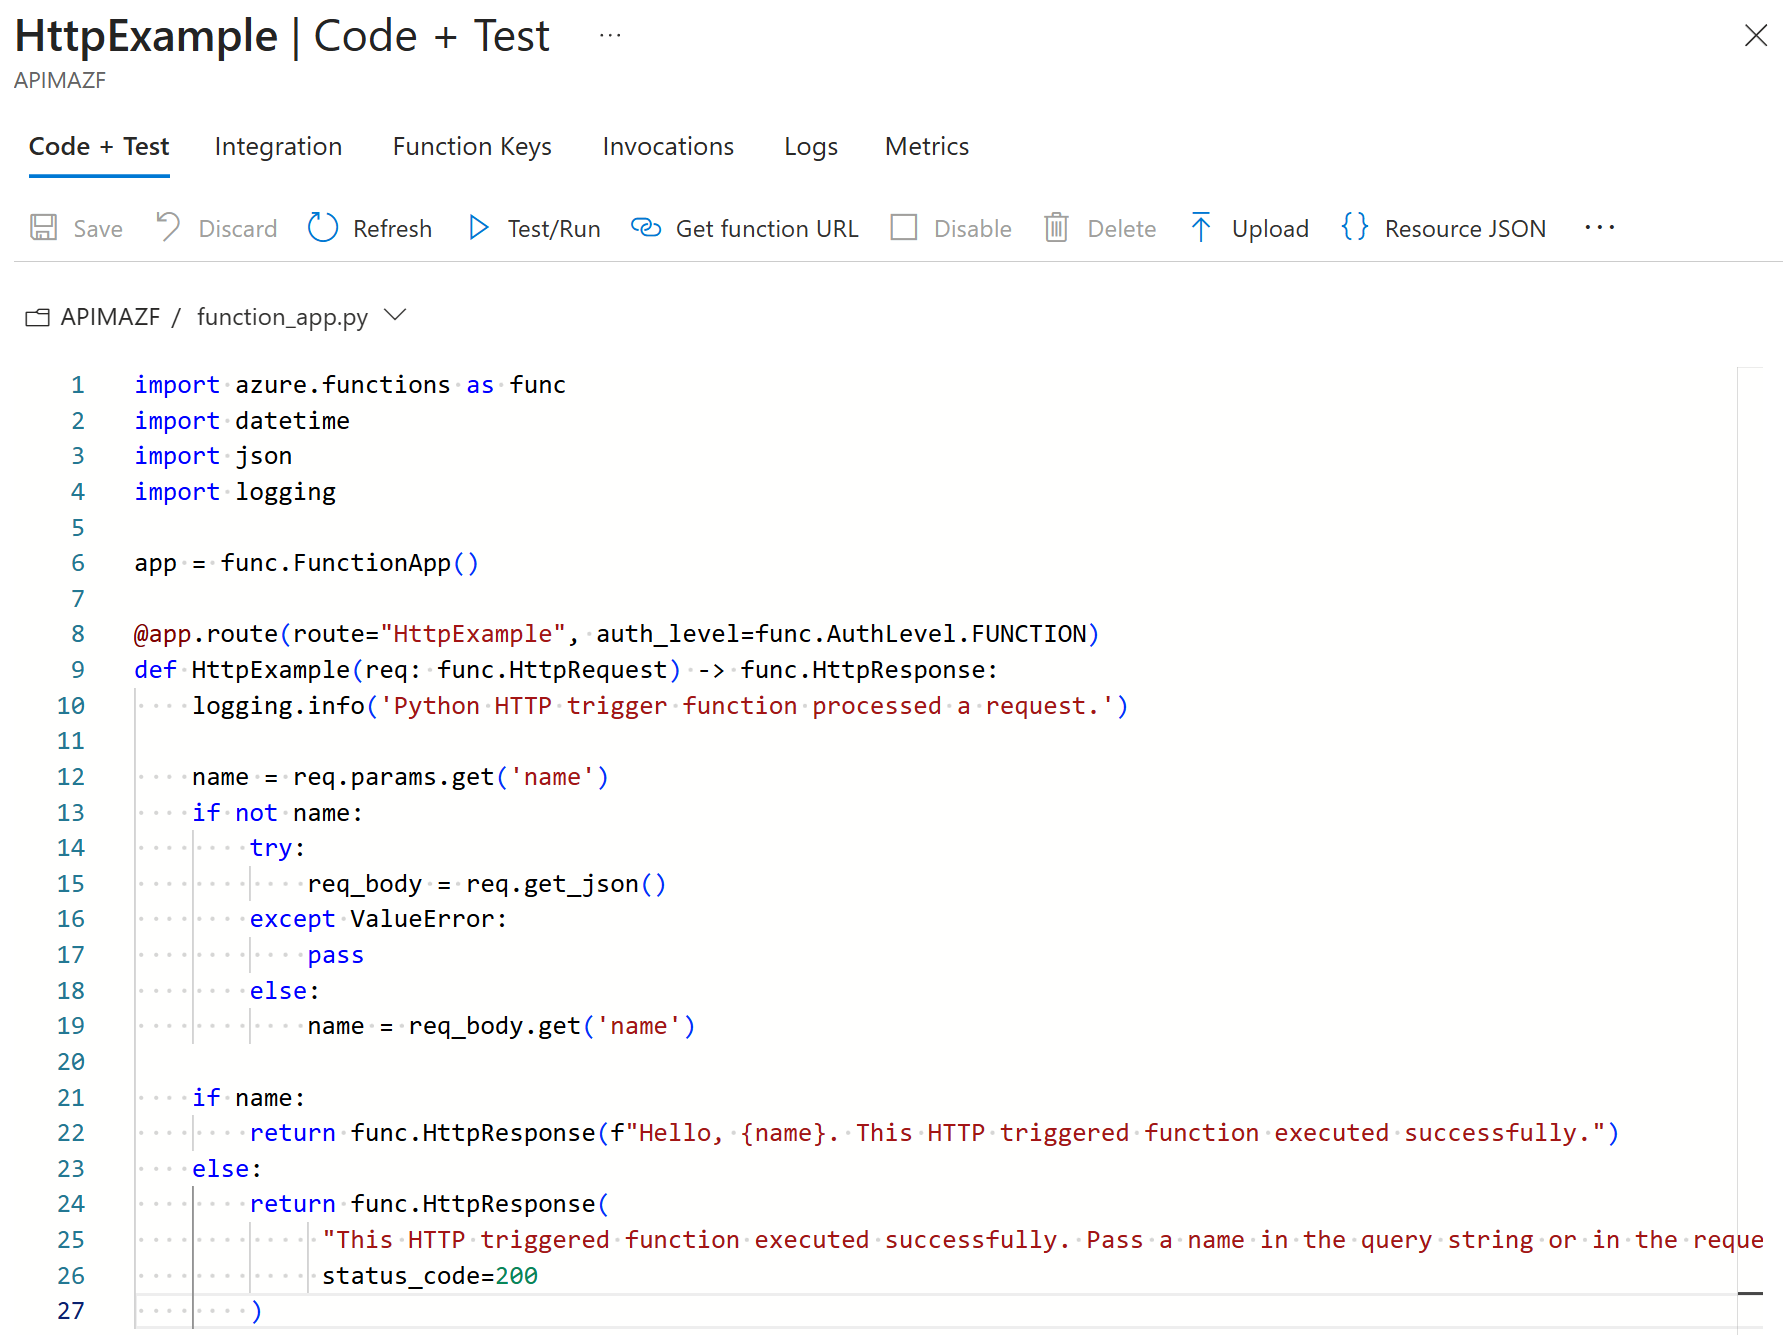
- If you click on the HTTPExample Function, this will take you to the Code + Test console where you can inspect the function_app.py Python Code. As you can see below, the template HTTP Trigger code is very simple. It defines a single route which prints a successful message and a personalised message if a name is passed as a query parameter. Let’s test that next with an API.
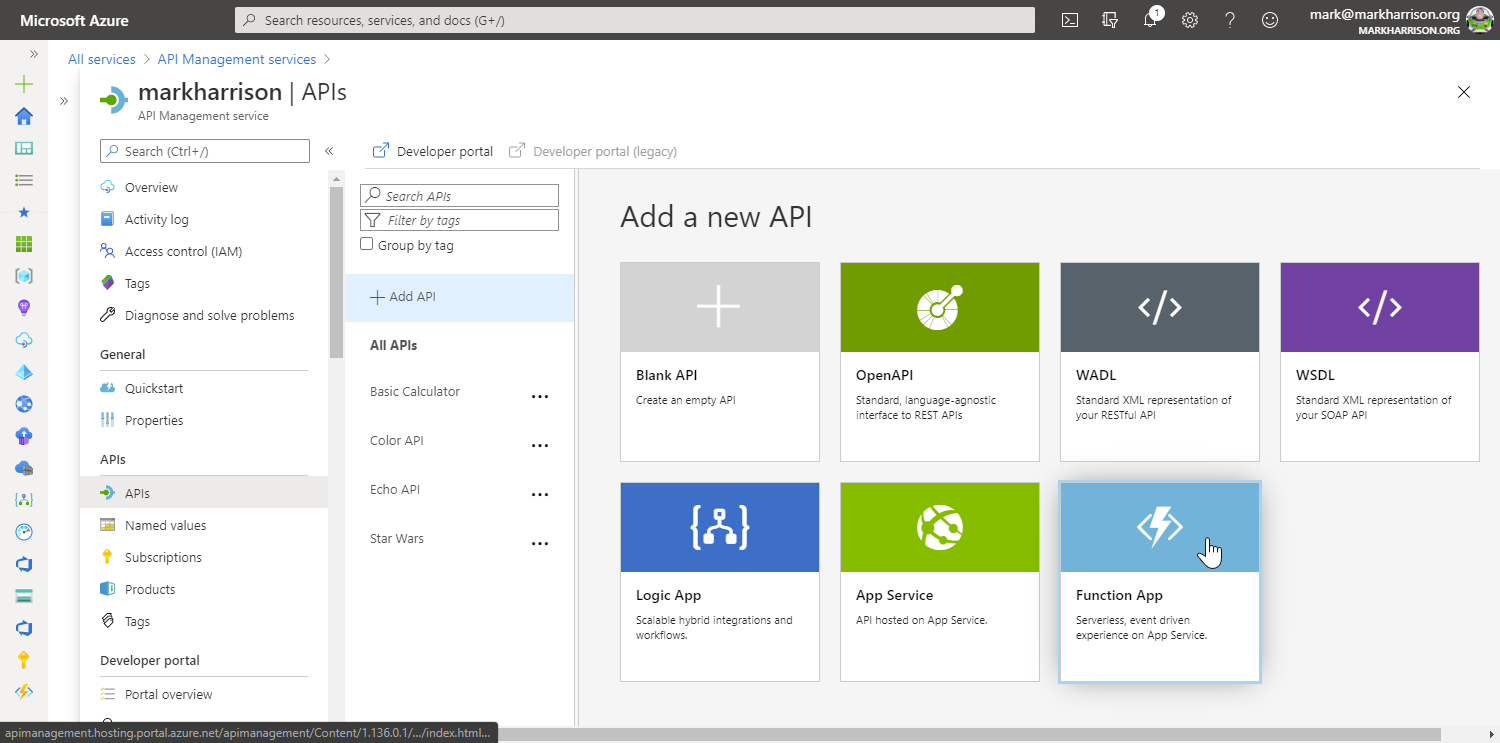
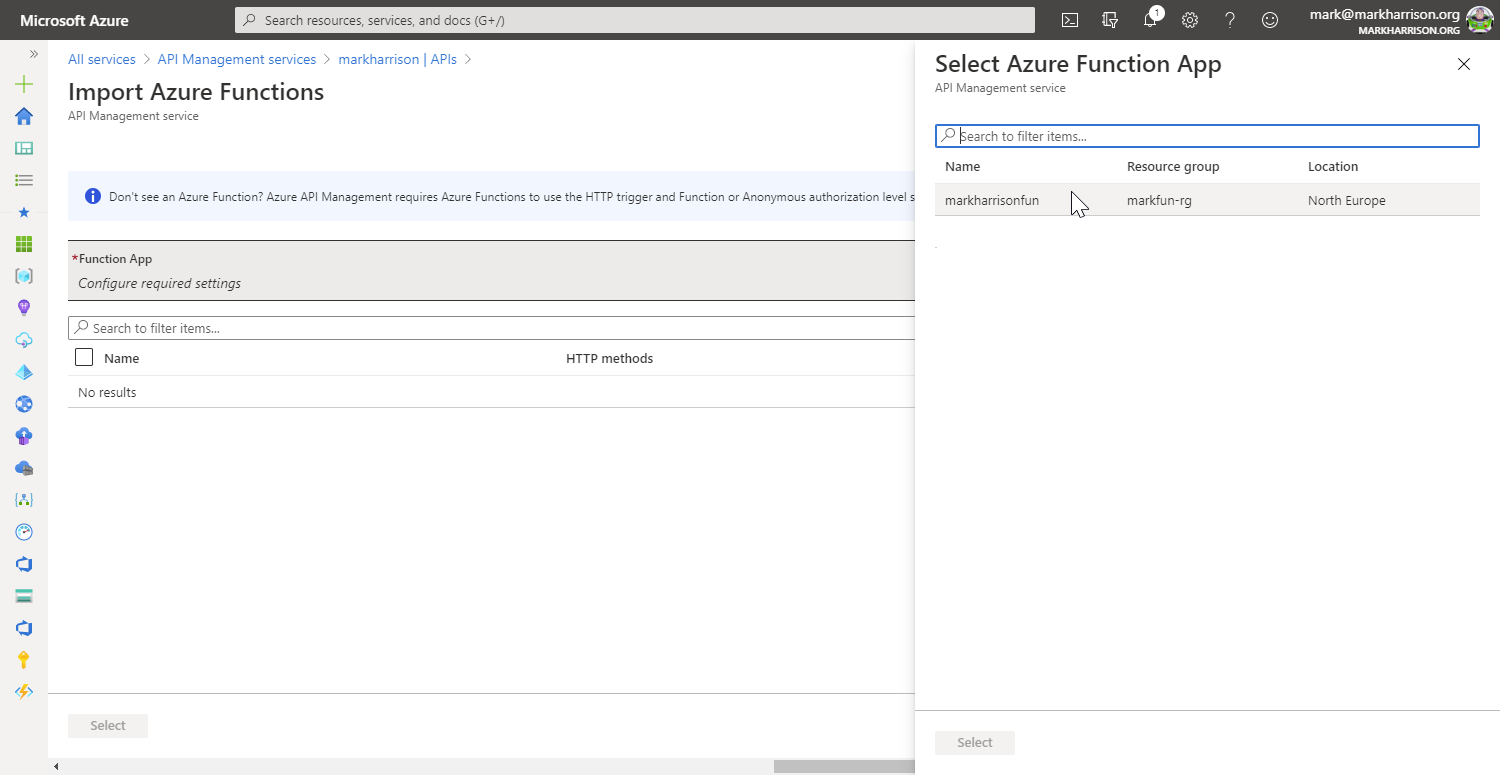
- Let’s now create an API based on this Azure Function App and HTTPTrigger. Add the function to Azure API Management. In the API blade, select +Add API and the Function App tile.
- Select the Browse button.
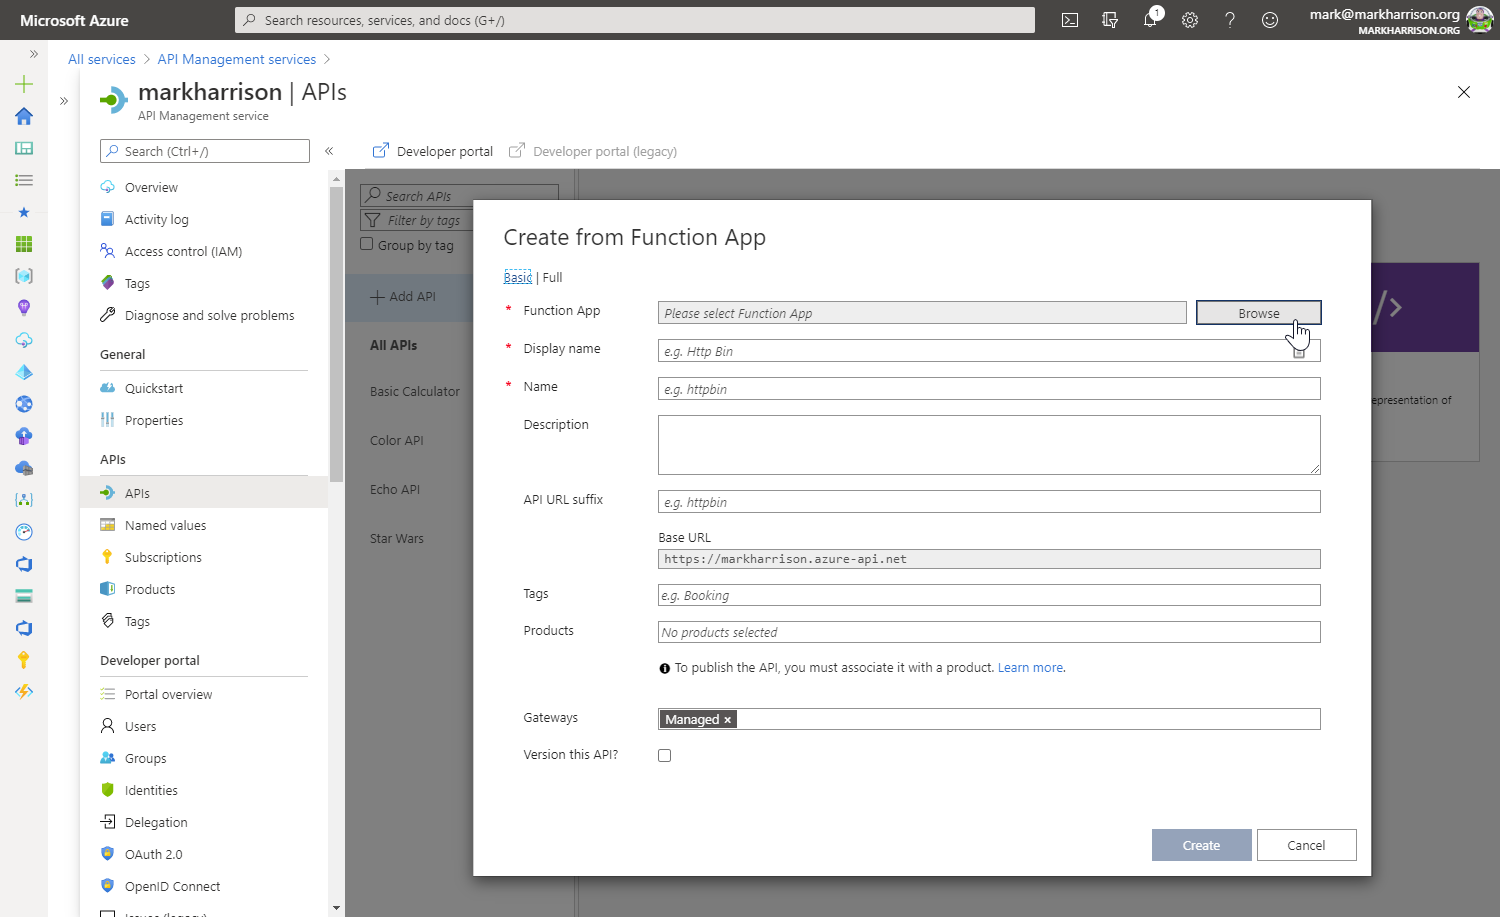
- Select the Function App we created earlier and then Select.
- Select the HTTPExample Function Handler from the app and then Select.
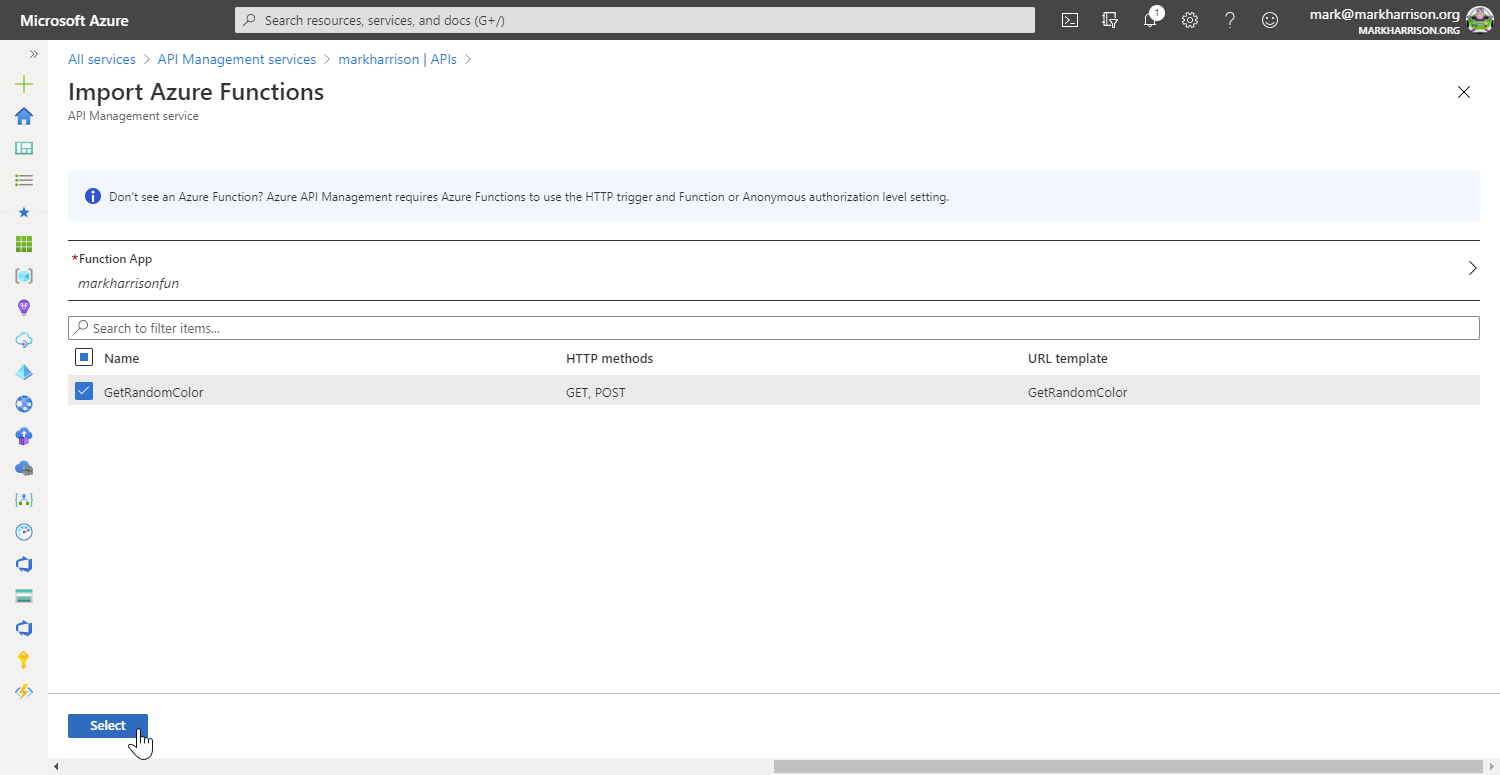
-
Accept the defaults and click Create
-
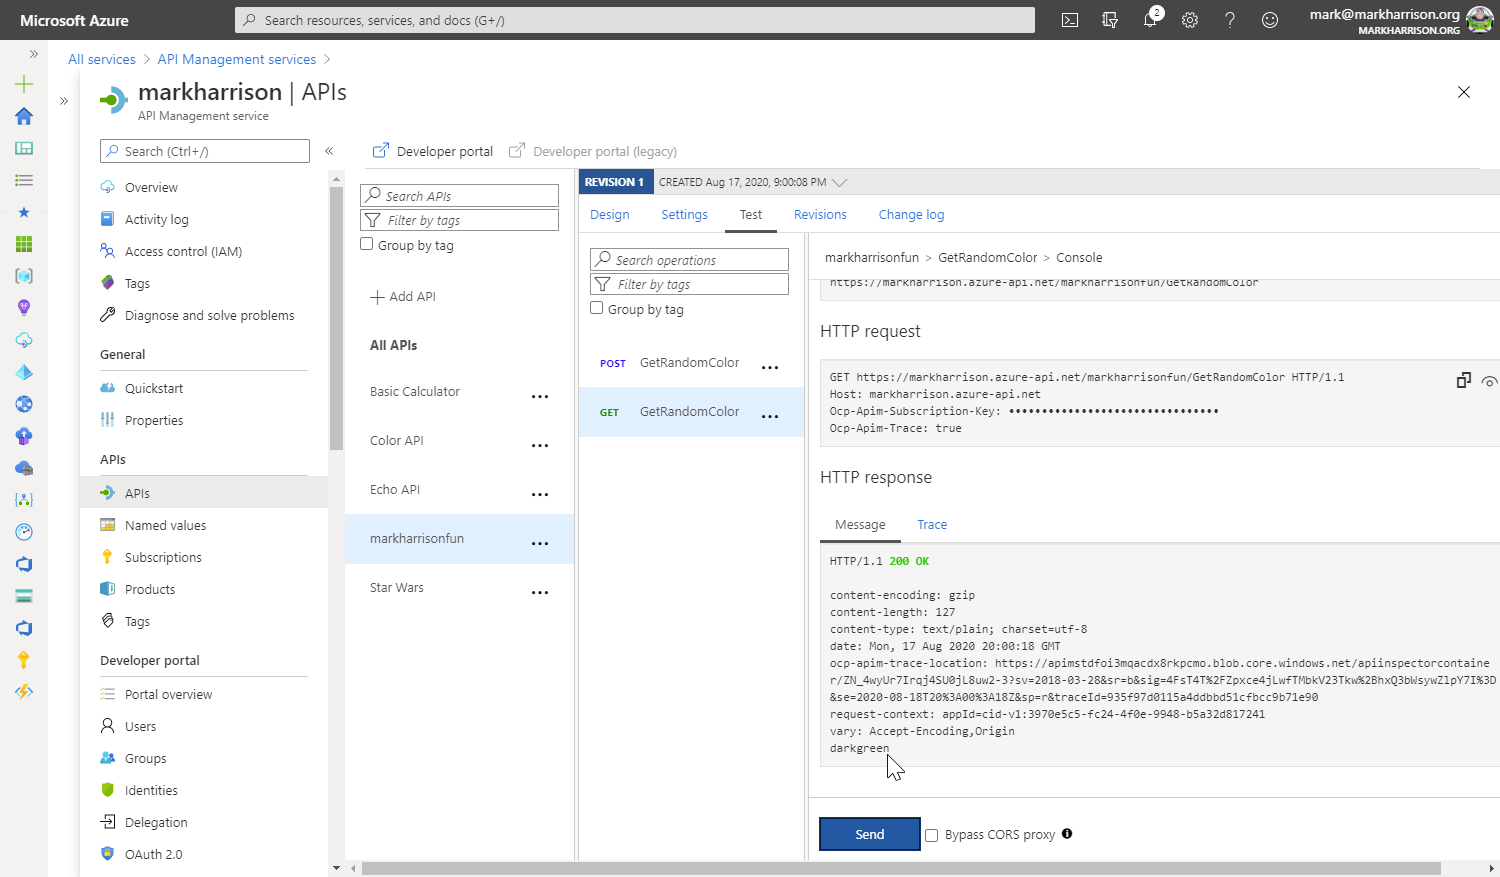
Validate the function works in the APIM portal. Select the APIMAZF API, select Test, then select the HTTExample post route. Add a Query Parameter called Name with the value of your choice. Click Send to see the response. You can optionally test again but this time remove the name query parameter to see a different response.
Congratulations, you have successfully created an API from an Azure Function!
Azure Logic Apps
In this section, we will create a simple Logic App that is Triggered by a HTTP Request and which will run our Azure Function from the previous step. We will then use this Logic App to create an API in APIM.
-
Before we create a Logic App, we will need the Function URL from our Azure Function. In the Azure Function portal, find the Azure Function you created in the previous step. In Overview, click on HTTPExample from the Functions list and then Get Function URL. Copy the default (Function key) and keep this safe. This is the function URL with the default function key and we will need this for our Logic App to call the Azure Function.
-
In the Logic App portal, click Create and then select Consumption to create a new Logic App on the Consumption plan.
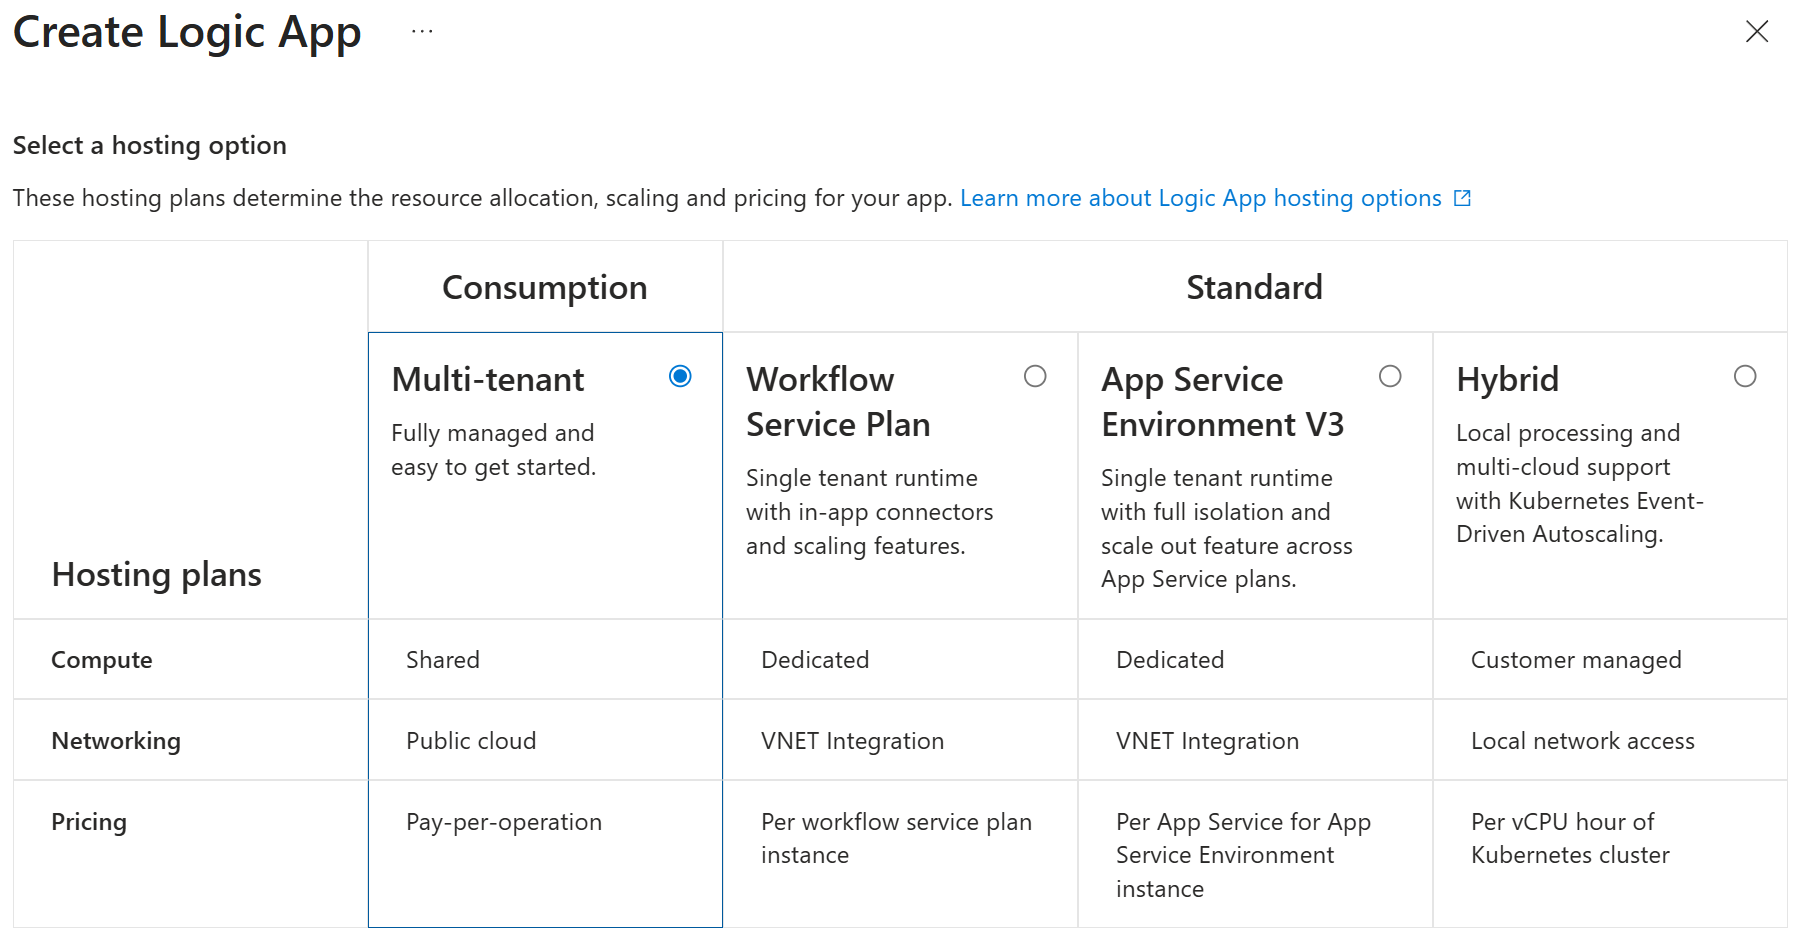
- Add the following basic details:
- Name:
APIMLGA - Resource Group (re-use Azure Function RG):
af-dev-we-apimazf-[your-initials]-01
- Name:
-
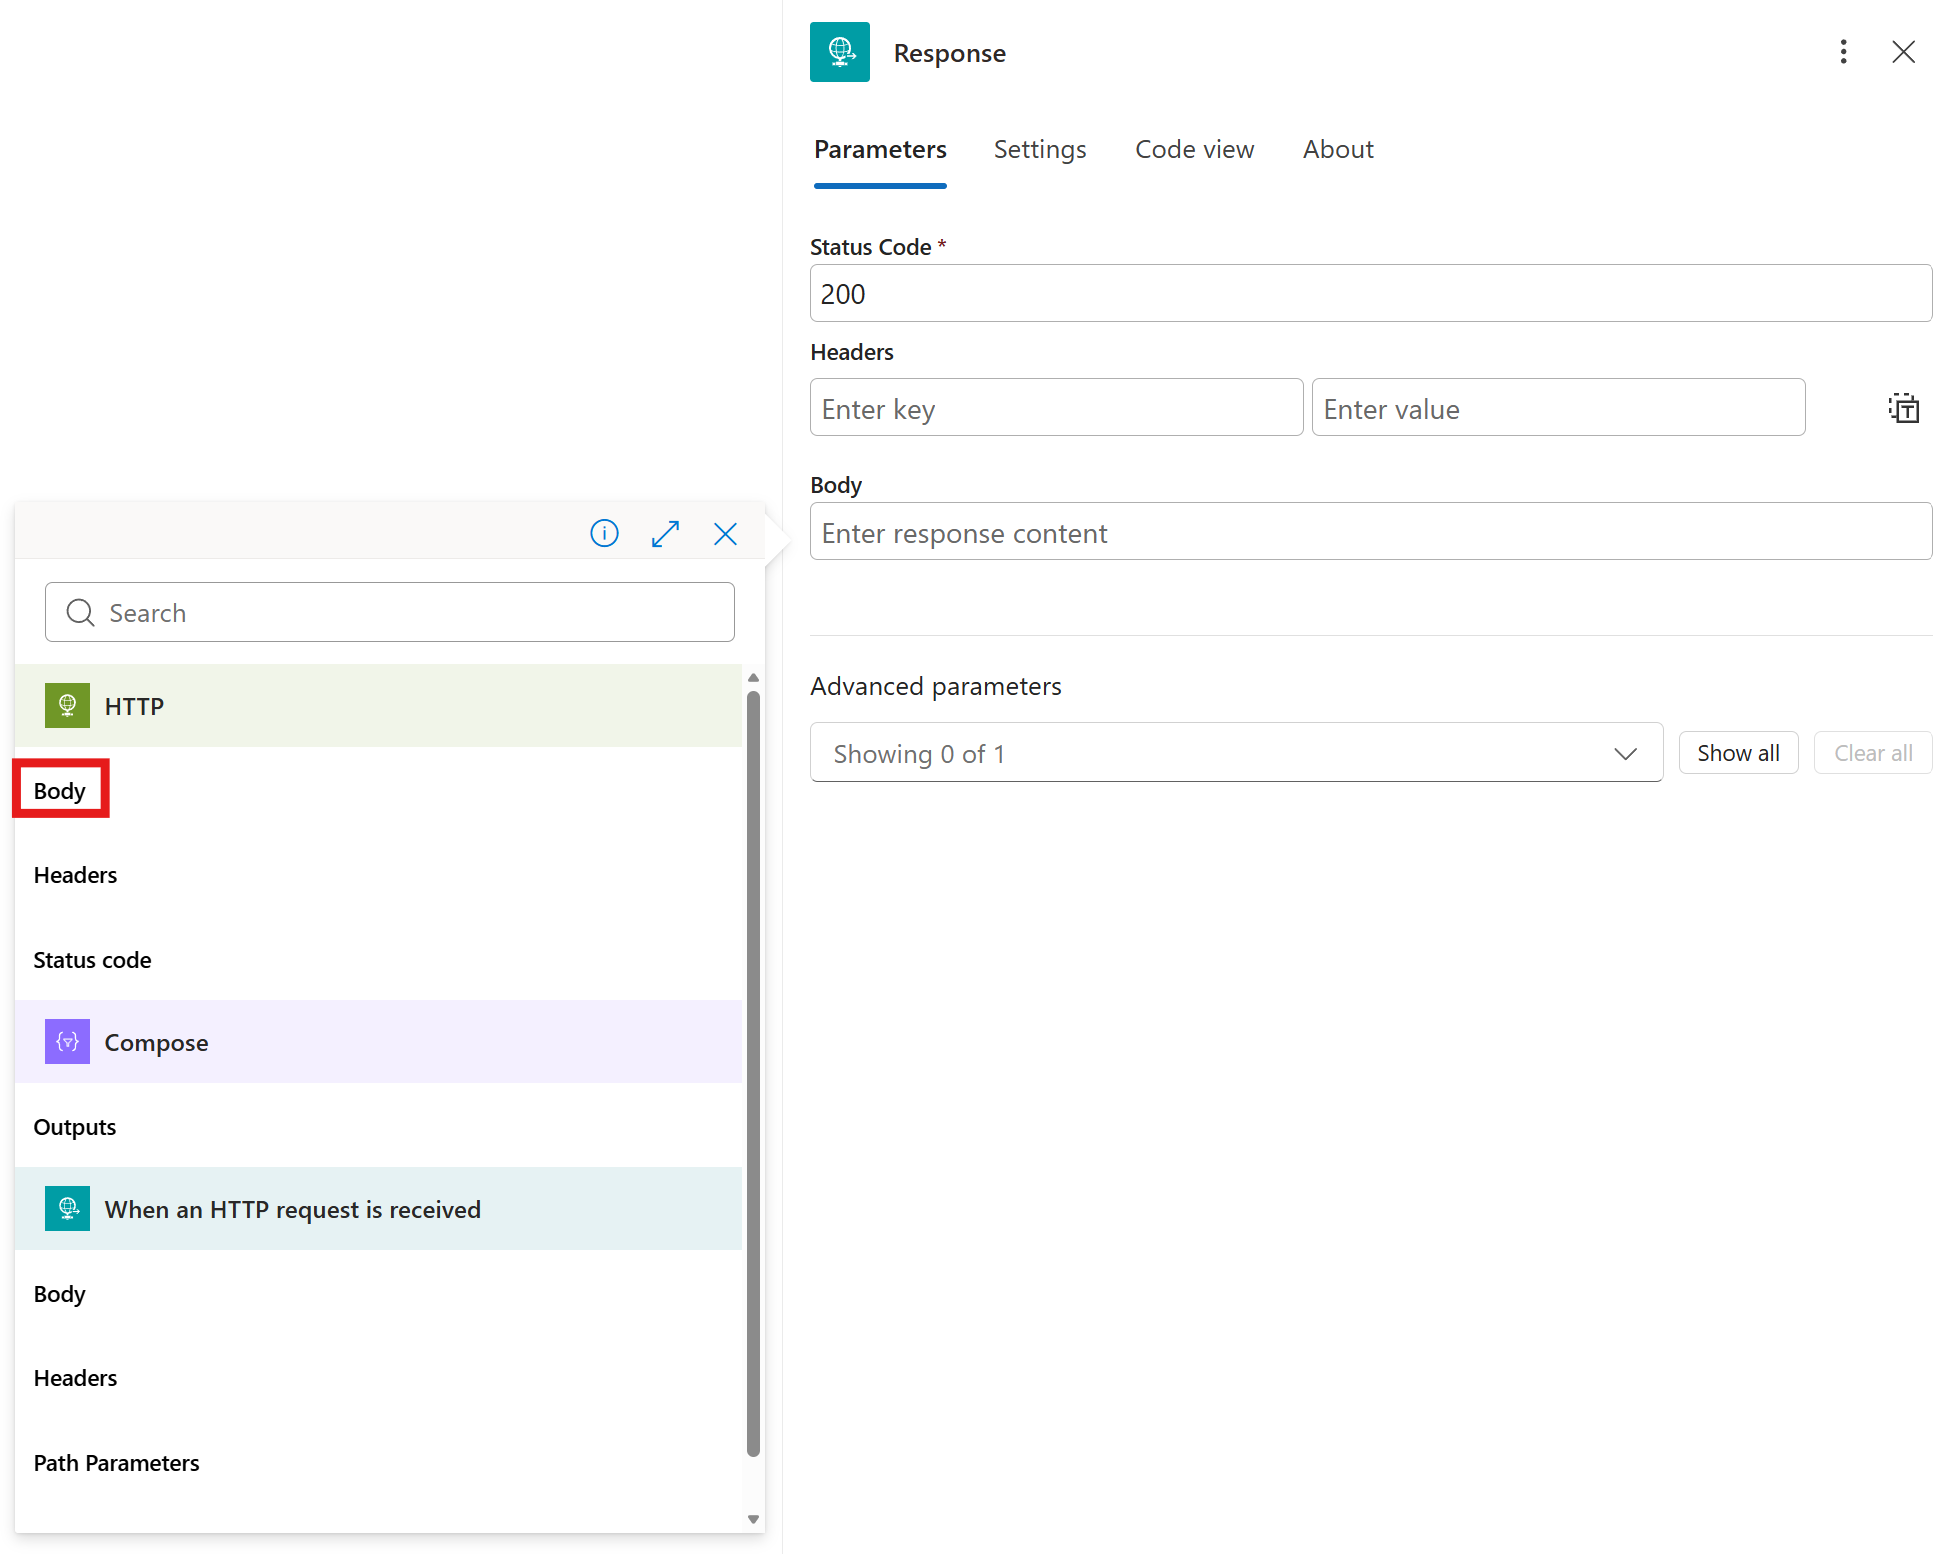
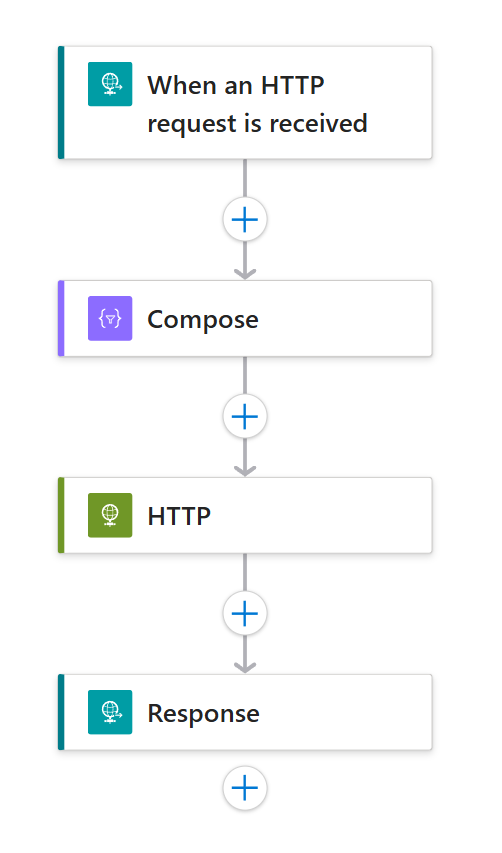
After creation and in the Logic app designer, click on Add a Trigger, click on Request, and then select When an HTTP request is received.
-
Click on the + to add an action after the When an HTTP request is received and select Compose within the Data Operations section. Paste the following into the Inputs textbox:
@{triggerOutputs()?['queries']?['name']}. This retrieves the name from the query parameters that we will pass in to the Logic App and eventually pass in from APIM. - Click on the + to add a HTTP action within the built-in HTTP section. In the HTTP details, enter the following and hit Save when complete:
- URI: Add the first section of your function URL before the question mark e.g.
https://apimazf-e2fxbwhnd8dwd8ch.westeurope-01.azurewebsites.net/api/HttpExample. - Method: Select POST
- Headers: Add a key x-functions-key and use the code value from the remainder of your function url as the value e.g code=rxgSatMHC4Dmsi26OXvRzg0QFkzGyMkRqBQJrqhdszFuSueRvQ==
- Queries: Enter name for the name and for the value, select the lightenning bolt to select a Dynamic Expression and then selecting Outputs from the Compose action. This enables us to propogate the name query parameter from the input to Logic App through to the Azure Function.
- URI: Add the first section of your function URL before the question mark e.g.

- Click on the + below the HTTP action to add a Response action, which is under Request in the By Connector section. In the Body text box, click the lightenning bolt to add a dynamic expression and select Body from the HTTP action. This will return the response body from the Azure Function.
- Your final Logic App workflow should look like the image below:
-
Hit Save at the top left of the workflow.
-
Back in the APIM Portal, navigate to the APIs blade, click Add API and in the Create from Azure resource section, click on Logic App.

-
In the Create from Logic App dialog, click browse to find the Logic App you just created. Click Select. Once the details from the Logic App you selected have been filled into boxes automatically in the Create from Logic App dialog, hit Create.
-
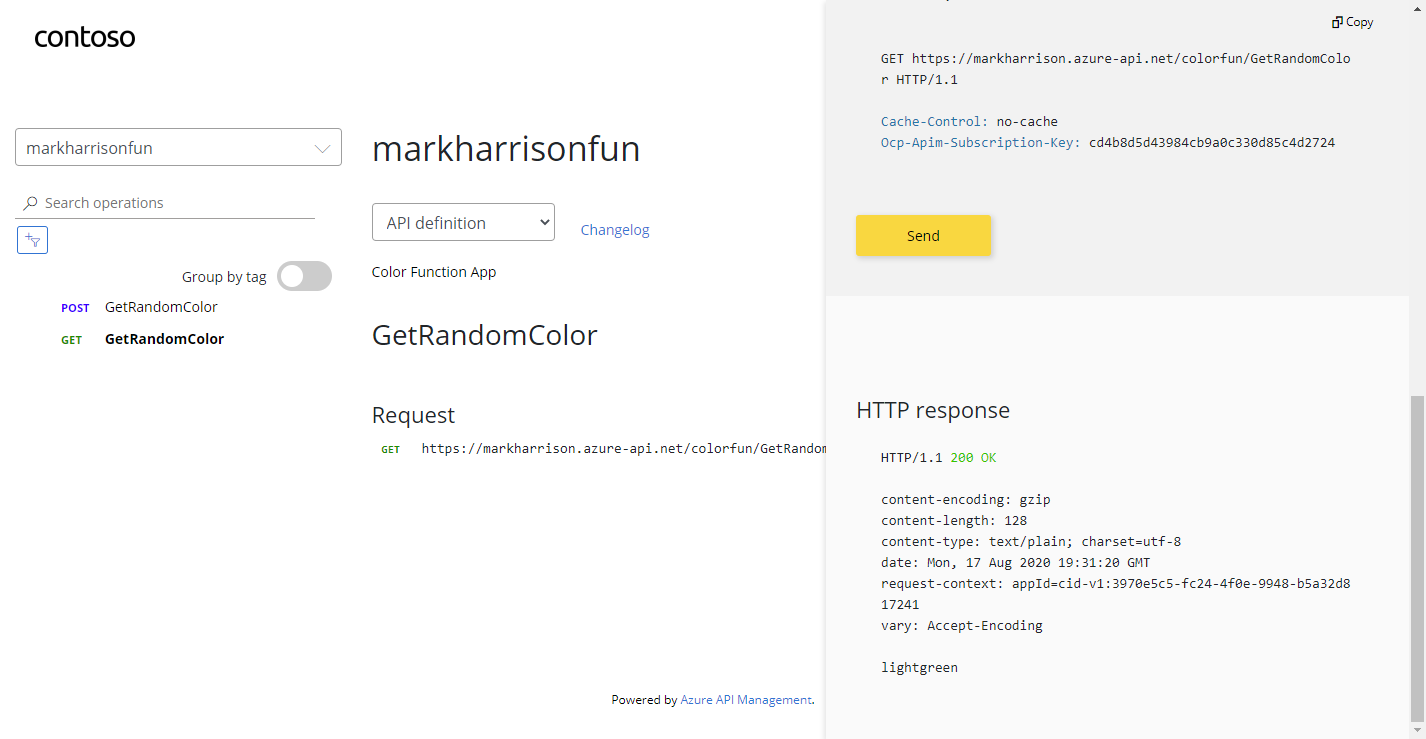
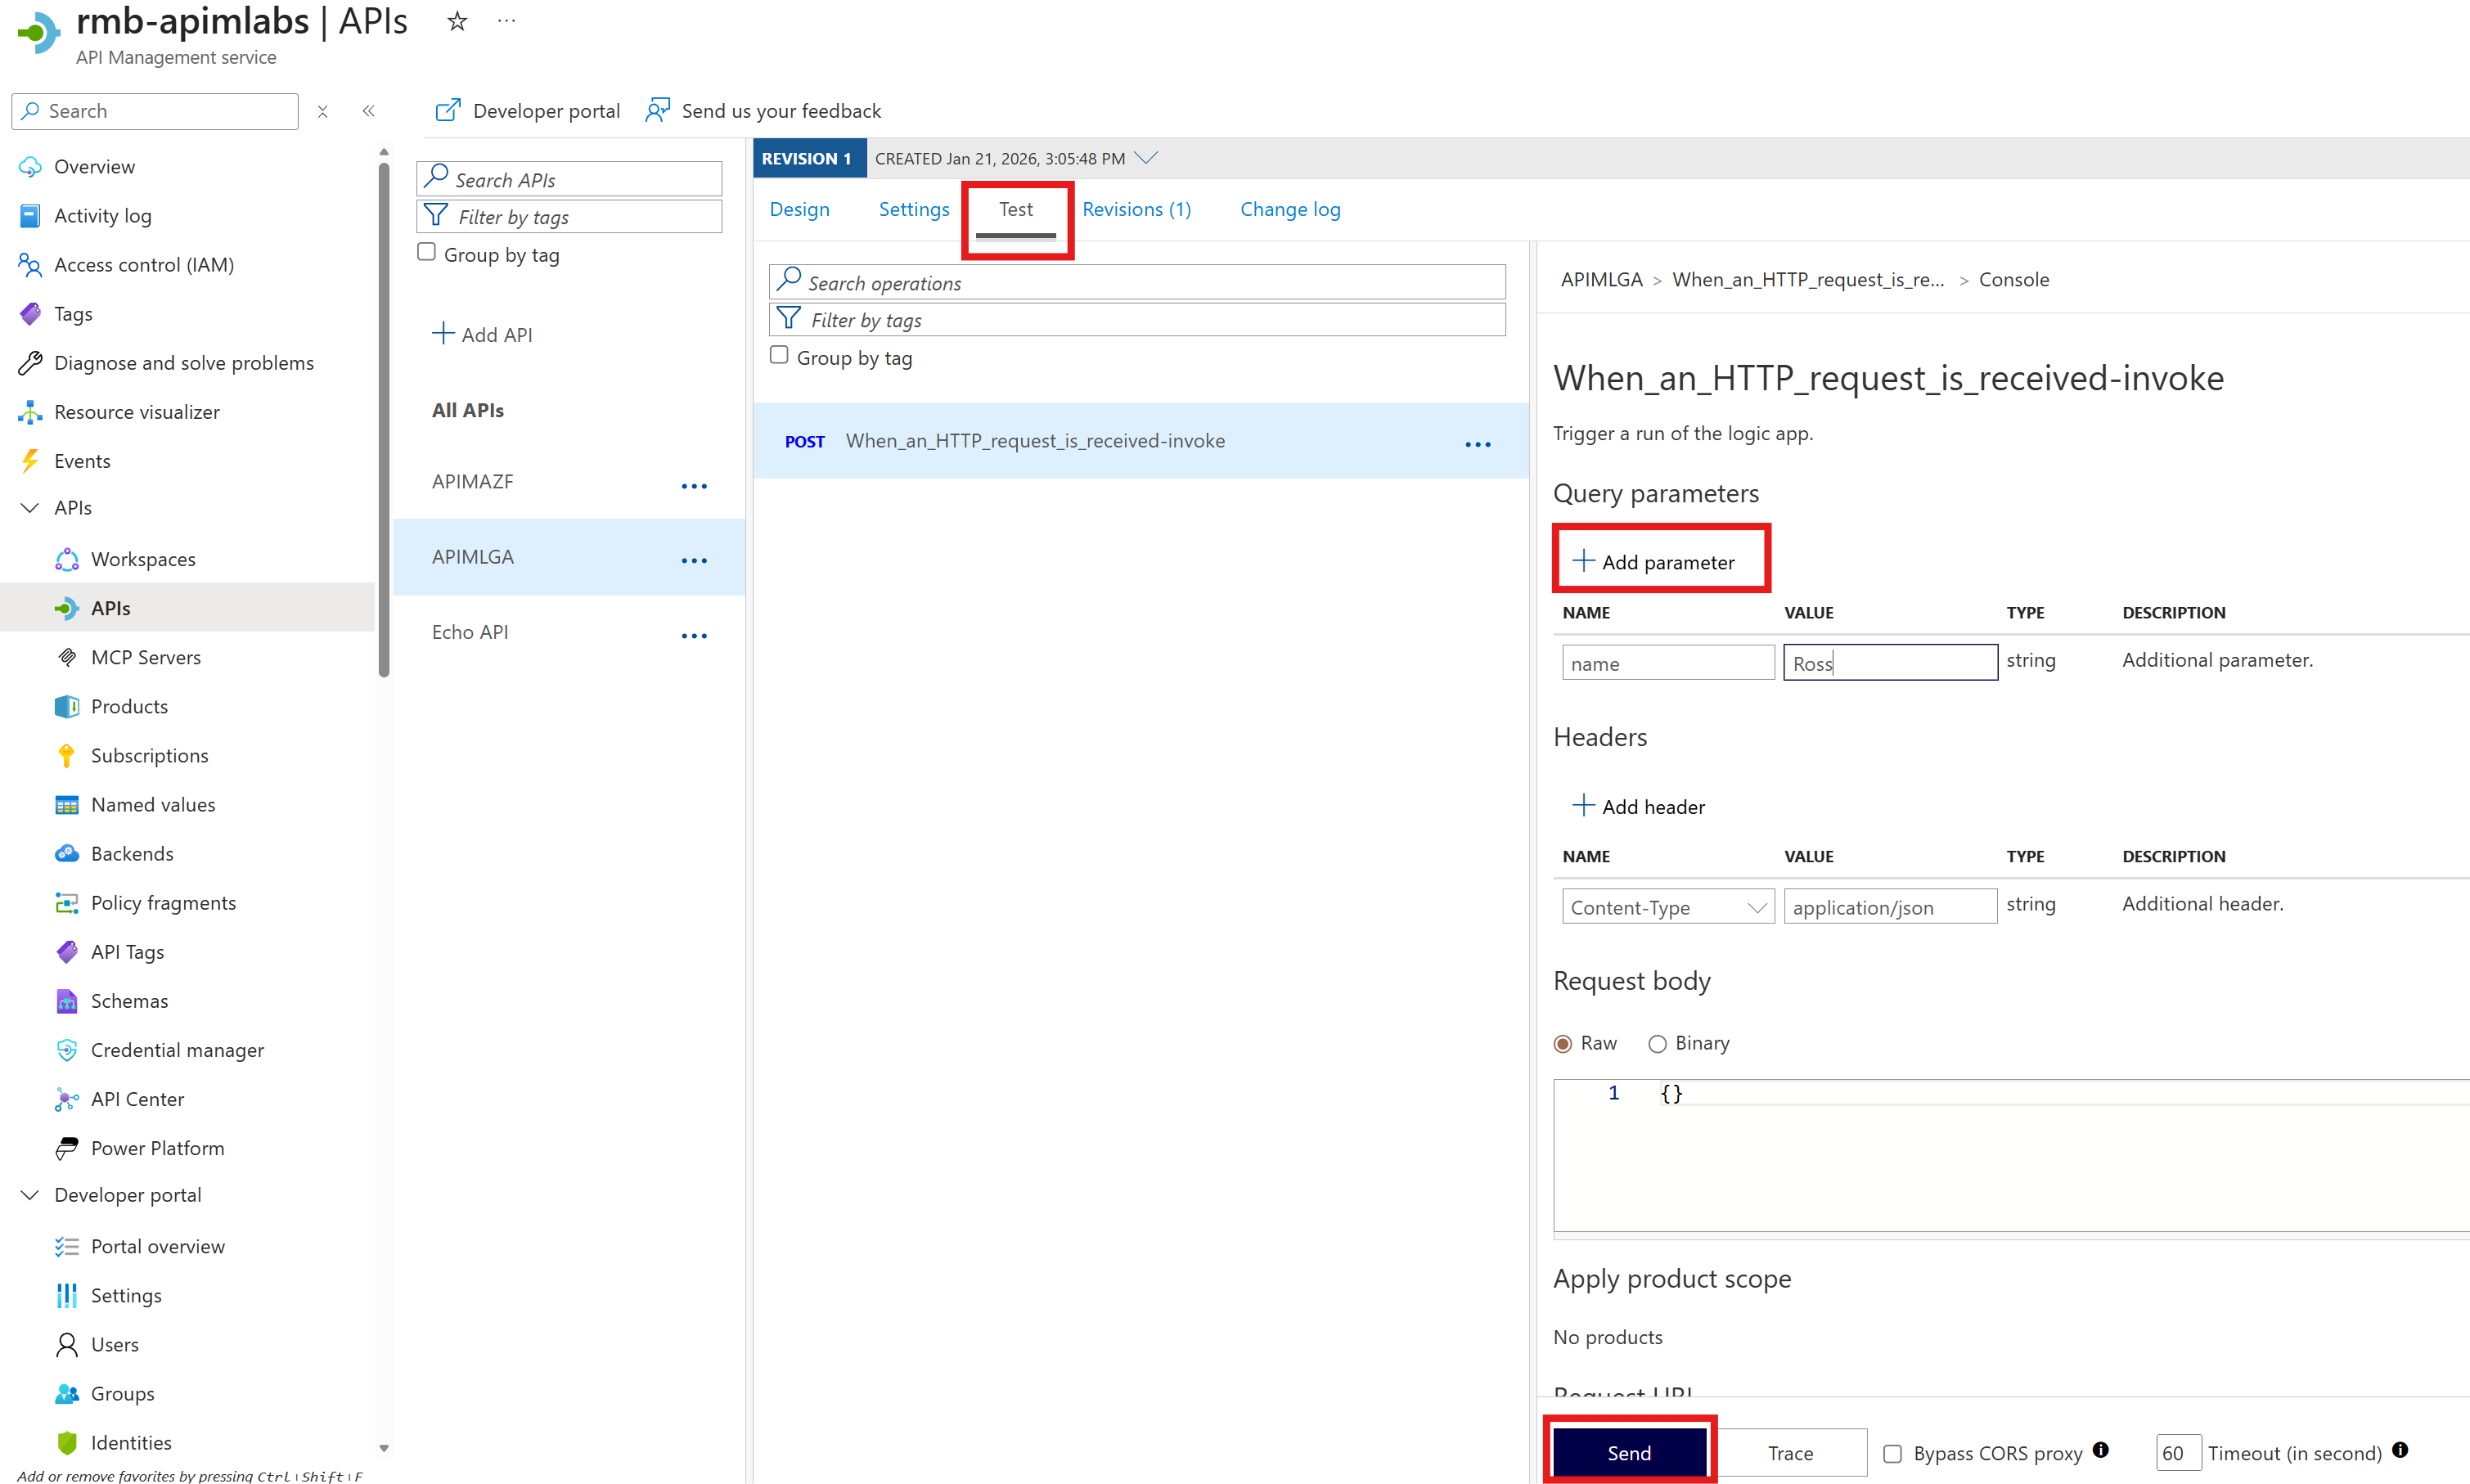
This will create an API based on our Logic App and should automatically generate a single POST route entitled When_an_HTTP_request_is_received-invoke. Select that POST operation and click on Test. Add a Query Parameter using name as the name and a value of your choice. Finally, click Send to send the test request. You should see the same response as previously because the Logic App will output the response from the Azure Function. As before, you can send another test without a name query parameter to get a generic and non-personalised response.
This completes our exercise into creating APIs in APIM from Azure Functions and Logic Apps!