Event Hub Overview
Azure Event Hubs is a fully managed, real-time data ingestion service. Millions of events per second can be aggregated to build dynamic data pipelines.
We can use Event Hubs with Azure API Management to obtain analytics of our API usage.
Create an Event Hubs namespace
An Event Hubs namespace provides a unique scoping container in which you create one or more event hubs. To create a namespace in your resource group using the Azure portal, follow these steps:
- In the Azure portal select Create a resource at the top left of the screen.
-
Search for Event Hubs, then click on the resource.
If you cannot find it there, please try the same Event Hubs term in the top search bar.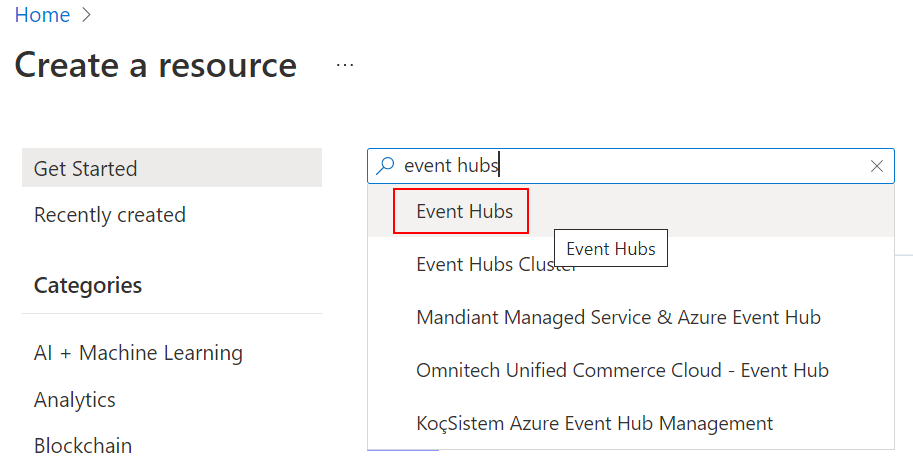
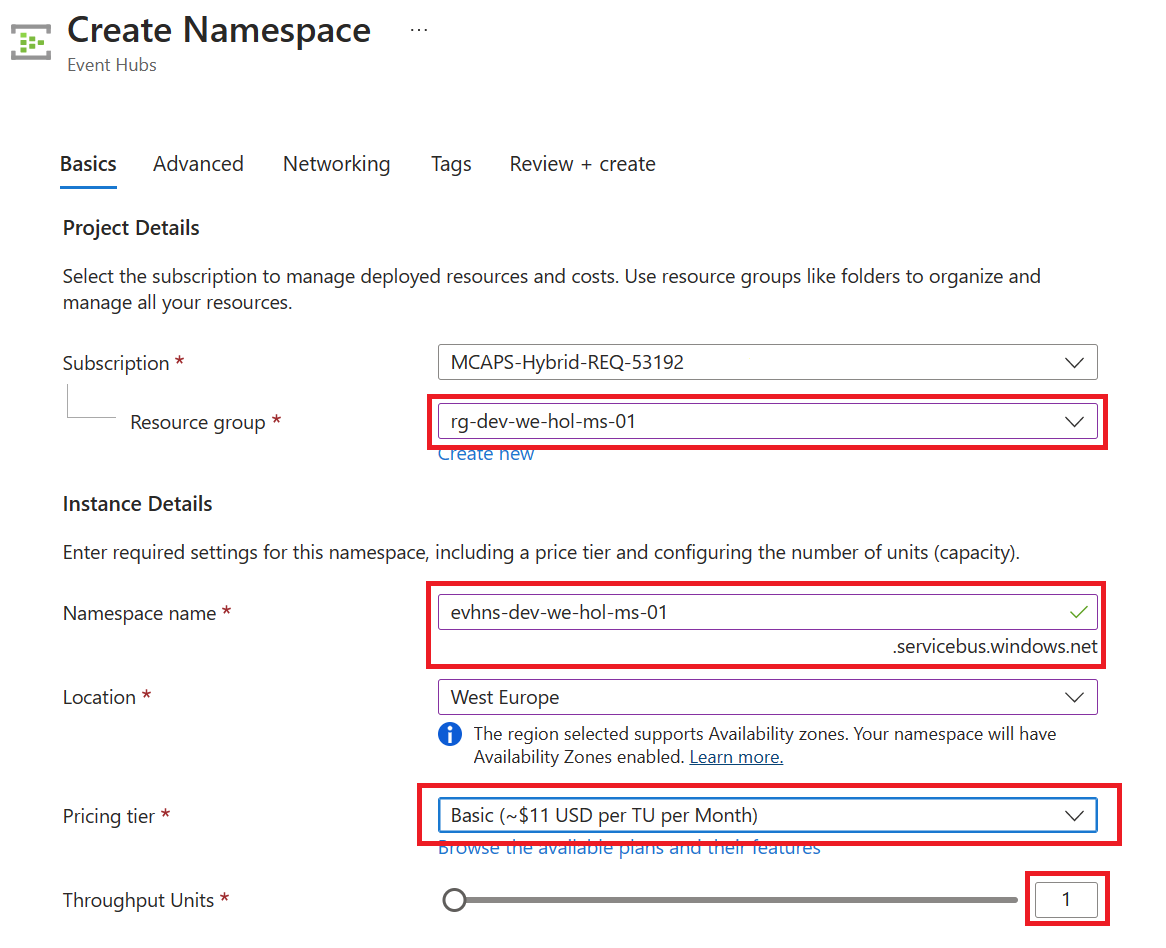
- Press Create to create the namespace, then enter the following:
- Select the Resource Group you created in previous labs.
- Enter a unique Namespace name, the naming convention for Event Hub Namespace is:
evhns-<environment>-<region>-<application-name>-<owner>-<instance> - Select the Location you used in previous labs.
- Choose Basic for the Pricing Tier. To learn about differences between tiers, see Quotas and limits, Event Hubs Premium, and Event Hubs Dedicated articles.
- Leave the Throughput Units setting as it is. To learn more about throughput units or processing units: Event Hubs scalability.
-
Select Review + Create at the bottom of the page, followed by Create.
-
Press Go to resource when it’s created.
-
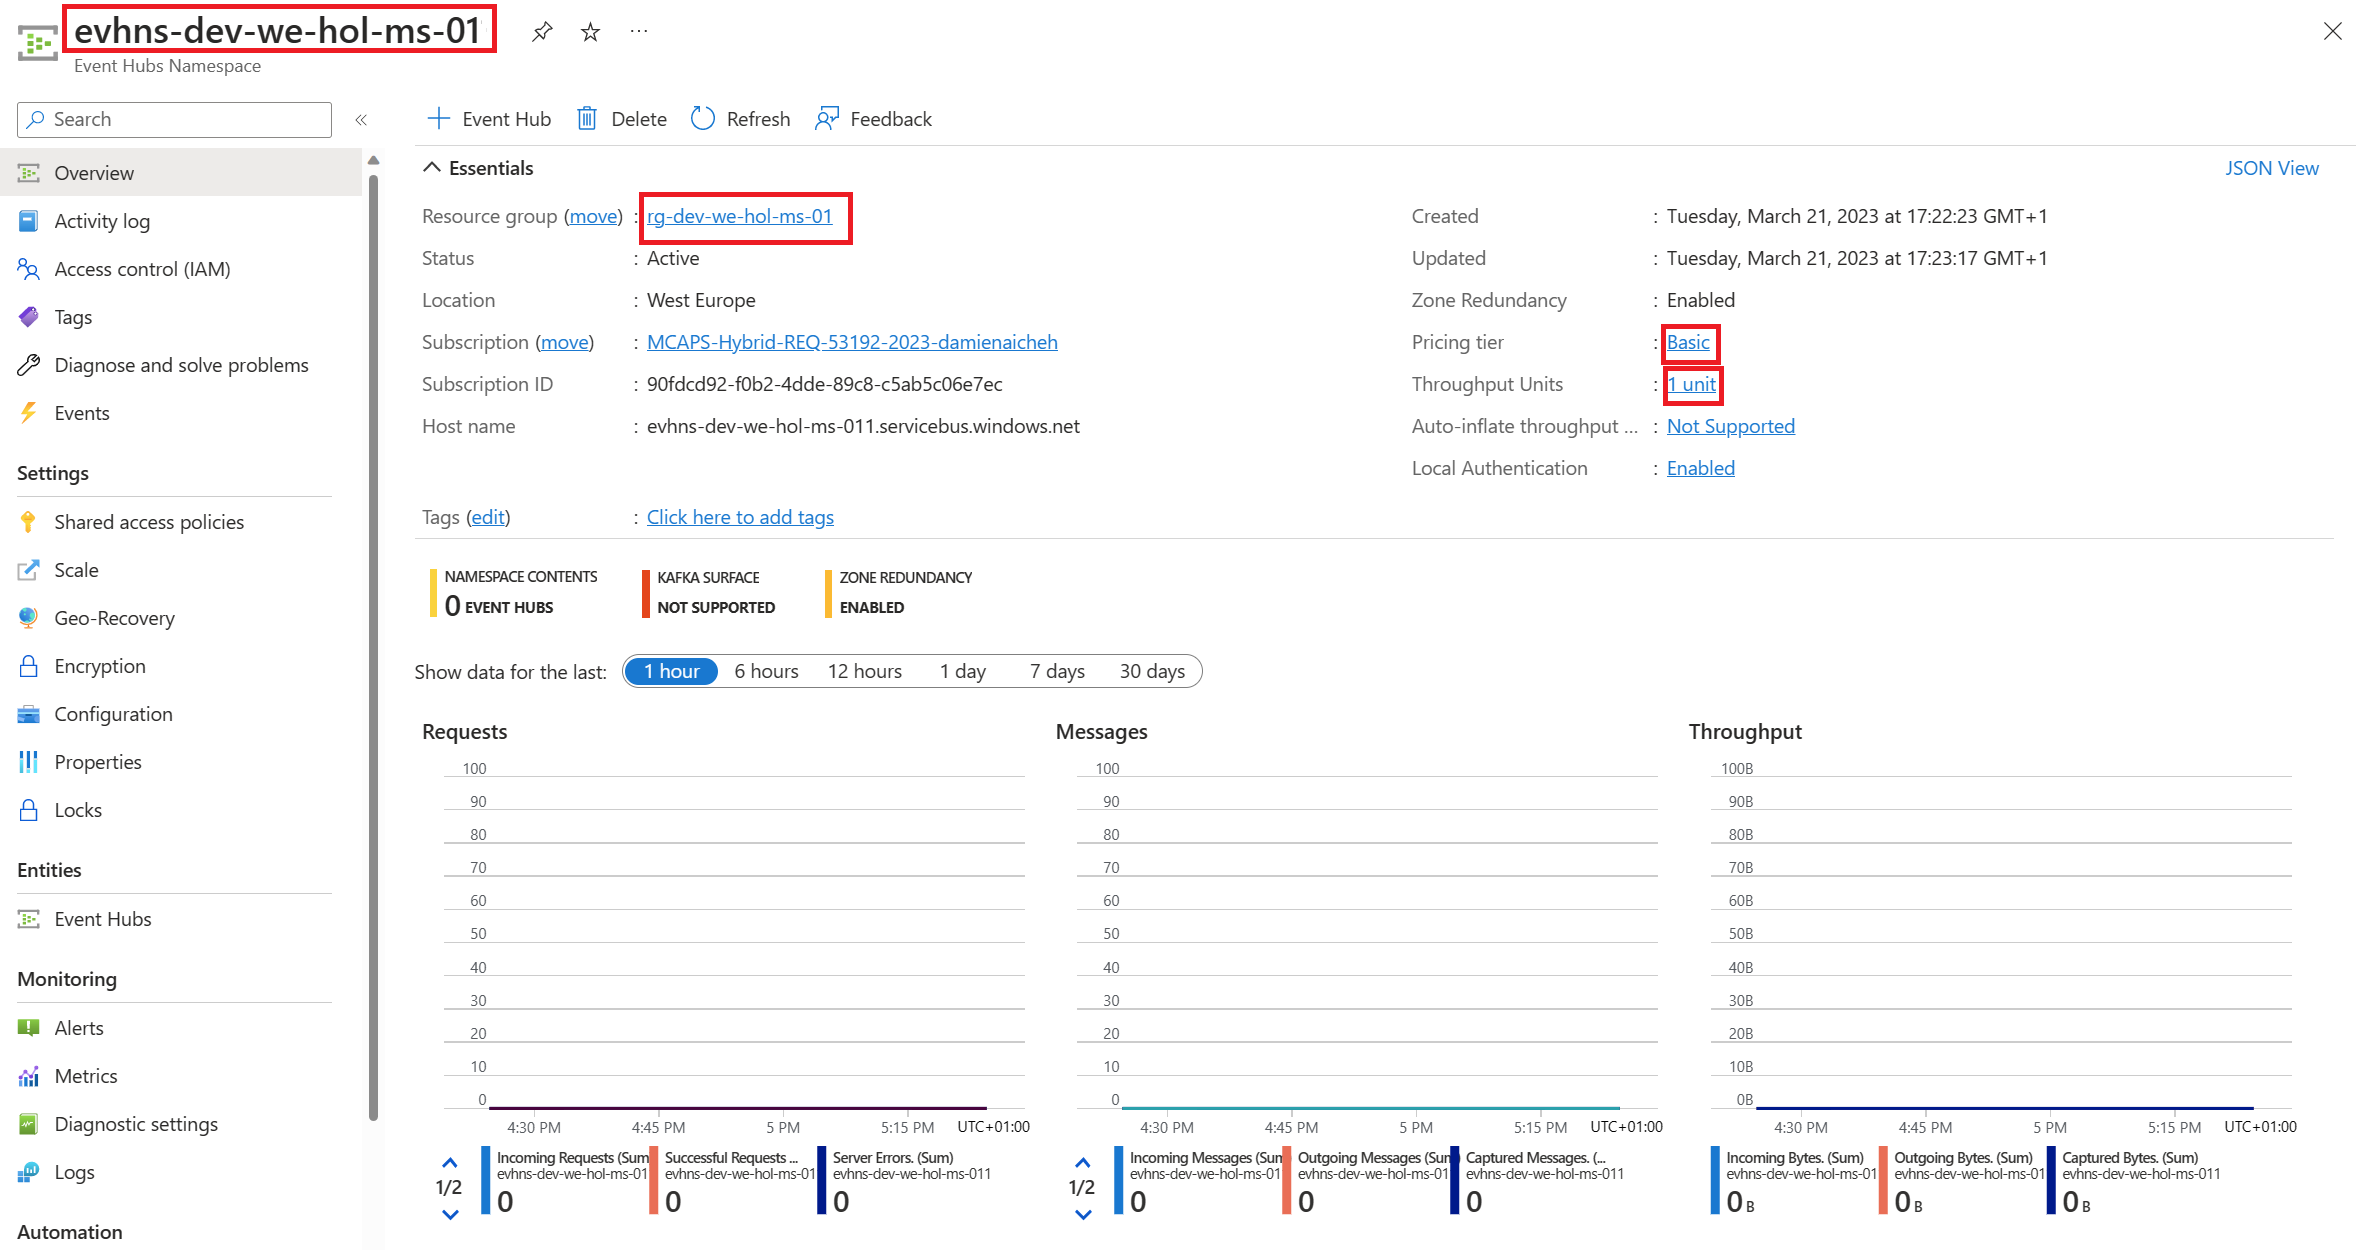
Confirm that you see the Event Hubs Namespace page similar to the following example:
Create an Event Hub
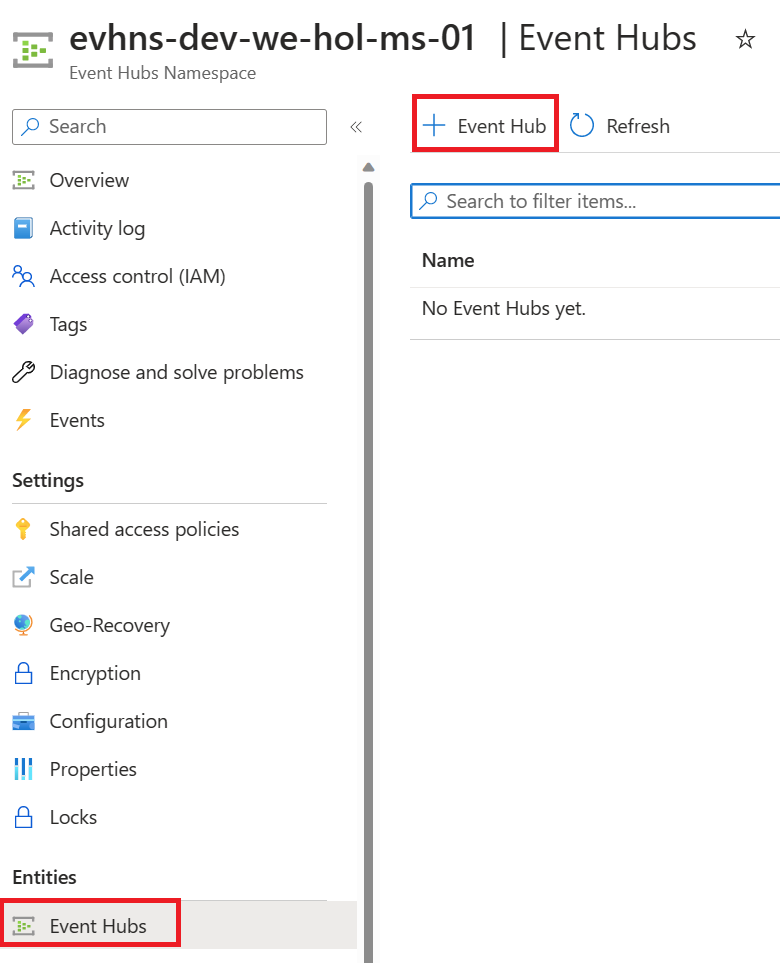
We will create an Event hub to receive logs from our APIM. To create an event hub within the namespace, follow these steps:
-
From the Event Hubs blade select + Event Hub
-
Type a name for your event hub, the naming convention is
evh-<the-goal>-<environment>-<region>-<application-name>-<owner>-<instance>then select Create.The partition count setting allows you to parallelize consumption across many consumers. For more information, see Partitions.
The message retention setting specifies how long the Event Hubs service keeps data. For more information, see Event retention.

-
After the event hub is created, you see it in the list of event hubs.

Create Access to the Event Hub
- Click on the newly-created event hub.
- Open the Shared access policies blade.
-
Click on + Add.

-
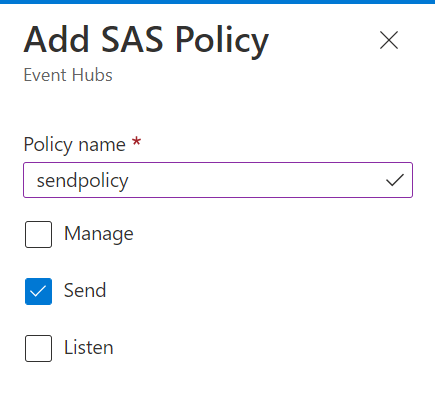
On the right side of your screen create a ´sendpolicy´ with just ´Send´ permissions
-
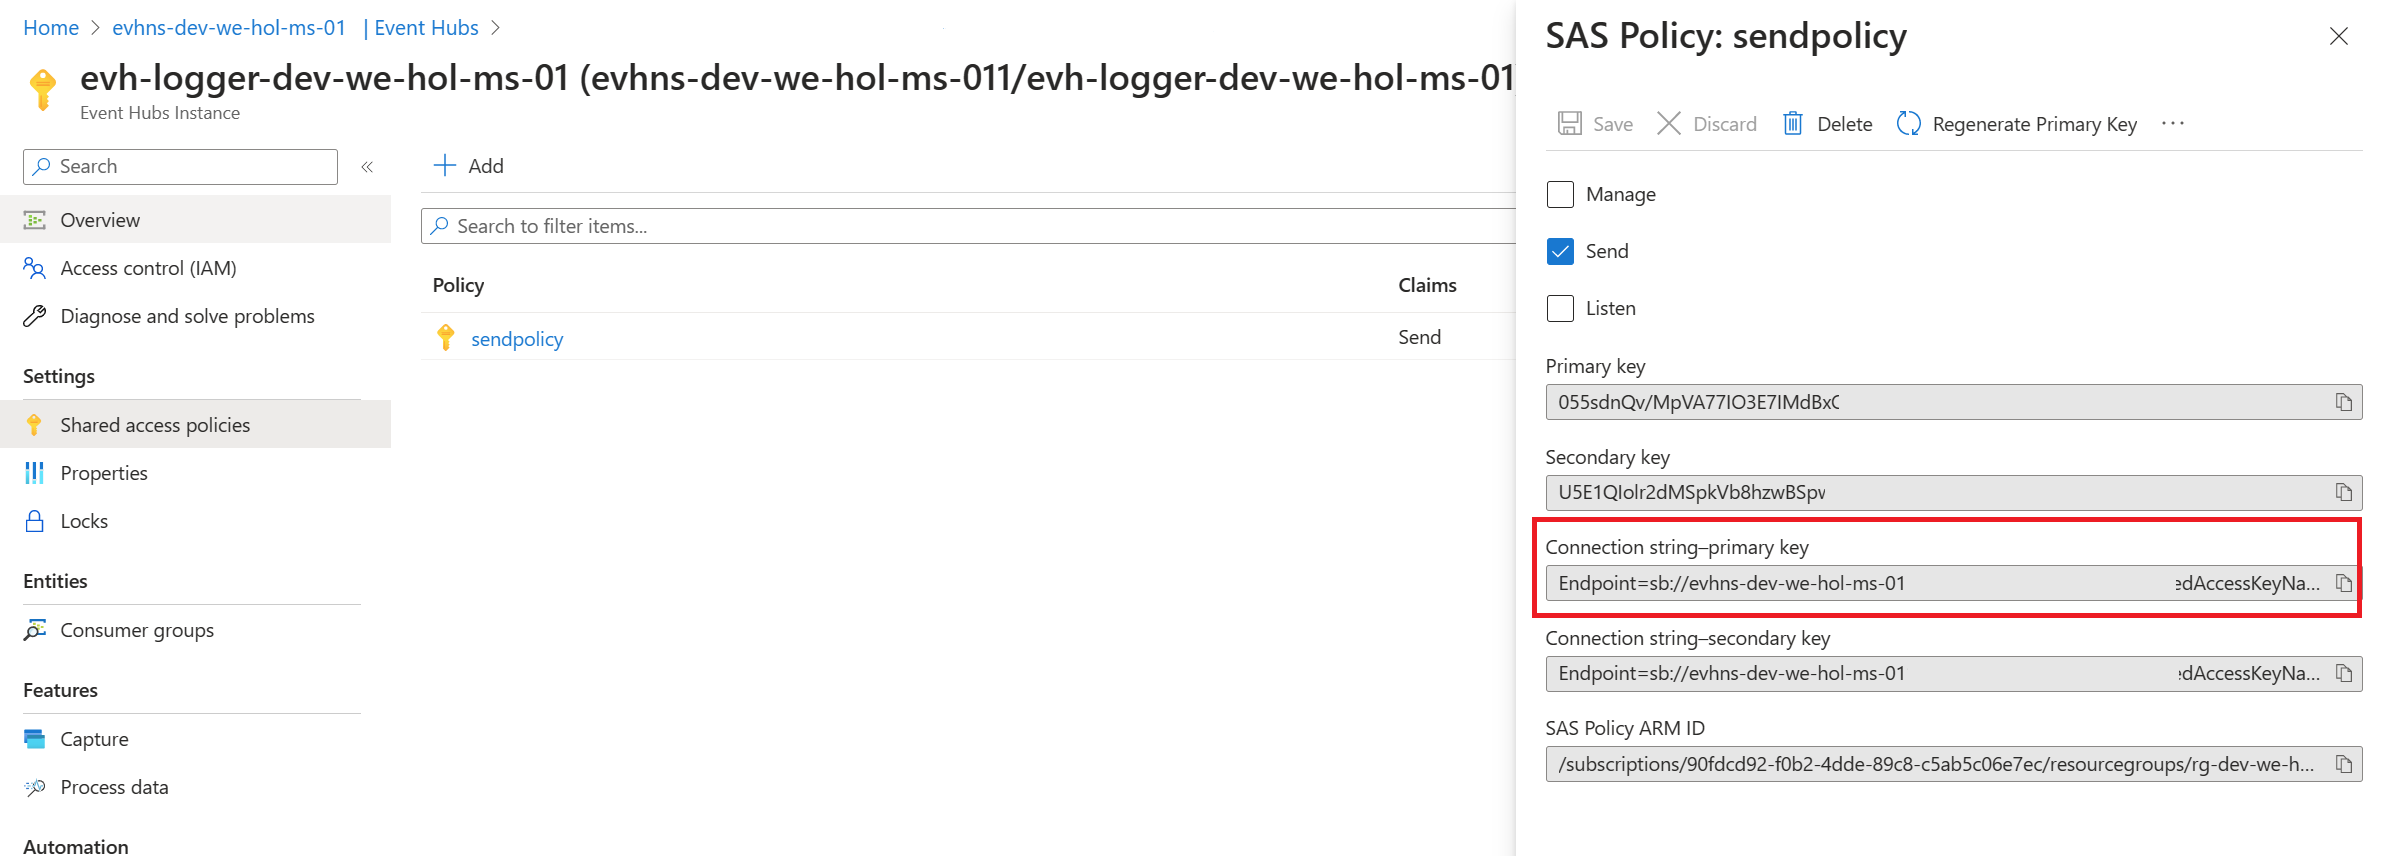
Click on the new policy created and copy the Connection string-primary key to a notepad. Also copy the Event Hub namespace. You will use both values in the next section.
Create an Azure API Management logger
Now that you have an Event Hub, the next step is to configure a Logger in your Azure API Management service, so that it can log events to the Event Hub.
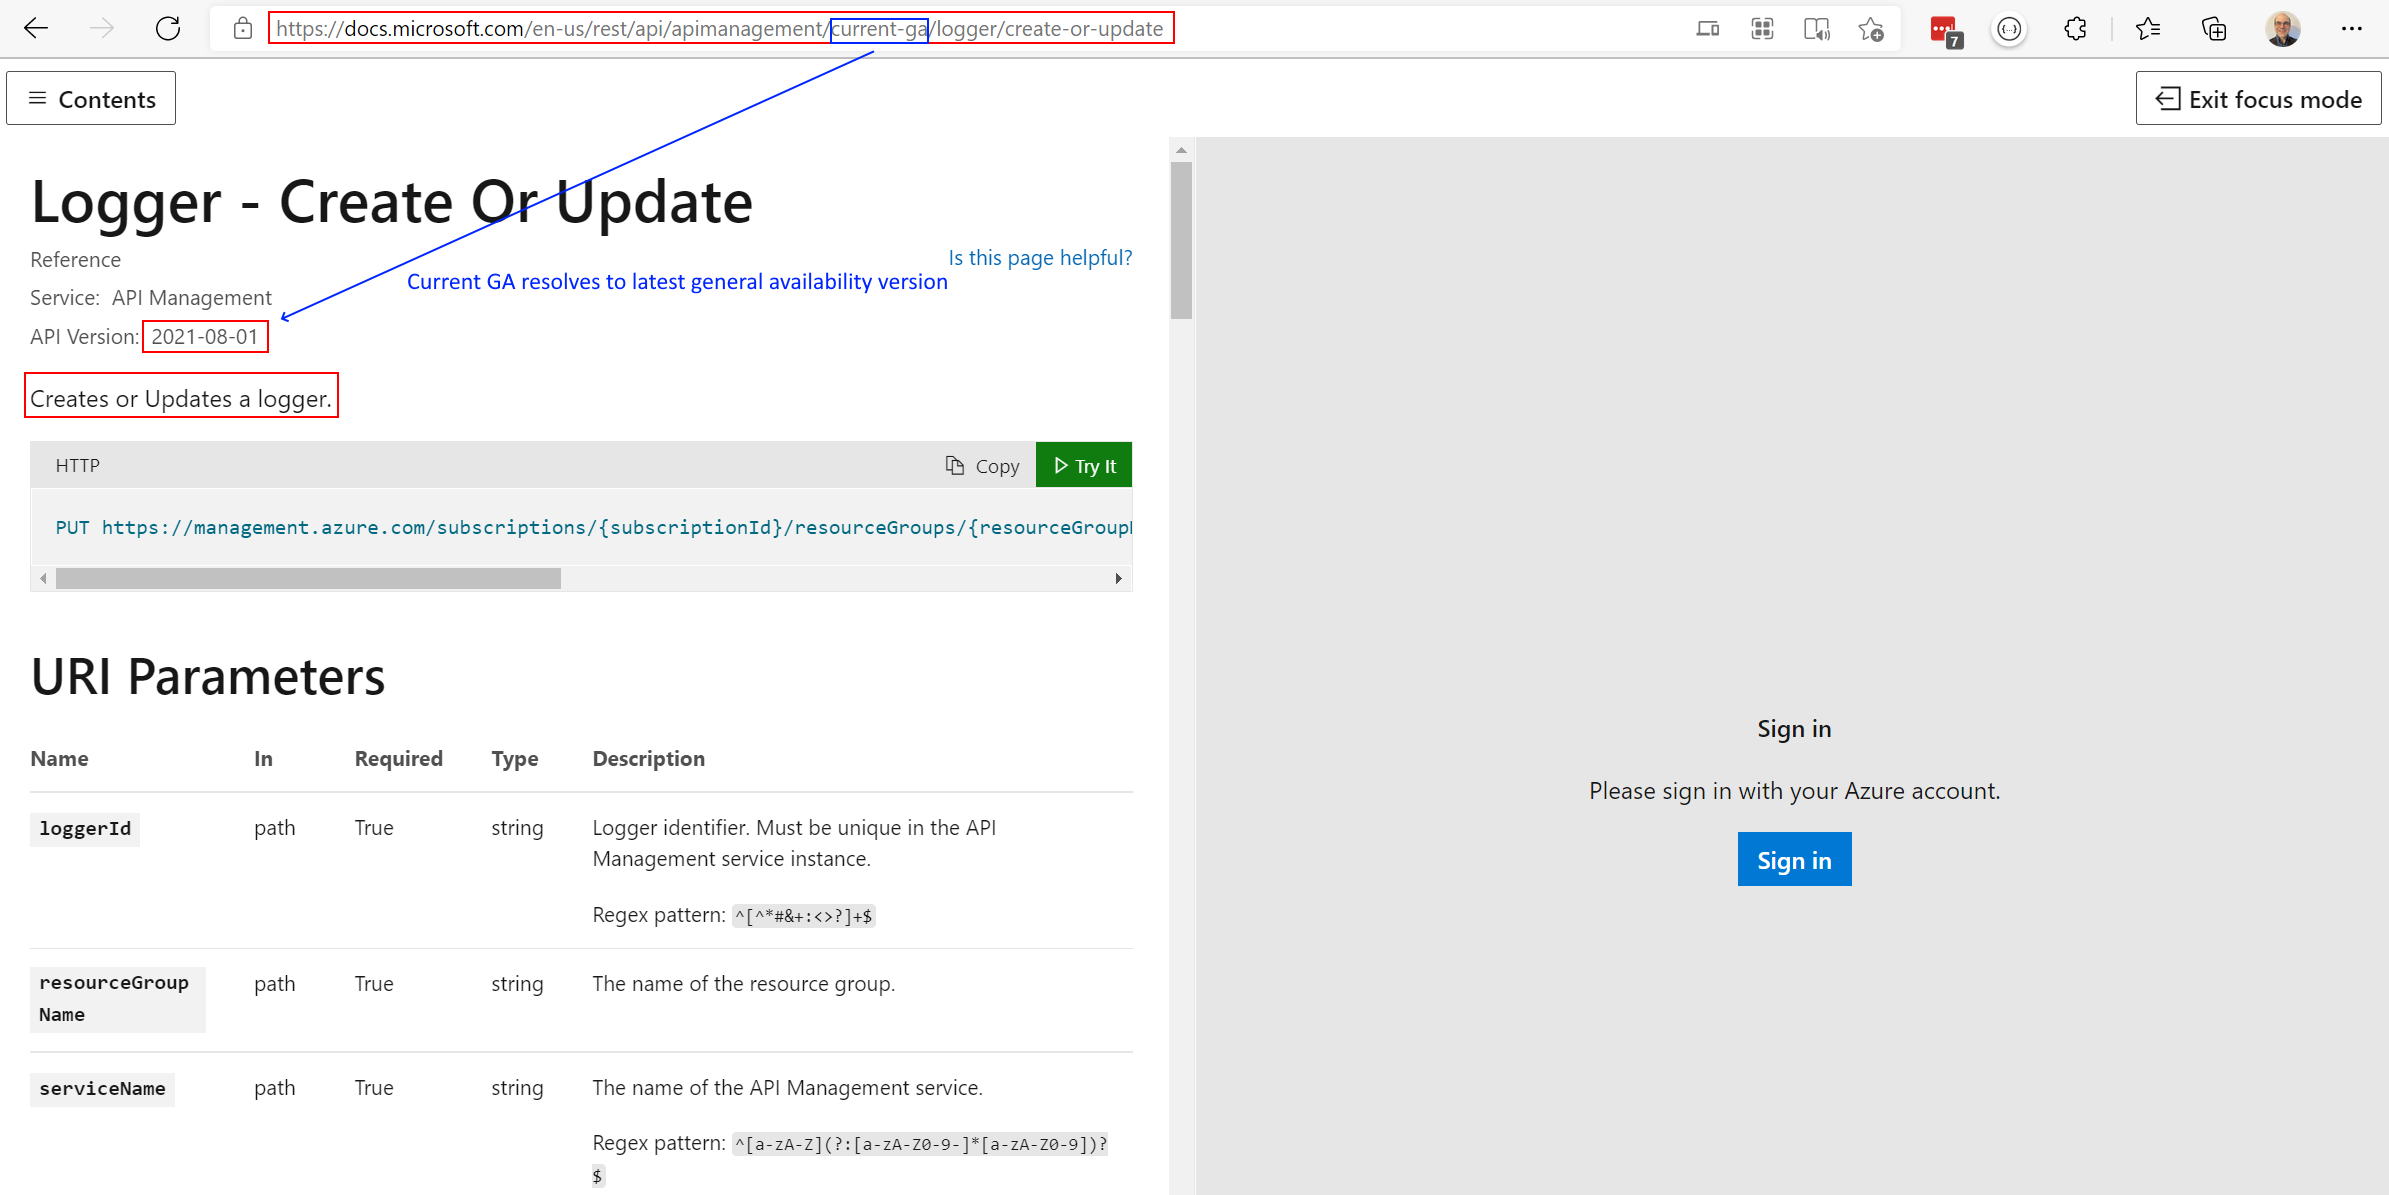
Azure API Management loggers are configured using the API Management REST API. For this example we are going to use the “REST API Try it” Functionality to create the logger:
-
Open the following link REST API Try It
- Press Sign in and use your Azure credentials that you have been using with this workshop, if prompted.
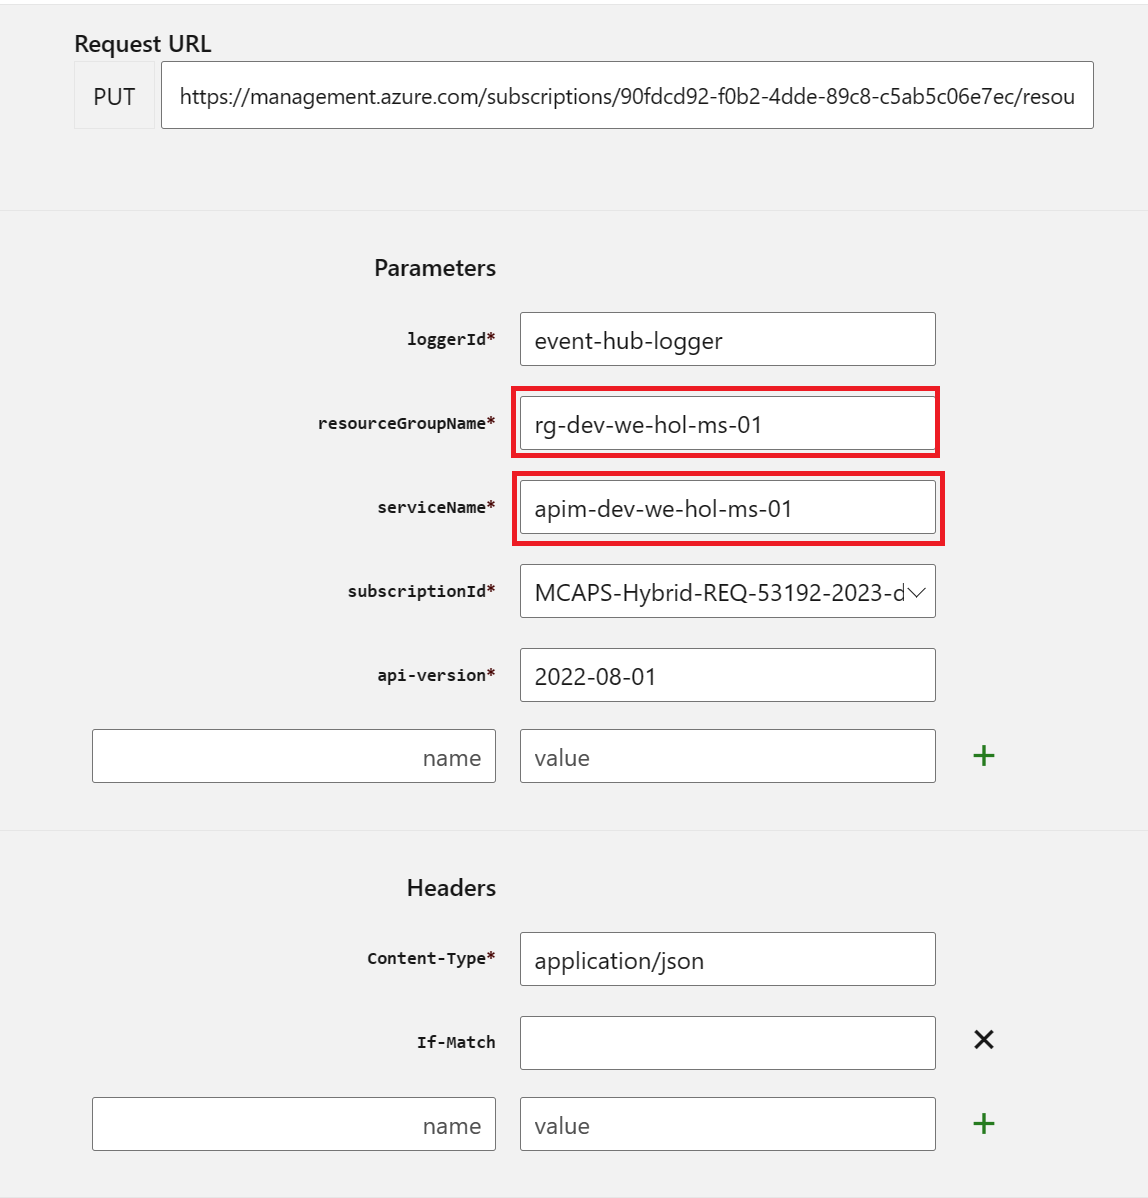
- Fill in the following Parameters:
- loggerId: event-hub-logger (you will use it in the next steps)
- resourceGroupName: your resource group
- serviceName: your Azure API Management instance
-
subscriptionId: your Azure subscription
- Replace the request Body with the following json. Make sure you replace the parameters appropriately:
{
    "properties": {
        "loggerType": "azureEventHub",
        "description": "adding a new logger",
        "credentials": {
            "name": "<your event hub namespace>",
            "connectionString": "<your Connection string-primary key>"
        }
    }
}
-
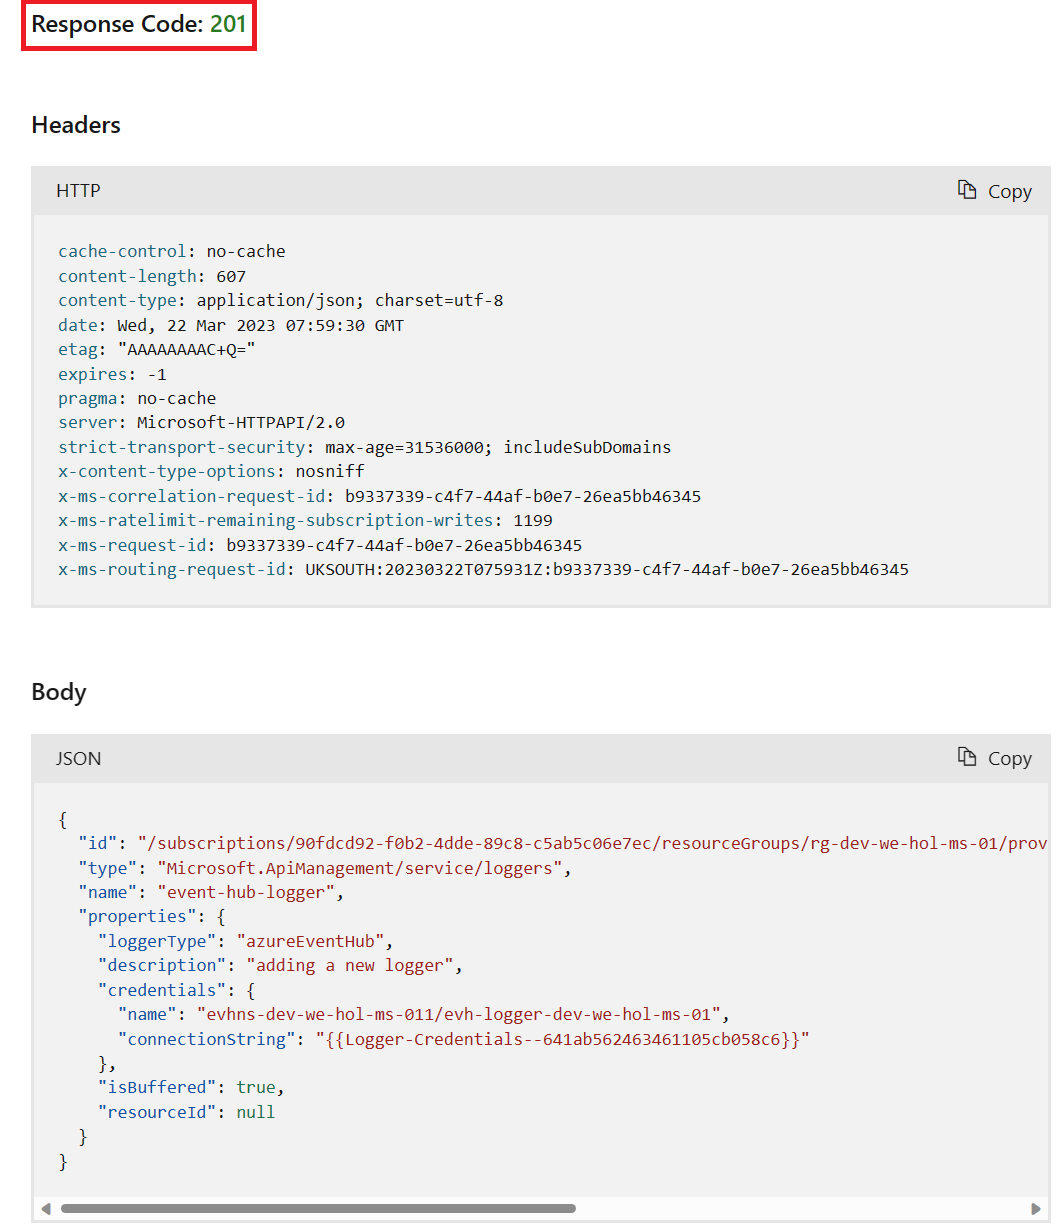
Your request parameters might then look similar to this:
Note my deviation by intential masking my
SharedAccessKey. Please do not alter your key.
 {
     "properties": {
         "loggerType": "azureEventHub",
         "description": "adding a new logger",
         "credentials": {
             "name": "evhns-dev-we-hol-ms-011/evh-logger-dev-we-hol-ms-01",
             "connectionString": "Endpoint=sb://evhns-dev-we-hol-ms-011.servicebus.windows.net/;SharedAccessKeyName=sendpolicy;SharedAccessKey******=;EntityPath=evh-logger-dev-we-hol-ms-01"
         }
     }
 }
- Press Run.
-
You should get a 201 response, confirming that the resource has been created.
Configure log-to-eventhub policies
Once your logger is configured in Azure API Management, you can configure your log-to-eventhub policy to log the desired events. The log-to-eventhub policy can be used in either the inbound policy section or the outbound policy section.
- Browse to your Azure API Management instance.
- Select the APIs blade.
- Select the API to which you want to add the policy.
In this example, we’re adding a policy to the Echo API. - Select All operations.
- On the top of the screen, select the Design tab.
- In the Inbound or Outbound processing window, enter the Code editor.
- Enter a new line after the
<base />tag in theinboundoroutboundpolicy section. - Select Show snippets.
-
In the window on the right, select Advanced policies > Log to EventHub. This inserts the
log-to-eventhubpolicy statement template.
-
Replace the policy with this snippet:
<log-to-eventhub logger-id="<your logger id>"> @{ return new JObject( new JProperty("EventTime", DateTime.UtcNow.ToString()), new JProperty("ServiceName", context.Deployment.ServiceName), new JProperty("RequestId", context.RequestId), new JProperty("RequestIp", context.Request.IpAddress), new JProperty("OperationName", context.Operation.Name) ).ToString(); } </log-to-eventhub> -
Replace
<your logger id>with the value you used for{loggerId}in the request URL to create the logger in the previous step (e.g.event-hub-logger).You can use any expression that returns a string as the value for the
log-to-eventhubelement. In this example, a string in JSON format containing the date and time, service name, request ID, request IP address, and operation name is logged.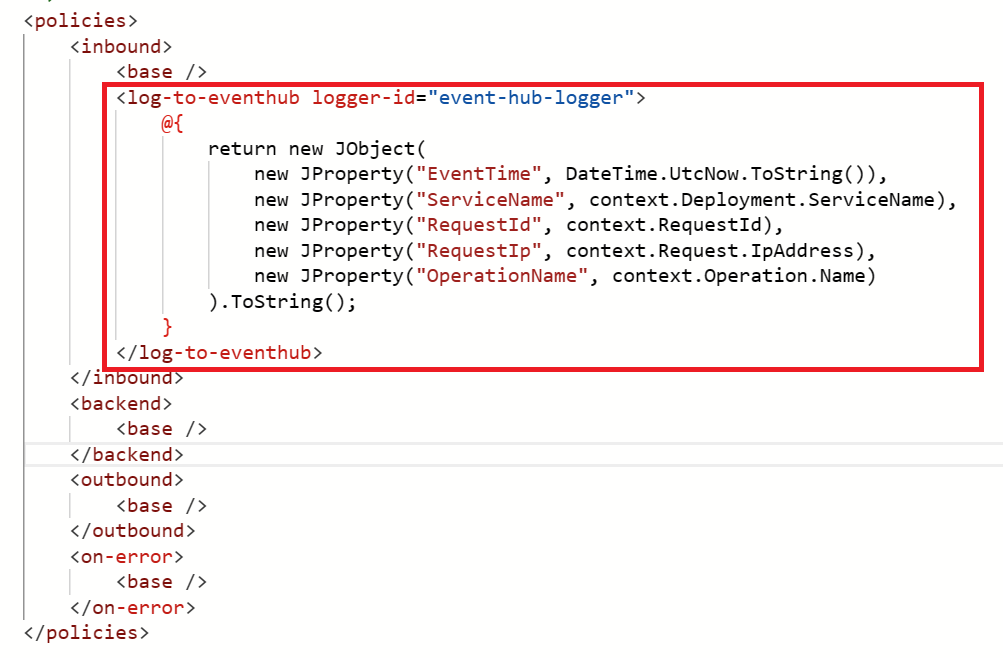
- Click Save to update the policy configuration. As soon as it is saved the policy is active and events are logged to the designated Event Hub.
Verify Events are logged in Event Hub
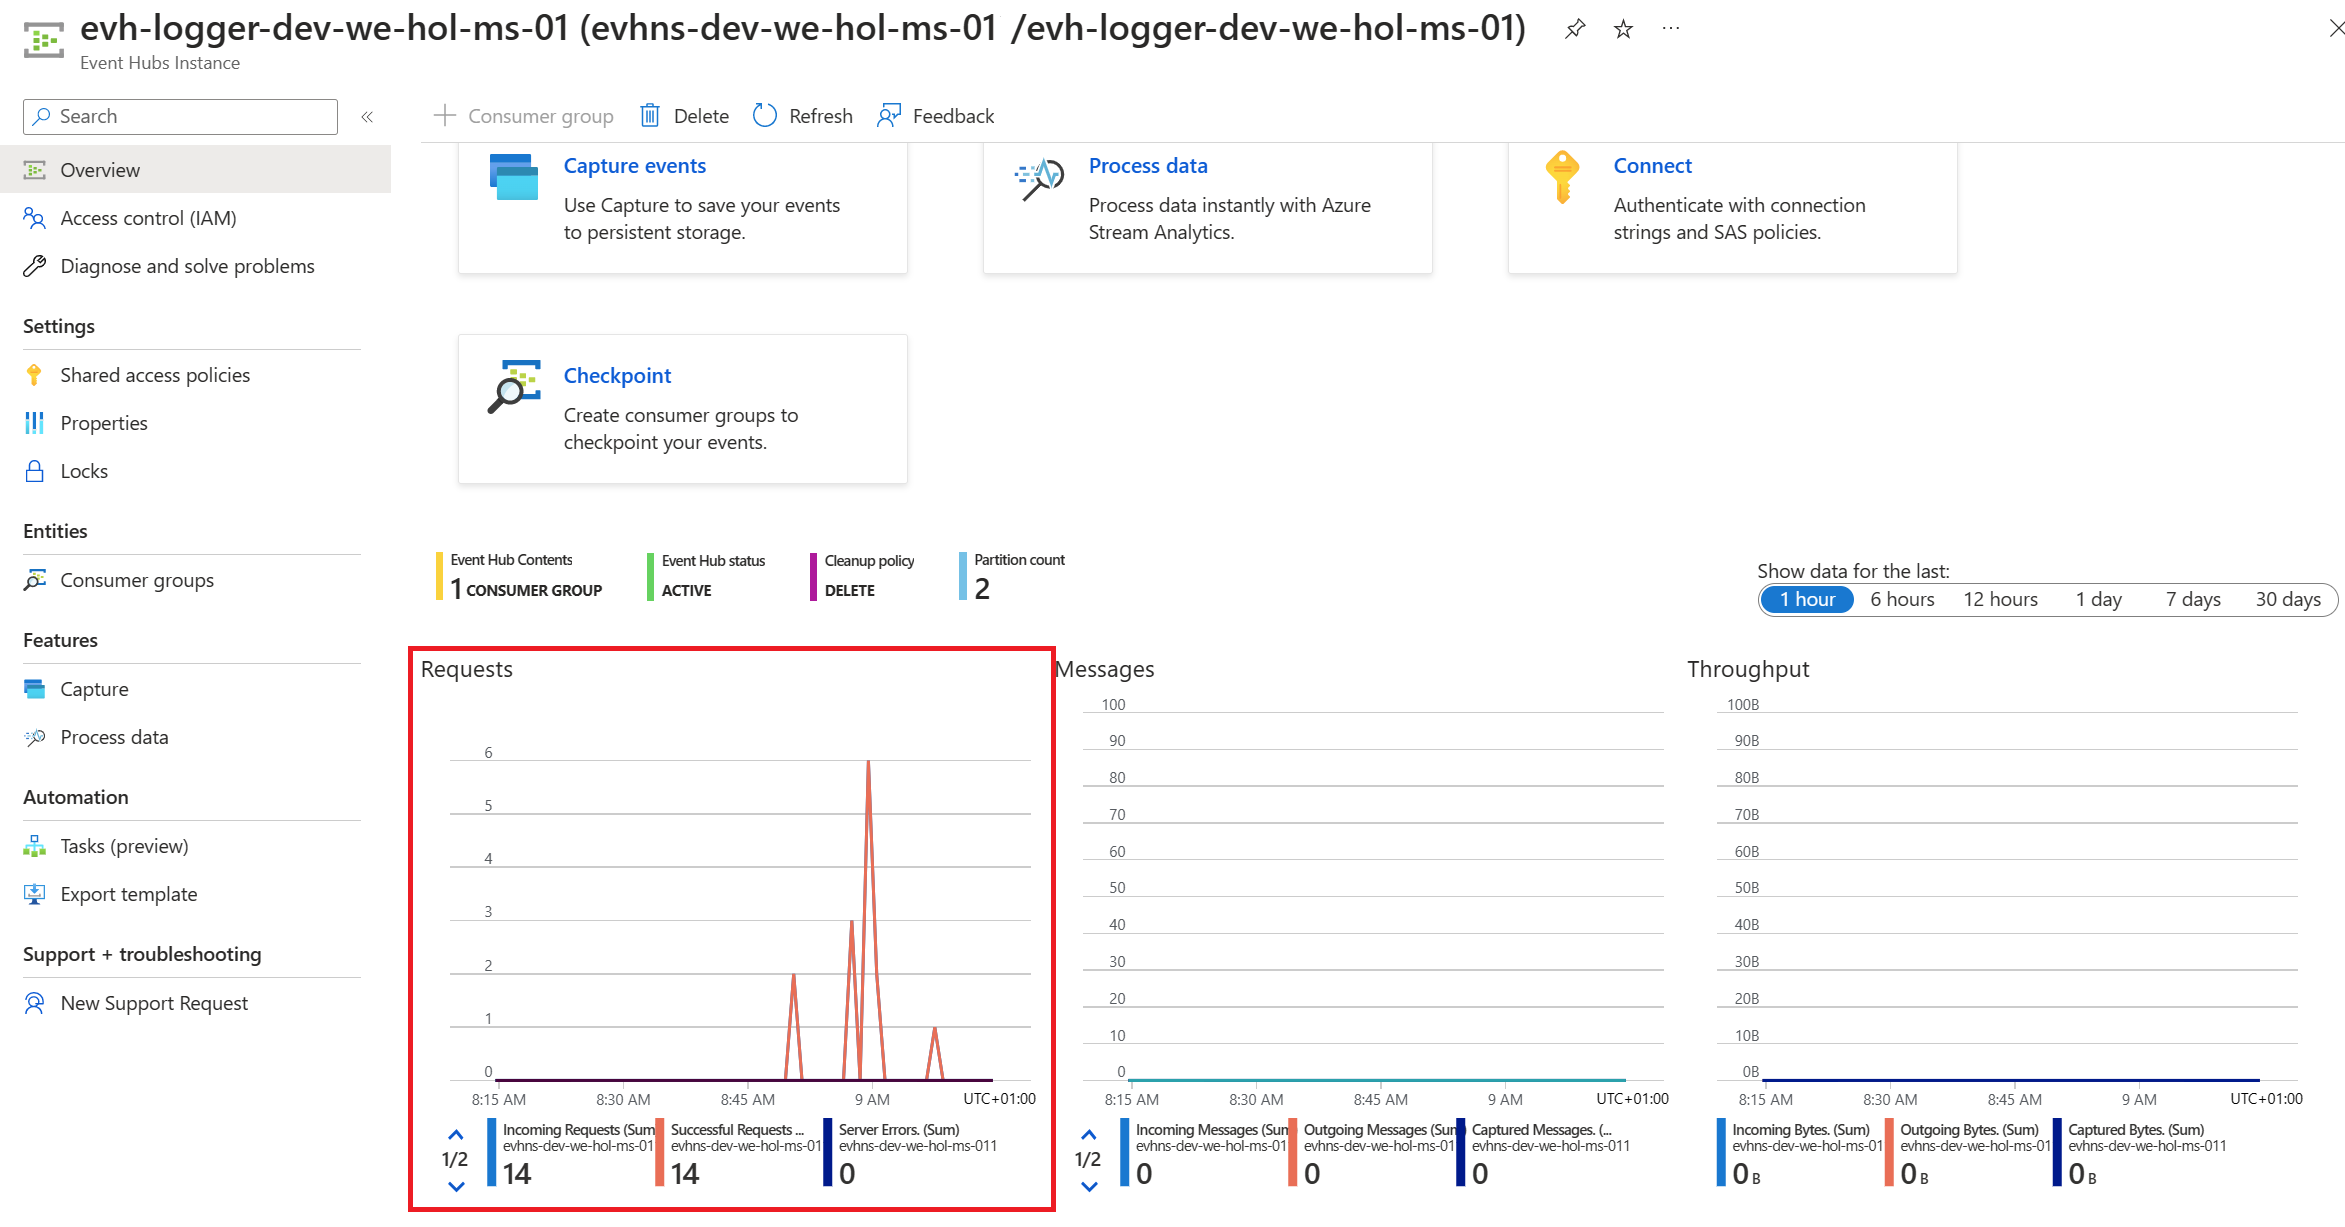
- Issue a handful of test Echo API calls from within Azure API Management (e.g. Get Retrieve Resource operation).
-
In the Azure portal open the Event Hub you created earlier. You should see recent events. If not, give it a minute, then refresh.
What to do with the data that is now in Event Hub is beyond the scope of this lab as this lab primarily focused on Azure API Management to Event Hub integration.