Verifying the Azure API Management instance
Once the Azure API Management instance has been created, please verify that it functions correctly by following these steps:
1) Navigate to the newly-created Azure API Management instance in the Azure Portal.
2) Select the APIs blade, then select the Echo API.
3) Press the Test tab, then select the GET Retrieve resource operation.
4) Press Send to issue a simple request.

5) Observe the 200 Success response.

At this time you have successfully verified that Azure API Management is set up!
Verification Failure (and Path to Success)
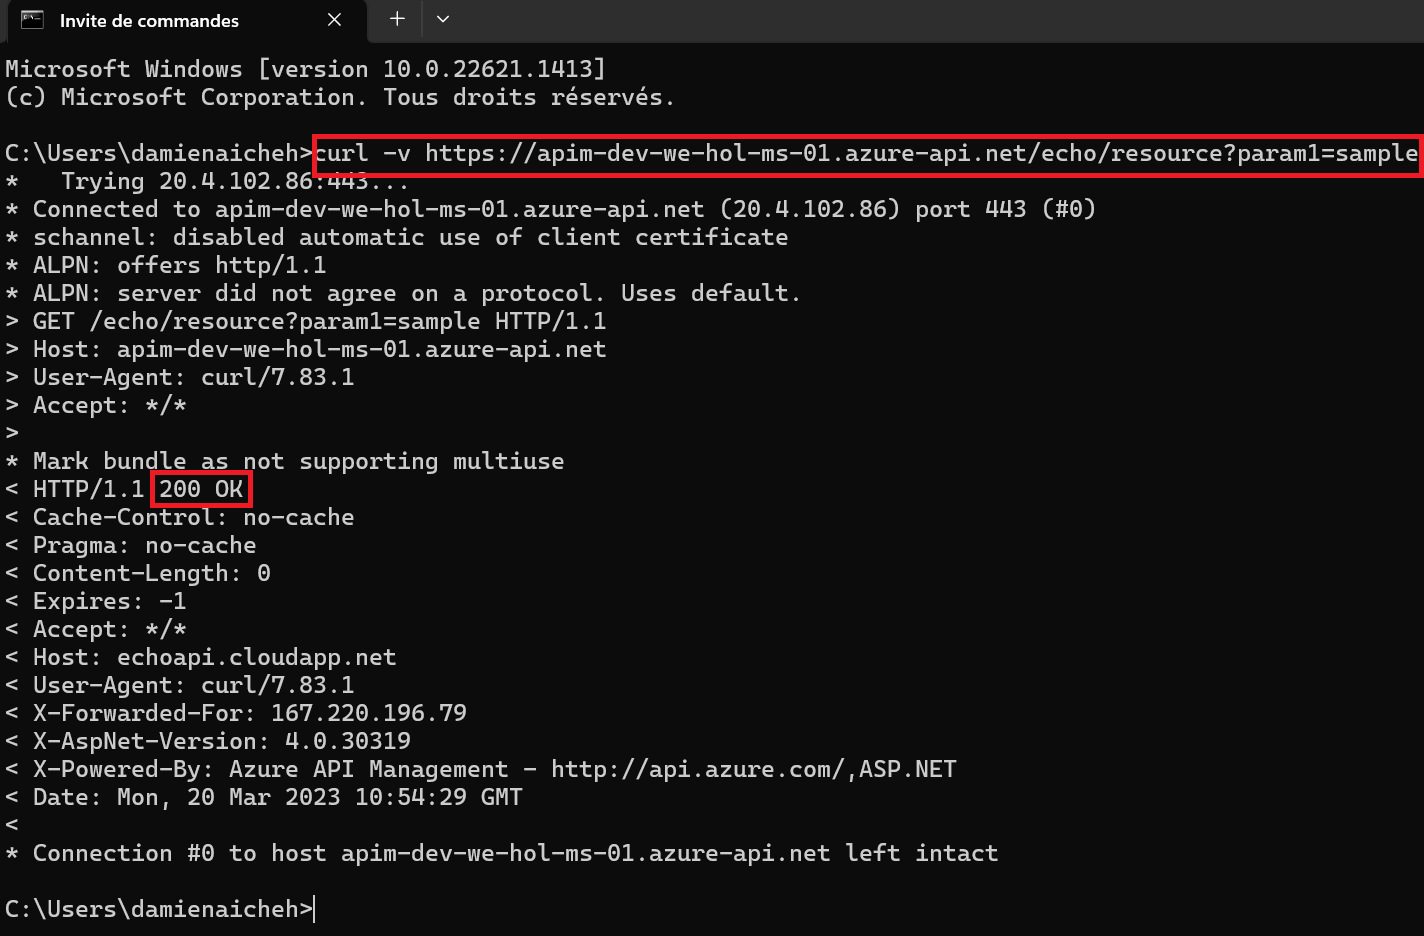
You may have noticed the Request URL and may be tempted to put it in your browser, issue a CURL statement, etc. If you do, you may see a 401 error and wonder what’s happening.

The reason for this the unauthorized access status code is that the Echo API requires a subscription key to be set. Whereas tests originating in Azure API Management account for this automatically, external callers cannot (and, naturally, should not).
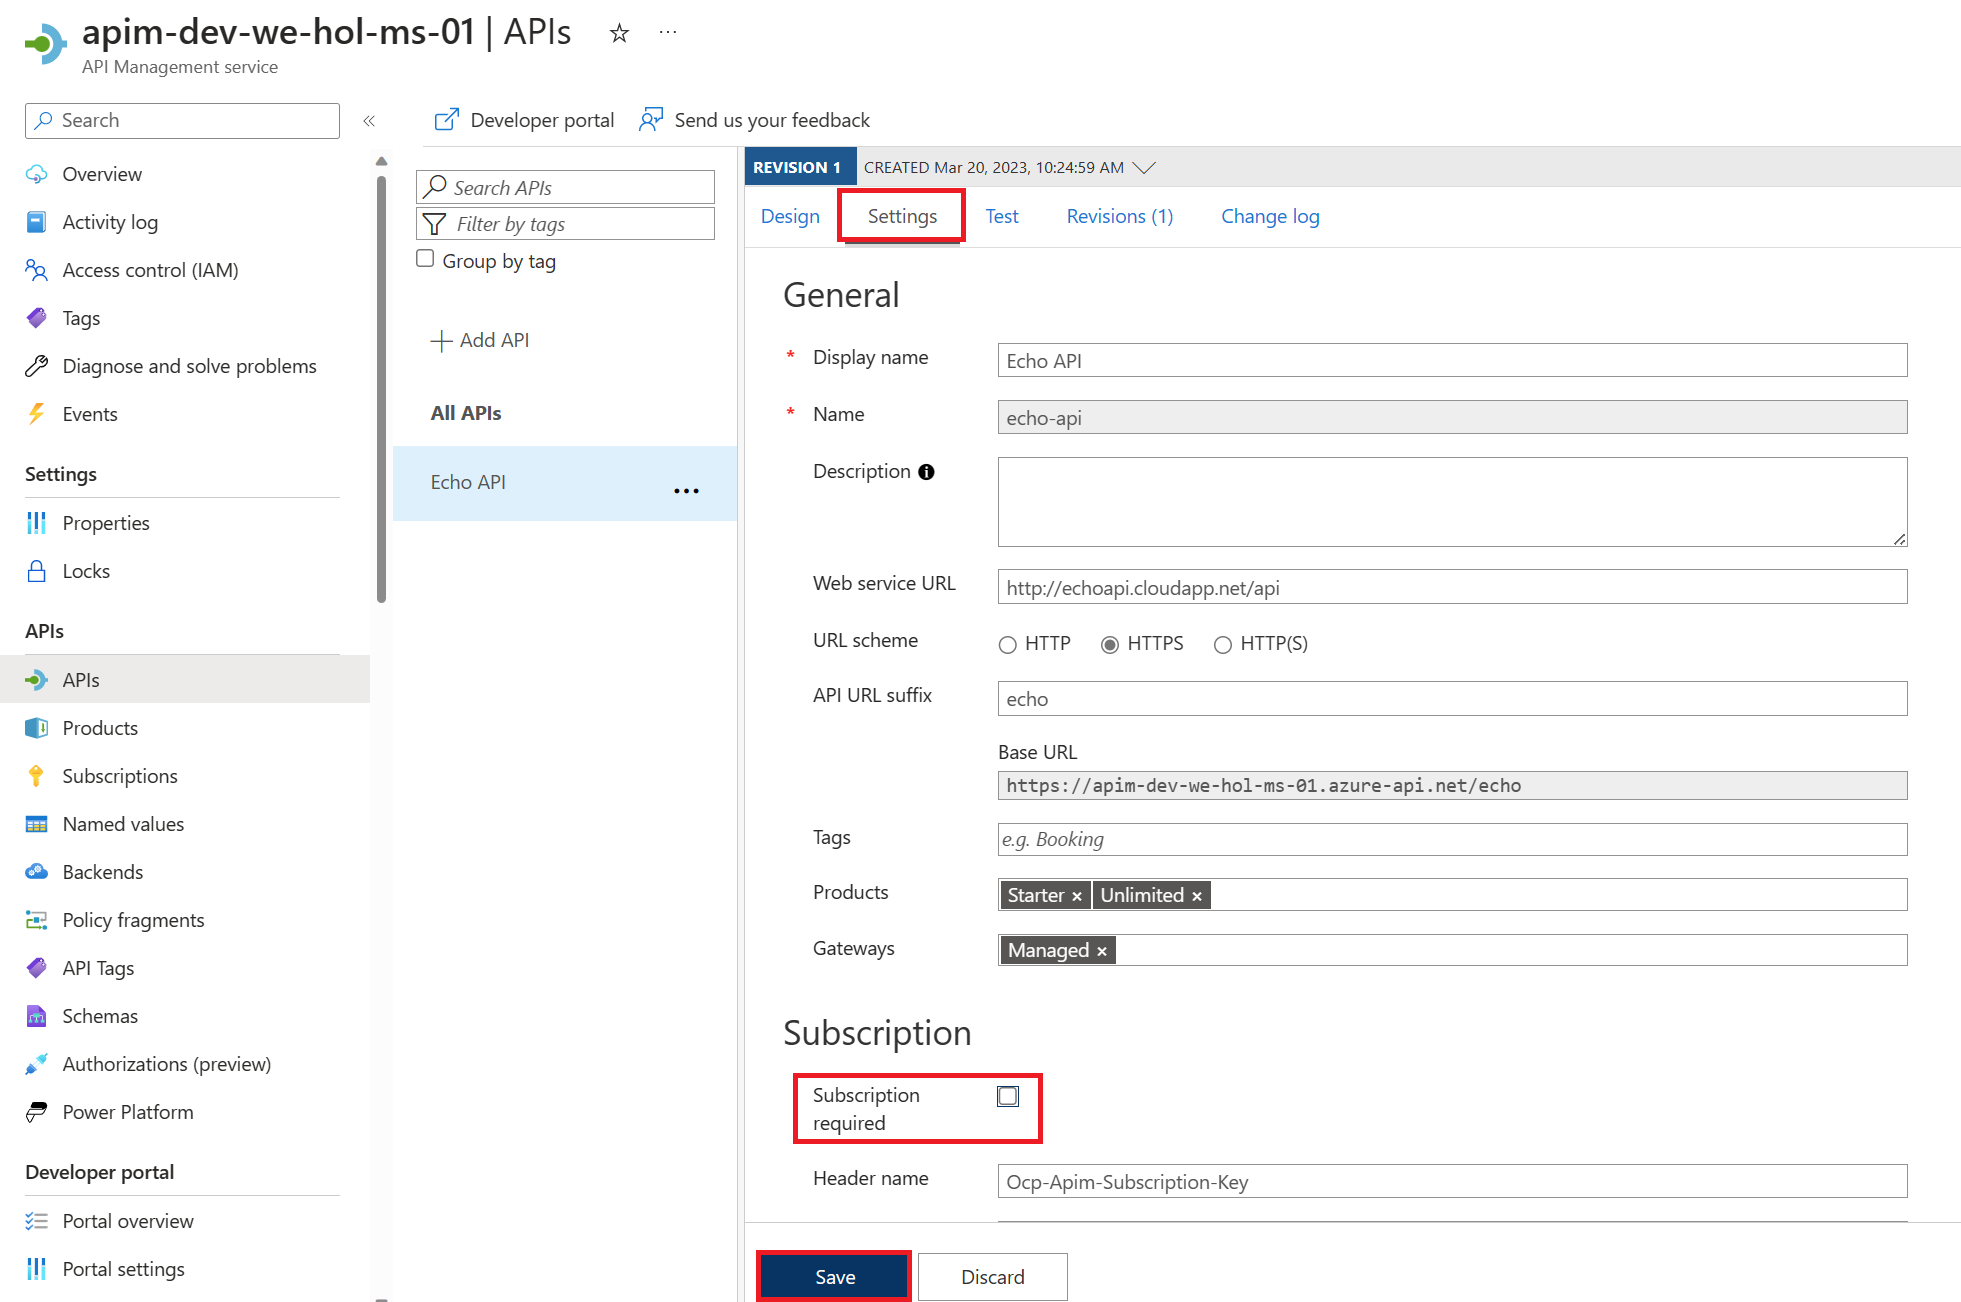
Back in APIM, switch to the Settings tab and uncheck Subscription required and press Save at the bottom of the page.
Subscriptions are important and useful, but in this case, we just want to quickly verify the Azure API Management instance is working as intended.
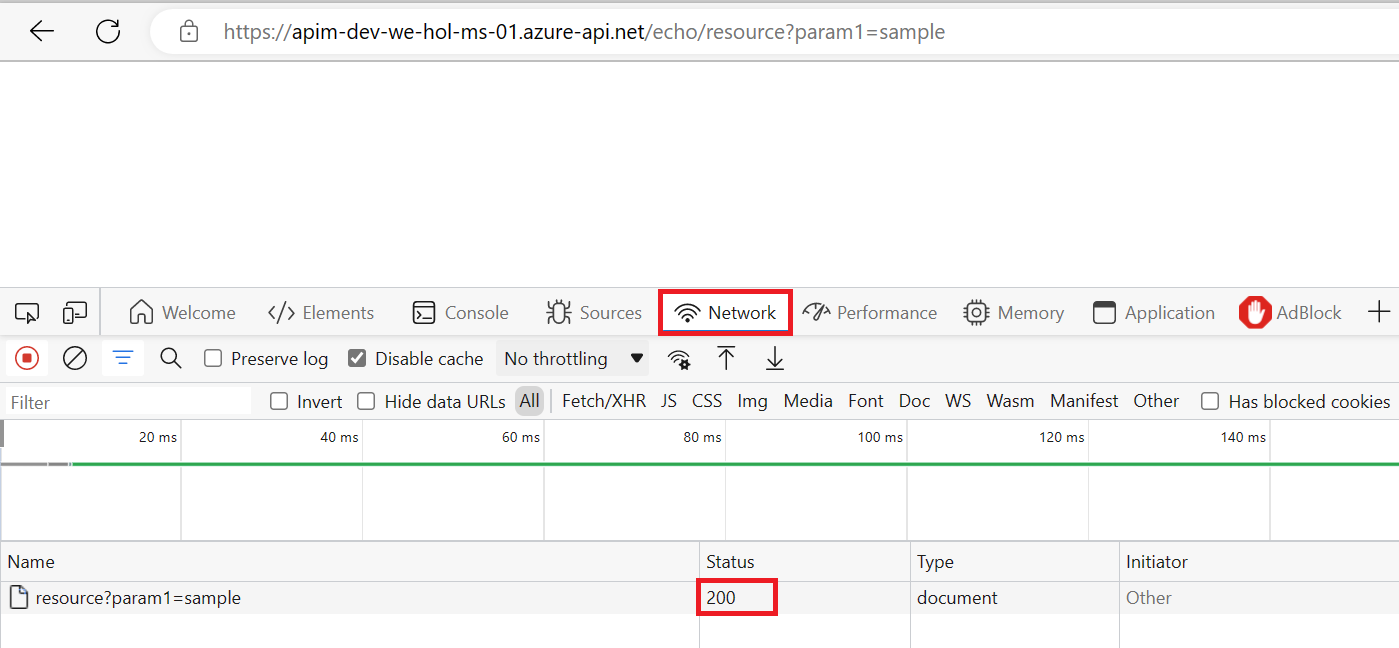
Accessing the link in your browser should now show you no error message. In fact, in order to verify the 200, it’s easiest to open your Developer Tools (F12), navigate to the Network tab, and look at All requests to see the 200.
Alternatively, you can issue a verbose (-v) CURL command against the Echo API and observe the 200 Success: curl -v https://<your azure api management instance>.azure-api.net/echo/resource?param1=sample