Cluster > Certificates
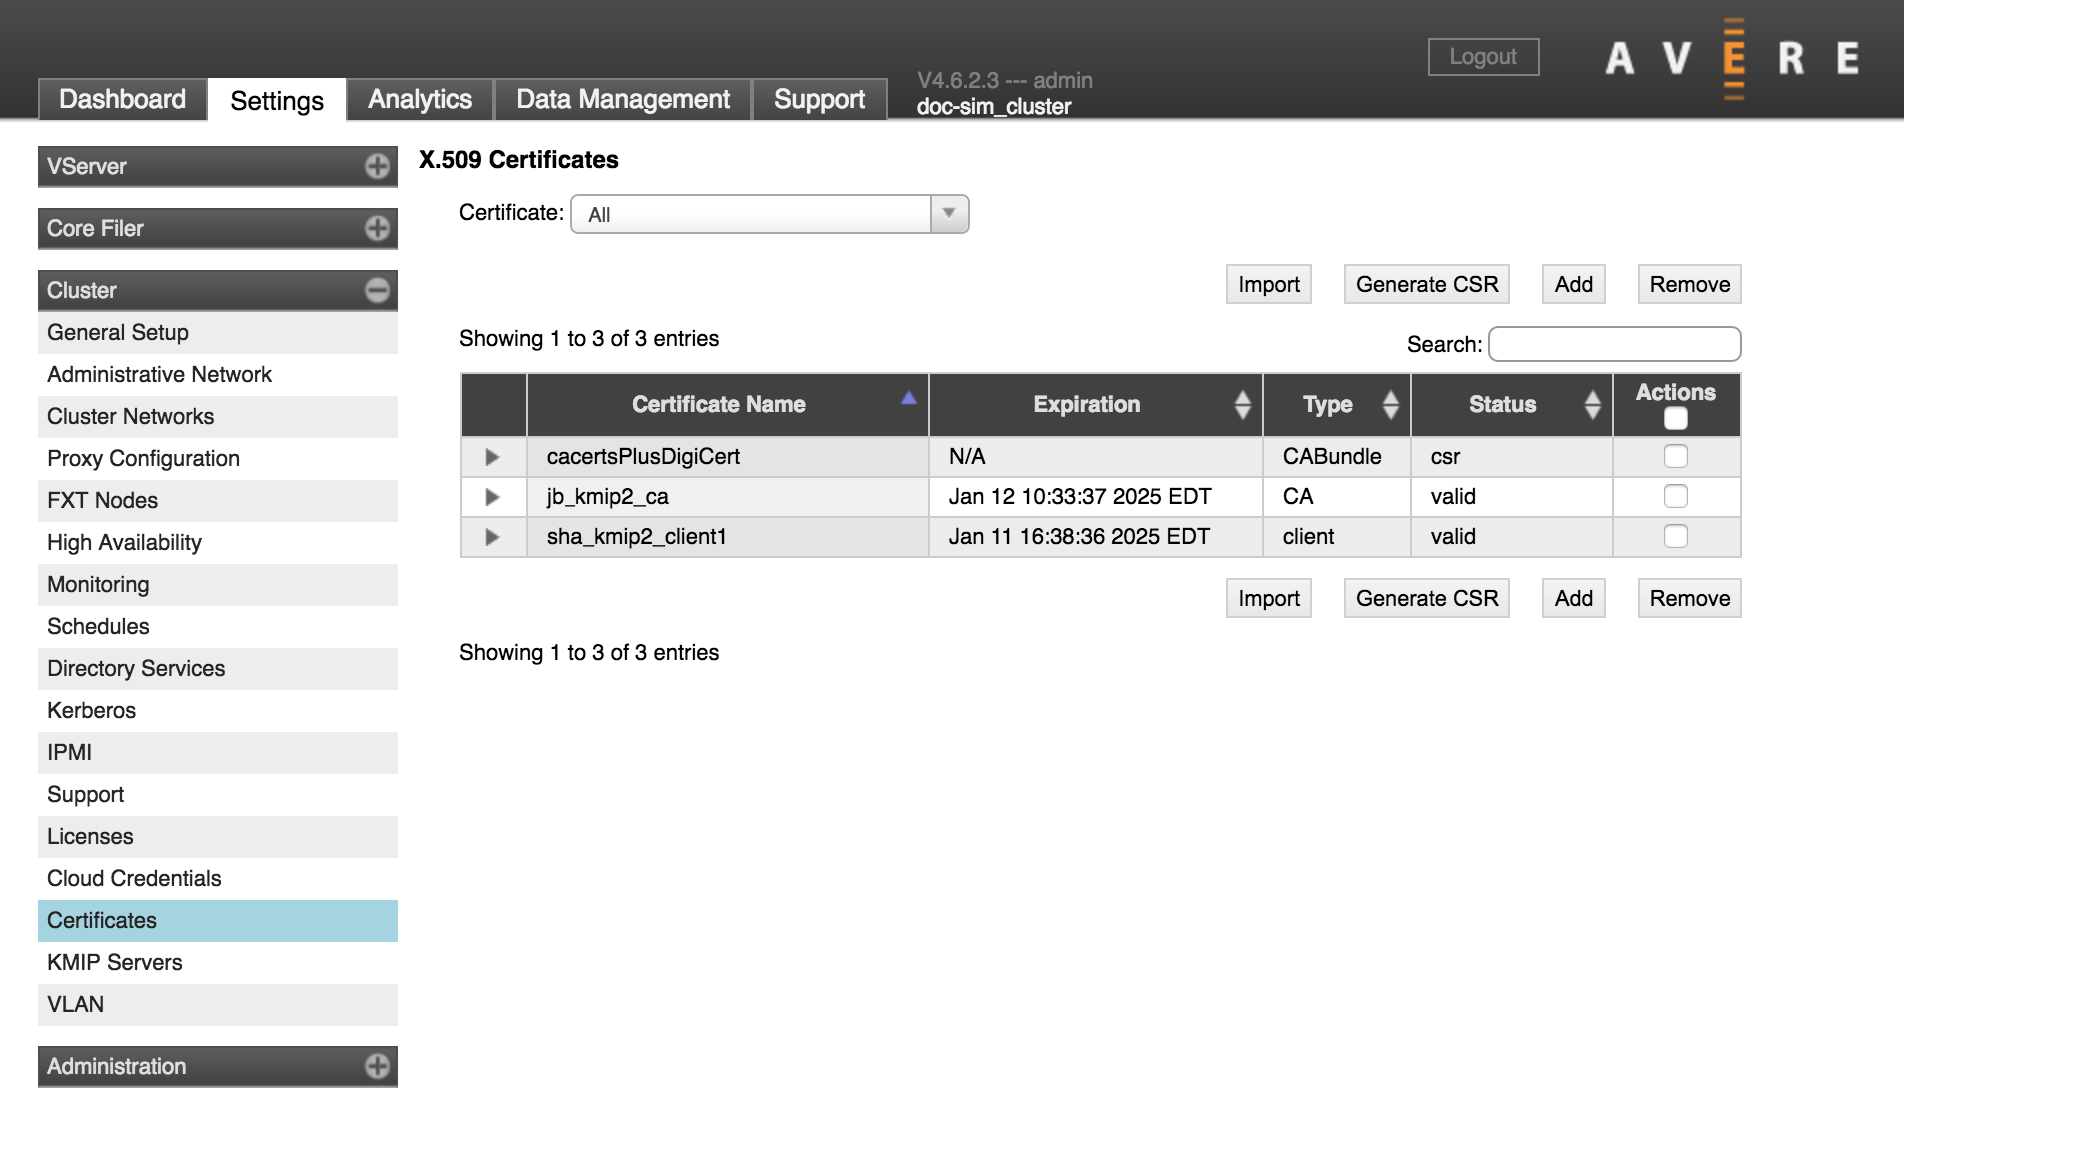
The Certificates page shows X.509 certificates that are stored in the cluster. These certificates can be used in Key Management Interoperability Protocol (KMIP) operations or to encrypt communication between the cluster and the administrator (that is, for the Avere Control Panel or command-line API).
Currently, Avere OS supports KMIP only for cloud core filer encryption.
These are the basic steps in enabling KMIP for a cluster:
Create an X.509 certificate, or import an external certificate (on this page)
To create a certificate:
- Generate a Certificate Signing Request (CSR)
- Email the CSR to a certificate authority (CA) for signing
- Upload the signed response to store the certificate in the cluster
To import a certificate, you need a PEM-encoded version of the private key and signed certificate.
Create a KMIP server (on the Cluster > KMIP Servers page)
Specify the KMIP server as the encryption key store for a cloud core filer. You can specify the KMIP server when you create the cloud core filer (Adding a New Core Filer - Cloud Core Filer) or on the Cluster > Cloud Credentials settings page.
The Certificates settings page has several controls to help you manage X.509 certificates and create new ones.
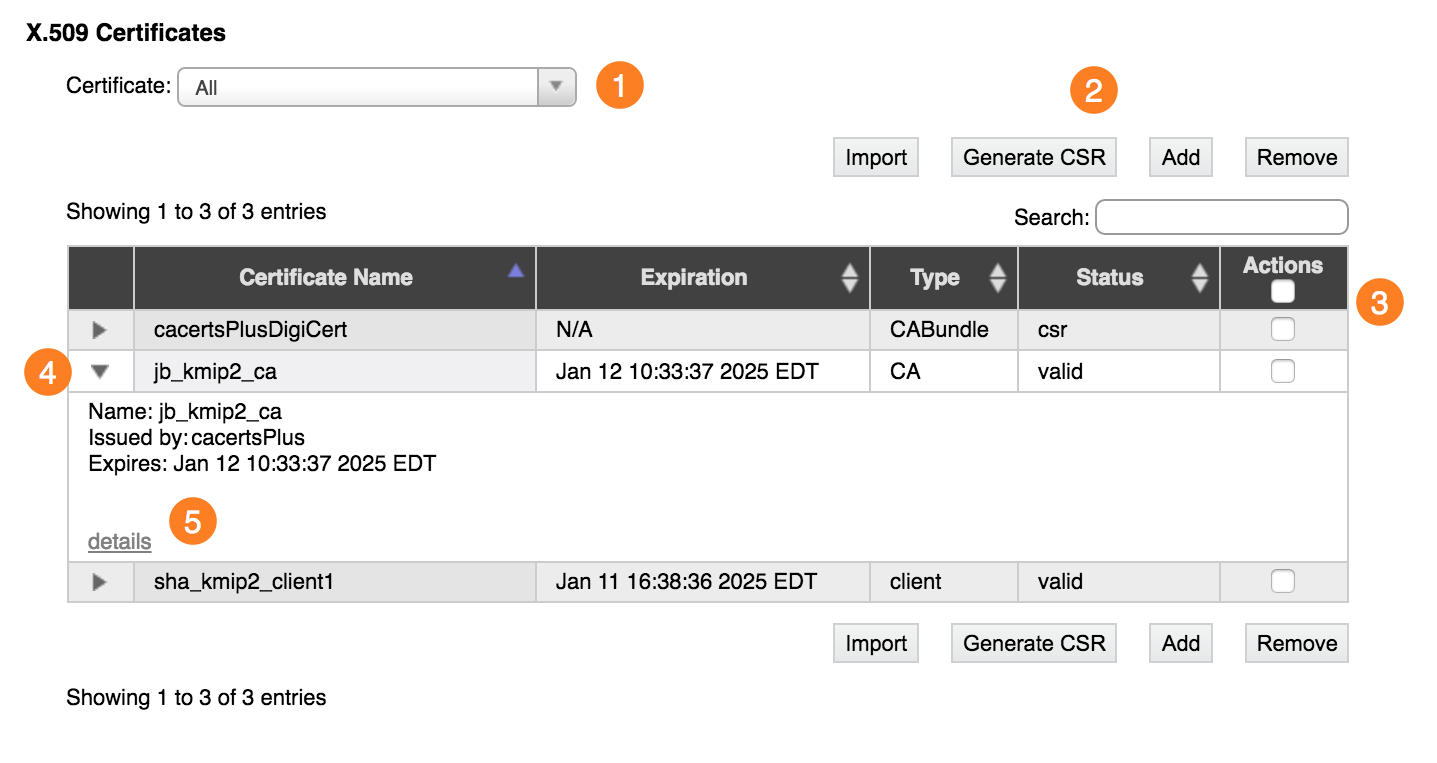
Working With the Certificates List
The table that lists the certificates includes features to help you focus on the information that interests you.
Filtering
Use the filter selector at the top left (1) to restrict the type of certificate shown in the list.
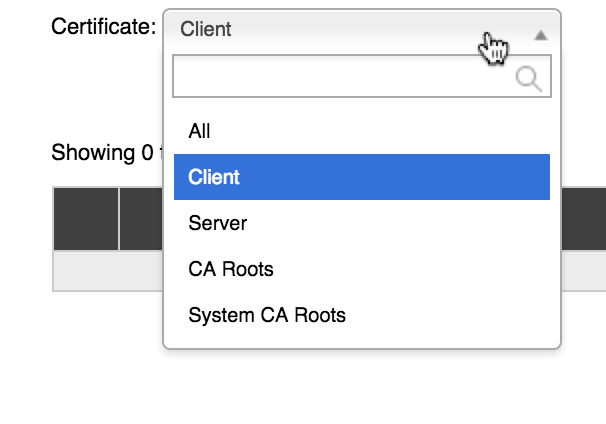
Choose All to return to the unfiltered list.
Searching
Enter a string in the Search field above the list to display only certificates with attributes that match that text.
Detail Views
Click the triangular control next to a certificate name (4) to expand the list entry and show more information about the certificate.
At the bottom of the expanded information panel is a details link (5). Click the link to show the certificate’s attributes (version, serial number, signature algorithm, issuer, valid dates, public key information and algorithm, extensions, signature algorithm, and other attributes).
Creating a New Signed Certificate
As mentioned above, you can use the controls on this page to generate a signing request and to upload the completed request for use by the cluster.
If you want to use a certificate that is not signed by a CA, or to import a previously created certificate, you can skip the CSR step and use the Add or Import controls.
Generating a Certificate Signing Request
The first step in generating an externally validated X.509 certificate is to create a Certificate Signing Request (CSR) to send to a certificate authority (CA). The system’s SSL software uses the cluster’s private key to create a public key and combines that with the information supplied here to generate an encoded request.
Click the Generate CSR button at the top of the list (2).
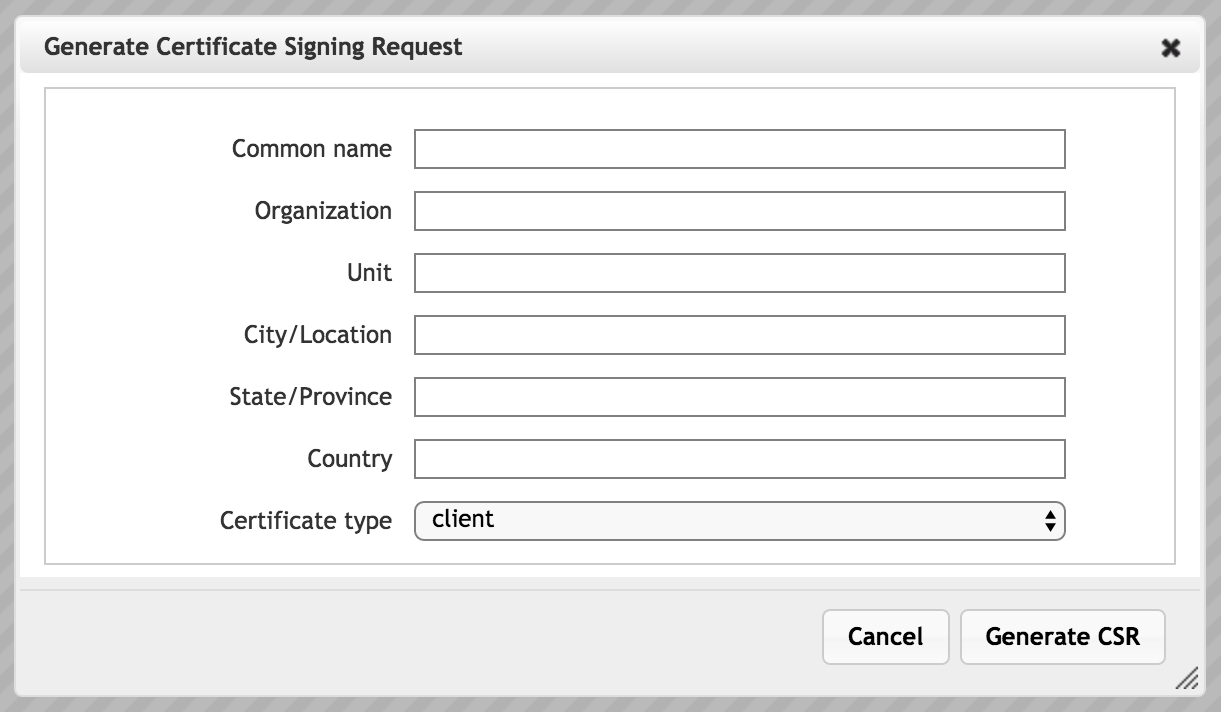
Enter the requested information. You must supply a value for each attribute.
- Common Name
- For server certificates, enter the fully qualified domain name or hostname of your server. For client certificates, enter any unique value.
- Organization
- The legal name of the organization
- Unit
- The division or unit of the organization that handles the certificate
- City/Location
- Location of the organization
- State/Province
- The country region where the organization is located
- Country
- Enter the two-character ISO code for the country where the organization is located.
- Certificate Type
- You can create a Client or Server certificate. A client certificate is needed to authenticate the Avere OS cluster to the KMIP server.
After configuring the requested information, click Generate CSR. The system shows a pop-up window with the request text to send to the certificate authority.
Obtaining a CA Signature
To get the request signed by an authority, copy the text from the certificate request and email it to your certificate authority. Request that the authority sign the certificate request.
The CA will send you a signed version of the certificate in response. Copy the response, and use the Add button to upload it to the cluster.
Adding the Signed Certificate
To add the signed certificate to the cluster, use the Add button. A window pops up with a large text field labeled Add PEM encoded certificate. Copy the text that the CA returned in response to your CSR, and paste it into the field. Click the Add Certificate button at the bottom of the pop-up window to save the signed certificate.
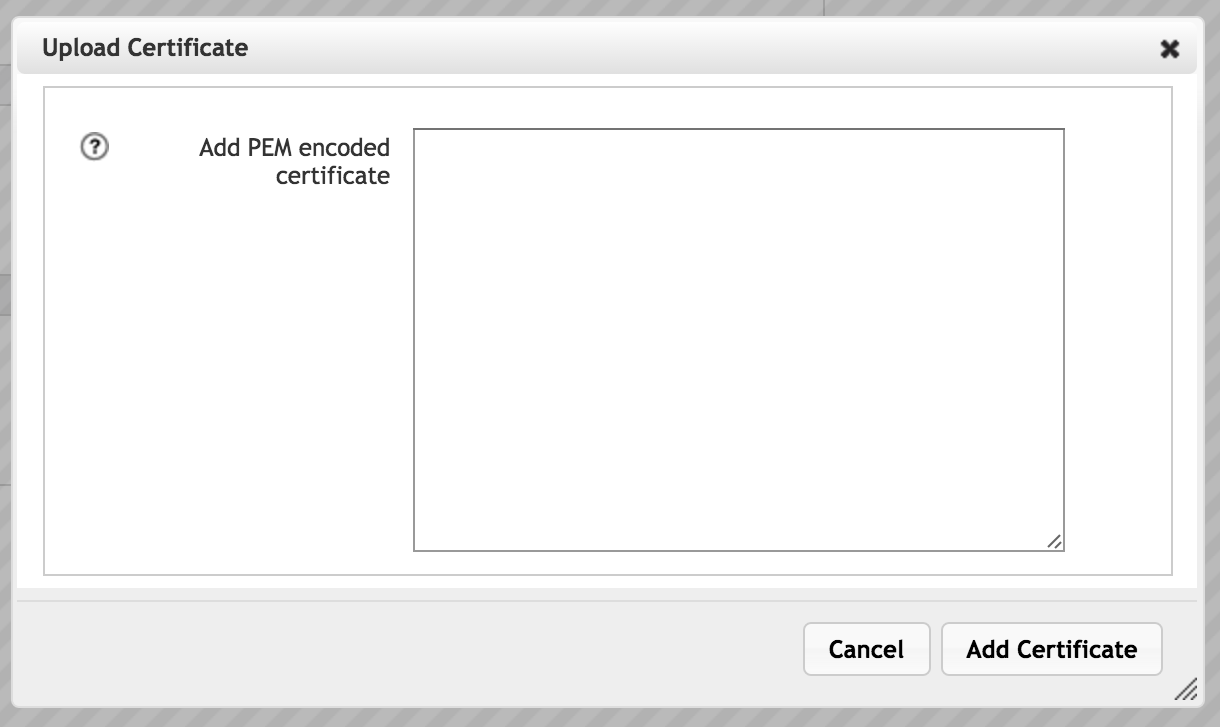
Note the difference between the Add and Import options. The Add button is for adding the certificate returned from a CSR created in the Avere Control Panel, so the Upload Certificate panel has only one text field, for the certificate. Avere OS automatically associates the private key from the CSR with the certificate added in this panel.
When importing a certificate, you must provide both the private key and the certificate, so the Import Certificate panel has two text fields. Click the Import button to upload an external certificate.
Importing a Certificate
You can import a certificate that was created elsewhere. To add an existing certificate to the Avere OS cluster, you must provide the certificate text and the private key that was used to create it. Both of these values should be in PEM format.
To import a certificate, click the Import button.
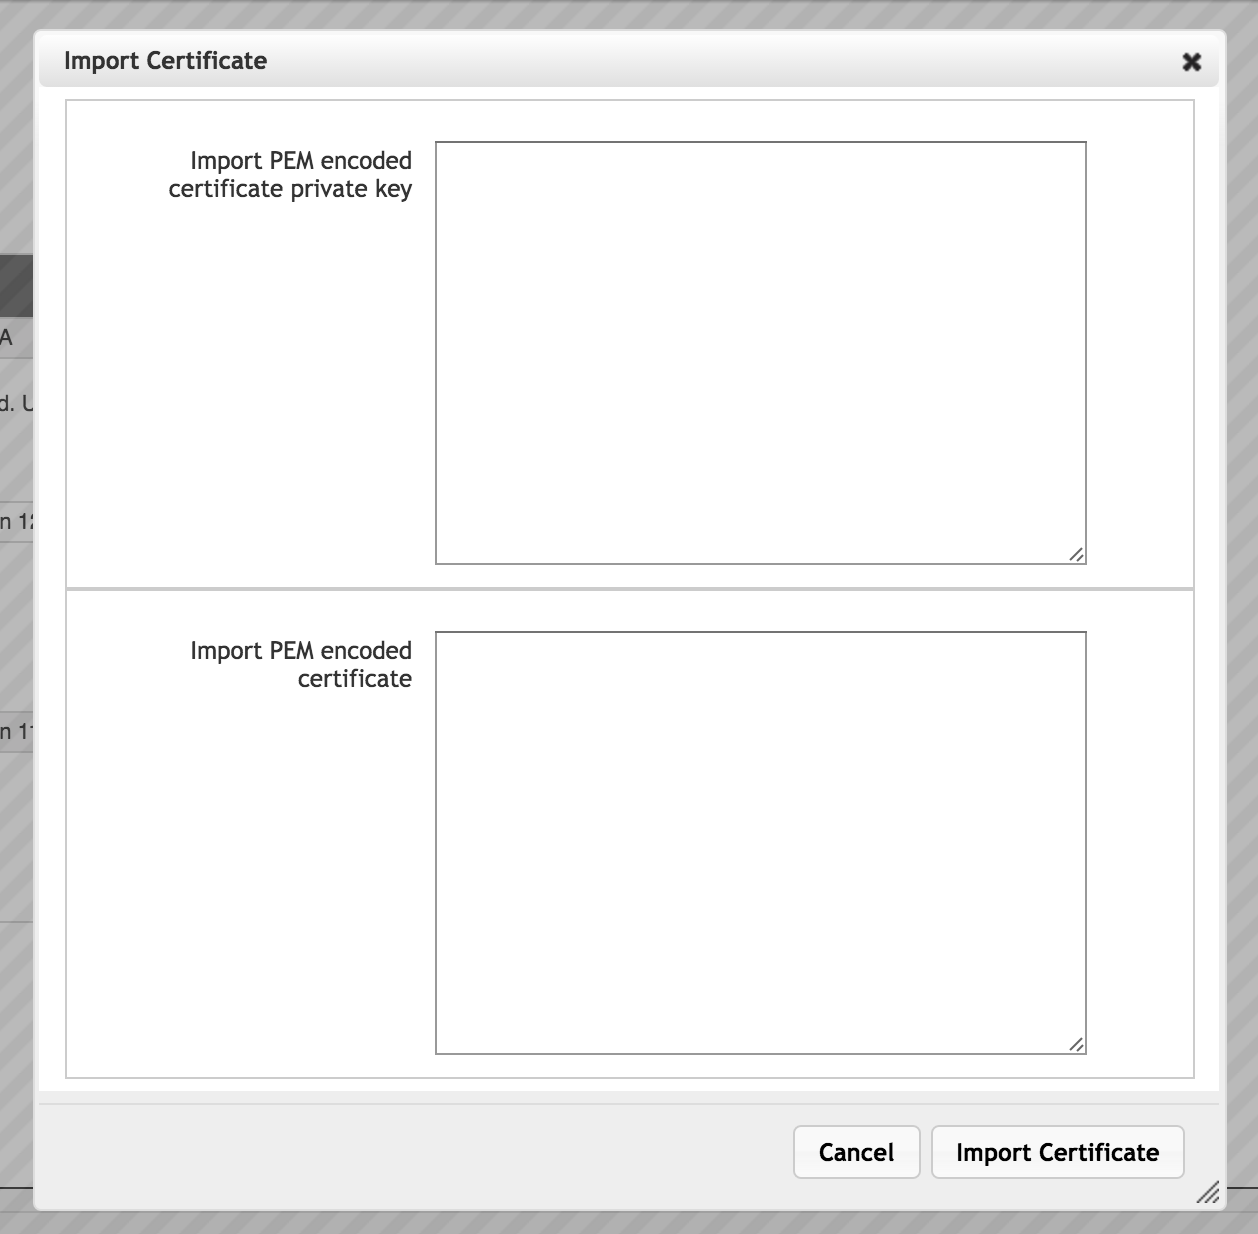
Paste the private key in the upper box and the certificate in the lower box. Include headers and footers - that is, the private key text should begin with -----BEGIN PRIVATE KEY----- and end with the corresponding footer.
Click the Add Certificate button at the bottom of the pop-up window to save the certificate.