VServer > Manage VServers
Manage VServers
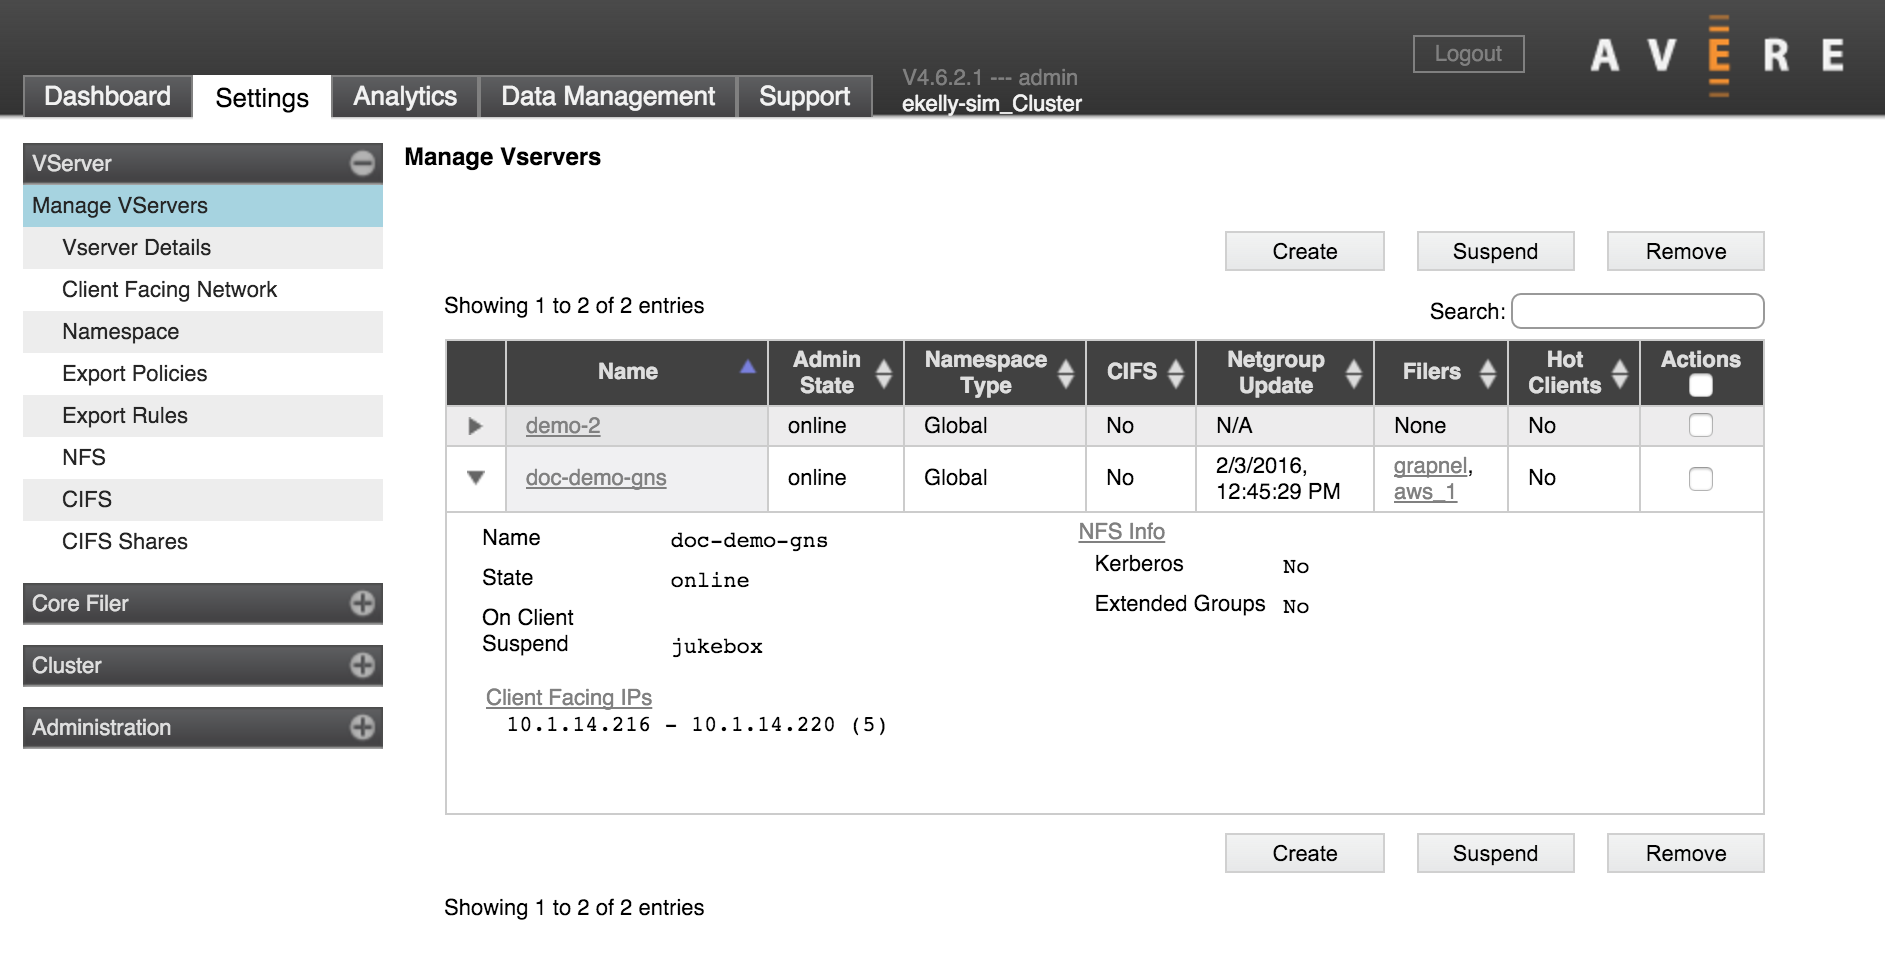
The Manage VServers settings page gives a list of the cluster’s vservers.
You can filter the list to show only vservers whose attributes match the string typed in the search box (2).
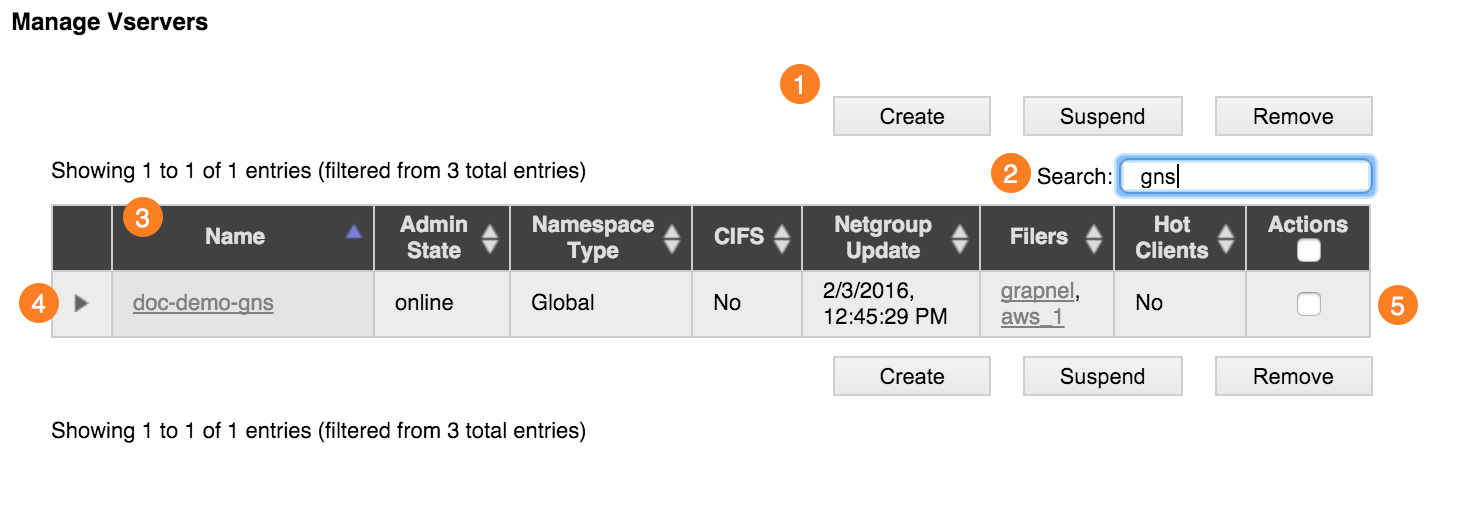
The buttons (1) above and below the list let you create a new vserver, suspend a vserver, or remove a vserver from the system. To use the buttons, first select one or more vservers by checking the Actions box (5) in the right column of the vserver’s table entry, then click the button for the action that you want to perform.
Identical sets of buttons appear at the top and bottom of the list for easier access when the list of vservers is long.
Click a column header (3) to sort the list by that column’s attribute.
Use the triangular control (4) in the left column to show or hide detailed information about that vserver.
Creating a VServer
Creating a vserver is the first step in configuring client access through the Avere cluster. (To learn more about vservers and their role in a cluster, read Creating and Working with VServers.)
You will need the following information:
- The name that you want to use for the vserver
- The range of client-facing IP addresses that the vserver will handle
Note
The set of client-facing IP addresses used for a virtual server must be manually assigned static IP addresses (not assigned by DHCP) and they must be in a contiguous range.
- For a simple namespace vserver: the name of the core filer that you will use with this vserver. The core filer must be defined before you create the vserver; read Adding a New Core Filer to learn how to add a core filer to the system. (For a GNS vserver, you can add core filers after creating the vserver.)
- If you use multiple VLANs, decide which VLAN you want this vserver to use.
These are the steps to create a new vserver:
From the Manage VServers page, choose create. The Add New VServer dialog box appears.
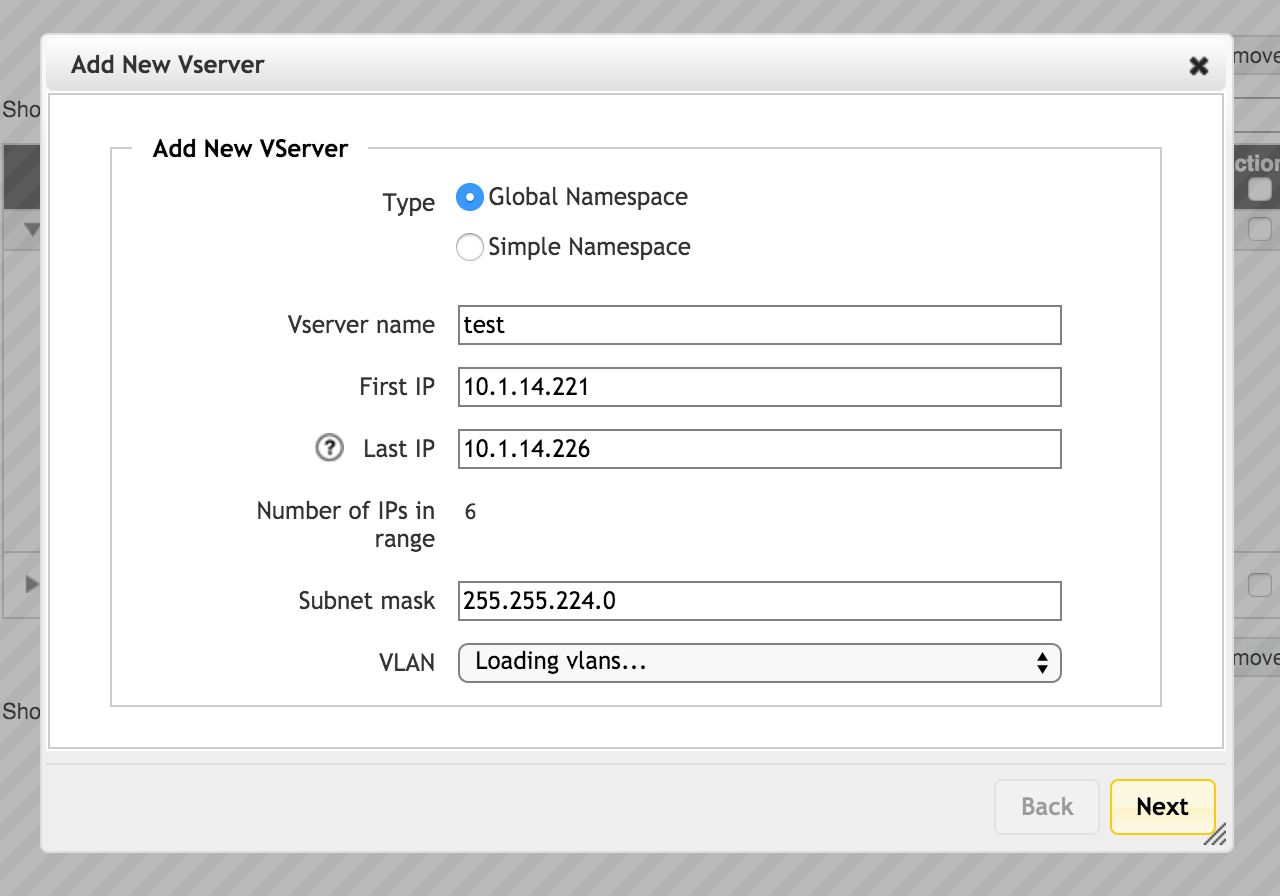
In the Type section, choose either a simple namespace (this vserver handles requests for one core filer’s directories only) or global namespace (this vserver handles requests in a client-side virtual namespace that is mapped to one or many core filers).
Enter the new virtual server’s name in the VServer Name field.
The name can include letters, numbers, and punctuation, but not the following characters:
+ ' & + < ; \ >
The maximum length is 255 characters.
For a simple namespace, the vserver name is typically an abbreviation of the core filer name (for example,
nas107).For a global namespace, it can be helpful to include a string indicating that the vserver exports a global namepsace (for example,
GNSornetfiles).
If you selected the Simple Namespace option, you must specify the core filer.
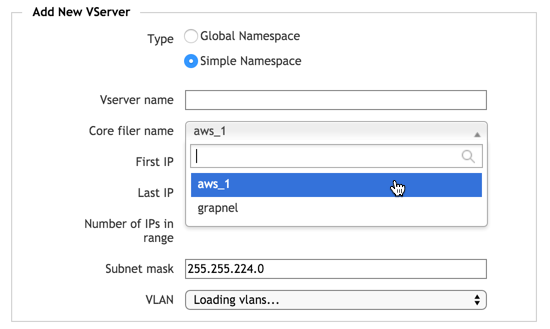
Select a core filer from the drop-down list. You can type a name to search for, but the core filer must be already defined in the system.
Set the IP address range:
Specify the first and last values for the IP address range that this vserver will use to accept client requests.
Note
You can set additional address ranges for this vserver after creating it. Use the Client Facing Network page to add IP addresses. This option is available only on systems that use Advanced Networking (which is enabled by default).
As mentioned in the prerequisites section, the IP range must be contiguous and manually assigned (not assigned by DHCP).
Enter the subnet mask associated with this VLAN. (You can choose which VLAN to use in the next field.)
Optionally, select a VLAN from the drop-down VLAN list. (Advanced Networking must be enabled to create and select VLANs.)
The default VLAN is listed, along with any client-role VLANs that you created in the Cluster > VLAN page. The IP addresses in this range will be associated with the VLAN that you select.
If your system does not use Advanced Networking, ignore this setting.
Click Add VServer to create the new server.
A message confirms that the vserver has been created. The Avere Control Panel might display alerts as the new vserver is added to the cluster.
Depending on the options that you selected, the Add New VServer utility might prompt you to customize more settings. The remaining settings also can be made from other Avere Control Panel pages.