VServer > Client Facing Network
The Client-Facing Network page has controls for configuring vserver IP address ranges and for assigning specific addresses to particular nodes.
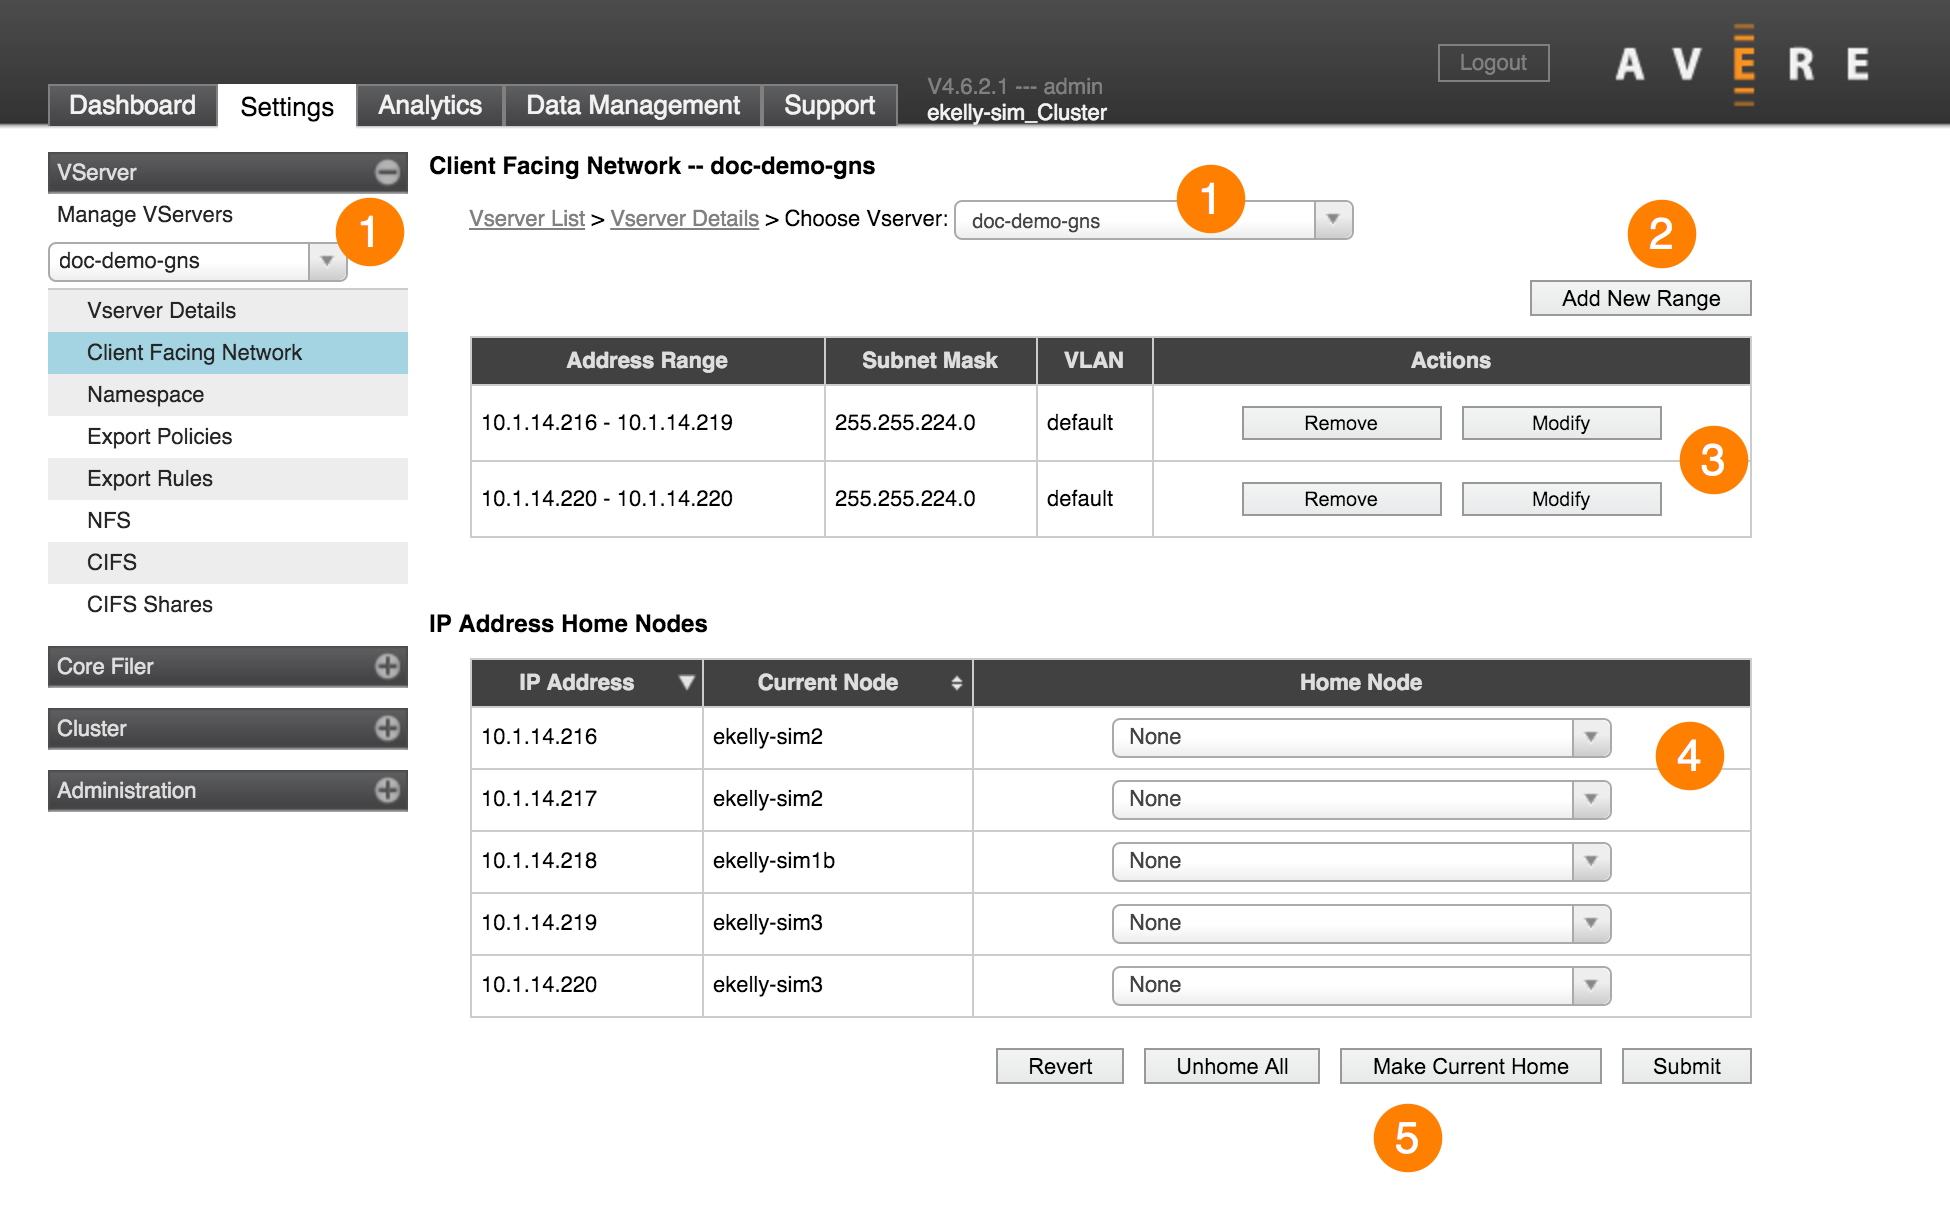
If you have more than one vserver, select the vserver that you want to configure by using the drop-down menu at the top of the page or in the sidebar (1).
The table at the top lists all IP address ranges assigned to the selected vserver.
Removing an IP Address Range
From the table of IP addresses, click the Remove button in the right column (3) to remove the address range from the vserver.
Note
The Remove button is active only if the vserver has multiple IP address ranges. You cannot remove the last IP address range from a vserver.
Editing an IP Address Range
Click the Modify button (3) in the table of IP addresses to edit an existing IP address range for this vserver. The IP range details section opens; you can change the first and last IP addresses, subnet mask, and VLAN settings.
Remember to click Submit to save your changes.
Adding an IP Address Range
To add an IP address range for this vserver, click the Add New Range button (2). (If your system has disabled Advanced Networking, this option is unavailable; only one address range can be defined. Consider editing the existing range, or enabling Advanced Networking.)
The IP range details section opens.
Specify the first and last values for the IP address range that this vserver will use to accept client requests.
The IP range must be contiguous and manually assigned (not assigned by DHCP).
Enter the subnet mask associated with this VLAN. (You can choose which VLAN to use in the next field.)
Optionally, select a VLAN from the drop-down VLAN list. The IP addresses in this range will be associated with the VLAN that you select.
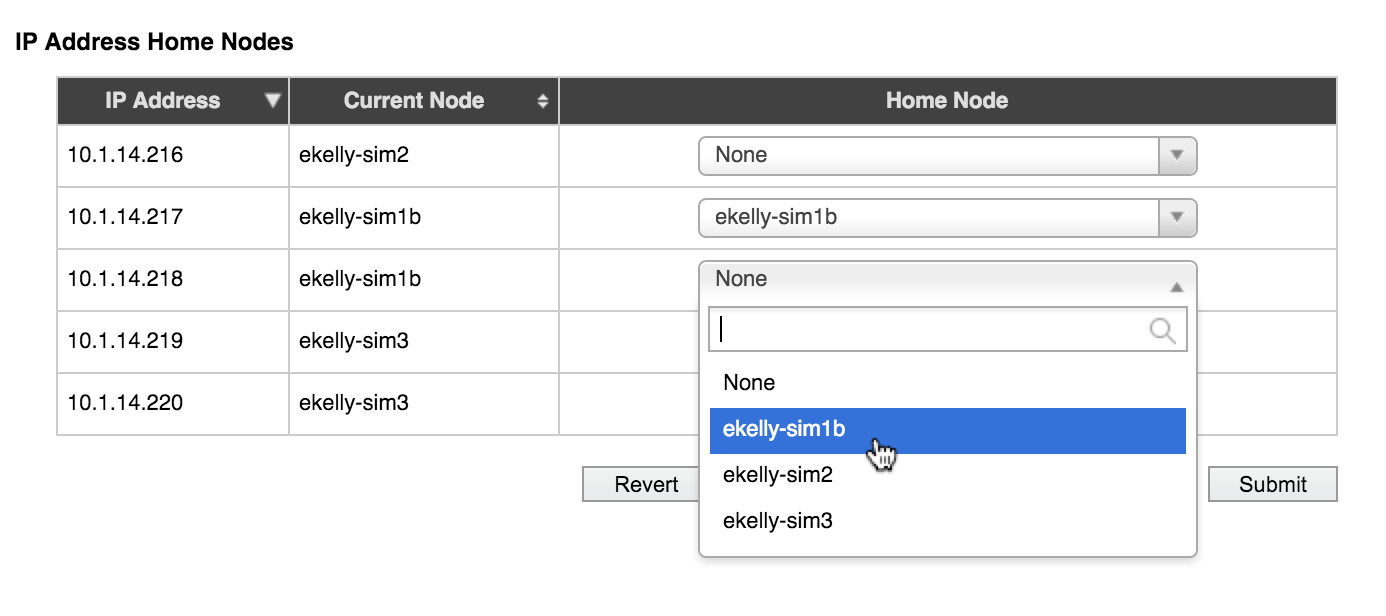
Setting Home Nodes
In normal operation, client-facing IP addresses can move from node to node in the cluster as a result of node failover or network conditions. A home node setting ensures that a particular IP address is reassigned to a specific cluster node after a failure or outage.
This feature allows you to customize the load distribution across cluster nodes. For example, you could assign more IP addresses to nodes with better connectivity, or isolate traffic so that some clients always access certain nodes. It also allows you to consolidate traffic to VMs to prevent them from becoming cold.
If home nodes are not configured, the cluster automatically balances the client-facing IP addresses across all healthy nodes.
The cluster does not assign home nodes to client-facing IP addresses by default; you must manually specify the home node for each client-facing IP address that you want to use this feature.
Note
Because the system automatically averages the available IP addresses among the cluster nodes, assigning some IP addresses to one home node will not necessarily increase traffic to that node if other IP addresses are assigned automatically.
For example, in a three-node cluster using nine client-facing IP addresses, each node would be assigned three IP addresses automatically. If you set two IP addresses to one home node but let the cluster automatically assign the other IP addresses, they system will give only one additional IP address to the node that already has two.
If you want the client-facing IP addresses to be assigned unequally, set home nodes for all of the IP addresses in the range.
Assign home nodes in the IP Address Home Nodes table (4). This table lists each client-facing IP address, the node to which it is currently assigned, and its home node, if one exists.
To assign home nodes individually, use the drop-down selector in the Home Node column to select the node for each IP address. You can select any node in the cluster, or None.
Home Node options
To make each IP address’s current node its home node, click the Make Current Home button (5).
To reset all IP addresses to have no home node, click the Unhome All button (5).
After you have made the appropriate home-node assignments for all IP addresses, click Submit (5).
The system pops up a warning indicating that changing home-node assignments for client-facing IP addresses can affect service as the changes are made. Click OK to proceed.