Adding a New Core Filer - Cloud Core Filer
This section walks through the process of adding a new core filer to your vserver. This section is customized for core filers that use cloud storage on the back end; the process is different for a core filer that uses NAS storage. Read Adding a New Core Filer - NAS Core Filer for details.
Prerequisites for Adding a New Cloud Core Filer
Before starting to configure the cloud core filer on the cluster, make sure you have the following information.
- A valid and active license for FlashCloud on this cluster. Read Appendix A: Adding or Removing Feature Licenses for more information.
- An existing credential for your cloud storage provider, or the access and private keys to create a new one
- The name of an existing cloud storage container. Read Configuring A Cloud Container As A Core Filer to learn more about instantiating a cloud core filer
- Encryption details - whether or not to encrypt the core filer, and the type of key storage used. If using KMIP, you should have a key server set up before creating the core filer; read Configuring KMIP for an Avere Cluster to learn how.
The Add New Core Filer wizard guides you through the steps to define a new storage volume. Start the wizard by clicking the Create label from the Manage Core Filer page.
New Core Filer Wizard
Start the New Core Filer wizard from the Core Filer > Manage Core Filers settings page.
The options are different for the type of core filer - select Cloud to define a core filer that uses cloud storage.
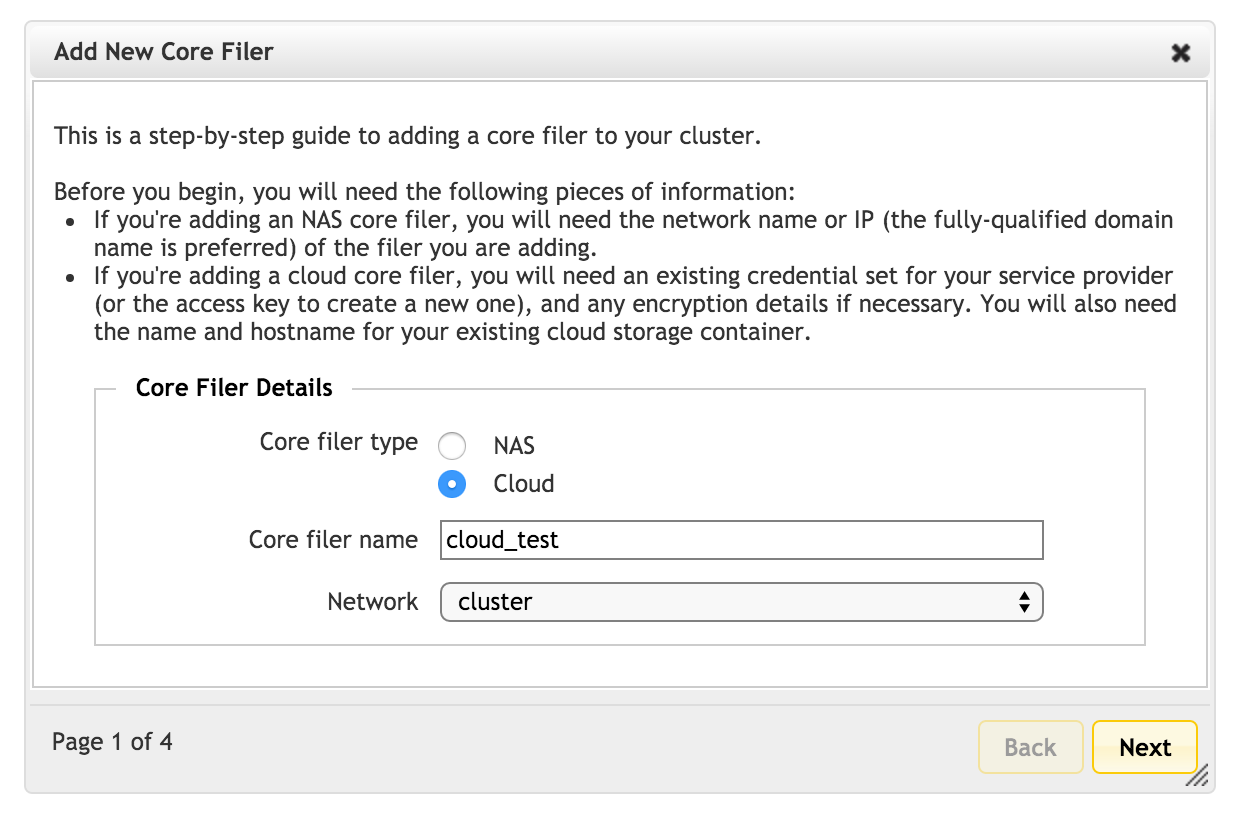
Fill in the required fields:
- Core filer name - Set the user-visible name for this core filer.
- Network - If your cluster has more than one network, select the network that this core filer will use to communicate with the cluster.
Click Next to continue.
Caching Policy
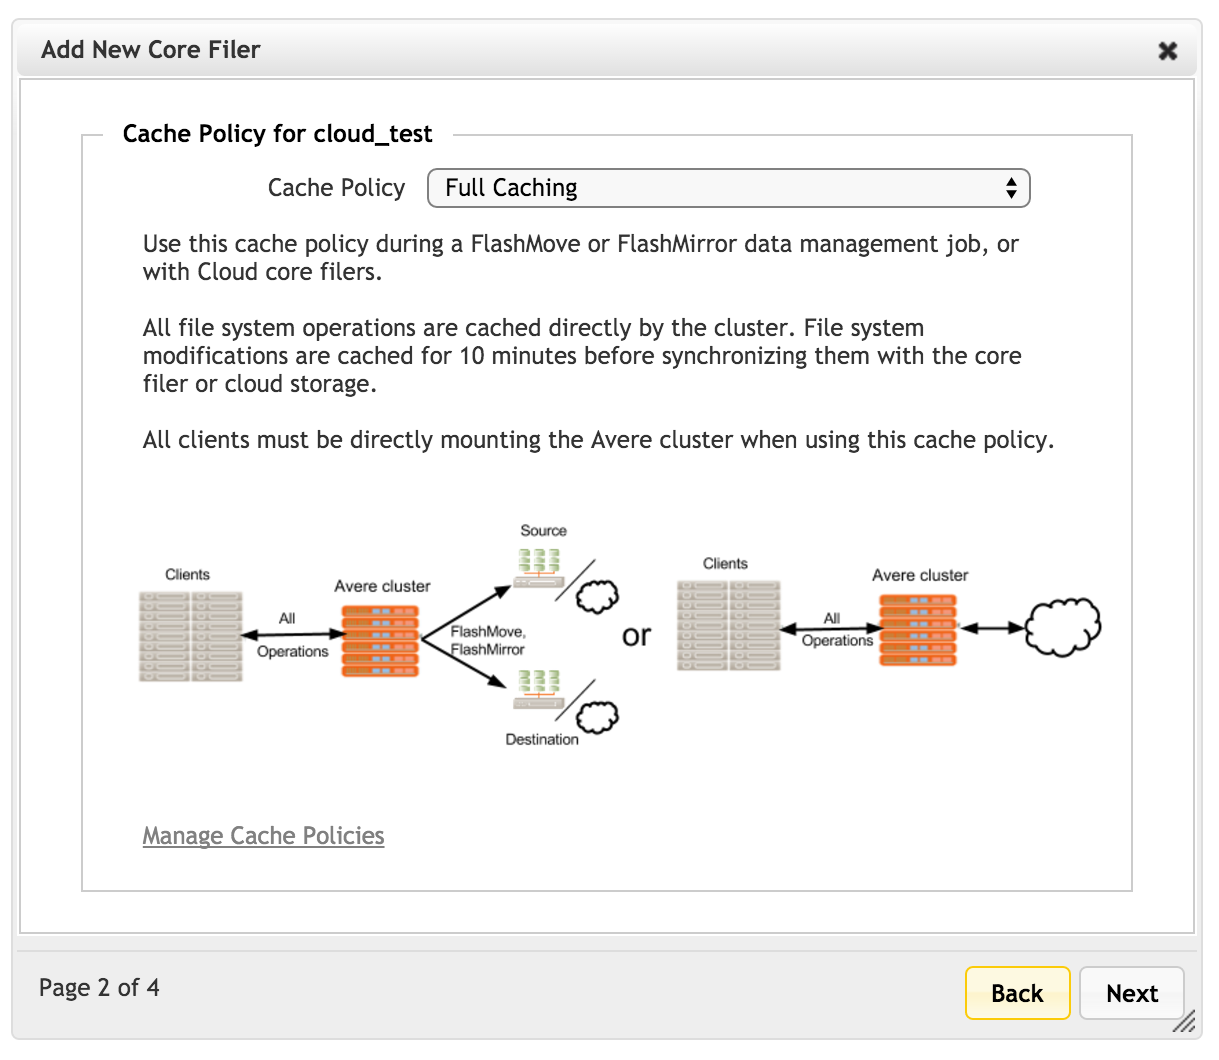
On the second page of the wizard, choose the caching policy for this core filer.
Read Manage Cache Policies to learn more about customizing cache settings.
Click Next to continue.
Cloud Service and Protocol
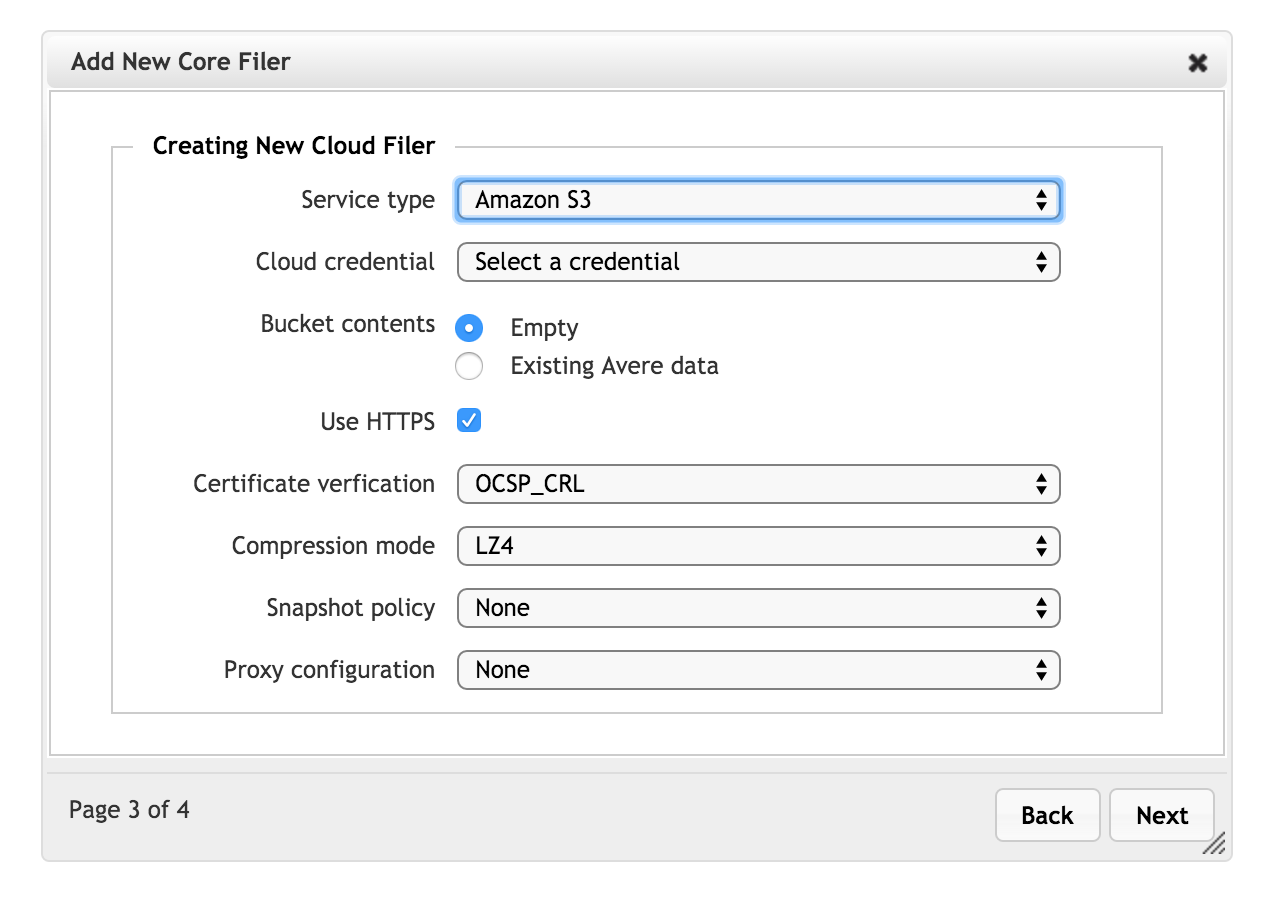
On the third page, specify details about the cloud storage service.
Service type - Select one of the cloud service types. These types are predefined in the Avere system; contact Avere Global Services if the provider or service type that you want is not listed.
Some options are preconfigured when you select a particular service. For example, selecting Cleversafe cloud storage automatically enables SSL (Use HTTPS) and specifies port 443.
Cloud Credential - From the next drop-down list, select an existing credential, or choose Create a new credential set to define a new one.
If you select the new credential option, additional fields appear so that you can specify the credential name, access key, and private key.
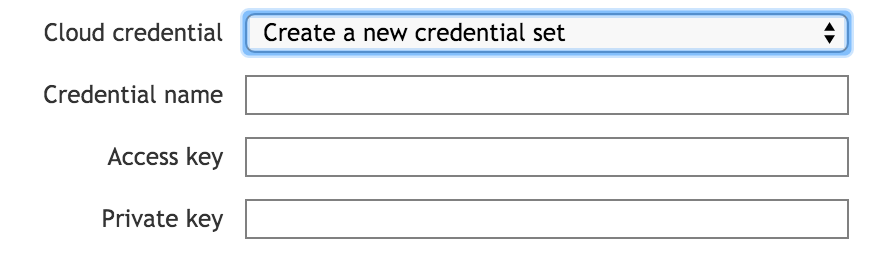
To learn more about these options, read Cluster > Cloud Credentials.
Bucket contents - Specify whether the cloud storage container is currently populated with Avere-managed files (that is, it was previously used as an Avere core filer) or if it is empty. Note that to reuse a container with Avere-managed files, you must use the same encryption setting that was previously used with this container.
You will enter more specific bucket information on the next page.
Note
Each cloud filer can be associated with only one bucket, and each bucket can be associated with only one cloud core filer. This means that:
- If you use an existing bucket, and choose Empty, you will no longer be able to access the information in the existing bucket without removing and re-creating the filer.
- If you intend to create a new bucket, and choose Existing Avere data, you will later be asked for an encryption key to access the bucket. If you are trying to access a bucket that did not previously exist, you will not be able to access it (there will be no encryption key), and you will have to re-create the cloud filer.
Use nearline bucket (Google Cloud Storage Only) - This checkbox allows you to mark this cloud core filer as a Nearline Storage bucket. (Avere OS does not verify whether or not the cloud object is actually configured as a Nearline Storage bucket.)
Nearline storage is designed for archive use, and writing data to this type of bucket can incur data transfer fees.
Nearline storage is the only one of the three Google Cloud Storage classes (Standard, Durable Reduced Availability (DRA), and Nearline), that must be explicitly enabled. Be sure that you understand the cost implications of using a Nearline bucket as a core filer before you select this option.
Use HTTPS - Check this box to use the secure web protocol in communications between the cloud and the cluster.
Depending on the cloud service type, a Port field appears when HTTPS is selected. If your cloud provider does not use the standard SSL port, 443, enter the port or range of ports into the Port field. For some cloud services, the port is not configurable.
Separate port numbers or ranges with spaces - for example,
7070 7072-7074defines four ports: 7070, 7072, 7073, and 7074.Compression mode - If you want to compress objects before they are written to the cloud core filer, select either LZ4 or LZ4HC compression in this list.
You can change compression options at any time; objects written to this core filer are either compressed or uncompressed according to the setting at the time they are written.
Bucket Details
The fourth page of the New Core Filer wizard for cloud storage has settings for the storage container.
The options are different for populated storage and for empty storage, and different cloud services also show different options.
Configuring an Empty Bucket
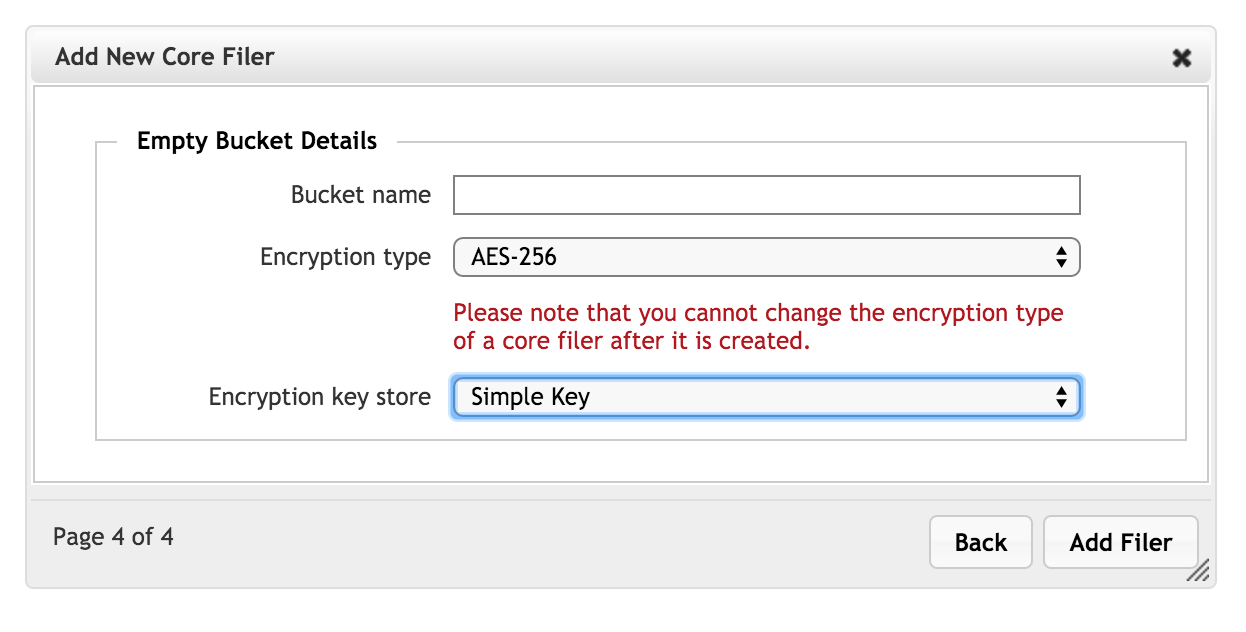
Set these options for a bucket that has not previously been used for Avere storage.
- Bucket name - Enter the name of the bucket that has been or will be created on the cloud provider’s network.
Network hostname (some cloud providers only) - Enter the hostname or IP address of the endpoint that will be used to access this bucket. Avere strongly recommends using the fully qualified domain name for the region-specific endpoint in this field.
Only certain cloud storage providers require this configuration. If this field does not appear, it is not required for the selected provider.
Encryption type - Choose an encryption algorithm (AES-256 is currently the only option) or choose None to leave the storage volume unencrypted.
Note
The encryption type cannot be changed later.
Encryption key store - Select the type of key storage used. You can choose a simple key file stored locally on the cluster, or select a KMIP server in the cluster. (KMIP servers are configured in the Cluster section; read Configuring KMIP for an Avere Cluster to learn more.)
Configuring an Existing Bucket
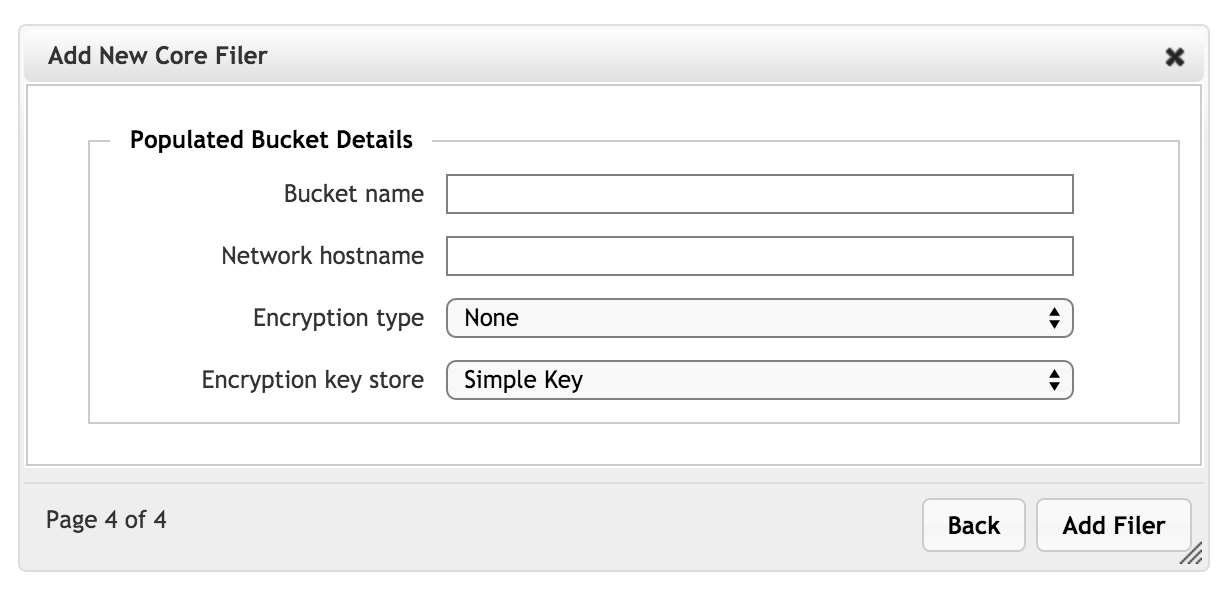
Bucket name - Enter the name of the bucket on the cloud provider’s network.
Network hostname (some cloud providers only) - Enter the hostname or IP address of the endpoint that will be used to access this bucket. (For example: cloud-server-round-robin-dns.mycompany.com) Avere strongly recommends using the fully qualified domain name for the region-specific endpoint in this field.
Only certain cloud storage providers require the network hostname; others determine the endpoint automatically. If this field does not appear, it is not required for the selected provider.
Encryption type - Choose an encryption algorithm (AES-256 is currently the only option) or choose None to leave the storage volume unencrypted.
Note
The encryption type cannot be changed later.
Encryption key store - Select the type of key storage used. You can choose a simple key file stored locally on the cluster, or select a KMIP server in the cluster. (KMIP servers are configured in the Cluster section; read Configuring KMIP for an Avere Cluster to learn more.)