Vision AI Dev Kit hands on lab for Embedded Linux Conference
Welcome to Vision AI Dev Kit hands on lab!!
What you will do
- Connect the Vision AI DevKit camera to Wi-Fi
- Use pre-created Azure resources and connect the Vision AI DevKit camera to a created IoT Edge Device (in IoT Hub)
- See video output from the camera to a connected monitor or connected video streaming client using a default vision AI model
- Use customvision.ai to create your own AI model and deploy that to the camera.
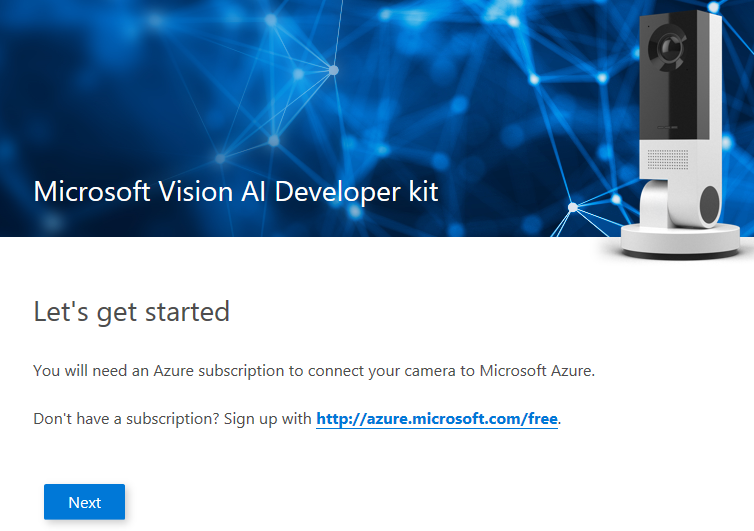
Azure account
Your Azure username and password are taped to the device. Please use them in all to login to Azure, customvision.ai and Azure portal during this lab.
Connect your PC to the camera’s Wi-Fi access point
-
At this point the camera should be flashing red lights indicating that it is running its own Wi-Fi access point.
-
The label at the bottom of the device will have the default Wi-Fi access point and password.
-
From your PC, connect to a Wi-Fi network named MSIOT_xxxxxx (xxxxxx is the last 6 characters of the device’s Wi-Fi MAC address, e.g. MSIOT_BD097D).
Note! as everyone will be doing this at the same time there will be a huge amount of SSIDs that look similar so be careful and select the correct one.
Configure the camera for your Wi-Fi network
- Use your computer’s web browser (we recommend you use Chrome) to visit http://setupaicamera.ms. If you do not see the below screen, verify your computer is connected to the Dev Kit hardware’s access point.
-
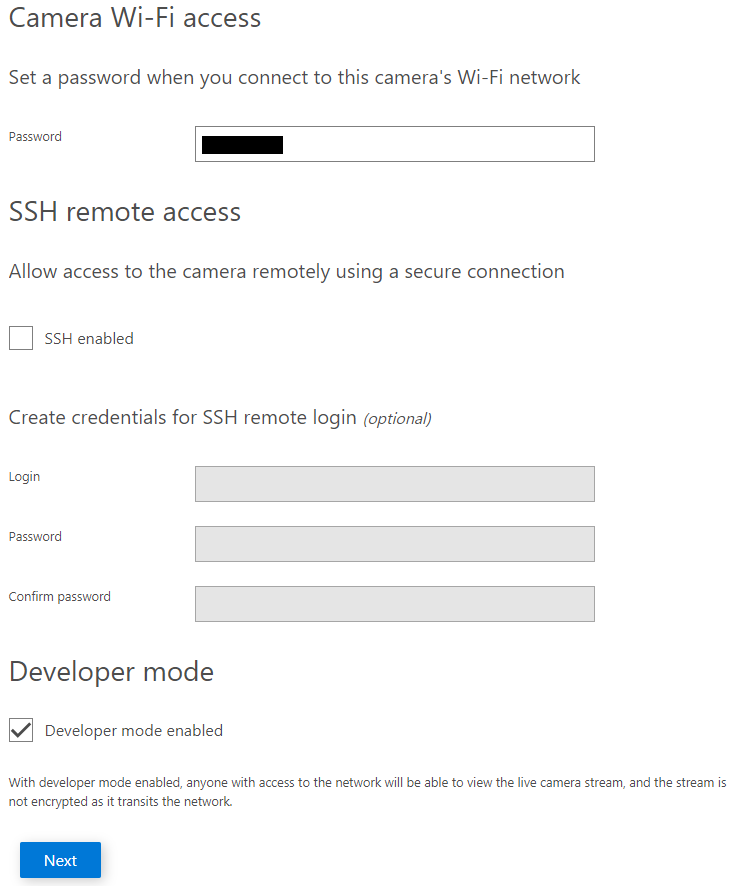
Tapping Next will open the SSH configuration screen. Please do not change the default password. Also SSH configuration doesn’t have to be enabled.
-
Tapping Next will open the Wi-Fi settings page, where you will connect your Vision AI DevKit to the Wi-Fi network it will use during normal operation.
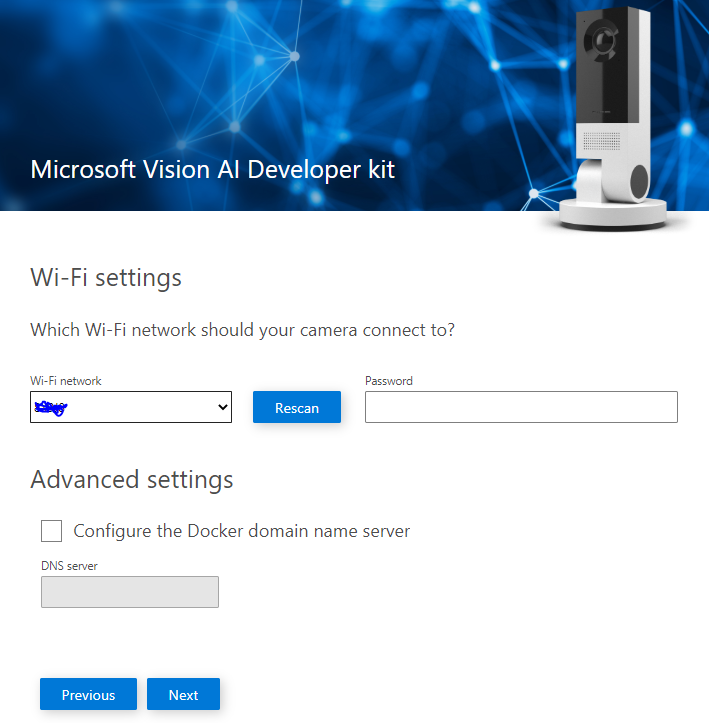
- Select the iothack Wi-Fi network your camera will connect to from the drop down box and then enter the Wi-Fi passphrase iothack1. You will see a confirmation screen when the camera successfully connects to your selected Wi-Fi network.
-
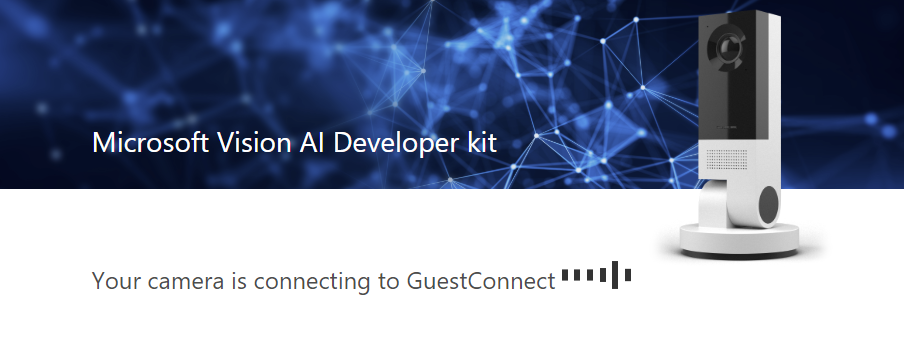
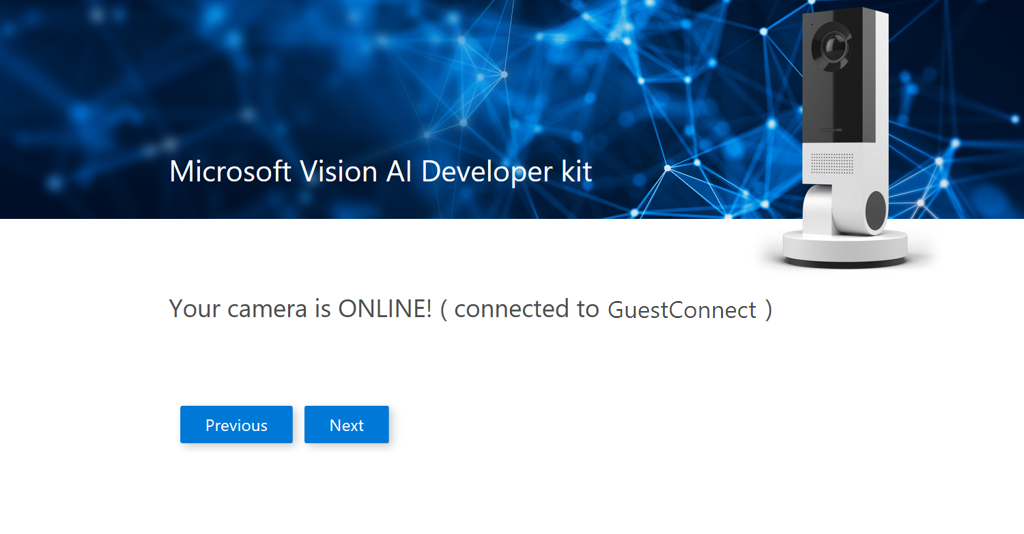
Tapping Next will take you to the connecting and connected screens.
Configure your camera to connect to Azure as an IoT Edge device
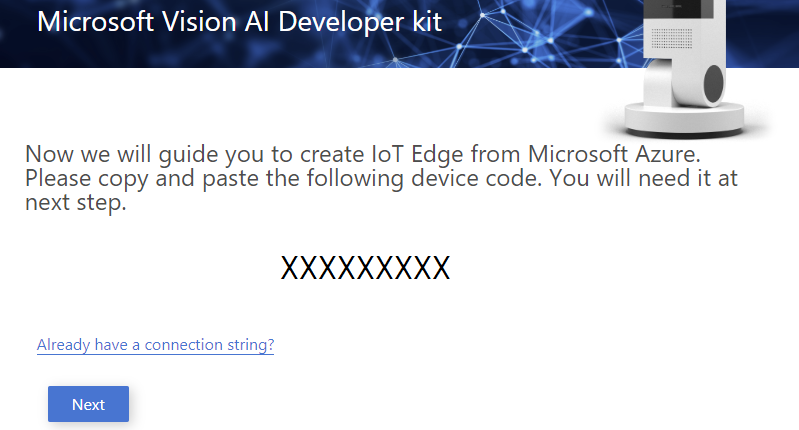
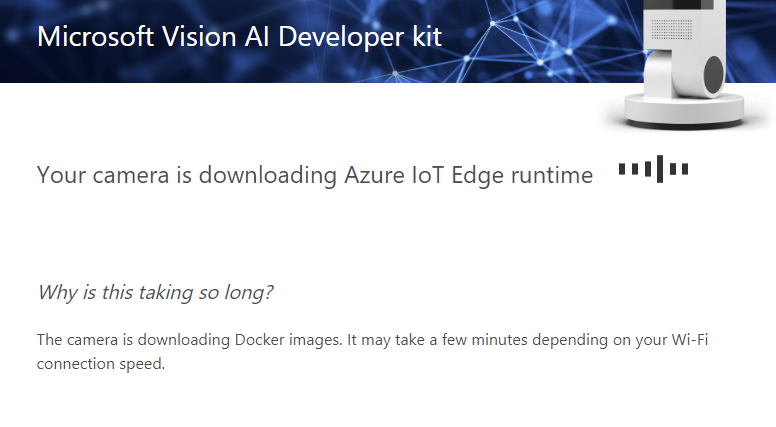
Tapping Next starts the process of connecting to Azure resources. We have already created in IoT Hub that manages the network traffic between the cloud and the device.
-
You will see the following screen. You should copy the device code for use in the next step.
-
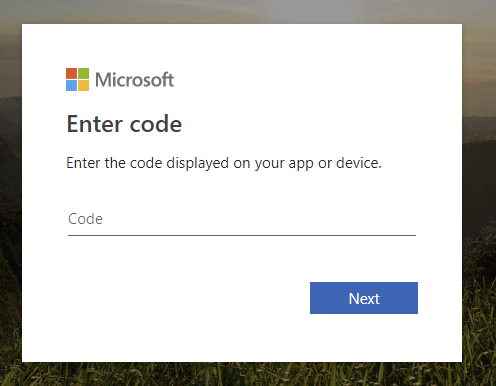
Tap Next and insert the device code you received in the previous screen.
-
You should reach the following screen when your code is accepted. (Press ‘OK’ to close the pop-up messsage, if seen.)
-
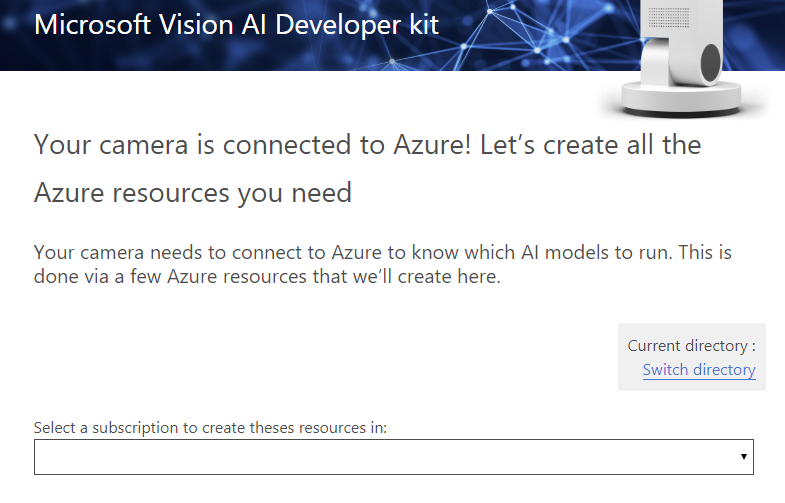
Log in to Azure using the credentials taped in your camera. Note that there is an underscore between user and number like user_1@ELCLabs.onmicrosoft.com
- Note! you may have to use the
Switch directoryin order to get a subscription visible. - Use the
Select your IoT Hublink to choose an existing IoT Hub.
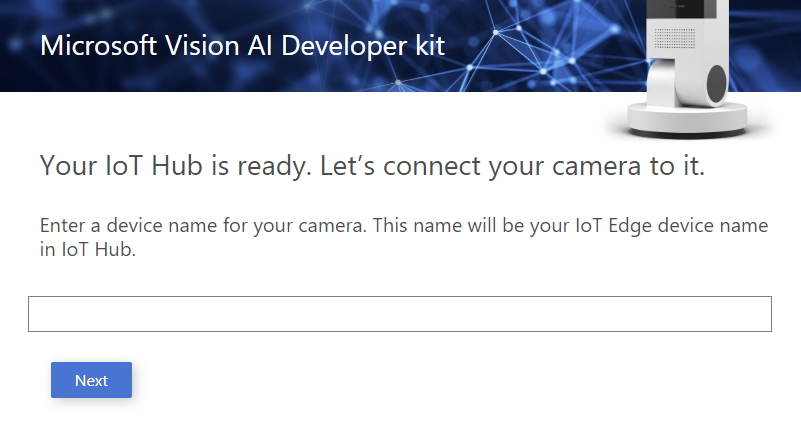
- Click Next, then input a name for your DevKit camera in this screen. Please use your Azure user name as a name of the device.
- Click Next and you should see the following screen:
- You will see the following screen showing your DevKit camera is ready to recognize objects.
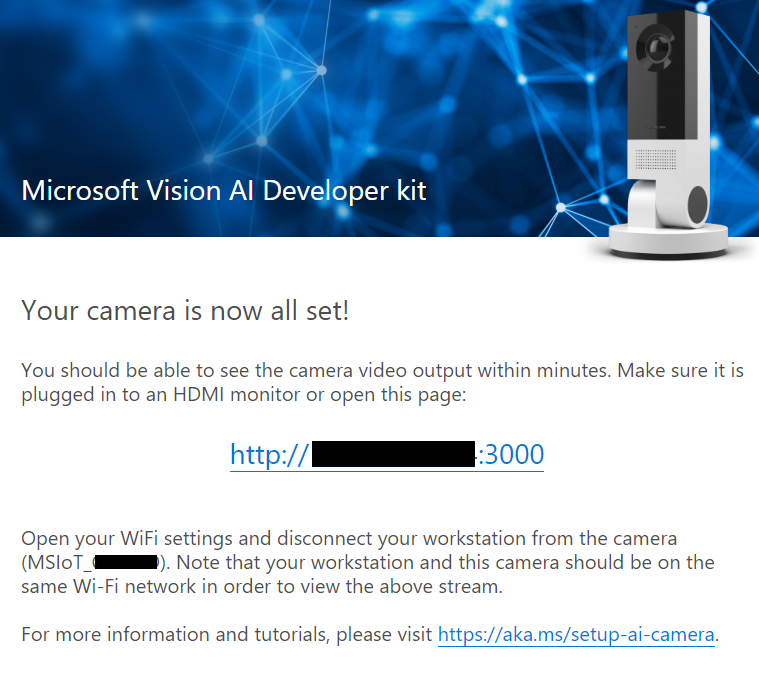
View DevKit camera output
You can view the DevKit camera output with a web browser, using the URL given on the final device setup page.
Basic setup
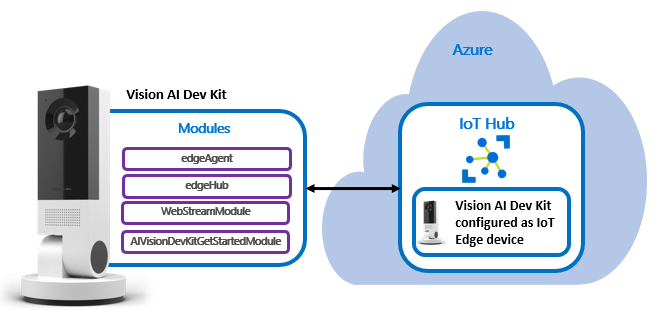
After running through the initial setup, the camera should have 4 modules (containers) running:
- edgeAgent and edgeHub are two modules that make up the IoT Edge runtime
- AIVisionDevKitGetStartedModule is the default Vision AI model and recognizes 183 different objects
- WebStreamModule streams the video from AIVisionDevKitGetStartedModule to a web browser
Build you own Vision AI model using customvision.ai
- Build a vision AI model with Azure Custom Vision service for that detects if a person is wearing a yellow hard hat for workplace safety applications.
- Deploy the vision AI module to the Vision AI DevKit camera using Azure IoT Edge and module twin update.
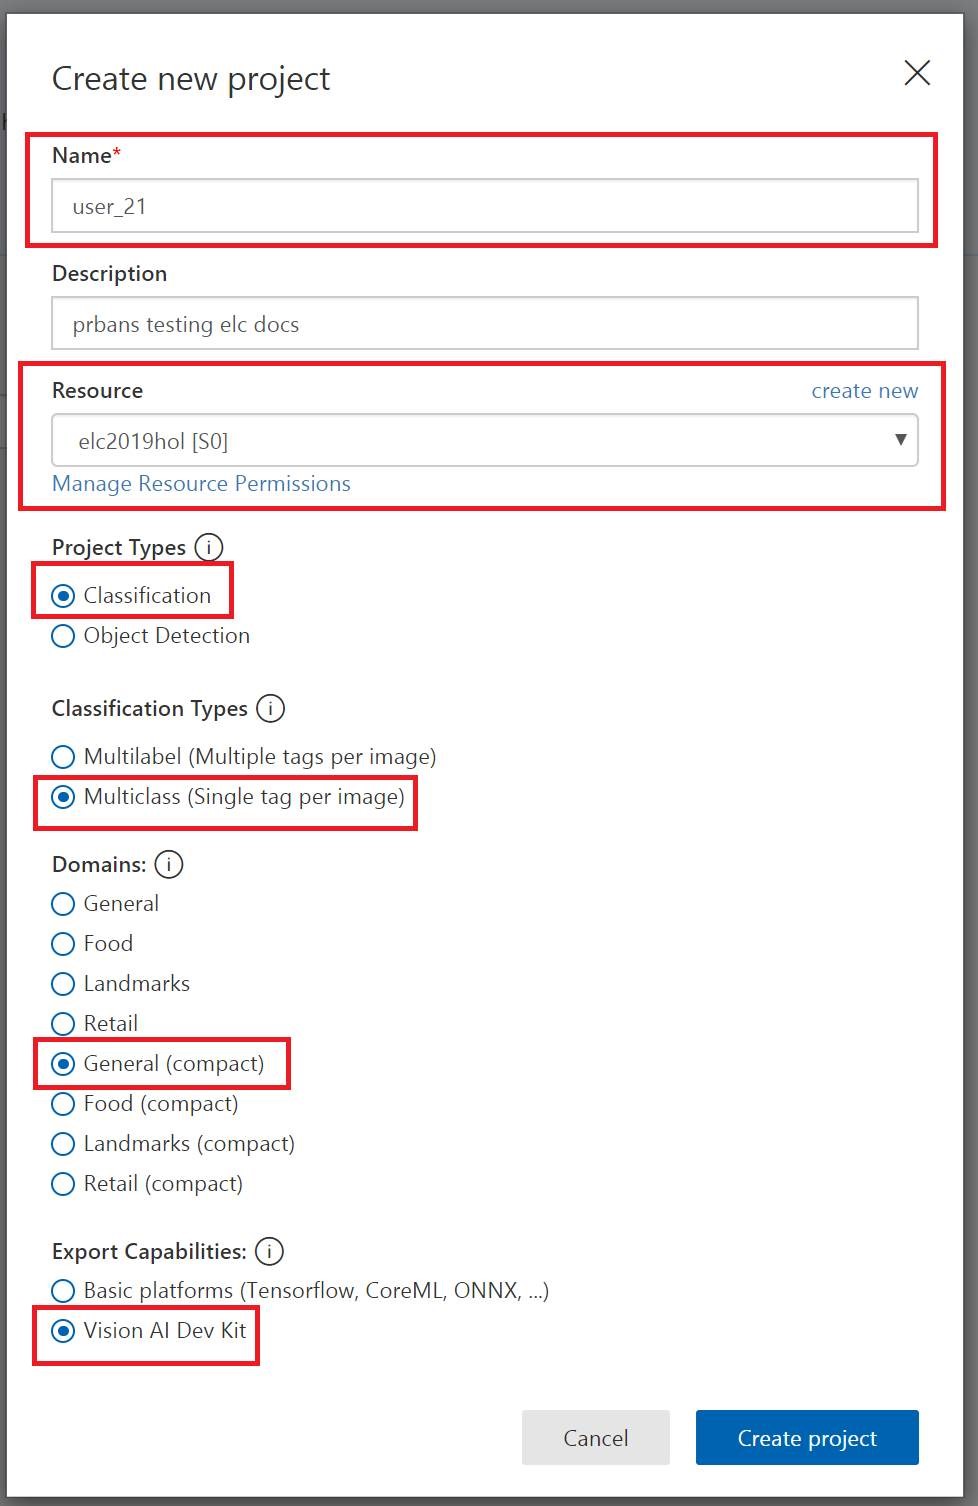
Setup a new Azure Custom Vision project
-
Login to the Azure Custom Vision Service at https://www.customvision.ai.
-
Create a new project, using these recommended settings:
- Please use your username as a name for the project
- Project Type - select between [Classification]
- Use the existing resource group
- Classification Type - [Multiclass (Single tag per image)]
- Domain - [General(compact)] NOTE: Ensure you do not select the
Generaloption - Export Capabilites - Vision AI Dev Kit
Upload and tag your training data
- Download the training images here - TrainingData.zip.
- Uncompress the zip file to a local directory
- Upload images to Custom Vision in batches:
- Upload one batch of pictures per tag (images containing HardHat in the name, then NoHardHat), adding the appropriate tag (HardHat, NoHardHat) during each upload.
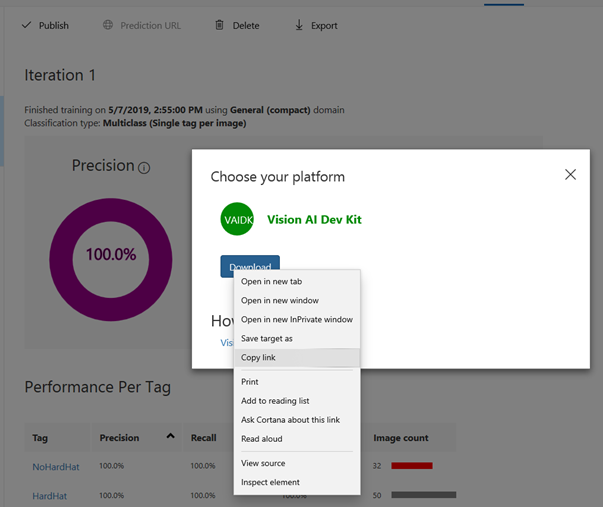
Train and export your custom model
- Go to your Custom Vision project and click on
Train. - Select the
Performancestab and then click theExportbutton - Choose the
Vision AI DevKitoption to download your new custom model. Don’t download yet!
Deploy your custom model to your device
To deploy your custom model, we will first store your model in a publicly accessible location and then update the configuration of the VisionAIDevKitGetStartedModule.
Use the model directly from customvision.ai
Instead of downloading the model from customvision.ai, press the right button of your mouse in order to see options. Select Copy link. It is a link that points to a zip file of your model.
This is the fastest way to deploy the model to your camera. Please note that this link will expire, so this method should be used primarily when doing fast iterations to further develop your Vision AI model.
Update the configuration of the VisionAIDevKitGetStartedModule module to use your custom model
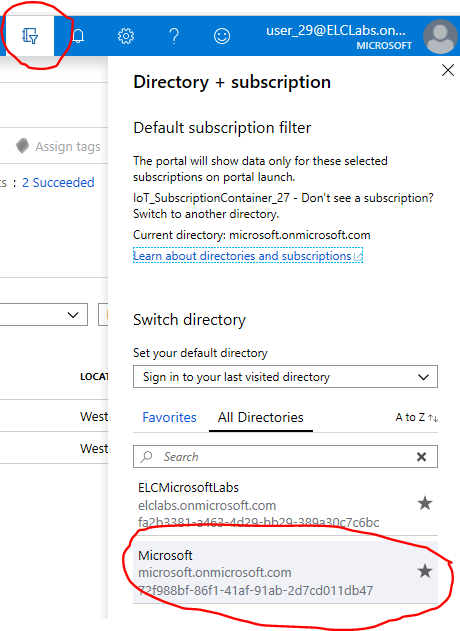
- Login to http://portal.azure.com.
-
Note you may have to change the directory to be “Microsoft”
- Go to the IoT Hub resource you created earlier (You’ll find it from “Home’ -> “See all your resource”). Click the
IoT Edgetab, then click on IoT edge device you created earlier. - Click on the
AIVisionDevKitGetStartedModulename, then clickModule Identity Twin. - Update the zip file with the URL you saved earlier to “ModelZipUrl”: ““, then click
Save.
After a few seconds, your device should now be running your custom model! If it doesn’t, try editing the module twin (for example, press space then delete the space) and save again.
Test your new model
- Put on a hard hat on and smile at the camera!
- Verify the camera correctly classifies you as wearing a hard hat.
Note that the sample picture size in the example is small and the purpose of the tutorial is to show how easy it is to get started with Vision AI Dev Kit and Custom Vision! This model only has roughly 50 source pictures, and doesn’t yet do a 100% accurate recognition.
Image classification vs. object detection
There are two ways to train your model - image classification and object detection.
Image classification: Analyzes the whole frame as a picture and doesn’t draw bounding boxes. Can only identify one object per frame. Easy to train.
Object detection: Can identify multiple objects per image and draws bounding boxes around them. Takes a little bit more time to train as the training requires identifying the object per uploaded image. If you choose to use the object detection model with hard hat data, remember to include both the wearer’s head and hard hat as the object when applicable (not only the hat).
Want to also try object detection model? Use this update this URL to the module identity twin: https://jussimlworkspa9385743868.blob.core.windows.net/hardhatobjectdetection/hardhat_object_detection2.VAIDK.zip