Deploy a vision AI container module using Azure IoT Hub
What you will do
- Deploy a pre-built sample container module to the Vision AI DevKit camera using Azure IoT Hub
What you will need
- Configured Azure Iot Hub with the Vision AI DevKit registered as an IoT Edge device (Instructions)
- (optional) Monitor and HDMI cable
Select your Vision AI DevKit hardware in the Azure portal
- Sign in to the Azure portal and navigate to your IoT hub.
- Select IoT Edge from the menu.
- Click on the ID of the target camera hardware from the list of devices.
- Select Set Modules.
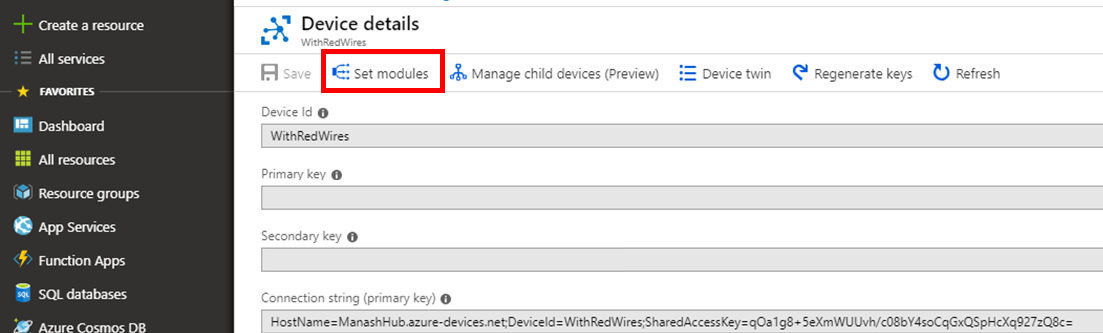
Note: If the Set Modules option is not available, ensure that you are selecting the IoT Edge item from the list below Automatic Device Management. The Set Modules option is not available via the IoT devices link under the Explorers heading
Configure a deployment manifest
A deployment manifest is a JSON document that describes which modules to deploy, how data flows between the modules, and desired properties of the module twins. For more information on deployment manifests, see Understand how IoT Edge modules can be used, configured, and reused.
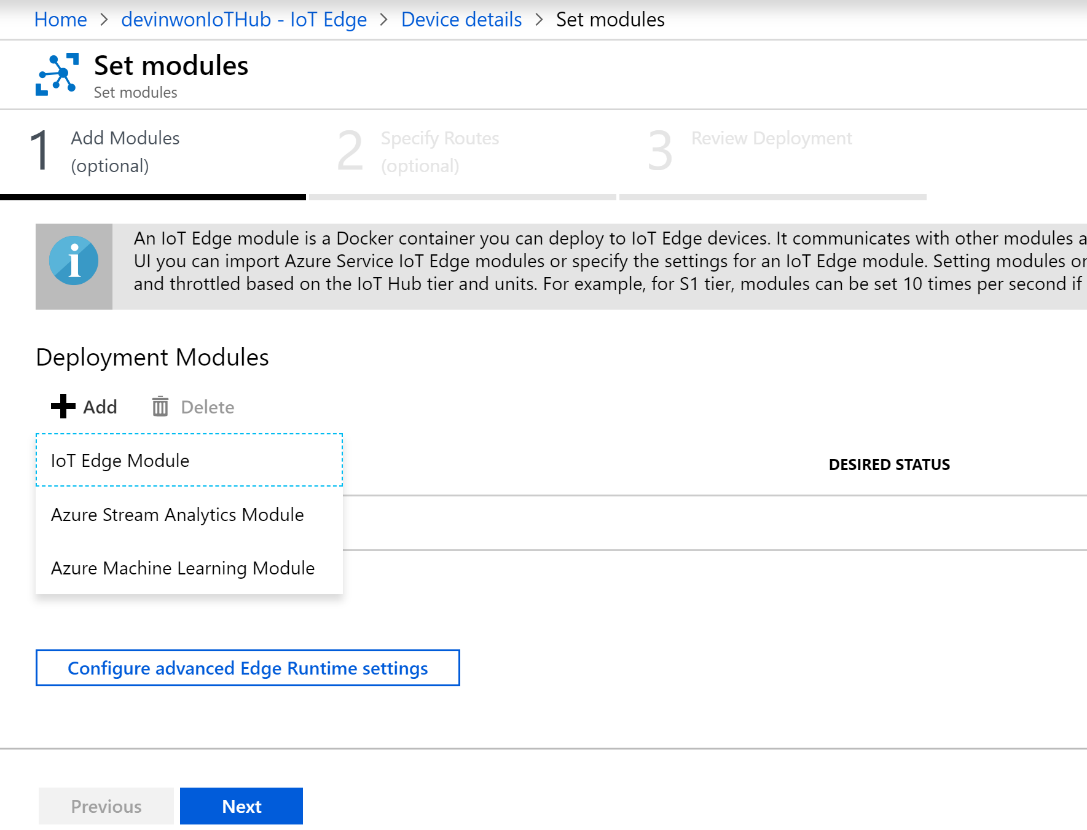
The Azure portal uses a wizard to walk you through creating the deployment manifest. It has three steps: Add modules, Specify routes, and Review deployment.
Add modules
- In the Deployment modules section of the page, select Add.
- Select the IoT Edge Module.
-
Provide a name for the module, then specify the container image. To deploy the pre-configured sample, use the following values:
Name - VisionSample Image URI - mcr.microsoft.com/aivision/visionsamplemodule:latest Container create options – { "HostConfig": { "NetworkMode": "host", "Binds": [ "/data/misc/camera:/app/vam_model_folder", "/run/systemd:/run/systemd" ] }, "NetworkingConfig": { "EndpointsConfig": { "host": {} } } } - Select Save
- Select Configure advanced Edge Runtime settings
- Under
Edge Agent, useImage -mcr.microsoft.com/azureiotedge-agent:1.0.7.1
- Under
- Select Save, then select Next
Optional: Deploy the Webstream module if you want to view the video output in a browser. To deploy the Webstream module, use the following values and replace the IP address with the IP address of your device:
     Name – WebStreamModule
     Image URI - mcr.microsoft.com/aivision/visionsamplemodule:webstream_0.0.13-arm32v7
     Environment variables –
        RTSP_IP <IP_address_of_camera>
        RTSP_PORT 8900
        RTSP_PATH live

     Container create options –
     {
      "ExposedPorts": {
      "3000/tcp": {},
      "3002/tcp": {}
     },
      "HostConfig": {
        "NetworkMode": "host",
        "PortBindings": {
        "3000/tcp": [
          {
            "HostPort": "3000"
          }
        ],
        "3002/tcp": [
          {
            "HostPort": "3002"
          }
        ]
      }
      },
        "NetworkingConfig": {
          "EndpointsConfig": {
            "host": {}
          }
        }
     }
- For more information about Container Create Options, Restart Policy, and Desired Status see EdgeAgent desired properties.
- For more information about Module Twin see Define or update desired properties.
Specify routes
By default the wizard gives you a route called route, defined as FROM /* INTO $upstream, which means that any messages output by any module will be sent to your IoT hub.
While the sample module requires no changes, you can add or update the routes with information from Declare routes, then select Next to continue to the review section.
Review deployment
The review section shows you the JSON deployment manifest created based on your selections in the previous two sections.
- Note: There are two modules declared that you didn’t add, $edgeAgent and $edgeHub. These modules represent the IoT Edge runtime and are required for every deployment.
Review your deployment information, then select Submit.
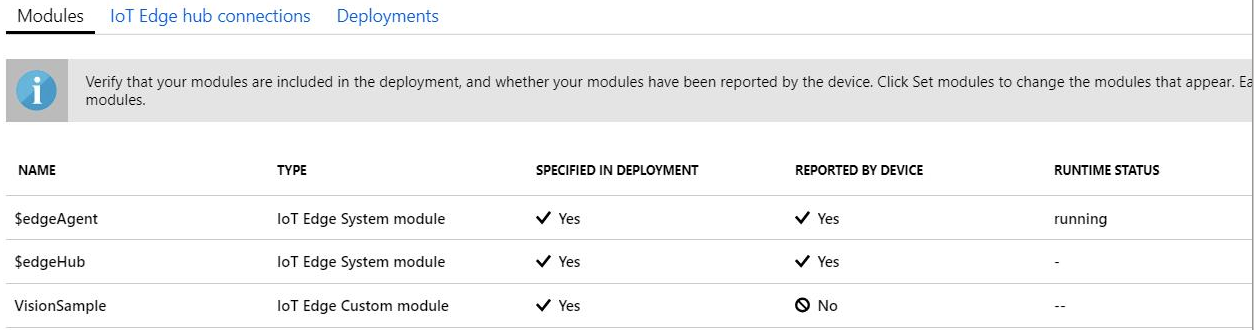
Verify DevKit camera output
After a few minutes (once the module has downloaded to your DevKit camera), you should see objects detected by the camera showing on a monitor connected to the HDMI port on the DevKit camera. (Note: if you see a 417 Runtime Response, it should be replaced with ‘OK’ once the module has downloaded.)
You can optionally use a video player app supporting the RTSP protocol, such as VLC Player, to view the video output from your camera. See View RTSP video stream for more information.