Quick Start
This guide will start you on your vision AI journey with the Vision AI DevKit, taking you from setting up your Microsoft Azure account to seeing video output of recognized objects by the DevKit camera. We will use a VisionSample model for this process, which has been trained to recognize up to 183 different objects.
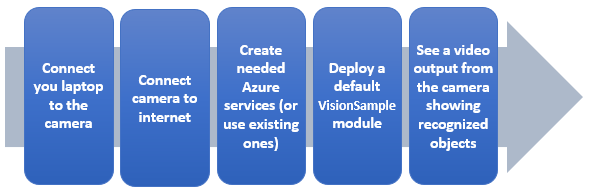
What you will do
- Connect the Vision AI DevKit camera to Wi-Fi
- Create necessary Azure IoT resources (Resource Group, IoT Hub, IoT Edge device)
- Connect the Vision AI DevKit camera to a created IoT Edge Device
- See video output from the camera to a connected monitor or connected video streaming client
What you will need
- Active Azure account
- Vision AI DevKit camera hardware
- Monitor supporting HDMI input with an HDMI cable (do not use any cable adapters), or an RTSP supporting video player application
Configure your DevKit
Azure account
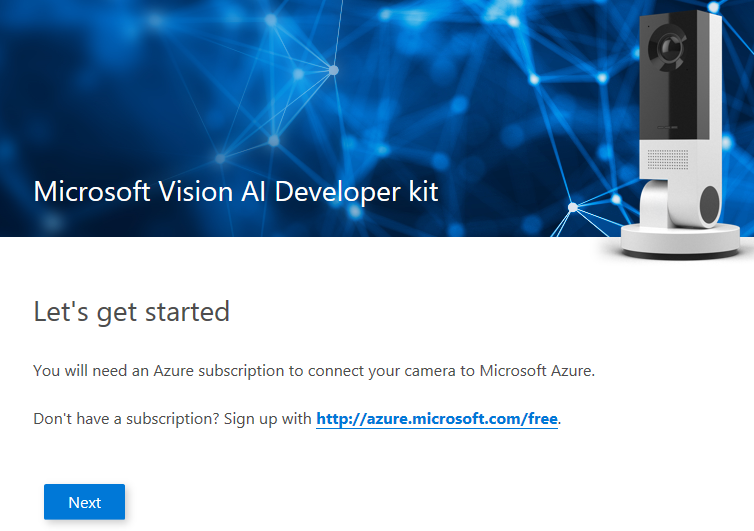
The Vision AI DevKit is configured to work with Microsoft Azure IoT resources. To get started, you will need a new or existing Azure account. You can create a free account by visiting this link: https://azure.microsoft.com/free.
Setup your DevKit camera
These steps will configure your DevKit camera for Wi-Fi and connect the the camera to the IoT Edge device you created earlier in Azure IoT Hub.
Connect your PC to the camera’s Wi-Fi access point
- Within 10 seconds of first power up, you should see three flashing RED LED lights. This indicates the device is in Wi-Fi access point mode. If your device is not flashing RED, press the power button for 5 seconds to turn on the DevKit hardware access point.
Guide to DevKit camera LEDs
Device state |
LED1 |
LED2 |
LED3 |
Description |
|---|---|---|---|---|
Setup |
Blink Red |
Blink Red |
Blink Red |
Device is ready for setup. |
Connected to WiFi |
Blink Green |
Blink Green |
Blink Green |
WiFi connected to internet access/not connected to IoT Hub |
Powering ON/OFF |
Red |
Red |
Red |
Device is powering on/off and/or performing system restore |
IoT Hub Connected |
Green |
Green |
Green |
Connected to IoT Hub, downloading manifest/modules, executing modules |
Offline |
Amber |
Amber |
Amber |
Device is setup but not connected to WiFi. Modules running in Offline mode. |
Reboot |
Red |
Device is rebooting |
- From your PC, connect to a Wi-Fi network named MSIOT_xxxxxx (xxxxxx is the last 6 characters of the device’s Wi-Fi MAC address, e.g. MSIOT_BD097D).
Notes
- The label at the bottom of the device will have the default Wi-Fi access point password. If there is no label, see Troubleshooting Wi-Fi Issues.
- If you have connected your device to a display via the HDMI port, the display will show a gray pattern. You will not see any text or images on your display until the IoT Edge runtime has been deployed to the device.
Configure the camera for your Wi-Fi network
-
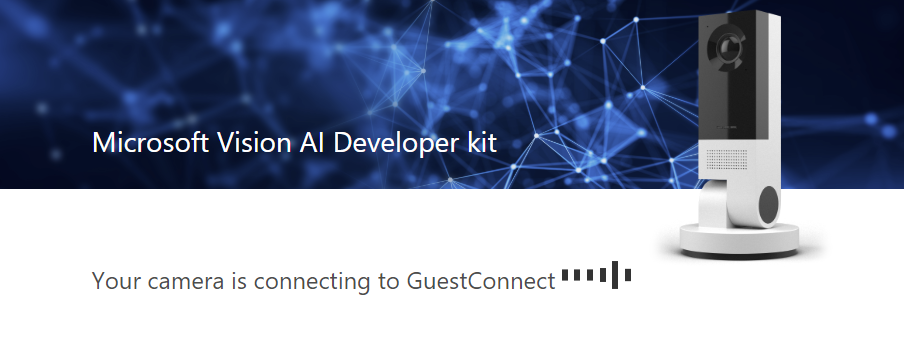
Use your computer’s web browser to visit http://setupaicamera.ms. If you do not see the below screen, verify your computer is connected to the Dev Kit hardware’s access point.
-
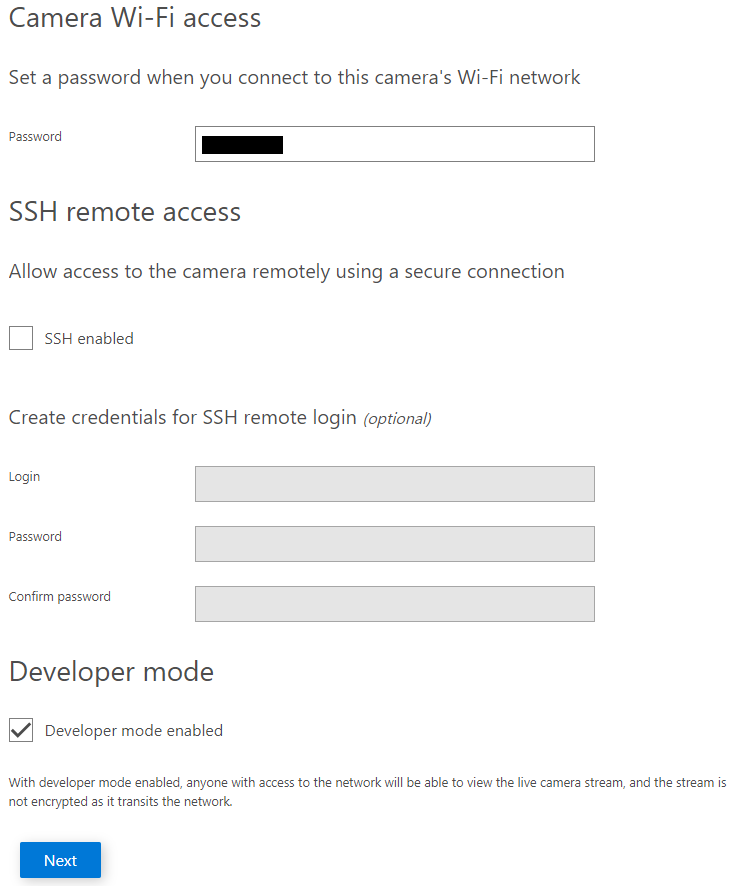
Tapping Next will open the SSH configuration screen, where you can create a new Wi-Fi access point passphrase for the camera, if desired. All settings can be left at their defaults.
-
Tapping Next will open the Wi-Fi settings page, where you will connect your Vision AI DevKit to the Wi-Fi network it will use during normal operation.
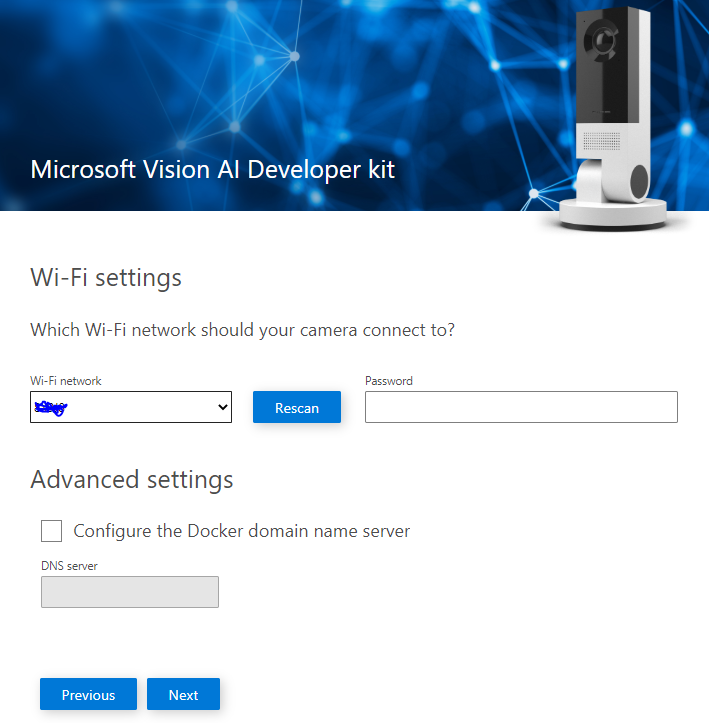
- Select the Wi-Fi network your camera will connect to from the drop down box, then enter the Wi-Fi passphrase. You will see a confirmation screen when the camera successfully connects to your selected Wi-Fi network.
- The Wi-Fi passphrase cannot have spaces (even at the end of the passphrase string), or the camera will be unable to connect to the Wi-Fi network.
-
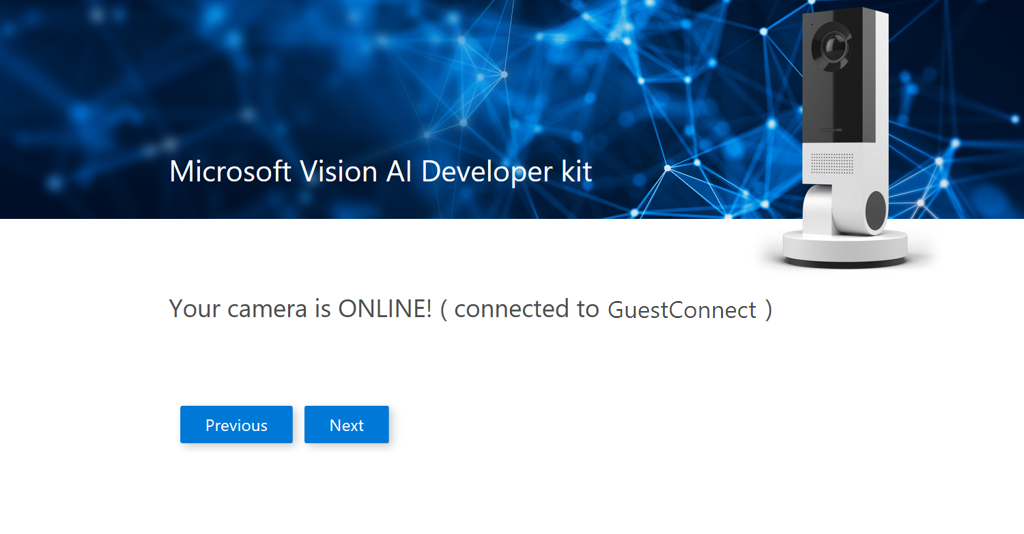
Tapping Next will take you to the connecting and connected screens.
Configure your camera to connect to Azure as an IoT Edge device
Tapping Next starts the process of creating the necessary Azure resources, then connecting the camera to these resources.
-
You will see the following screen. You should copy the device code for use in the next step.
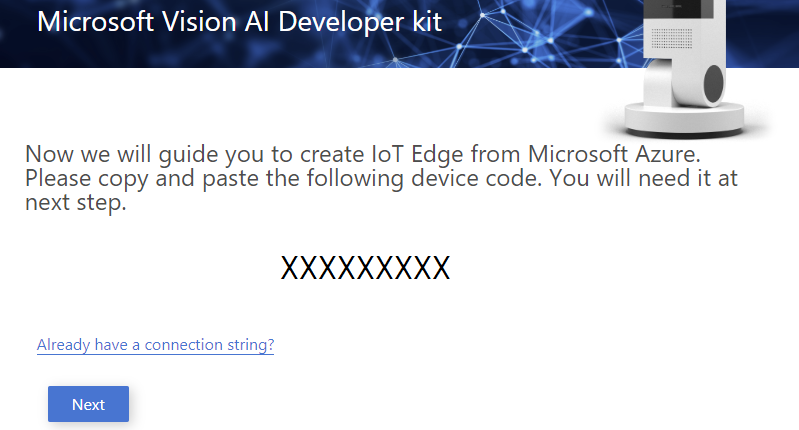
Note: If you already have an Azure IoT Edge device connection string associated with the Vision AI Dev Kit, click the `Already have a connection string?’ link and enter that connection string. However, in order to get the full first use experience, the existing connection string must have been used with Vision AI Dev Kit device arlier. A different IoT Edge connection string will not load the default vision sample module to the device.
-
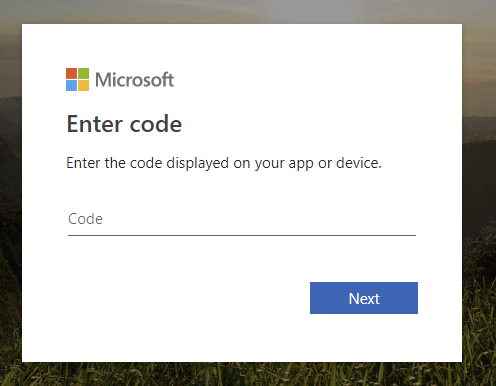
Tap Next and insert the device code you received in the previous screen.
-
You should reach the following screen when your code is accepted. (Press ‘OK’ to close the pop-up message, if seen.)
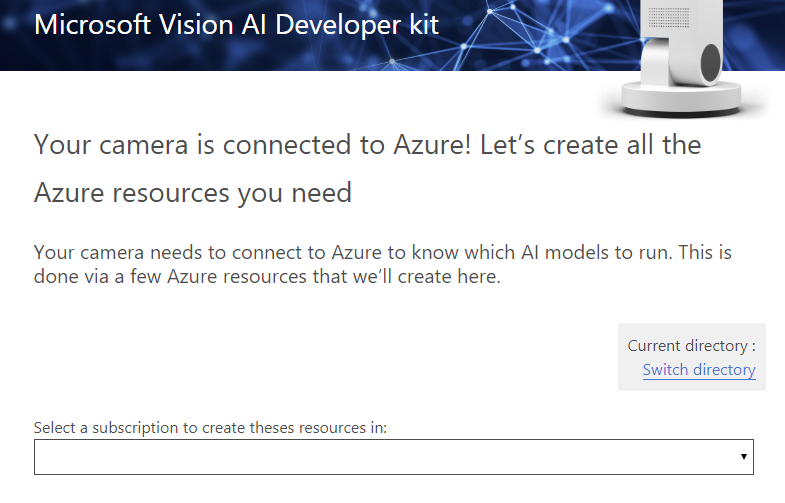
- Use the
Switch directorylink to choose the GUID of your Azure account. - Use the
Select your IoT Hublink to choose an existing IoT Hub, or create a new one.
- Use the
-
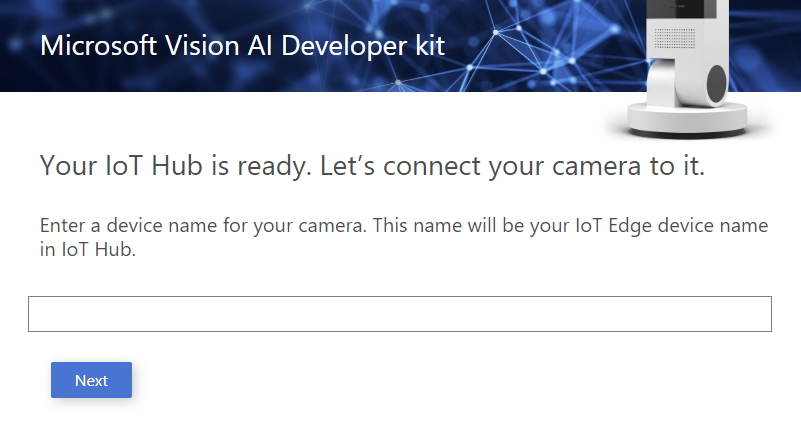
Click Next, then input a name for your DevKit camera in this screen.
-
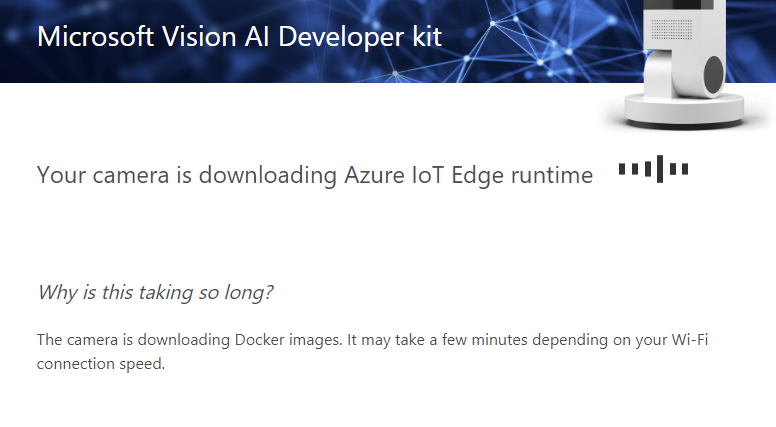
Click Next and you should see the following screen:
-
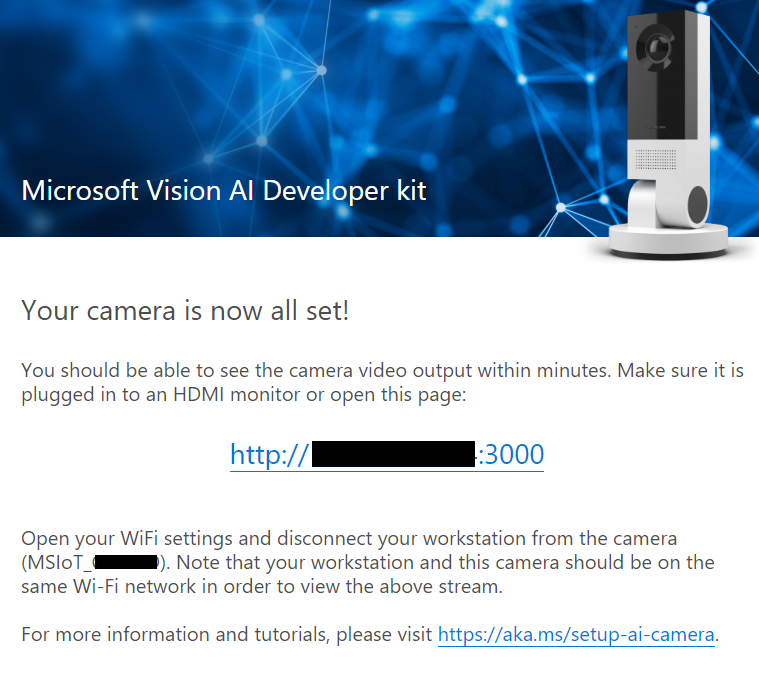
You will see the following screen showing your DevKit camera is ready to recognize objects.
-
View DevKit camera output
You can view the DevKit camera output with a web browser, using the URL given on the final device setup page. You can also connect an HDMI montior to the HDMI port on the camera directly or a video playback application (such as VLC Player) that supports RTSP video. Note: If using a cable, there should be no adapters at either end.
For more information on using RTSP streaming, see the topic View RTSP video stream.
Basic setup
After setting up the device, you will have a following setup.
Next steps
In this quick start, you configured the Vision AI DevKit camera to display output for objects recognized by the VisionSample model to a monitor or RTSP capable video player.
From here, your next step is to create and deploy a custom vision ML model using the Azure Custom Vision service.
Create and deploy a vision ML model using the Azure Custom Vision service