Training model using Azure Machine Learning and Azure Notebooks
What you will do
- Train a model using Azure Machine Learning and Azure Notebooks. Deploy the model to your Vision AI Dev Kit device
Pre-requisites
- Vision AI DevKit camera
- Azure Machine Learning workspace
Clone example GitHub and Get Started
- Clone or download the example GitHub contents (link in the top menu)
- Login to Azure Notebooks and upload the contents to your Azure Notebook
Prep your environment
- Change the aml_config/config.json file to match the subscription details for your Azure ML Workspace
- In case you want to use your own data go to the data folder and create a folder with your data, e.g. my_data.
- In the my_data folder, copy your data. Each folder name is the label of the images in that folder. For example, the soda_cans folder looks like this:
- soda_cans
- coke
- ice
- pepsi
- In the my_data folder, copy your data. Each folder name is the label of the images in that folder. For example, the soda_cans folder looks like this:
- IMPORTANT: You MUST upload more than 35 images per folder so there’s enough data for training.
Run the notebook
-
Open the 02-mobilenet-transfer-learning-final.ipynb notebook
-
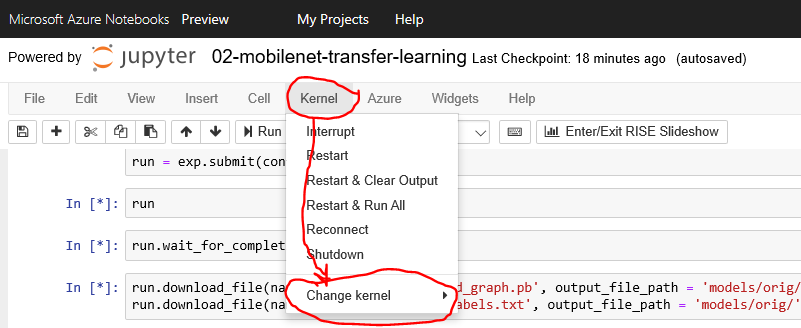
Set the Kernel to Python 3.6
- Run the notebook by running each cell individually
- In case you don’t want to run a cell you can change it to markdown
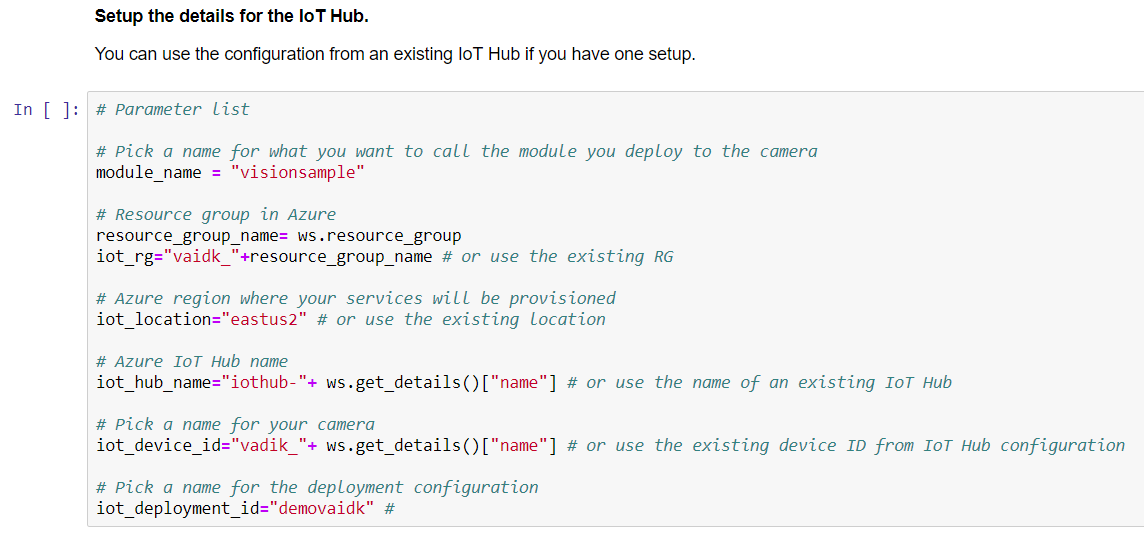
Configure your IoT Hub details
- Change the cell content to reflect your IoT Hub. Please note that you can use format:
- Iot_hub_name=”youriothub”


