Using the Redis Sidecar Extension with Azure App Service for Linux
Azure App Service now supports running Redis as a sidecar extension, allowing you to easily add Redis caching to your applications. This blog will walk you through deploying an application to Azure App Service, adding the Redis sidecar extension, and verifying that it works.
Configuring the Application to Use Redis
You can find the full project code here. In this blog, we will highlight some of the main points for configuring your application to use Redis.
Setting Up the Redis Connection String
In appsettings.json, set up your Redis connection string:
{
  "ConnectionStrings": {
    "Redis": "localhost:6379"
  }
}
Configuring Redis in Startup.cs
In Startup.cs, configure your web API to connect to the Redis instance:
public void ConfigureServices(IServiceCollection services)
{
    // Other service configurations

    // Add Redis
    services.AddStackExchangeRedisCache(options =>
    {
        options.Configuration = Configuration.GetConnectionString("Redis");
        options.InstanceName = "Redis.Core.WebApi_";
    });

    // Other service configurations
}
Implementing Caching in the API
Whenever the API is called, it will first check if the values are in the cache. If not, it will fetch them from the database:
public async Task<IEnumerable<WeatherForecast>> GetWeatherForecasts()
{
    var dataFromCache = await _cache.GetRecordAsync<IEnumerable<WeatherForecast>>(WeatherData_Key);
    if (dataFromCache != null)
    {
        _logger.LogInformation("Data loaded from cache @" + DateTime.Now);
        return dataFromCache;
    }
    else
    {
        _logger.LogInformation("Data loaded from db @" + DateTime.Now);
        var dataFromDb = GetDataFromDB();
        await _cache.SetRecordAsync<IEnumerable<WeatherForecast>>(dataFromDb, WeatherData_Key);
        return dataFromDb;
    }
}
Adding Values to the Cache
We have an extension method that adds values to the cache:
public static async Task SetRecordAsync<T>(this IDistributedCache cache,
    T value,
    string key,
    TimeSpan? absoluteExpiry = null,
    TimeSpan? slidingExpiry = null)
{
    // Caching option
    var cachingOption = new DistributedCacheEntryOptions();

    // Cache Time to Live, from Current Time to <specified> mins, after that cache will expire
    cachingOption.AbsoluteExpirationRelativeToNow = absoluteExpiry ?? TimeSpan.FromSeconds(60);

    // Cache Time to Live, will slide if it is accessed within the sliding window
    cachingOption.SlidingExpiration = slidingExpiry;

    // Convert to JSON
    var dataToStore = JsonSerializer.Serialize(value);

    // Set Cache
    await cache.SetStringAsync(key, dataToStore, cachingOption);
}
Deploying Your Web Application
Before adding the Redis sidecar extension, you need to deploy your application to Azure App Service. There are two ways to deploy applications: code-based deployment and container-based deployment.
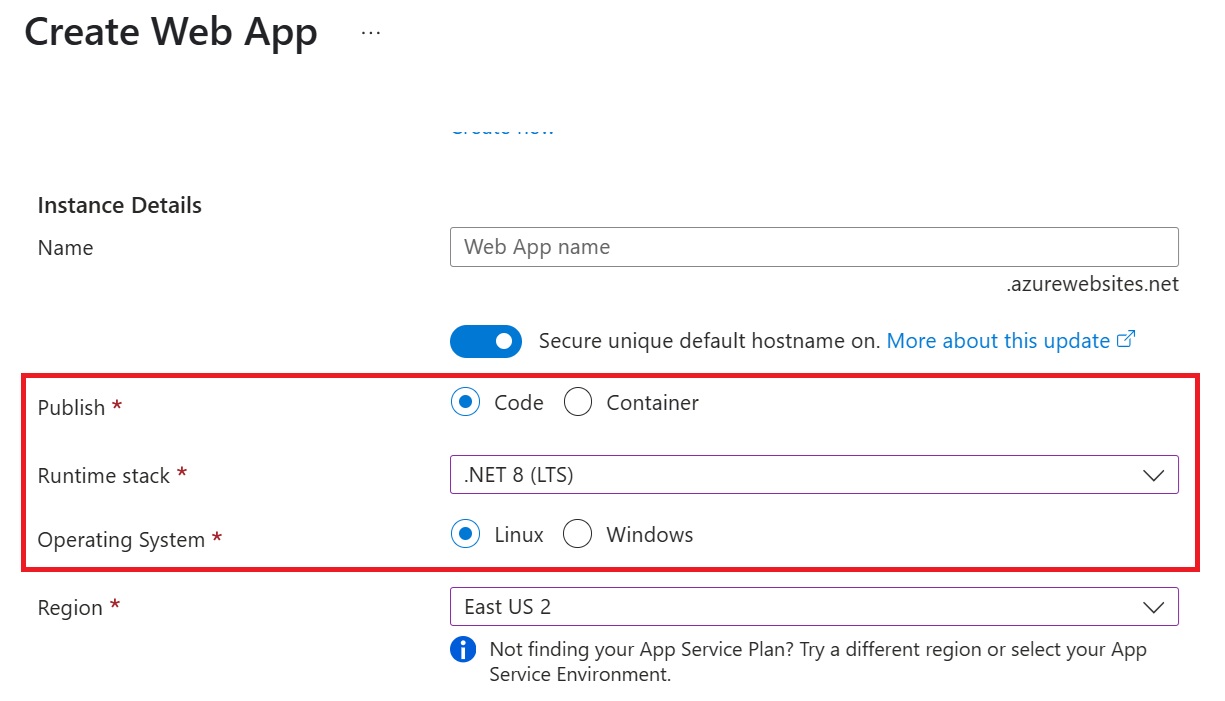
Code-Based Deployment
-
Go to the Azure Portal and create a .NET 8 Linux App Service.
-
Set up CI/CD with GitHub to automate deployments. Deploy to App Service using GitHub Actions
Note: Sidecars for code-based applications only support GitHub Actions right now. We are rolling out the experience for other deployment methods
-
Push your application code to your GitHub repository.
The deployment pipeline will automatically build and deploy your web application to Azure App Service.
Container-Based Deployment
-
Use the Dockerfile in your repository to build a container image of your application. We have a sample Dockerfile here
-
Build the image and push it to your preferred container registry, such as Azure Container Registry, Docker Hub, or a private registry.
-
Go to the Azure Portal and create a container-based App Service.
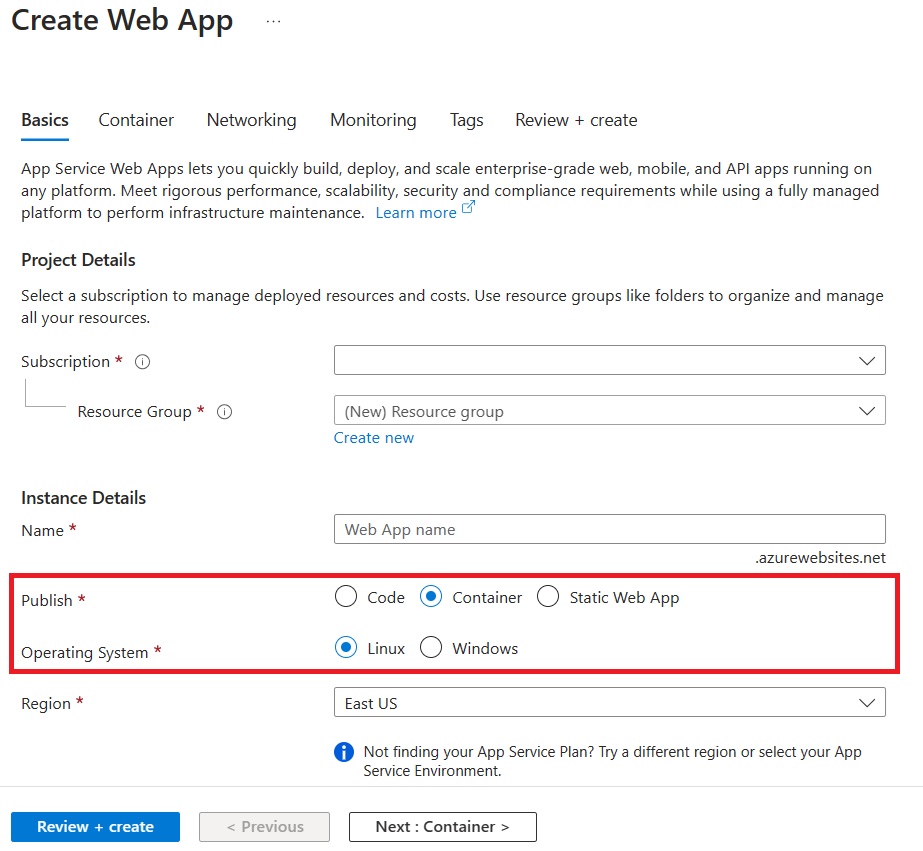
On the Container tab, make sure that Sidecar support is Enabled.
Specify the details of your application image.
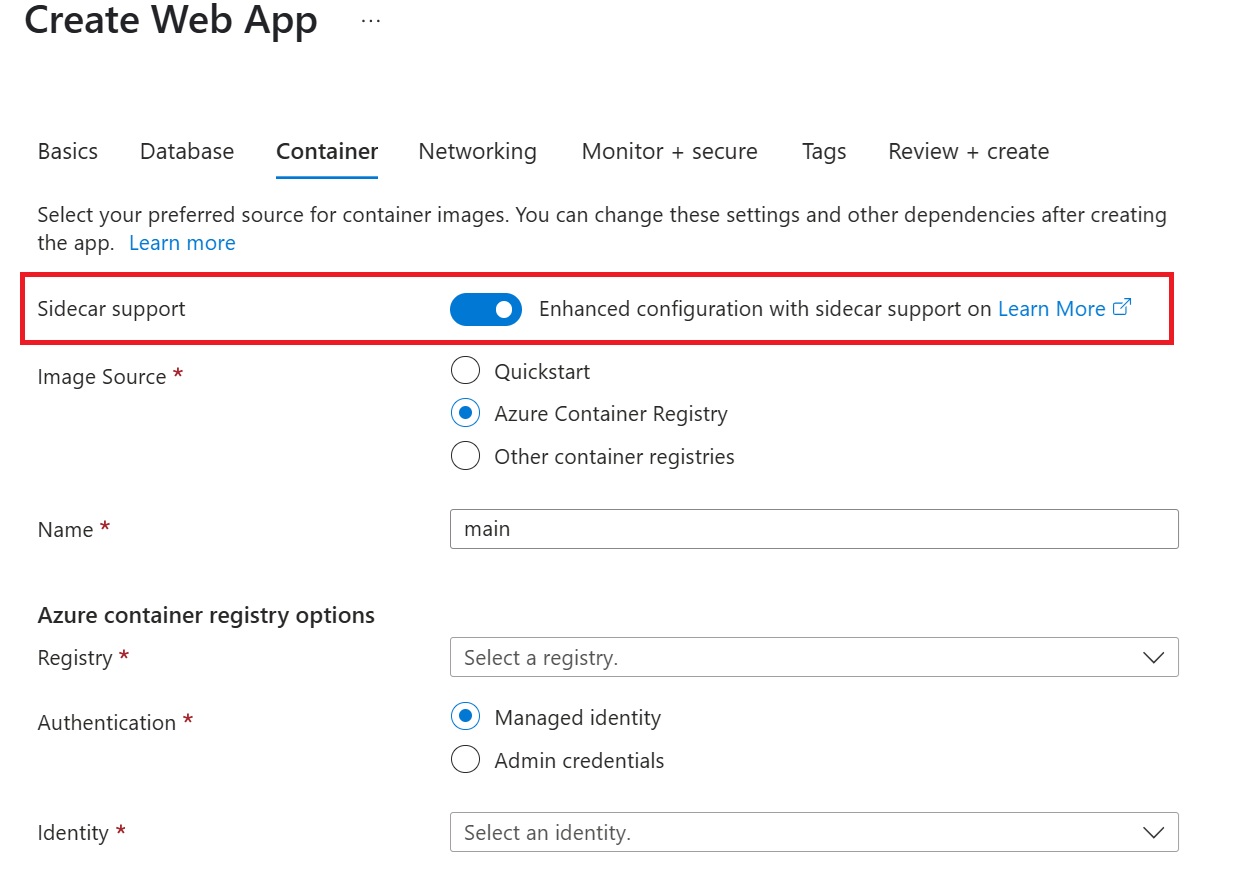
Note: We strongly recommend enabling Managed Identity for your Azure resources.
Adding the Redis Sidecar Extension
Once your application is deployed, follow these steps to enable the Redis sidecar extension:
- Navigate to the Azure Portal and open your App Service resource.
-
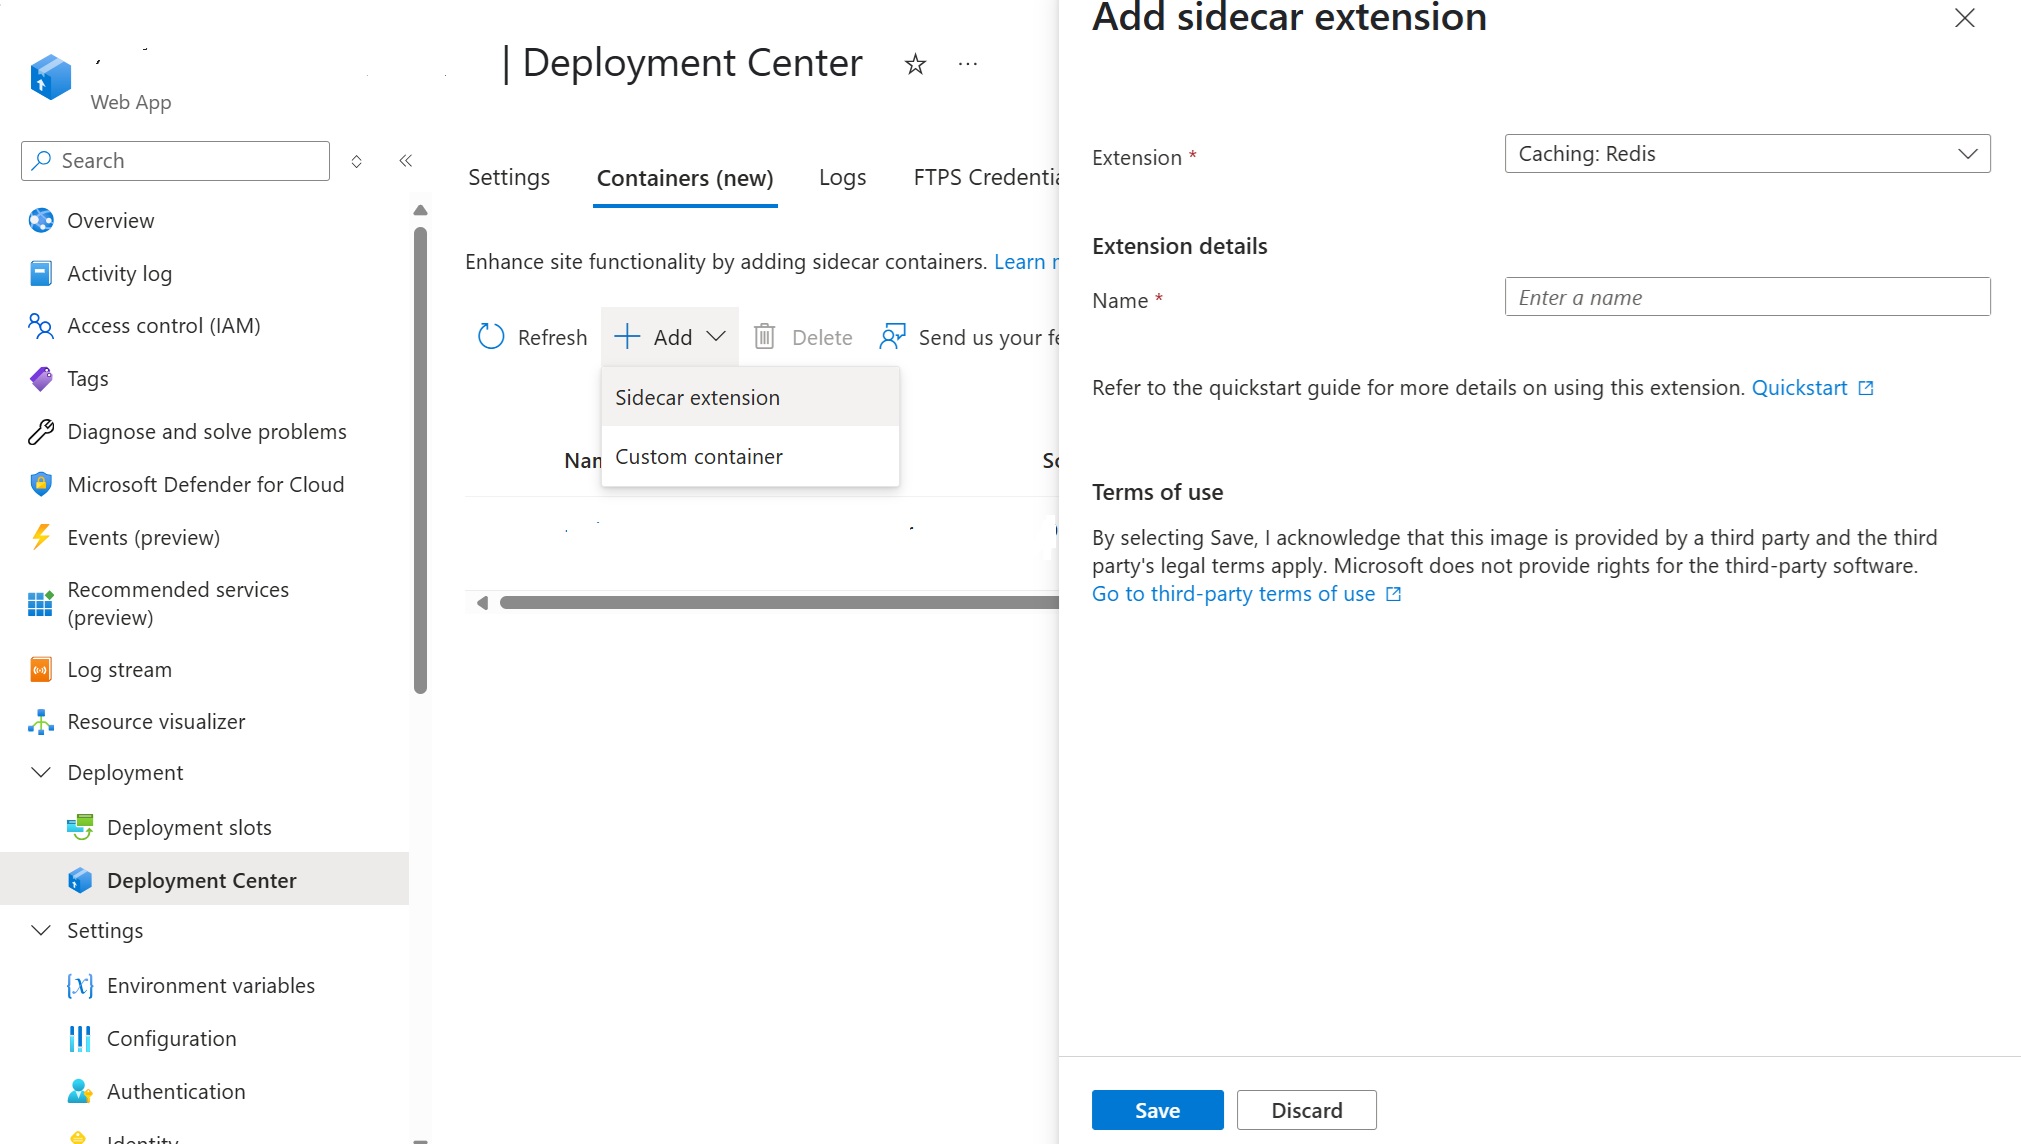
Go to Deployment Center in the left-hand menu and navigate to the Containers tab.
Note: You might see a banner which says *Interested in adding containers to run alongside your app? Click here to give it a try. Clicking on the banner will enable the new Containers experience for you.*
-
Add the Redis sidecar extension like this
Testing the Redis Connection
Once your deployment is complete, you can browse to <your application url>/weatherforecast
You should see output like this
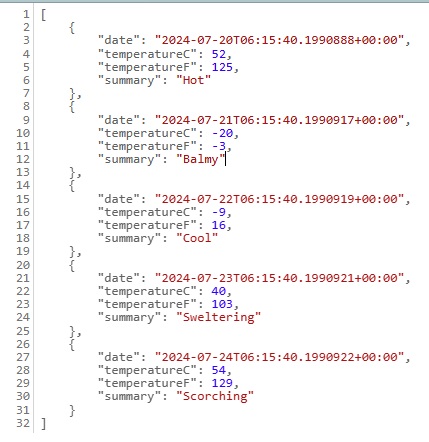
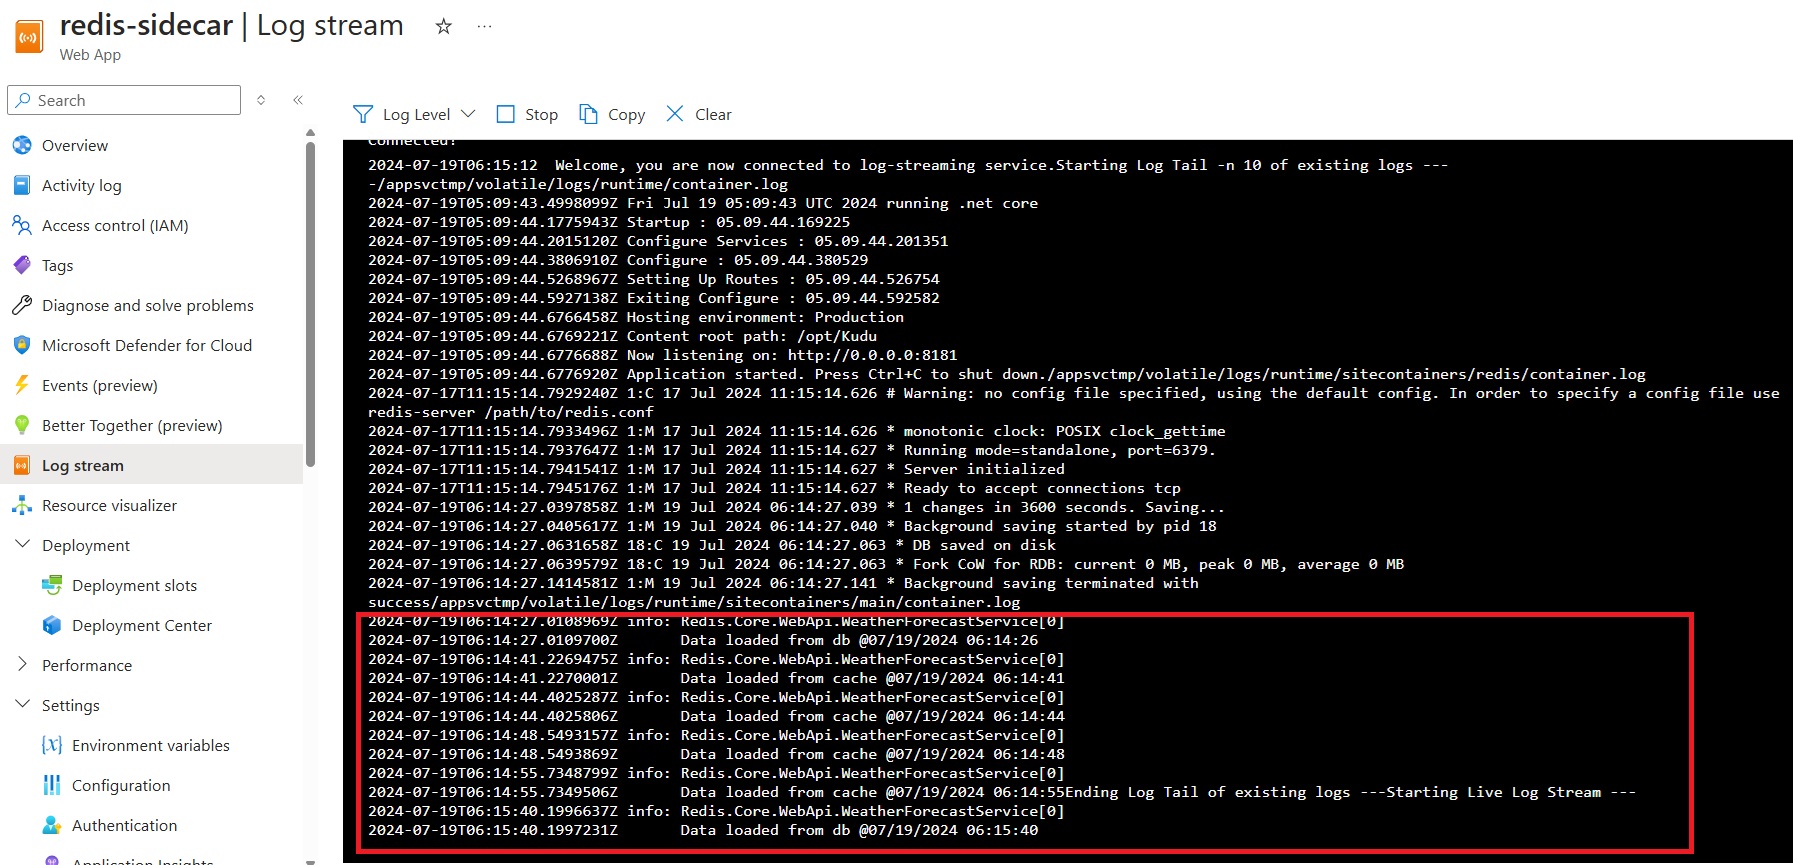
Refresh the page a few times. You can go to the Log Stream in the Azure Portal to see logs indicating whether the response is coming from the database or the cache.
Important Caveat
The Redis sidecar extension is suitable for caching scenarios and lightweight in-memory storage. It is not a replacement for a fully managed Redis instance, such as Azure Cache for Redis, and should not be used for persistent or large-scale data storage.
Try It Out with a Sample Python App
If you want to try the Redis sidecar extension with a Python application, we have a sample available here.