How to create a Blazor WebAssembly gRPC-Web app using App Service on an Azure Arc Enabled Kubernetes Cluster
With the release of the App Service on Kubernetes preview, you can now run App Service on Kubernetes deploying your web apps to Azure Kubernetes Service, or the cluster of your choosing. This enables you to utilize App Service features including continuous deployment with GitHub Actions and deployment slots.
In this tutorial, we’ll be deploying a .NET 5 gRPC-Web app to a Custom Location (App Service deployed on an Arc-enabled AKS cluster) with App Service on Kubernetes using the same gRPC-Web app we created in this blog. This example assumes you already have your resource group, connected Arc cluster, custom location, and App Service Kubernetes environment setup. Follow the steps in the documentation if you do not have these resources created.
Creating your Web App
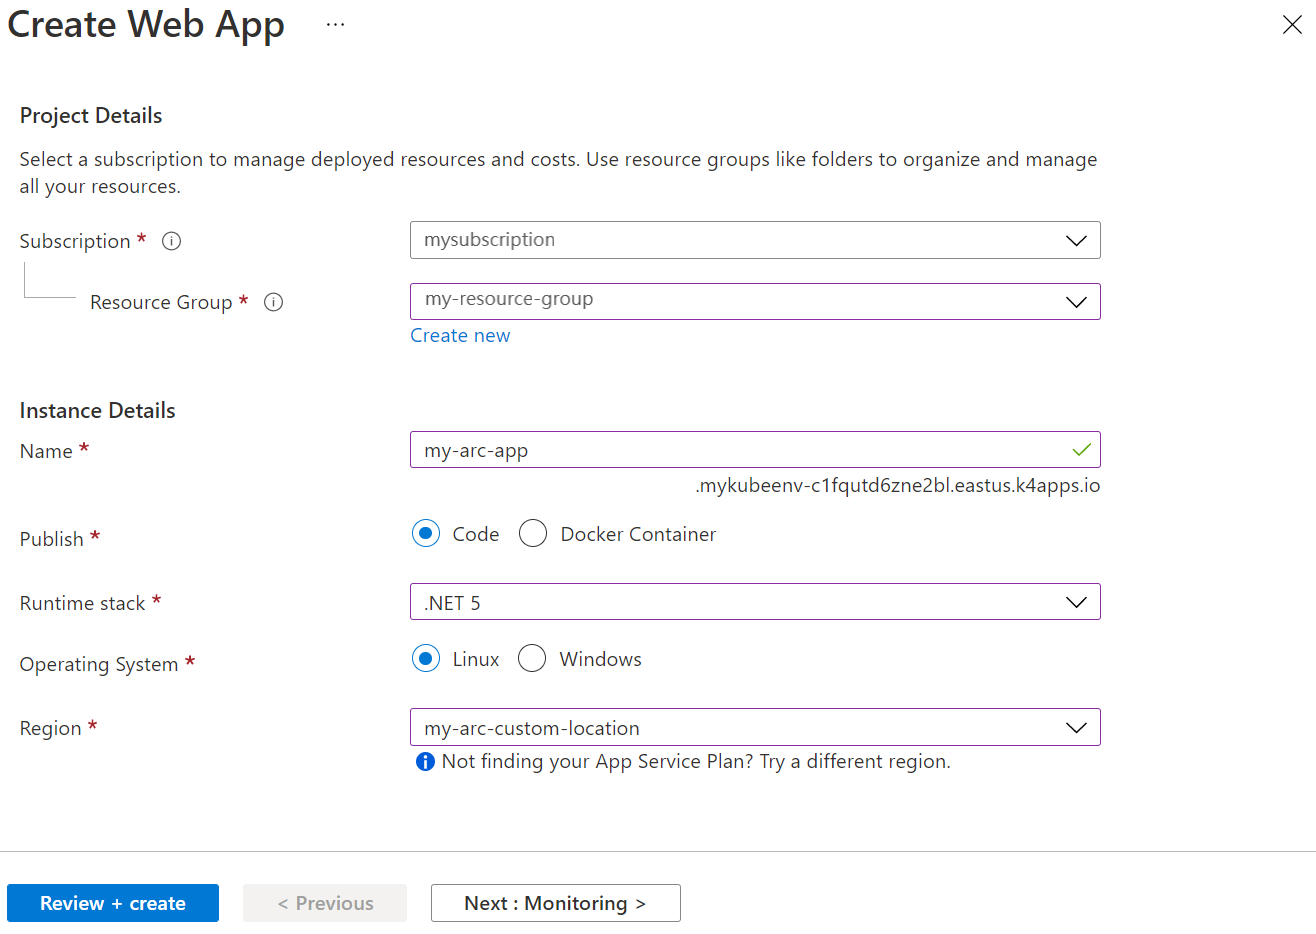
Creating your web app resource in the Azure portal should look very familiar to what you’ve seen before. When selecting your Resource Group, make sure it is the resource group you’ve created with all of your Azure Arc resources in them. Once the correct resource group is selected, as well as the operating system (Linux) you will find your Arc custom location in the Region drop-down menu.
If you would like to use the CLI to create your App Service resource, please see the documentation.
To create your web app using the portal:
- Choose the Subscription where the Resource Group lives containing your Azure Arc resources
- Choose the correct Resource Group that contains your Azure Arc resources (cluster, custom location, Kube environment, etc.)
- Give your site a unique Name
- Choose .NET 5 for your Runtime stack
- The Operating System will need to be Linux since App Service on Kubernetes is currently Linux only.
-
Go to the Region drop down menu and choose your custom location under Custom Locations (Preview). You may notice when you choose your custom location, the appended domain under the Name option is updated to include your Kube environment name and Arc region. Where you typically would see azurewebsites.net, you now see k4apps.io. Keep in mind the custom location is the abstracted layer on top of your Azure Arc enabled cluster that enables you to use Azure services.

-
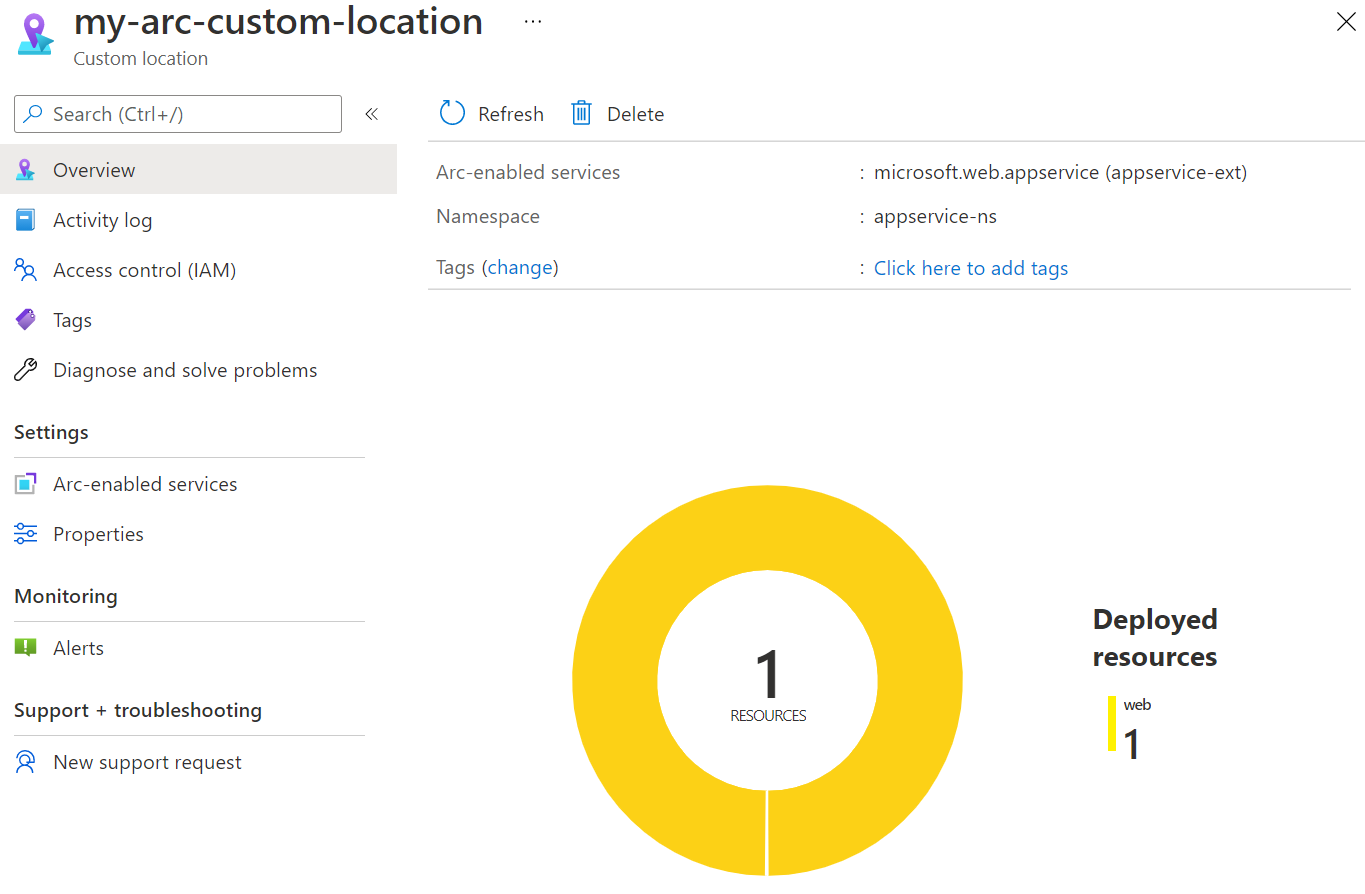
Next, click Review + create to create your resource. Once your resource is created, you can view that it is deployed to your custom location by visiting the custom location resource.

Deploy your application
Once your web app resource is created you can use the Zip Deploy method to push your application code to your web app.
-
Using the command line, navigate to the publish files. These will be the publish files in your Server project. The path should look similar to this:
BlazorGrpcWebApp/Server/bin/Release/net5.0/publish - Select all of the files in the publish directory using ctl+a, then Right-click, navigate to Send to, select Compressed (zipped) folder. Name the file blazorgrpcwebapp.zip and save it. This will create the .zip file that you will use in the next step.
-
Using the command line, navigate to the directory including the blazorgrpcwebapp.zip file you just created and run the following command
az webapp deployment source config-zip --resource-group my-resource-group --name my-arc-app --src blazorgrpcwebapp.zip
This command will publish your code to the web app and you’ll be able to re-visit your resource my-arc-app and select Browse to view your application in the browser. Notice your URL is appended with the .k4app.io domain. This deployment may take a few minutes so you may see the default deployment screen while you wait.
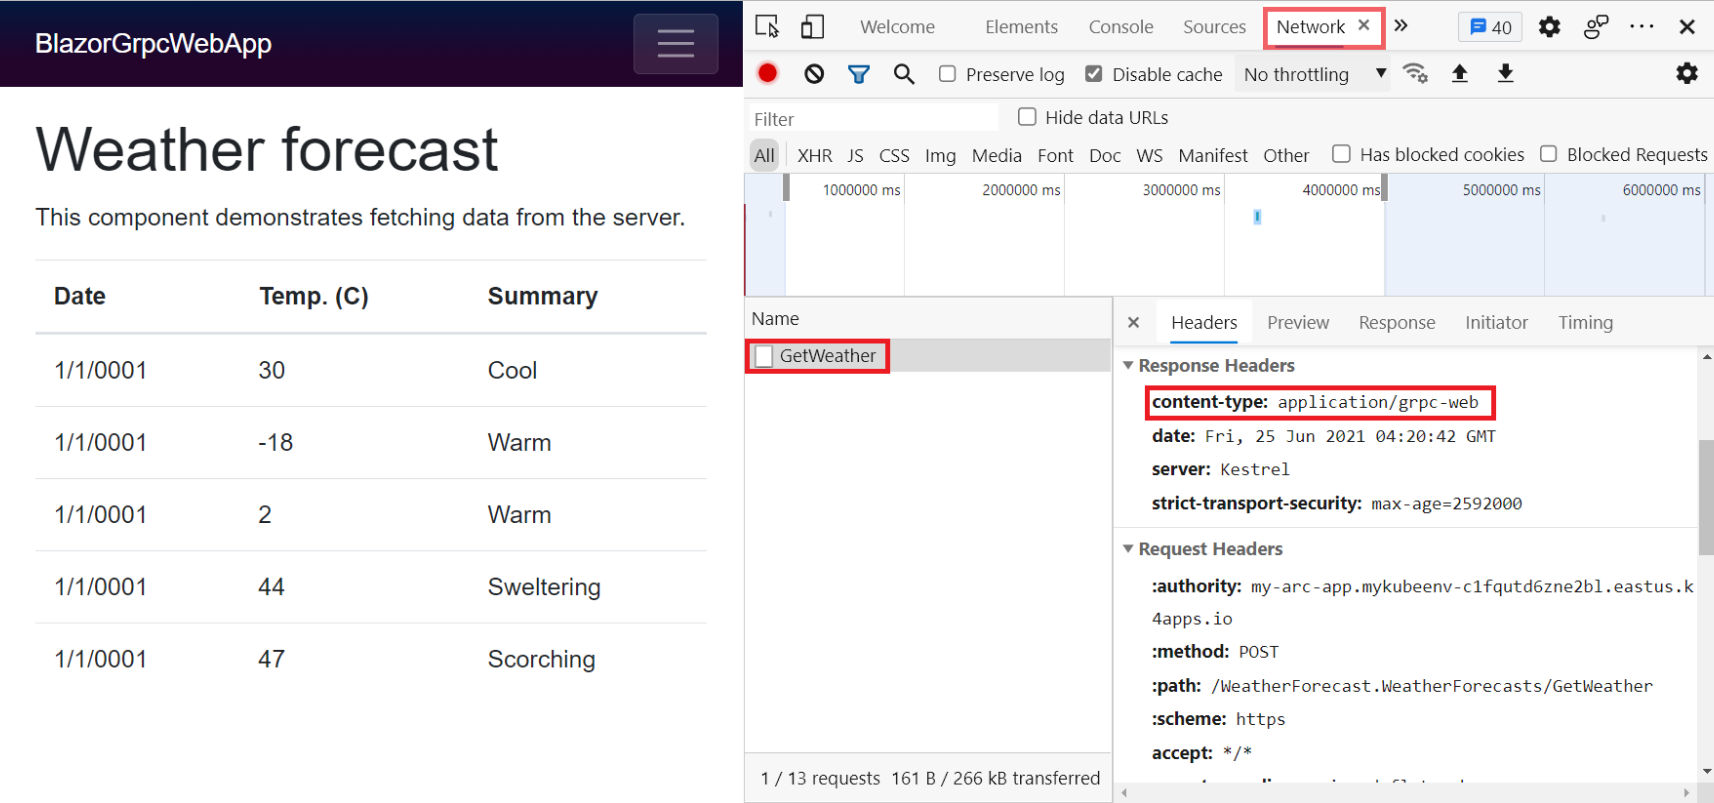
Once it’s complete you can view the application and verify that grpc-web calls are still being made.

