12 - Create the 'ServiceNow Close Incident' tool
In this module we will create a stateful workflow to close an existing ServiceNow incident and add resolution comments.
Create the Stateful Workflow
-
Search for and navigate to the Logic Apps service
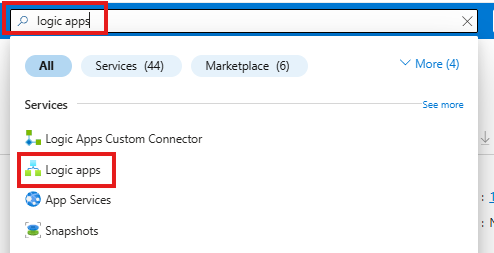
-
Open the Logic App created earlier

-
Create a new workflow
-
Click
Workflows -> Workflowsfrom the menu on the left -
Click
+ Add -> Add
-
-
Create a new stateful workflow with:
- Workflow name:
tool-ServiceNow-CloseIncident - Select the radio button for the
Statefulworkflow type - Click
Create
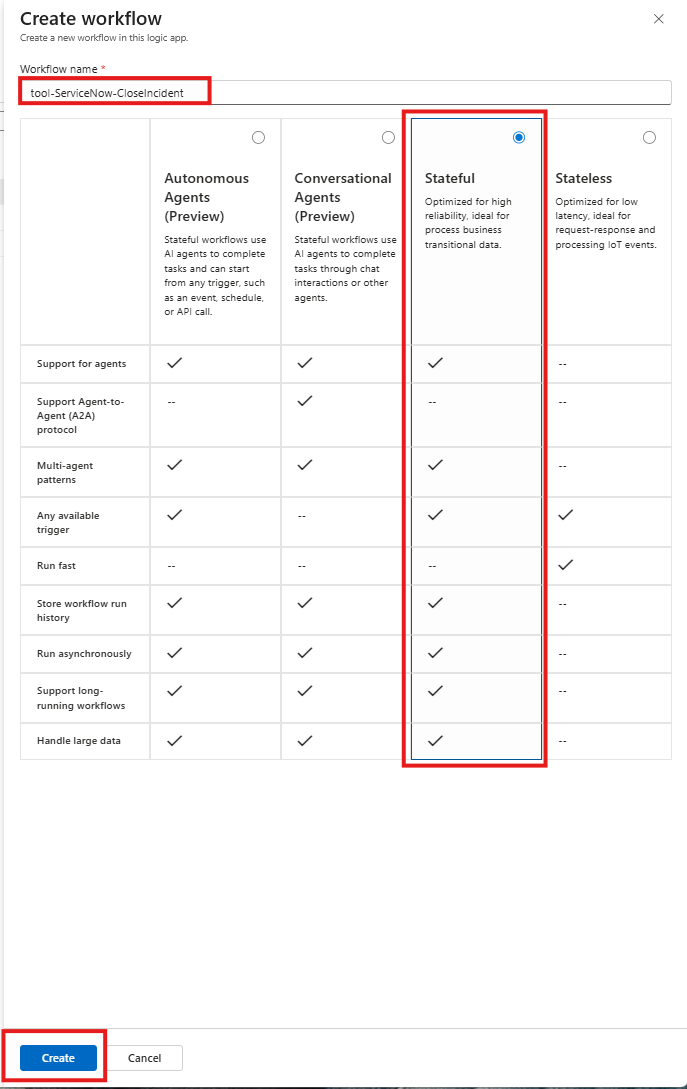
- Workflow name:
-
Open the workflow visual editor by clicking on the
tool-ServiceNow-UpdateIncidentlink (if the workflow designer isn't opened automatically)
🚀 Create Workflow using existing workflow.json (expand for details)
- 📄 - provides a preconfigured workflow definition
- 🕐 - This option saves you time creating the tools allowing more time to explore and interact with the agent.
Configure Worflow using existing workflow.json
-
Select the
CodeOption in the Tools
-
Paste the contents of the
workflow.jsonfile into the editor{
"definition": {
"$schema": "https://schema.management.azure.com/providers/Microsoft.Logic/schemas/2016-06-01/workflowdefinition.json#",
"contentVersion": "1.0.0.0",
"actions": {
"List_Records": {
"type": "ApiConnection",
"inputs": {
"host": {
"connection": {
"referenceName": "service-now"
}
},
"method": "get",
"path": "/api/now/v2/table/@{encodeURIComponent('incident')}",
"queries": {
"sysparm_display_value": false,
"sysparm_exclude_reference_link": true,
"sysparm_query": "number=@{triggerBody()?['TicketNumber']}"
}
},
"runAfter": {}
},
"Update_Record": {
"type": "ApiConnection",
"inputs": {
"host": {
"connection": {
"referenceName": "service-now"
}
},
"method": "put",
"body": {
"state": "7",
"close_code": "Solution Provided",
"close_notes": "@triggerBody()?['Notes']"
},
"path": "/api/now/v2/table/@{encodeURIComponent('incident')}/@{encodeURIComponent(first(body('List_Records')?['result'])['sys_id'])}",
"queries": {
"sysparm_display_value": false,
"sysparm_exclude_reference_link": true
}
},
"runAfter": {
"List_Records": [
"SUCCEEDED"
]
}
},
"Response": {
"type": "Response",
"kind": "Http",
"inputs": {
"statusCode": 200,
"body": {
"status": "Ticket {@{triggerBody()?['TicketNumber']}} has been updated successfully"
}
},
"runAfter": {
"Update_Record": [
"SUCCEEDED"
]
}
}
},
"outputs": {},
"triggers": {
"When_an_HTTP_request_is_received": {
"type": "Request",
"kind": "Http",
"inputs": {
"schema": {
"type": "object",
"properties": {
"TicketNumber": {
"type": "string"
},
"Notes": {
"type": "string"
}
}
}
}
}
}
},
"kind": "Stateful"
} -
Click the
Savebutton to save the changes to the workflow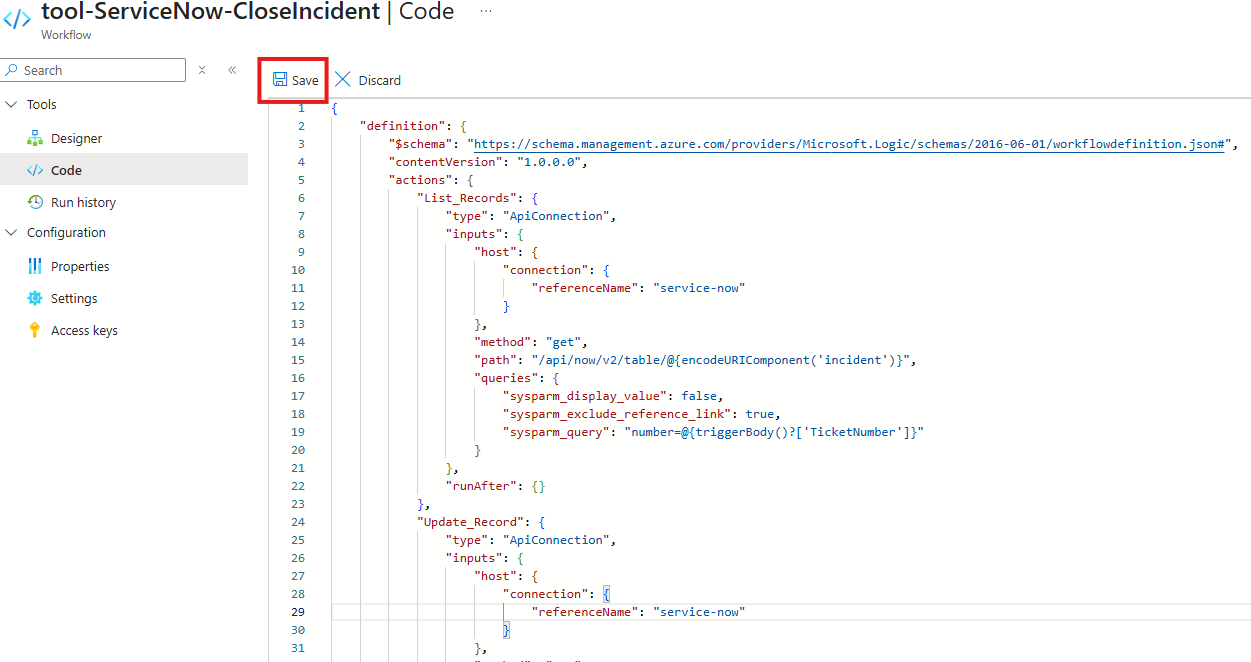
The follwoing message will appear once the changes have been successfully saved:
-
Click on the
Designeroption in the Tools menu to review the workflow using the designer.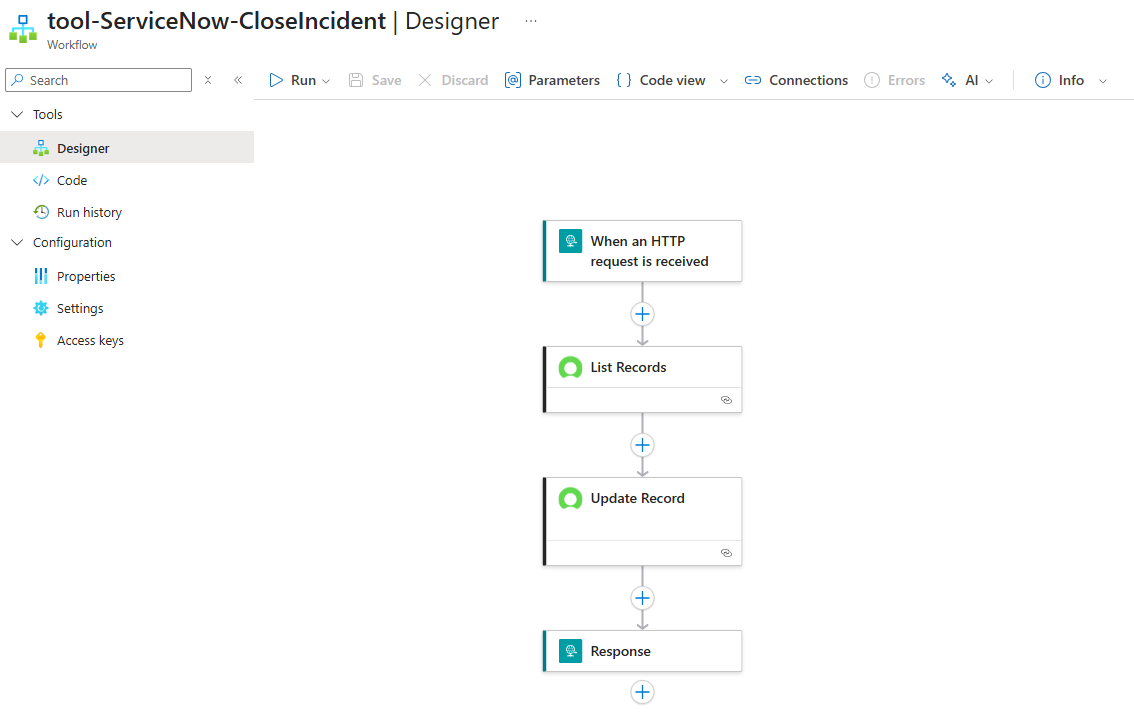
📋 Create Workflow using the Logic Apps Workflow Designer (expand for details)
- ✅ - provides step by step instructions for configuring the workflow using the designer.
- ✏️ - Use this option if you want more practice using the Logic Apps Designer
Configure Workflow using designer
-
Configure the workflow trigger to accept an HTTP Request
-
Click on
Add Trigger -
Select the
Requestaction located in the Built-in tools group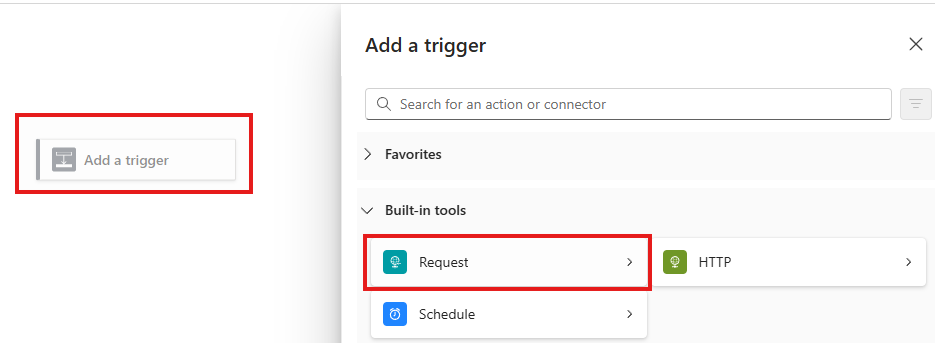
-
Select the
When a HTTP request is received
-
-
Configure the
When a HTTP request is receivedaction:- Request Body JSON Schema
{
    "type": "object",
    "properties": {
        "TicketNumber": {
            "type": "string"
        },
        "Notes": {
            "type": "string"
        }
    }
}
- Request Body JSON Schema
-
Look up the internal identifier for the Incident in ServiceNow
-
Add a new action. Click
+ Add an action -
Select the
ServiceNow - List Recordsaction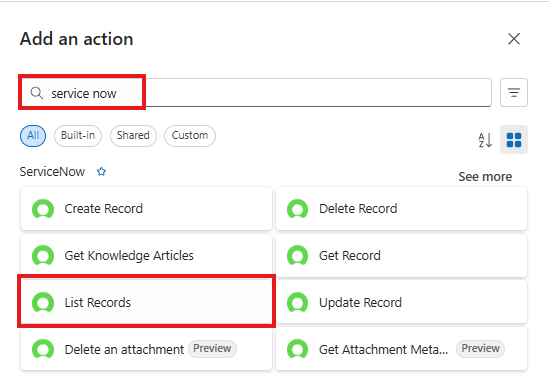
-
-
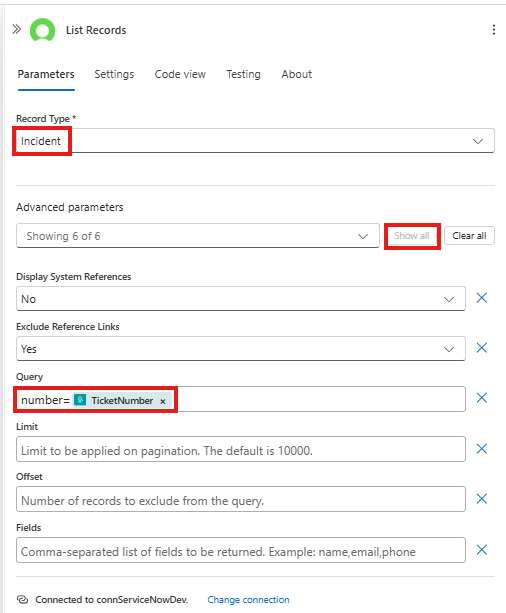
Configure the List Records Action as follows
-
Record Type:
Incident -
Advanced Parameters (click
Show all) -
Query:
number=@{triggerBody()?['TicketNumber']}(note: notice that the connection for the ServiceNow connection was automatically selected for the action)
-
-
Add the Update Record action to update the work notes on the incident in ServiceNow
-
Click on the
+->Add an Action -
Search for
ServiceNowConnector and select theUpdate RecordAction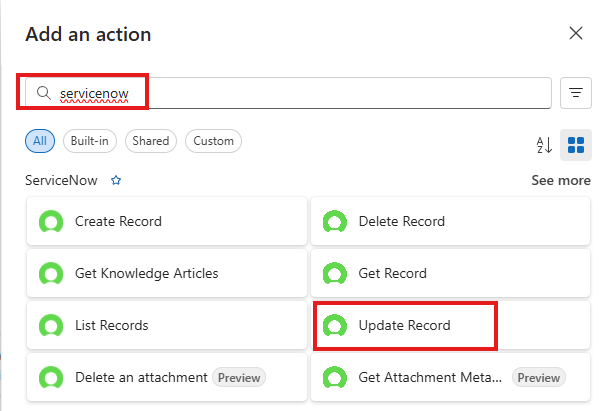
-
-
Configure the Update Record action
-
Rename action to
Update Incident Work Notes -
Record Type:
Incident -
System ID: (using the expression (fx) editor)
first(body('List_Records')?['result'])['sys_id'] -
State: (Advanced Parameter)
7 -
Resolution Code: (Advanced Parameter)
Solution Provided -
Resolution Notes: (Advanced Parameter)
@{triggerBody()?['Notes']}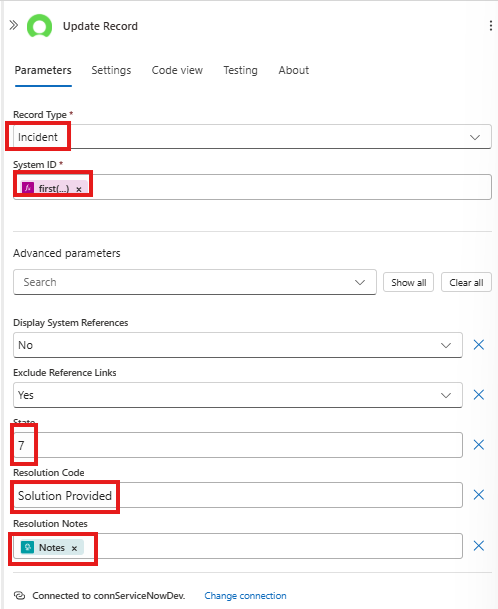
-
-
Add the Response action to return a status message to the calling process
-
Click on the
+->Add an Action -
Search for and select the
Responseaction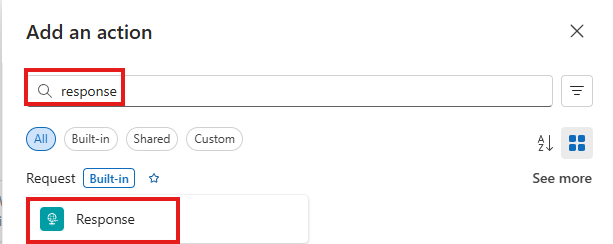
-
-
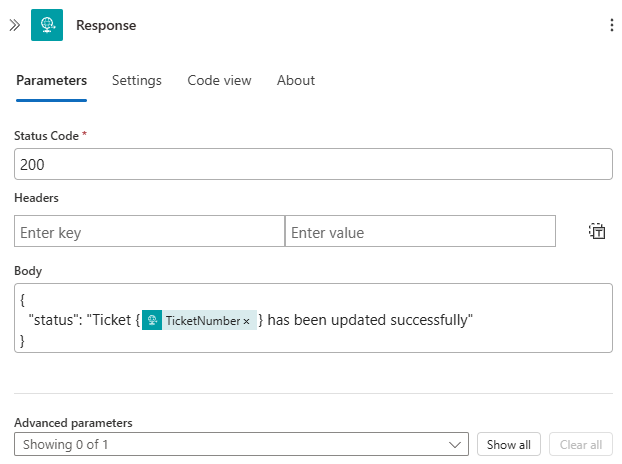
Configure the Response action
- Body:
{
    "status": "Ticket {@{triggerBody()?['TicketNumber']}} has been updated successfully"
}
- Body:
-
Save your workflow