Send notifications with Azure Logic Apps
In the following sample app, we notify users when products are updated. We use Azure Logic Apps to automate this process.
Azure Logic Apps handle automations that integrate systems, services, apps, and data. They move data around, send notifications, monitor data sources, and connect with other services through connectors.
Logic app capabilities include:
-
Sending email when an event occurs
-
Monitoring business reviews, analyzing review content, and sending notifications based on outcomes
-
Data cleansing pipelines and data migration
-
Integrating APIs and external systems
The following example is built from the chain that we started with our Azure Cosmos DB triggered Azure Function. The Azure Function sends data to Azure Event Hubs. Our logic app monitors Azure Event Hubs notifications and emails us when products are updated.
Create a logic app
-
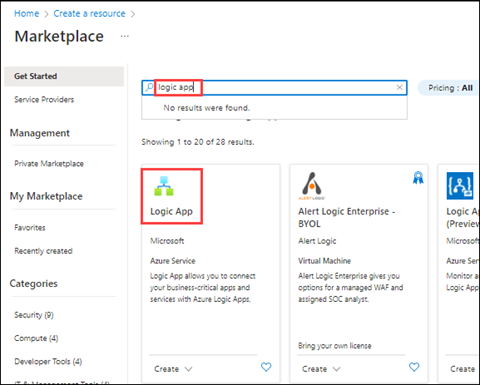
In the Azure portal, select Create a resource.

-
Search for logic app, and then select the Logic App.
-
Select Create.
-
On the Create Logic App page, enter the following settings:
- Resource Group: pet-supplies-demo-rg
- Logic App name: pet-supplies-wishlist-notice
- Publish: Workflow
- Region: <Choose your region>
- Plan type: Consumption
-
Select Review + create, then select Create.
Build the logic app
-
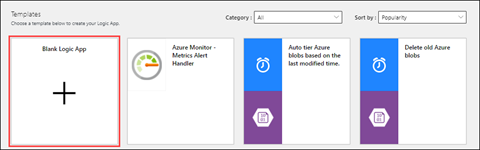
After the logic app is created, navigate to the resource, which loads Logic App Designer. Select Blank Logic App.
-
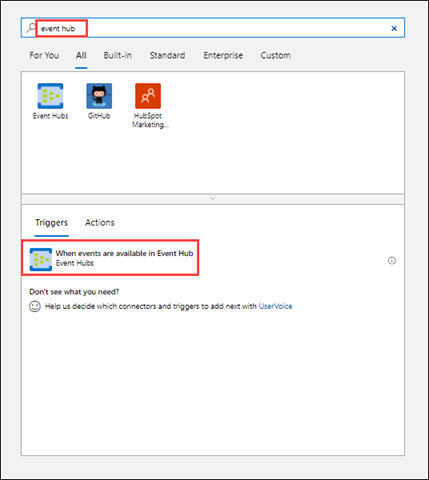
For the first task, search for event hub and then select the trigger When events are available in Event Hub.
-
Give your connection a name. For Connection String, set it to the value you used in AZURE_EVENT_HUB_CONNECTION. Then, select Create.
-
After the step connects to the event hub, enter the following settings:
- Event Hub name: pet-supplies-events
- Content type: application/json
- Consumer group name: $Default
-
Add a new step.
-
Search for Send an Email (V2) Outlook.
-
Sign in with your Office 365 credentials.
-
Enter your email address in the To list.
-
For the subject, use Contoso Product Update.
-
For the body, use: The following product is updated:.
-
Add Content from the Dynamic content dialog.
-
Select Save.
-
As a test, make changes to Pet Supplies products and verify that events were added to the event hub.
-
Select Run Trigger, then Run.