Announcing the New Auto Healing Experience in App Service Diagnostics
Jennifer Lee (MSFT)
Note: Currently, this new experience is only for Windows web apps for now.
Hopefully, most of the time your apps are running healthily and happily. However, sometimes your app may run into issues, resulting in downtimes, slowness, or other unexpected behaviors. We’ve built App Service Diagnostics to help you diagnose and solve issues with your web app with recommended troubleshooting and next steps. You can learn more about App Service Diagnostics here.
However, these unexpected behaviors may be temporarily resolved with some simple mitigation steps, such as restarting the process or starting another executable, or require additional data collection, so that you can better troubleshoot the ongoing issue at a later time.
Today, we’re excited to announce our new Auto Healing experience in App Service Diagnostics. With our new Auto Healing tile shortcut, you can set up custom mitigation actions to run when certain conditions (that you define as unexpected or a sign of unhealthy behavior) are met.
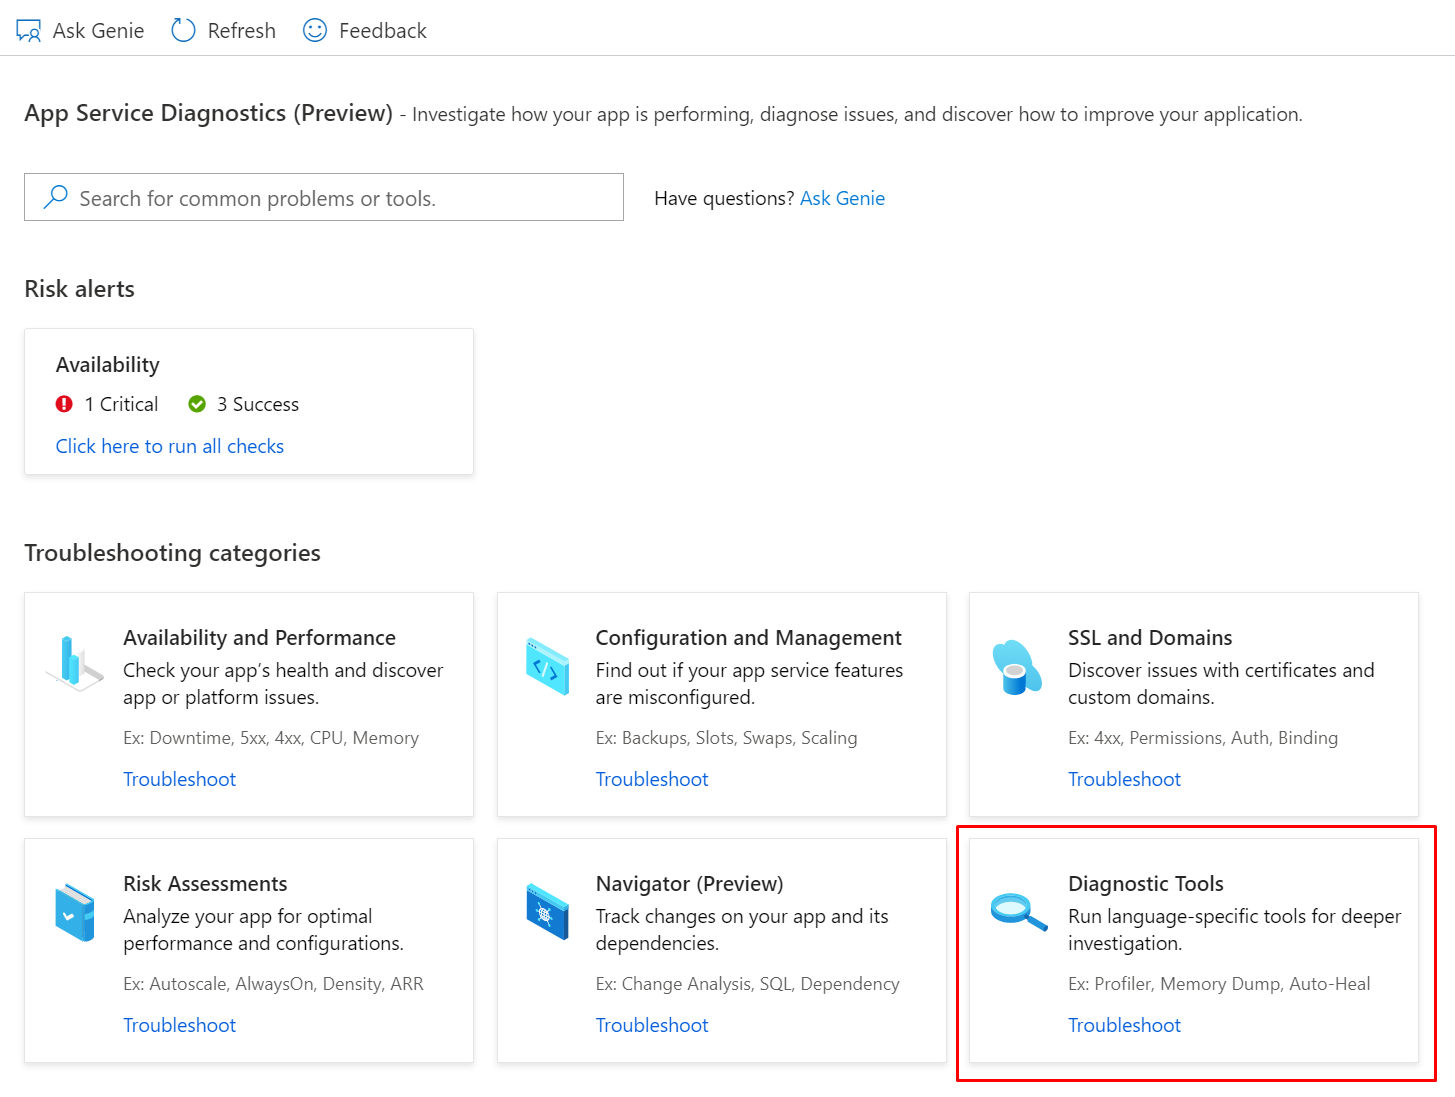 Click Diagnostic Tools from the App Service Diagnostics homepage.
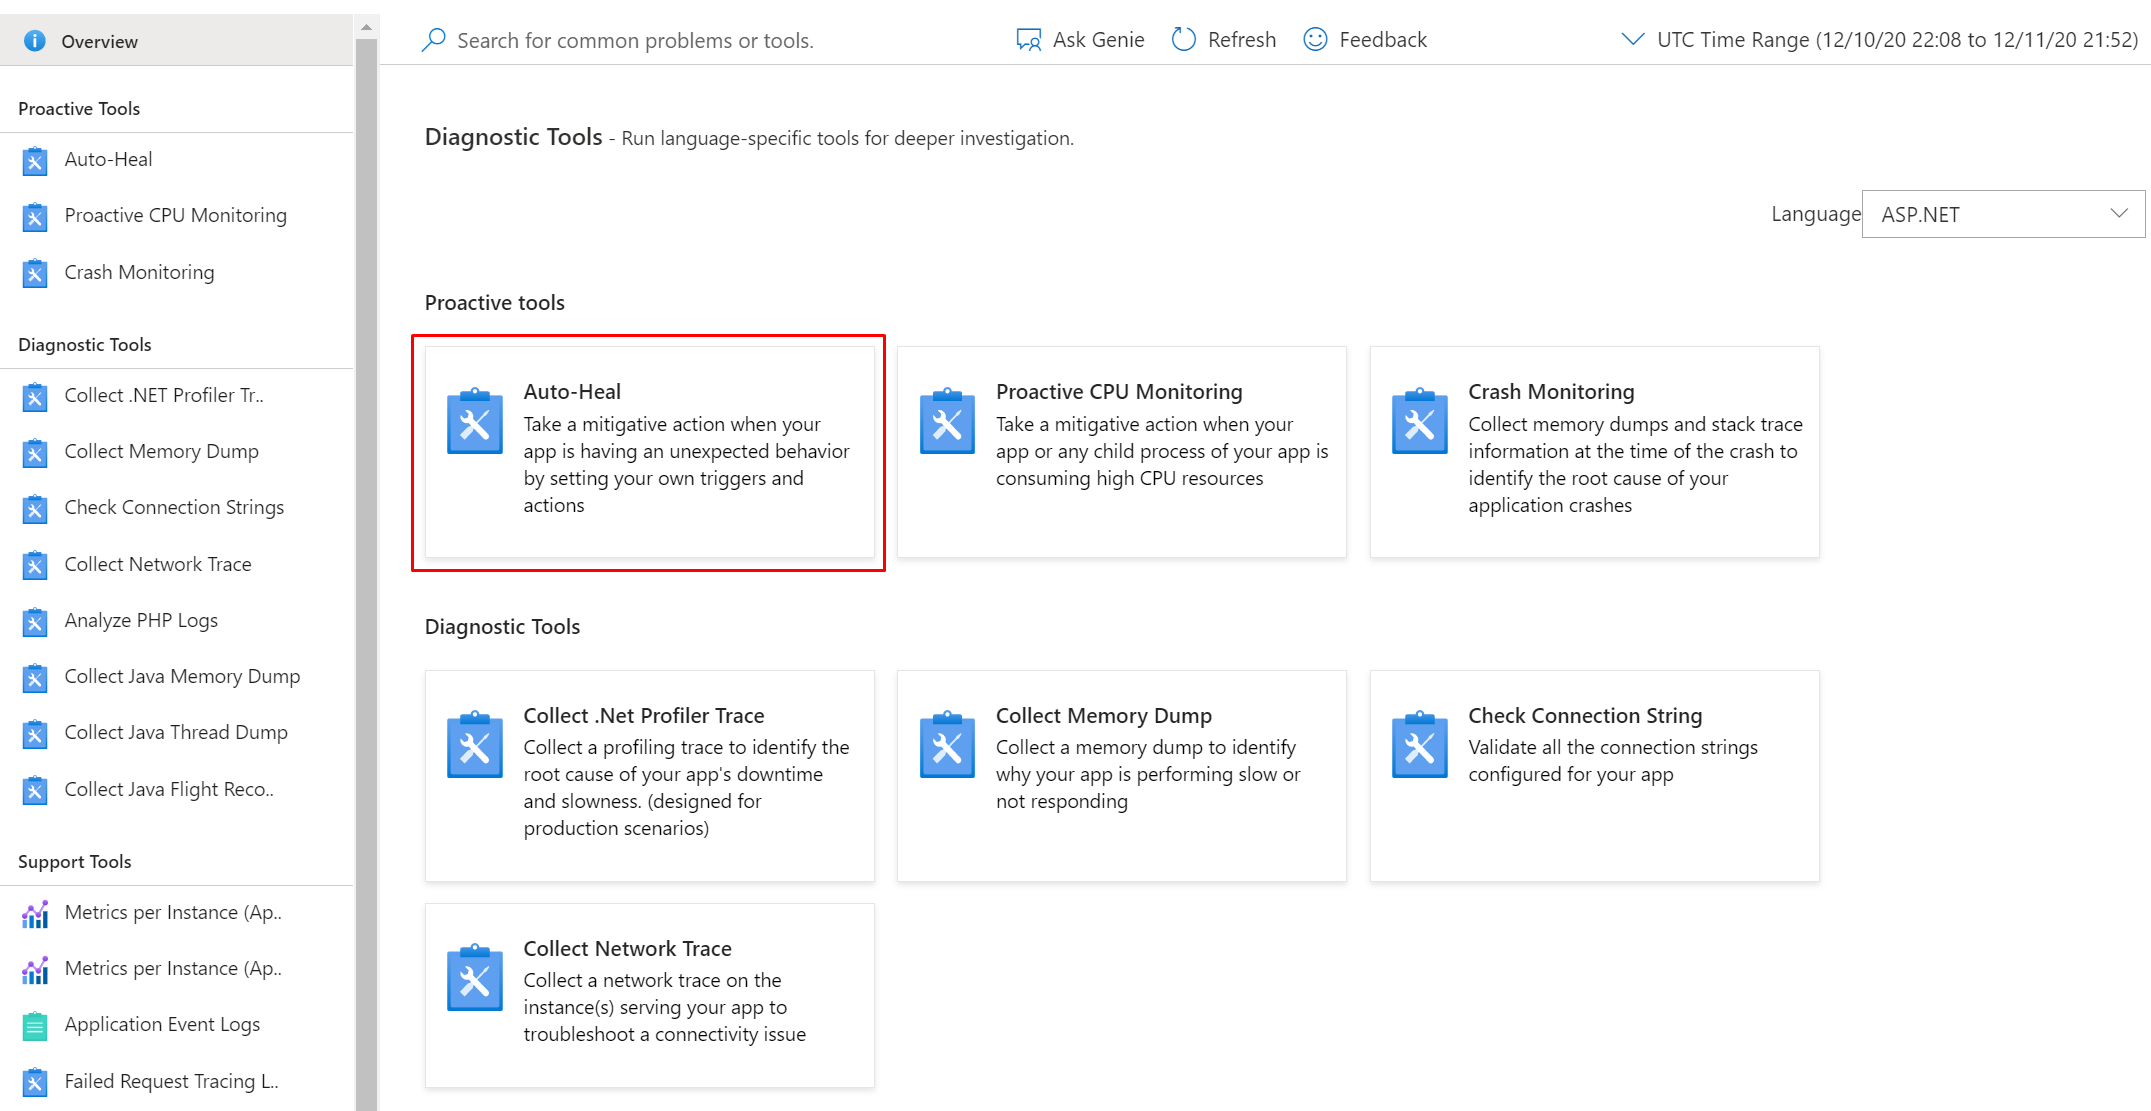 Then, click Auto-Heal.
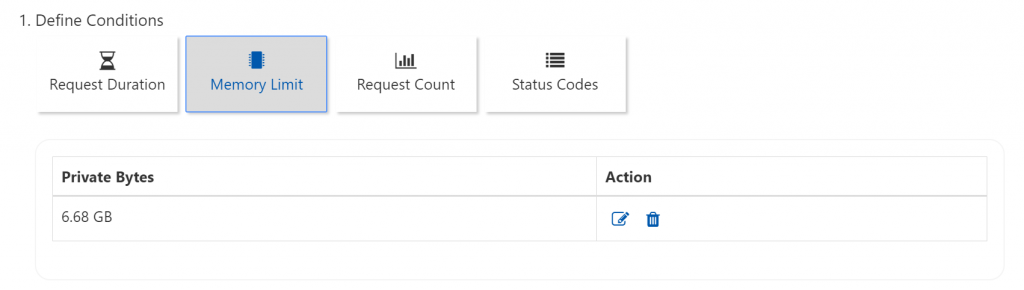
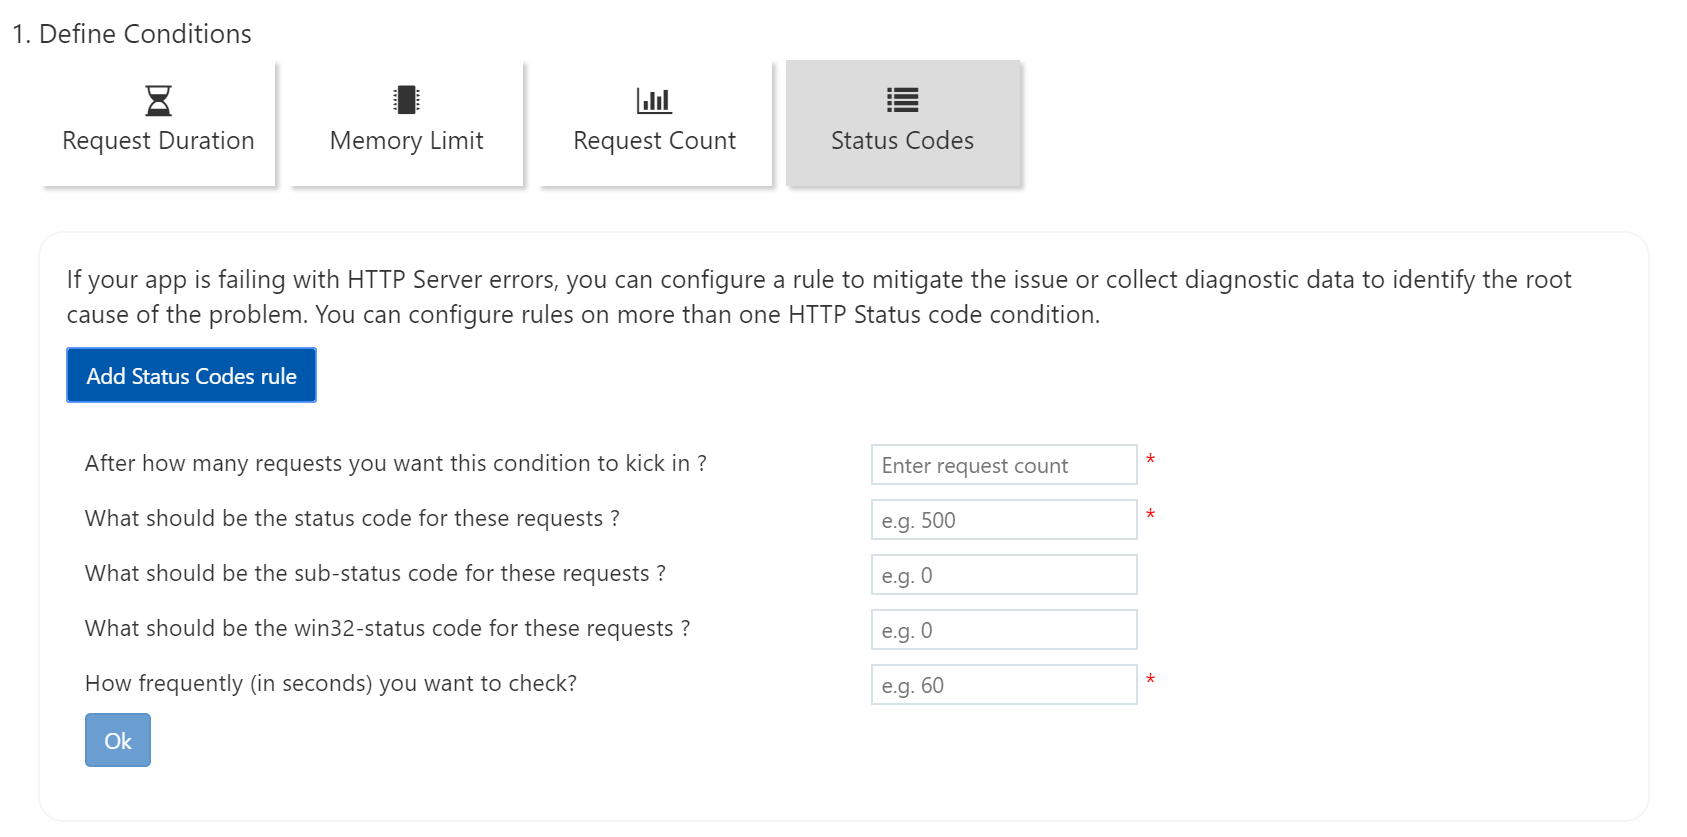
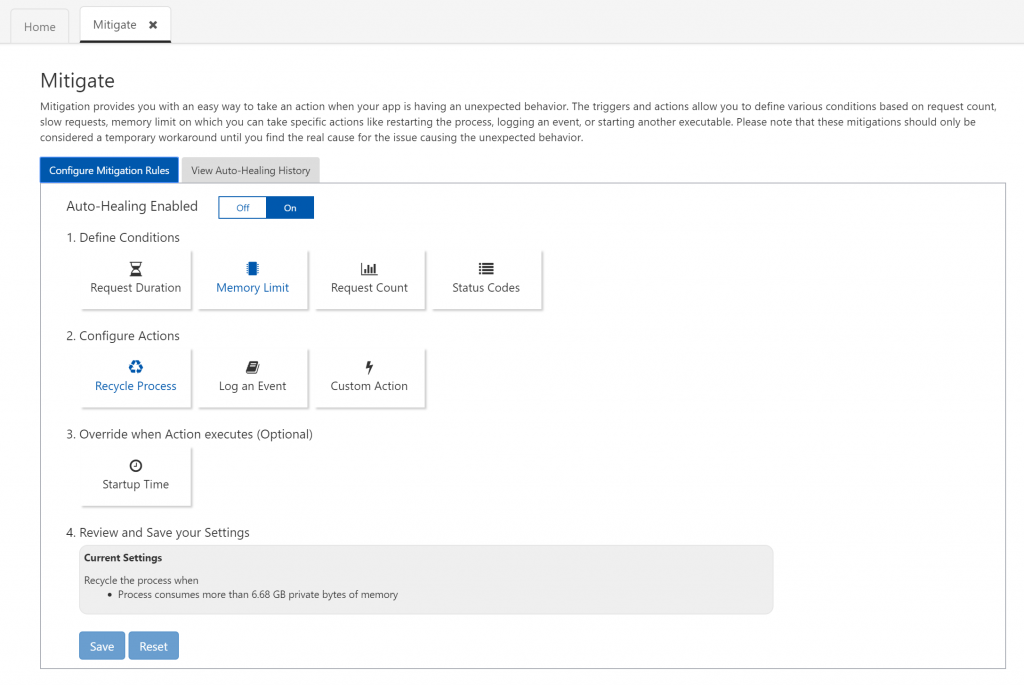 Step 1: Define conditions
Select the tile that best matches the condition that you want to set for your mitigation rule.
The conditions that are supported with the new Mitigate/Auto Heal experience in App Service Diagnostics are:
Step 1: Define conditions
Select the tile that best matches the condition that you want to set for your mitigation rule.
The conditions that are supported with the new Mitigate/Auto Heal experience in App Service Diagnostics are:
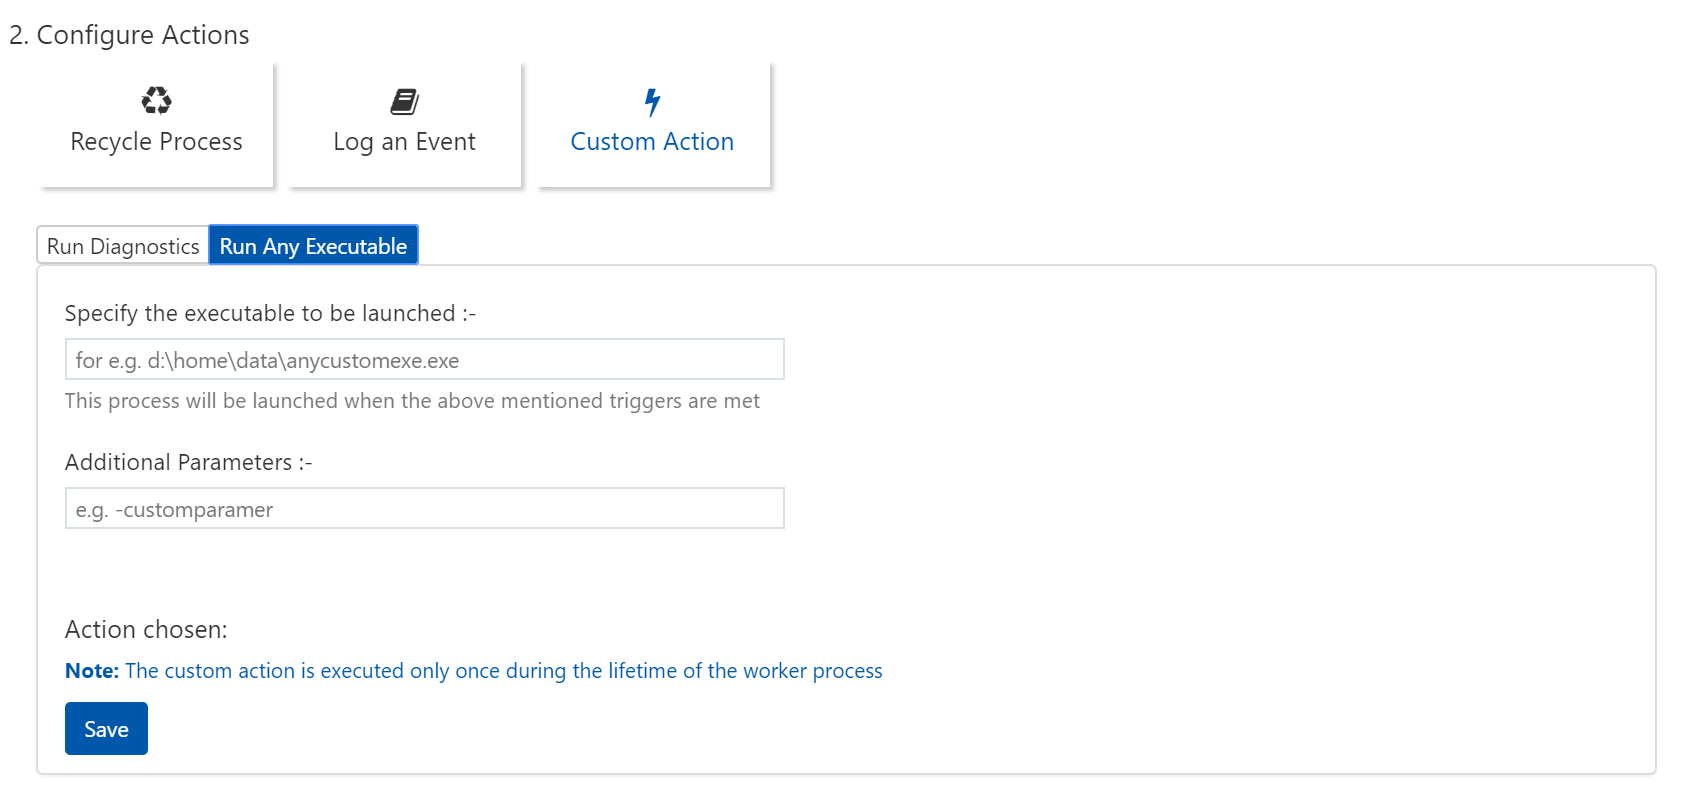
 Step 2: Configure actions
Select the tile that best matches the auto heal mitigation action that you want to perform under your mitigation rule conditions. When the graphic is blue, it means that action has been selected. (For custom actions, be sure to fill out the parameters required).
The custom mitigation actions that are supported are:
Step 2: Configure actions
Select the tile that best matches the auto heal mitigation action that you want to perform under your mitigation rule conditions. When the graphic is blue, it means that action has been selected. (For custom actions, be sure to fill out the parameters required).
The custom mitigation actions that are supported are:
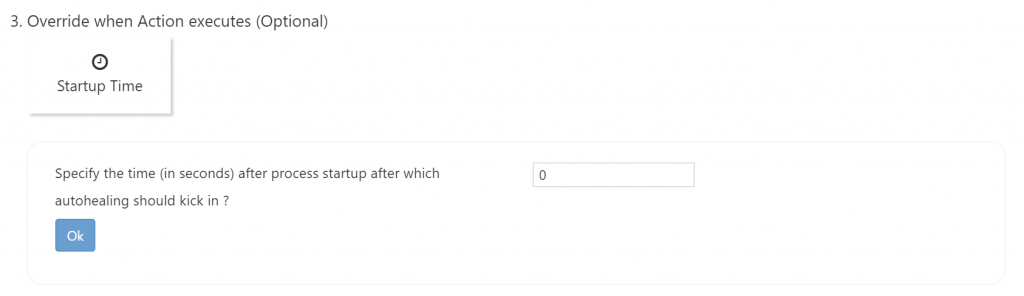
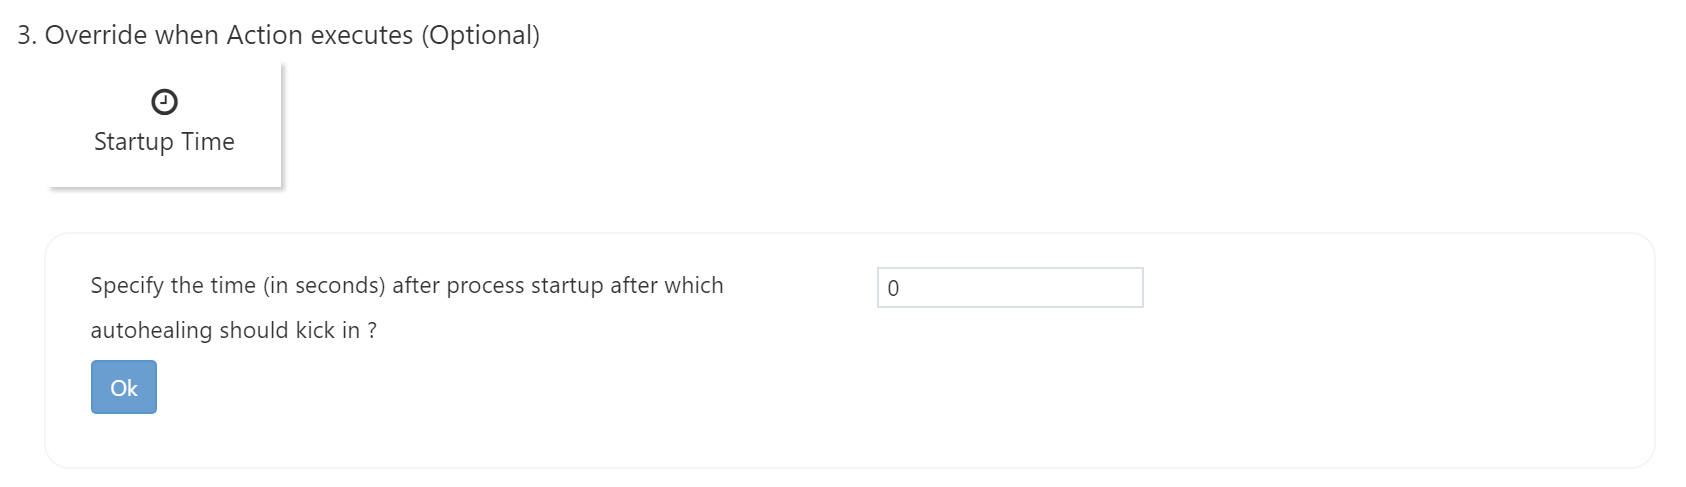
 Step 3: Override when action executes (optional)
Sometimes when an app has a long startup time, depending on the mitigation rule conditions that are set, it may kick off the mitigation action during app startup, which is not the intended use case. By modifying the startup time, you can specify how much time the mitigation rule should wait after the process startup before the mitigation rule kicks off.
Step 3: Override when action executes (optional)
Sometimes when an app has a long startup time, depending on the mitigation rule conditions that are set, it may kick off the mitigation action during app startup, which is not the intended use case. By modifying the startup time, you can specify how much time the mitigation rule should wait after the process startup before the mitigation rule kicks off.
 Step 4: Review and save your settings
Here, you can review the rules that you just created and save them. If you have previously defined rules, they will show up under Current Settings (no rules will show up under Current Settings until they are saved).
Saving mitigation settings will restart the application domain for the web app and this can cause logged-in user information, sessions, and in-memory cache to be cleared. Hence, it is advised to make these changes during non-business hours.
Two things to keep in mind:
Step 4: Review and save your settings
Here, you can review the rules that you just created and save them. If you have previously defined rules, they will show up under Current Settings (no rules will show up under Current Settings until they are saved).
Saving mitigation settings will restart the application domain for the web app and this can cause logged-in user information, sessions, and in-memory cache to be cleared. Hence, it is advised to make these changes during non-business hours.
Two things to keep in mind:
 Get ahead of your issues and automatically mitigate these unexpected behaviors by trying out Mitigate and Auto Heal in App Service Diagnostics.
Click Diagnostic Tools from the App Service Diagnostics homepage.
Then, click Auto-Heal.
How to Get Started
 Step 1: Define conditions
Select the tile that best matches the condition that you want to set for your mitigation rule.
The conditions that are supported with the new Mitigate/Auto Heal experience in App Service Diagnostics are:
Step 1: Define conditions
Select the tile that best matches the condition that you want to set for your mitigation rule.
The conditions that are supported with the new Mitigate/Auto Heal experience in App Service Diagnostics are:
- Request Duration: examines slow requests
- Memory Limit: examines process memory in private bytes
- Request Count: examines number of requests
- Status Codes: examines number of requests and their HTTP status code
 Step 2: Configure actions
Select the tile that best matches the auto heal mitigation action that you want to perform under your mitigation rule conditions. When the graphic is blue, it means that action has been selected. (For custom actions, be sure to fill out the parameters required).
The custom mitigation actions that are supported are:
Step 2: Configure actions
Select the tile that best matches the auto heal mitigation action that you want to perform under your mitigation rule conditions. When the graphic is blue, it means that action has been selected. (For custom actions, be sure to fill out the parameters required).
The custom mitigation actions that are supported are:
- Recycle Process
- Log an Event
- Custom Action
- Run Diagnostics: runs
- Run Any Executable: runs specified executable
 Step 3: Override when action executes (optional)
Sometimes when an app has a long startup time, depending on the mitigation rule conditions that are set, it may kick off the mitigation action during app startup, which is not the intended use case. By modifying the startup time, you can specify how much time the mitigation rule should wait after the process startup before the mitigation rule kicks off.
Step 3: Override when action executes (optional)
Sometimes when an app has a long startup time, depending on the mitigation rule conditions that are set, it may kick off the mitigation action during app startup, which is not the intended use case. By modifying the startup time, you can specify how much time the mitigation rule should wait after the process startup before the mitigation rule kicks off.
 Step 4: Review and save your settings
Here, you can review the rules that you just created and save them. If you have previously defined rules, they will show up under Current Settings (no rules will show up under Current Settings until they are saved).
Saving mitigation settings will restart the application domain for the web app and this can cause logged-in user information, sessions, and in-memory cache to be cleared. Hence, it is advised to make these changes during non-business hours.
Two things to keep in mind:
Step 4: Review and save your settings
Here, you can review the rules that you just created and save them. If you have previously defined rules, they will show up under Current Settings (no rules will show up under Current Settings until they are saved).
Saving mitigation settings will restart the application domain for the web app and this can cause logged-in user information, sessions, and in-memory cache to be cleared. Hence, it is advised to make these changes during non-business hours.
Two things to keep in mind:
- These mitigation actions should only be considered a temporary workaround until you find the real cause for the issue causing the unexpected behavior. For the latter, you can start with App Service Diagnostics to figure out what actually went wrong.
- The feature in this blog post is in addition to Proactive Auto Heal, which is automatically restarts your web app based on our percent memory and percent request rules. Learn more about Proactive Auto Heal here.
 Get ahead of your issues and automatically mitigate these unexpected behaviors by trying out Mitigate and Auto Heal in App Service Diagnostics.