Publishing a .NET class library as a Function App
Donna Malayeri
Update #1: The Azure Functions CLI has been renamed to Azure Functions Core Tools.
Update #2: We now have Visual Studio 2017 tooling for Azure Functions! You can use WebJobs attributes to configure triggers and bindings, so there is no need to manually author function.json. For more information, see the following:
With our new Azure Functions runtime support for precompiled functions, you can now use familiar Visual Studio features such IntelliSense and unit testing. These features were among the top requests after we launched the preview Visual Studio Tools for Azure Functions. This also enables an improved development workflow for customers who feel that that class libraries are a better fit for their application.
Azure Functions now supports publishing a class library as the implementation for one or more functions in a Function App. We’ve also recently made several runtime improvements to make assemblies much more useful, such as shadow-copying managed assemblies to avoid file locking issues and restarting the Functions runtime to pick up newly deployed binaries.
Using Visual Studio 2015 or 2017, you can try precompiled functions today with a few manual tweaks to your project. The manual steps are needed because the existing Functions project type (.funproj) has no build action, since it contains only script files. With the setup below, you'll instead use a web project which will provide the full development experience of IntelliSense, local debugging, and publishing to Azure.
The next version of Visual Studio tooling for Azure Functions won’t require this manual configuration, as it will be directly based on class libraries. In fact, the Visual Studio experience will be optimized around class libraries, while the Functions portal will continue to use script files.
 Here's a YouTube video that walks through these steps.


Performance benefits of class libraries
Aside from the tooling experience, another advantage of using a class library is that you’ll see improvements to “cold start,” particularly when running on a Consumption plan. Cold start occurs on the first request to a Function App after it has gone idle, which happens after 5 minutes of inactivity. When a Function App starts up, it indexes all functions and compiles C# and F# scripts into an assembly in memory. So, compilation time will add to cold start time. Customers aren’t charged for cold start since function execution hasn’t started, but it does cause a delay in event processing.Use a Web Application project with a customized start action
A Web Application project is really a special kind of class library, which means it produces an executable .dll as the build output. To enable local running and debugging, modify the start action of the web project to launch the Azure Functions Core Tools. Here are some sample projects set up this way:- HttpTrigger sample
- CoderCards – trading card generator with blob trigger
Project setup – Visual Studio 2015 or 2017
- From the New Project dialog, choose ASP.NET Web Application (.NET Framework) with the empty site template.
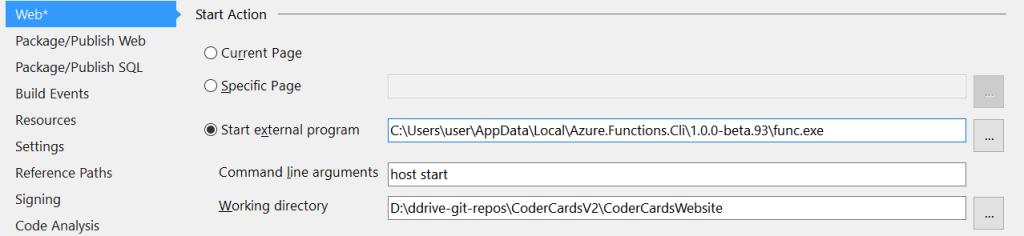
- Open the project properties. In the Web tab, choose Start External Program
- For the program path, enter the path to func.exe for the Azure Functions Core Tools.
- OR, if you've installed the Visual Studio Functions Tooling, the path will look something like
C:\Users\USERNAME\AppData\Local\Azure.Functions.Cli\1.0.0-beta.93\func.exe - If you've installed the Azure Functions Core Tools through NPM, the path will be something like
C:\Users\USERNAME\AppData\Roaming\npm\node_modules\azure-functions-core-tools\bin\func.exe
- OR, if you've installed the Visual Studio Functions Tooling, the path will look something like
- For Command line arguments, set
host start - For Working directory, specify the root of the web project on your machine (unfortunately, this isn’t set automatically.)
 Here's a YouTube video that walks through these steps.
Downloading existing function code
If you’ve already developed your functions in the Azure Portal, you can download your code and settings with the following steps.- Install the Azure Functions Core Tools from npm.
- If you’ve installed the Visual Studio Tools for Azure Functions, just add func.exe to your path from
%USERPROFILE%\AppData\Local\Azure.Functions.Cli\1.0.0-beta.93(or the latest version on your machine).
- If you’ve installed the Visual Studio Tools for Azure Functions, just add func.exe to your path from
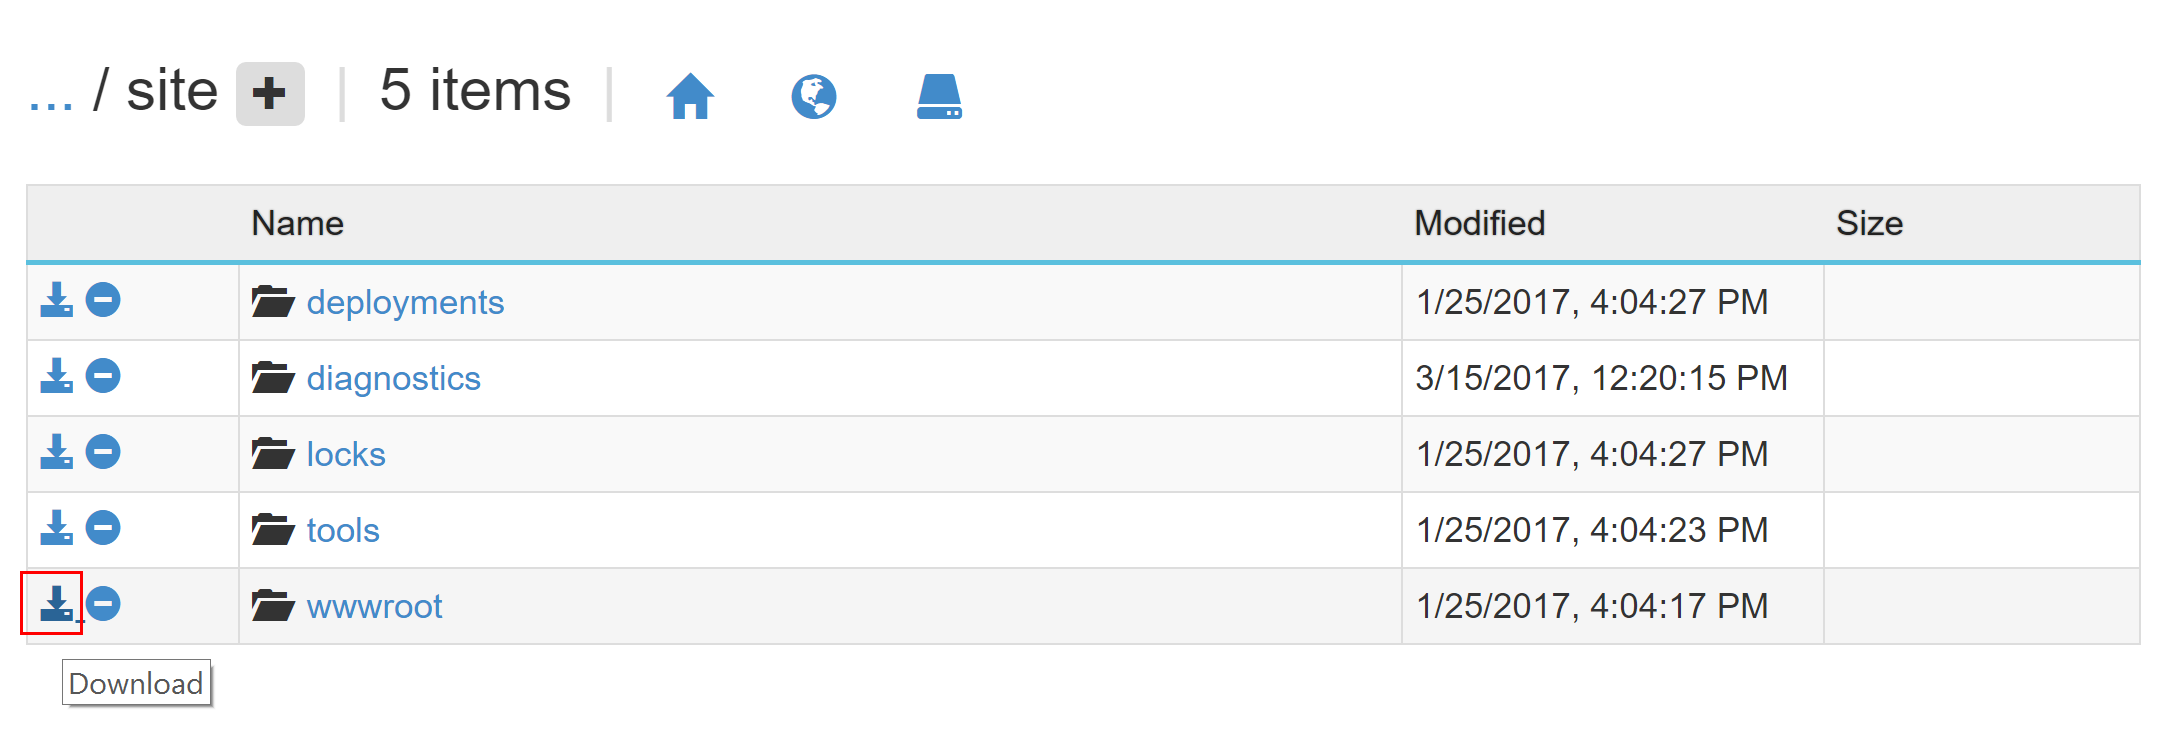
- Go to the Kudu console for your Function App in Function App Settings -> Kudu. Navigate to site and click on the download icon to the left of wwwroot (click on the animated gif below). Or, from an authenticated session, go to
https://your-function-app.scm.azurewebsites.net/api/zip/site/wwwroot/. - Unzip the file wwwroot.zip on your local machine. From that directory, run the following: [sourcecode language="plain" light="true" gutter="false"] func azure login (optional) func azure account list (optional) func azure account set func azure functionapp list func azure functionapp fetch-app-settings [name] [/sourcecode]
appsettings.json. These settings are only used locally by the Functions Core Tools. Since this file contains secrets, be sure not to check this file in to source control! (The Azure Functions Core Tools adds appsettings.json to .gitignore for you.)
Animated gif:
Project content
- Copy your downloaded files to the web project folder (including appsettings.json). Include the script files and function.json in the project.
- F5 should now work and successfully attach a debugger. But, you’re still using script files.
Converting to class files
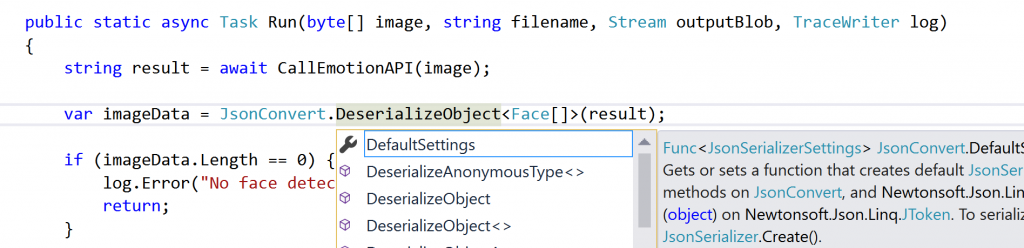
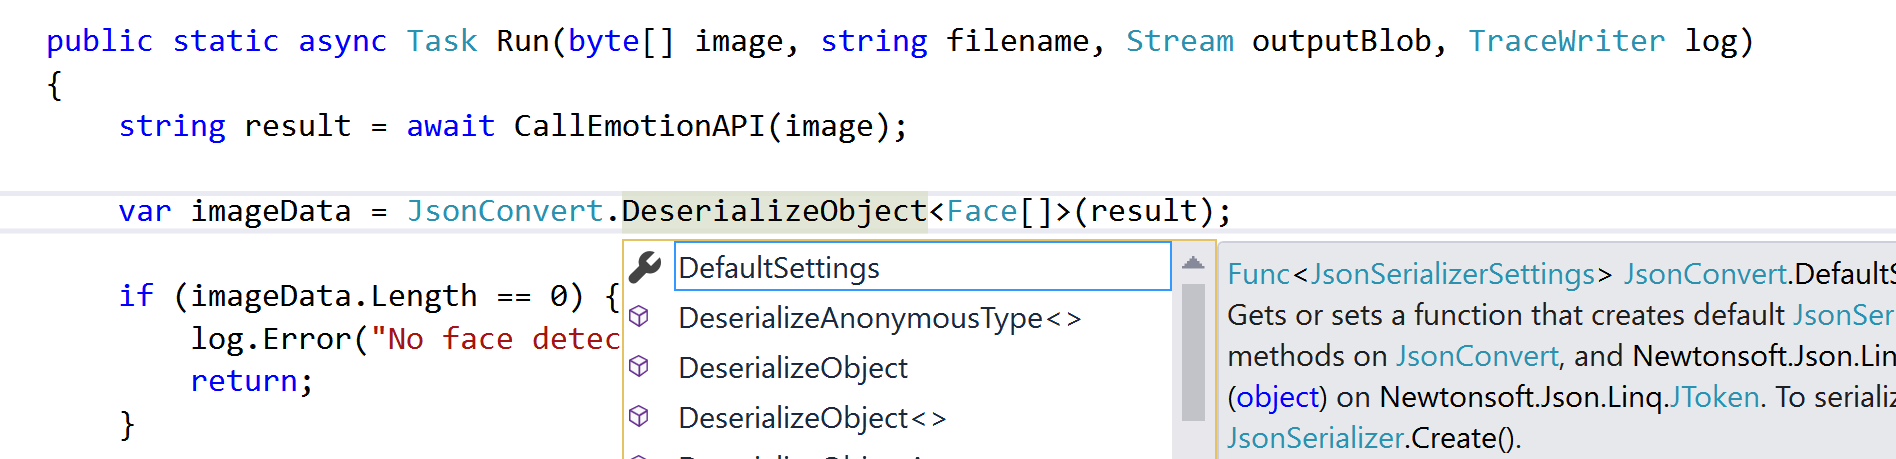
To convert script files to C# class files, most changes are straightforward. The one manual step is to modify function.json to point to a class library instead of a script file (step #7 below). The next version of the Visual Studio tooling will eliminate this manual step.- Rename .csx to .cs and add a class declaration and optional namespace declaration. Remove #load and replace #r with assembly references.
- If you’re using TraceWriter, add the NuGet package Microsoft.Azure.WebJobs and the statement:
using Microsoft.Azure.WebJobs.Host - If you're using timer triggers, add the NuGet package Microsoft.Azure.WebJobs.Extensions.
- Add NuGet package references for the packages that are automatically referenced, such as
Newtonsoft.JsonandMicrosoft.ServiceBus. - Add explicit namespace import statements if you’re using any of the automatically imported namespaces, such as
System.Threading.Tasks. - Add any other NuGet packages specified in project.json using NuGet package manager.
- For each function, modify function.json and specify the
scriptFileandentryPointproperties.scriptFileis a path to the assembly andentryPointis the qualified name of the method. Make sure that function.json is in a directory that matches the function name. See documentation on precompiled functions. [sourcecode language="plain" light="true" gutter="false"] "scriptFile": "..\\bin\\Assembly.dll", "entryPoint": "Namespace.ClassName.Run" [/sourcecode] See sample function.json.
Publish from Visual Studio
You can publish the project to a Function App using the same experience as App Service publish. The project template generates web.config, but publishing this file has no effect (it is not used by the Functions runtime). Each web project maps to one Function App. If you need to publish functions independently of one another, we recommend that you use separate Function Apps. To create a new Function App, choose Function App in the Create App Service dialog. To publish to an existing Function App, download your publish profile from the Azure Portal and import in the Visual Studio publish dialog. You can use the Azure portal to run precompiled functions and view execution logs. To make code changes, you should re-publish from Visual Studio.Publish from Azure Functions Core Tools
The Azure Functions Core Tools also provides a publish command, via the following: [sourcecode language="plain" light="true" gutter="false"] func azure login func azure functionapp publish [name] [/sourcecode]Building on the server using continuous integration and deployment
There’s another big advantage to using a web project—continuous integration with build on the server just works! Just follow the same steps as continuous deployment for Azure Functions. Your project will be built whenever there is a sync from source control. This will only work if you’re using a Web Application project, but not if you’re using a Functions Project (.funproj). To see this in action, just fork the HttpTrigger sample project and set up GitHub as your continuous integration source.Provide feedback
Ask questions in the comments section below or reach out to me on Twitter @lindydonna. For general feedback and questions about Azure Functions:- Ask product questions on the Azure Functions MSDN forum and StackOverflow, where you’ll get answers directly from the engineering team.
- Submit feature requests on feedback.azure.com or the Azure Functions GitHub repo.
- Reach out to us on Twitter via @Azure with the hashtag #AzureFunctions.