⭐Creating a model and dataset
Once you have ingested your dataset, you can train an anomaly detection model:
1. Create a new model
You can create a new model by clicking Create a new model.
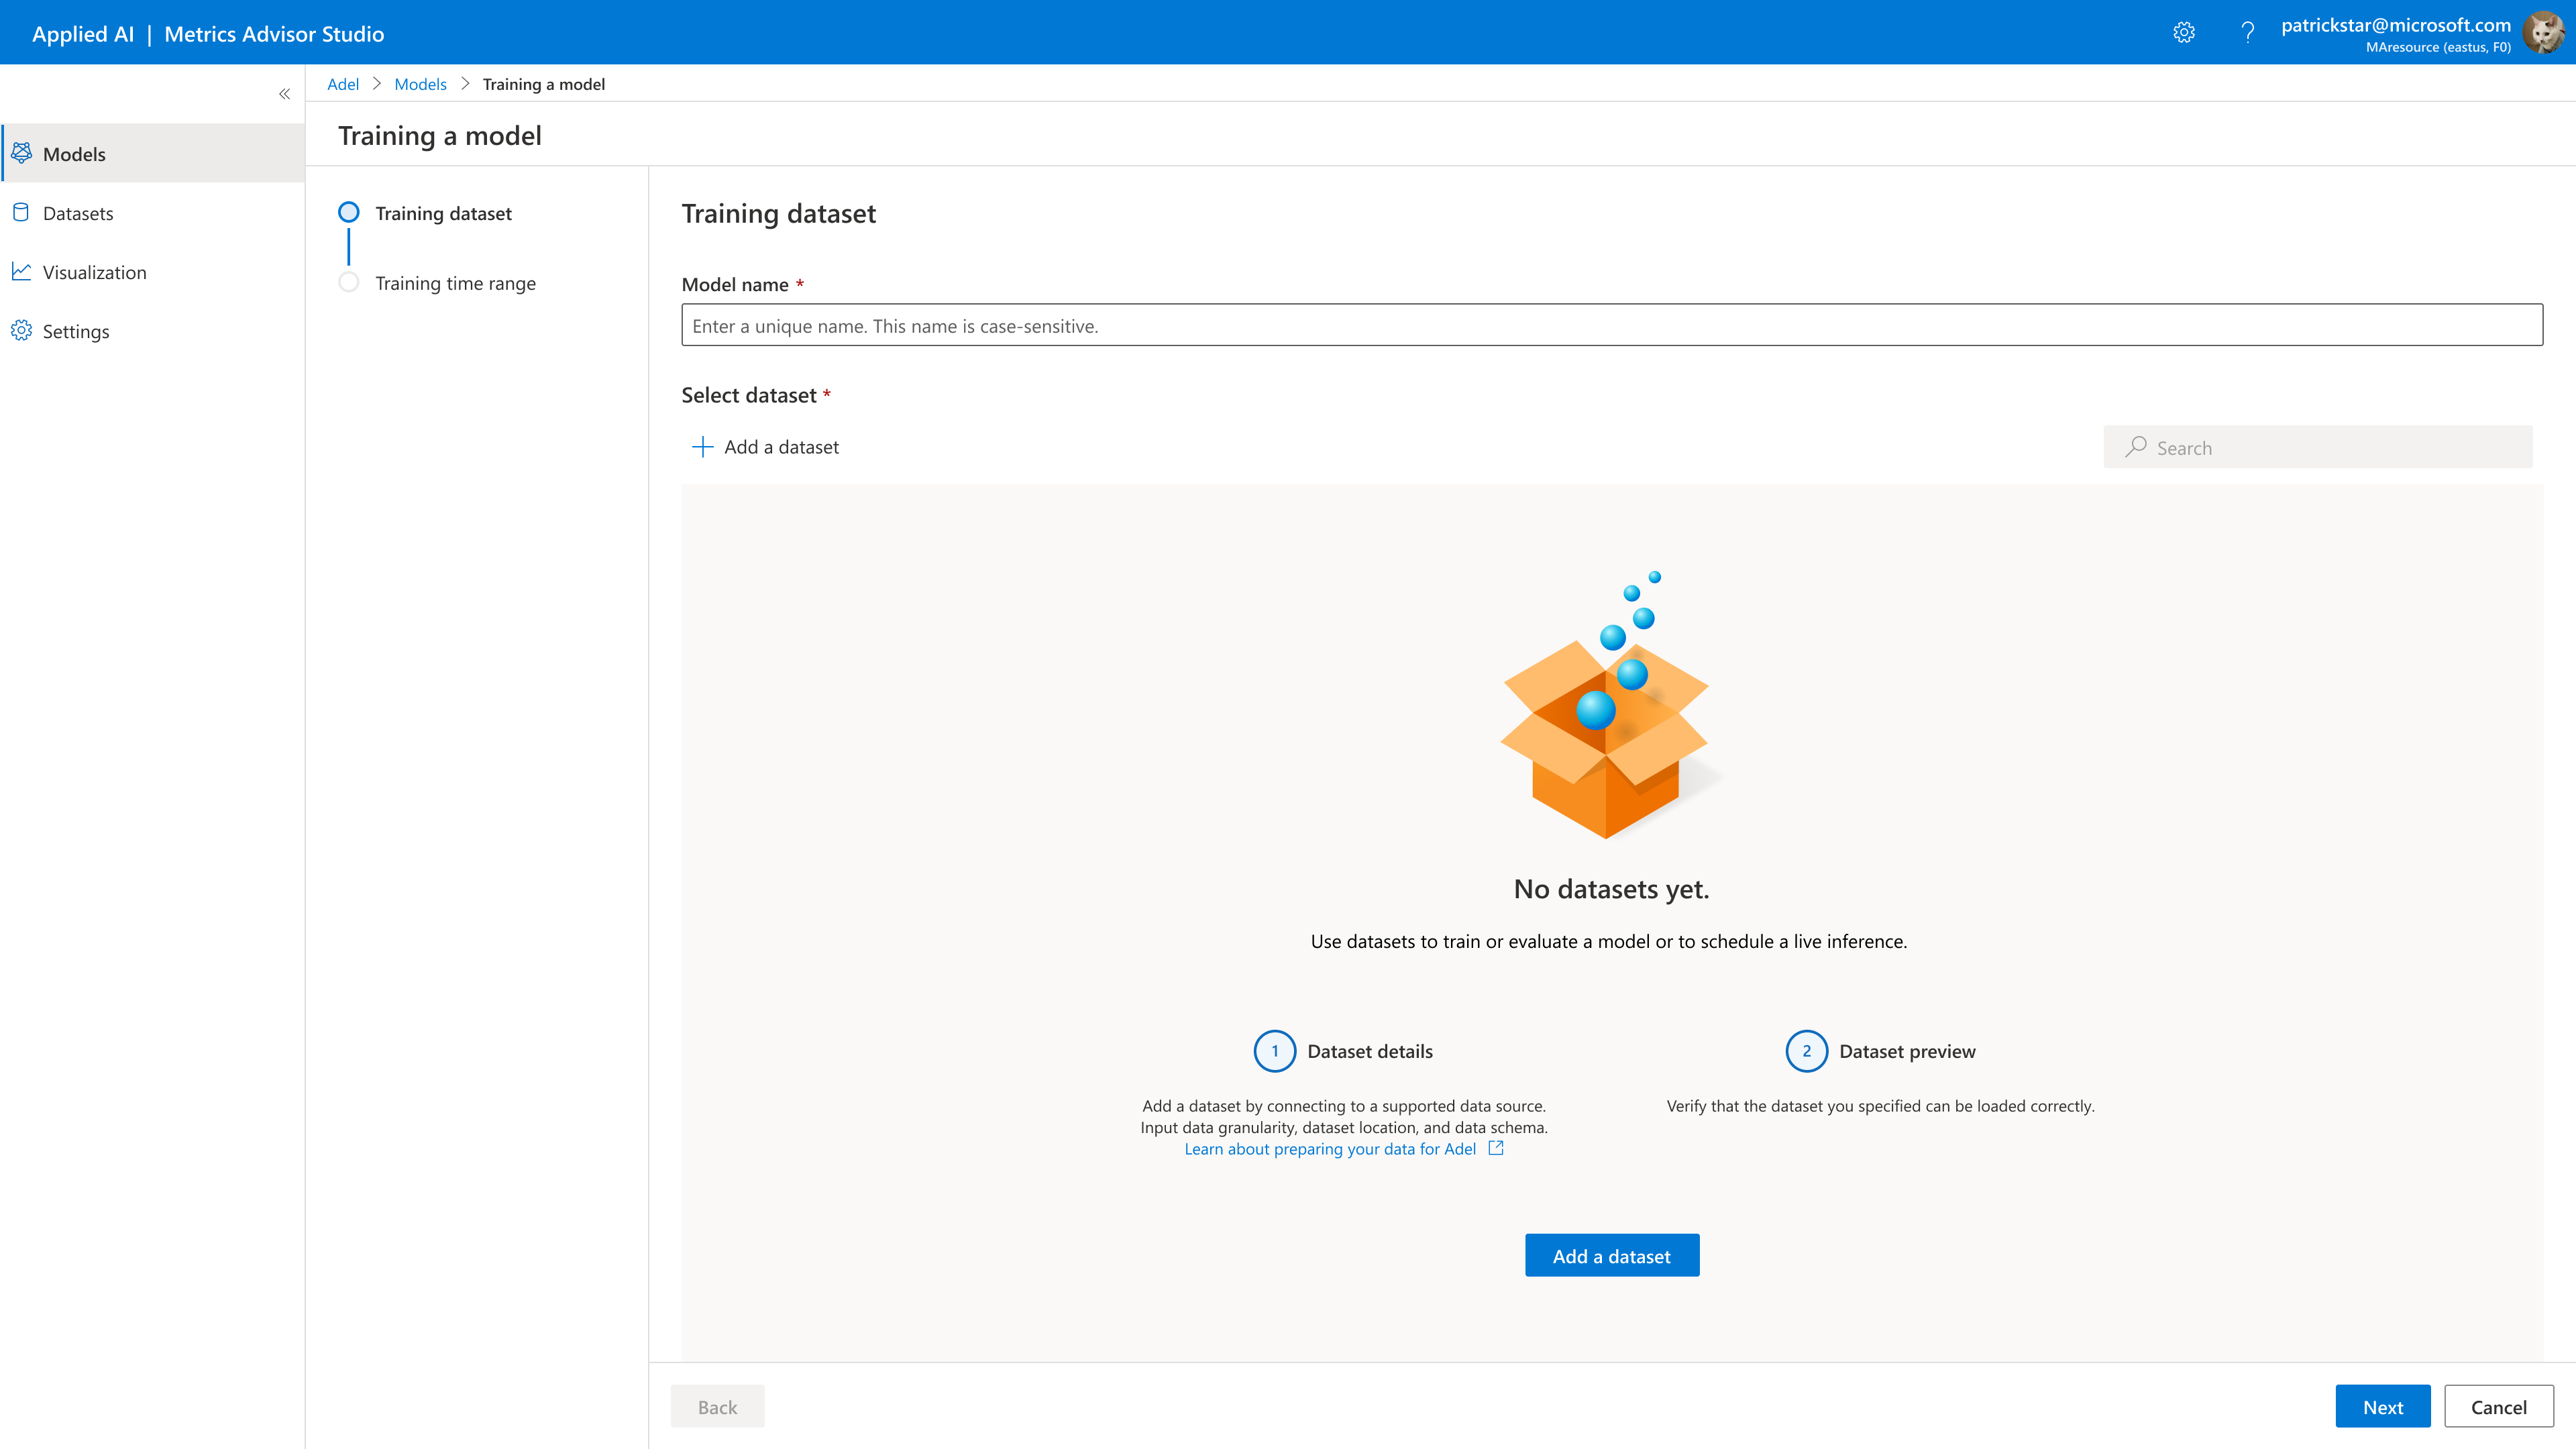
When you create a model, the model name must be unique. The model name can contain the following:
-
Max character limit: 200 characters.
-
Valid characters are: A-Z, a-z, 0-9, _(underscore), and -(hyphen). Do not start the name with an _(underscore) or -(hyphen).
-
Make sure that you don't have any duplicated names.
2. Create/Select a Dataset
Create a new dataset
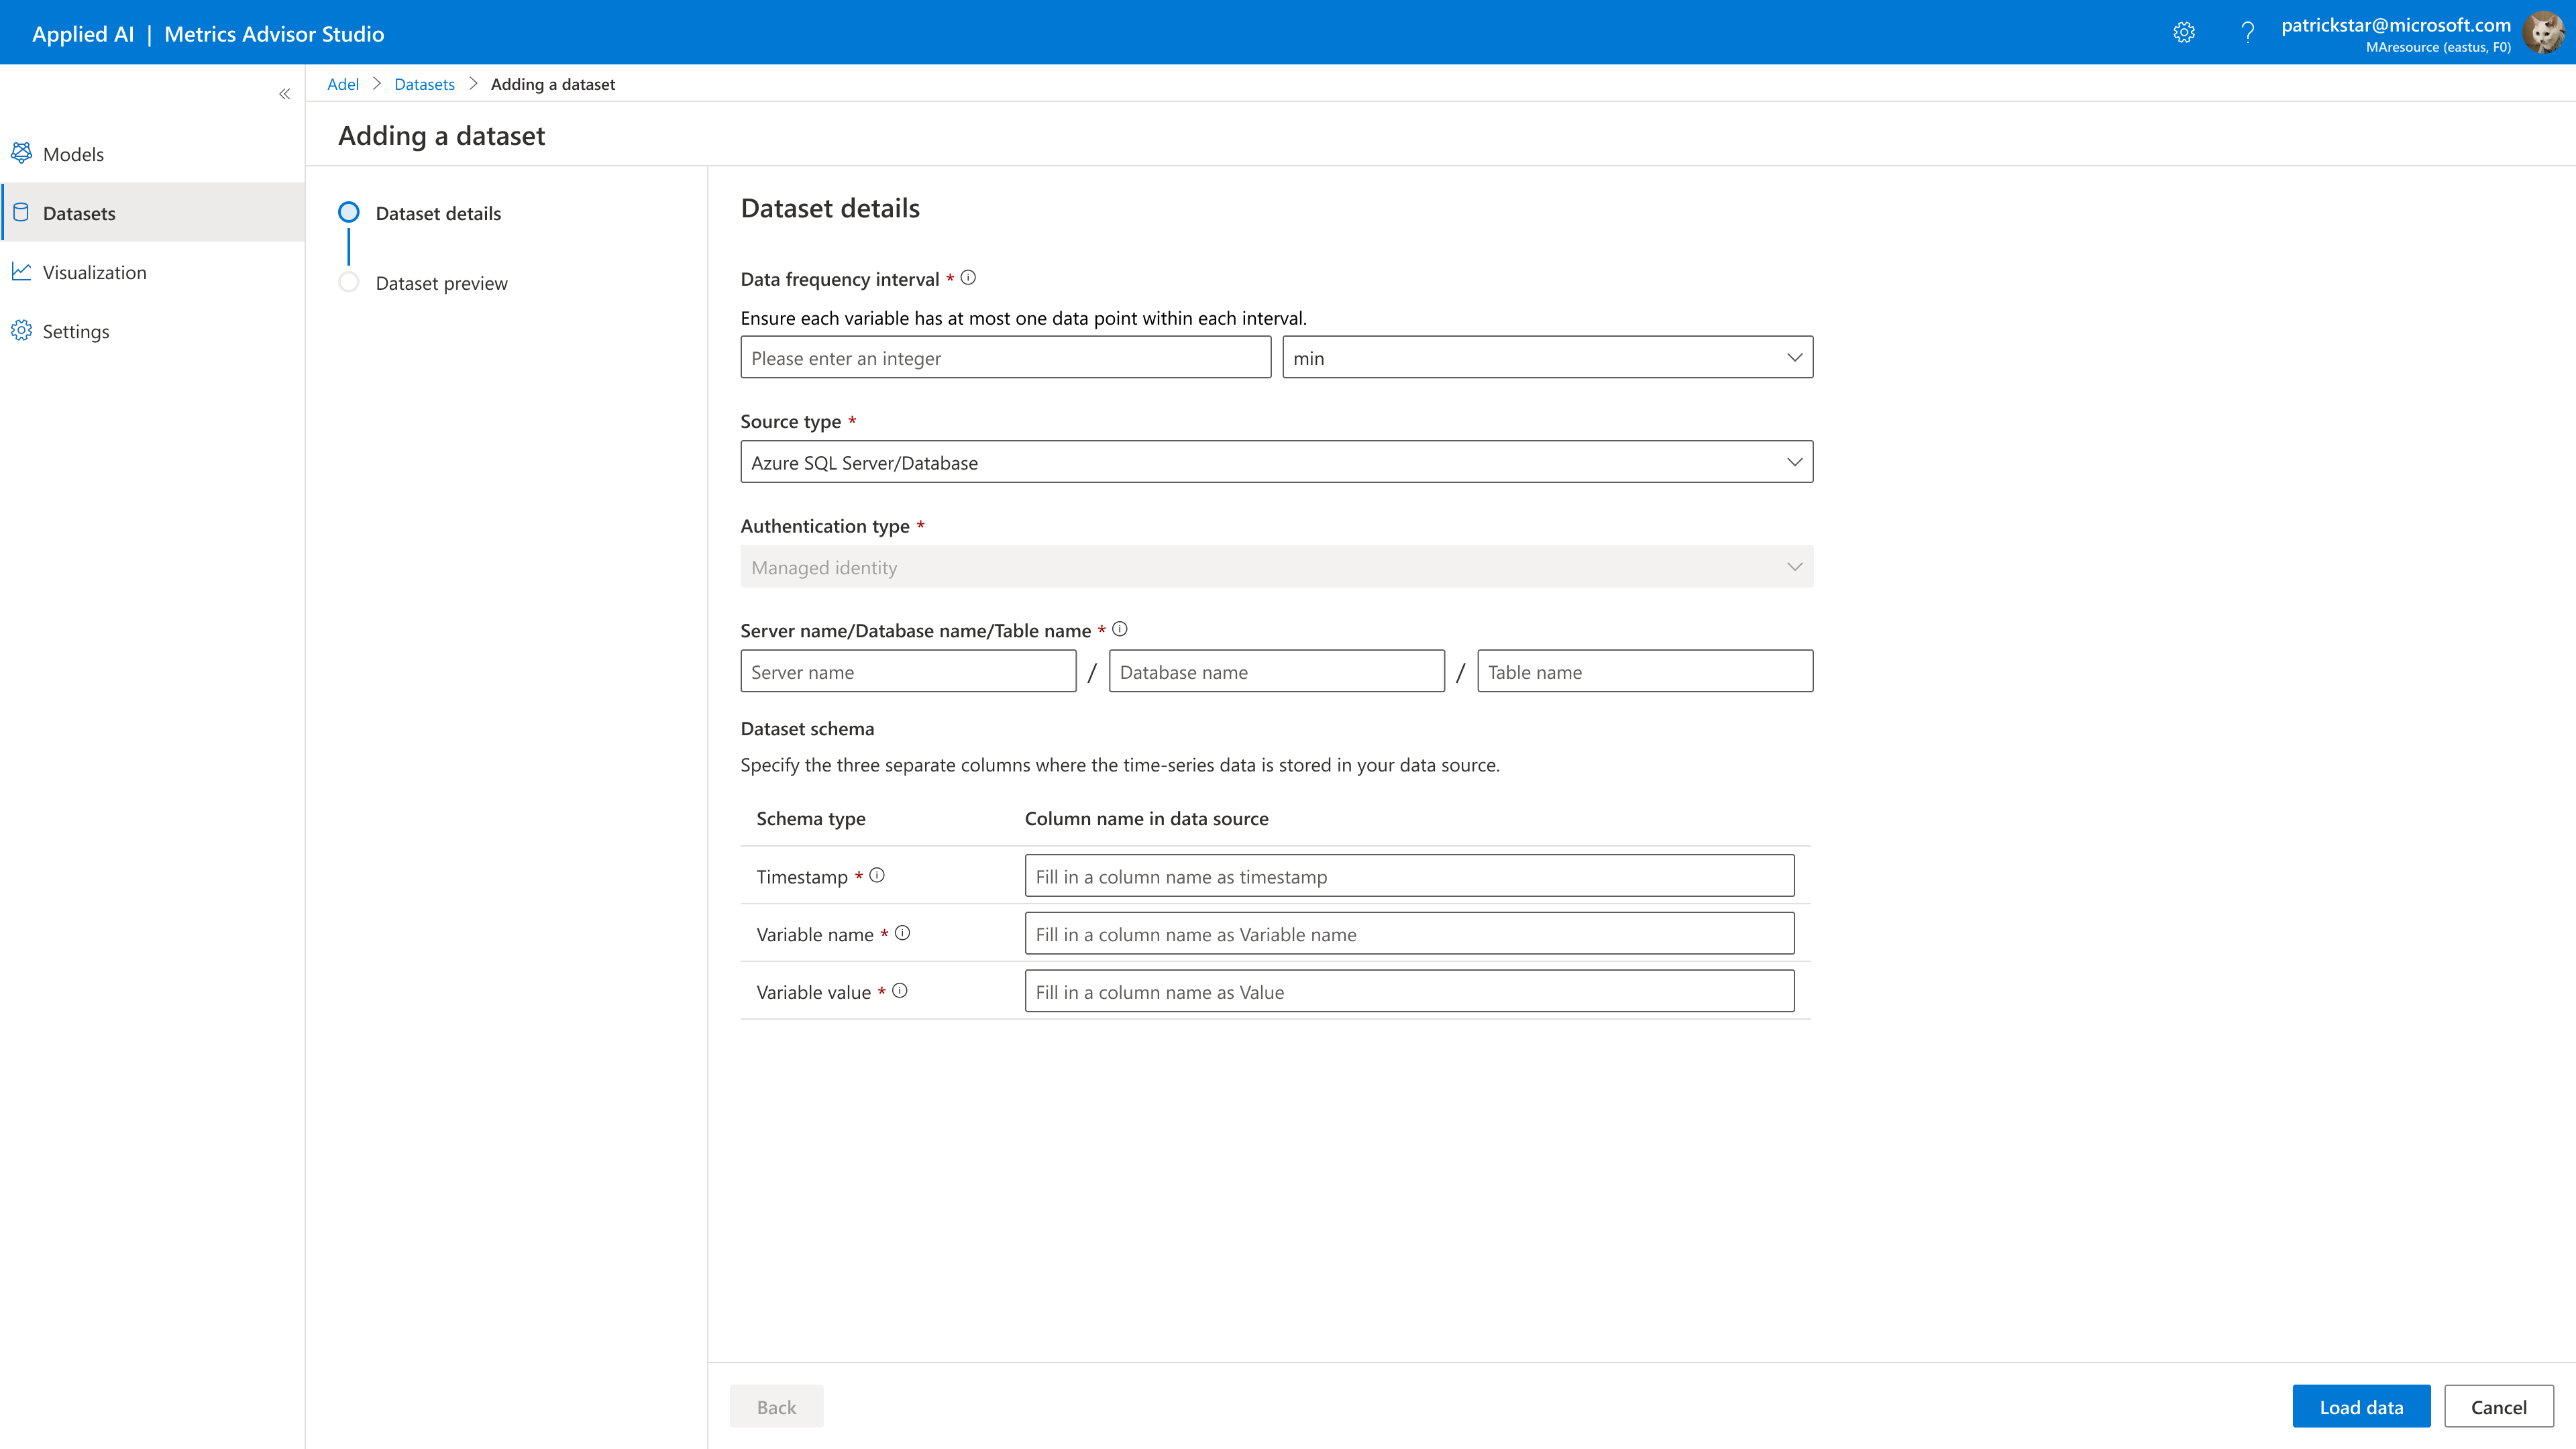
To create a dataset, click Create dataset. You'll see the new dataset window available:
Dataset Granularity is the smallest interval at which the sensor readings are recorded in your dataset. For example, suppose that data from some sensors are being recorded every 1 minute and other sensors are recording every 5 minutes. In this case, set the data frequency to an interval of 1 minute.
IMPORTANT NOTE: If your data granularity unit is minute, make sure that your data granularity is a multiple or factors of 60.
You need to fill your data granularity with the following options:
- X mins
- X hours
- X days
Data source is the type of data source where your time series data is stored. Choose Azure SQL or Azure Blob.
Authentication type : you need to assign a managed identity to Metrics Advisor for Equipment. How to assign role to a resource.
Server name/Database name/Table name: separate your SQL server name, database name and table name with a "/". All names are case-sensitive.
Data schema: Metrics Advisor for equipment accepts tables with only three columns, the time-series data from sensors on your equipment must be properly formatted in three columns. Each of the three columns in your data table/file should belong to one of the schema types below. No duplicate column headers are allowed.
- Timestamp: This is the column with time-series data. The timestamp column should contain date-time values in the yyyy-MM-ddTHH:mm:ss format and conform to ISO 8601.
- Variable name: The variable name column should contain the name of the variable for each data point.
- Variable Value: The value column should contain numeric values.
Click Load Data to complete the creation, then find the created dataset.
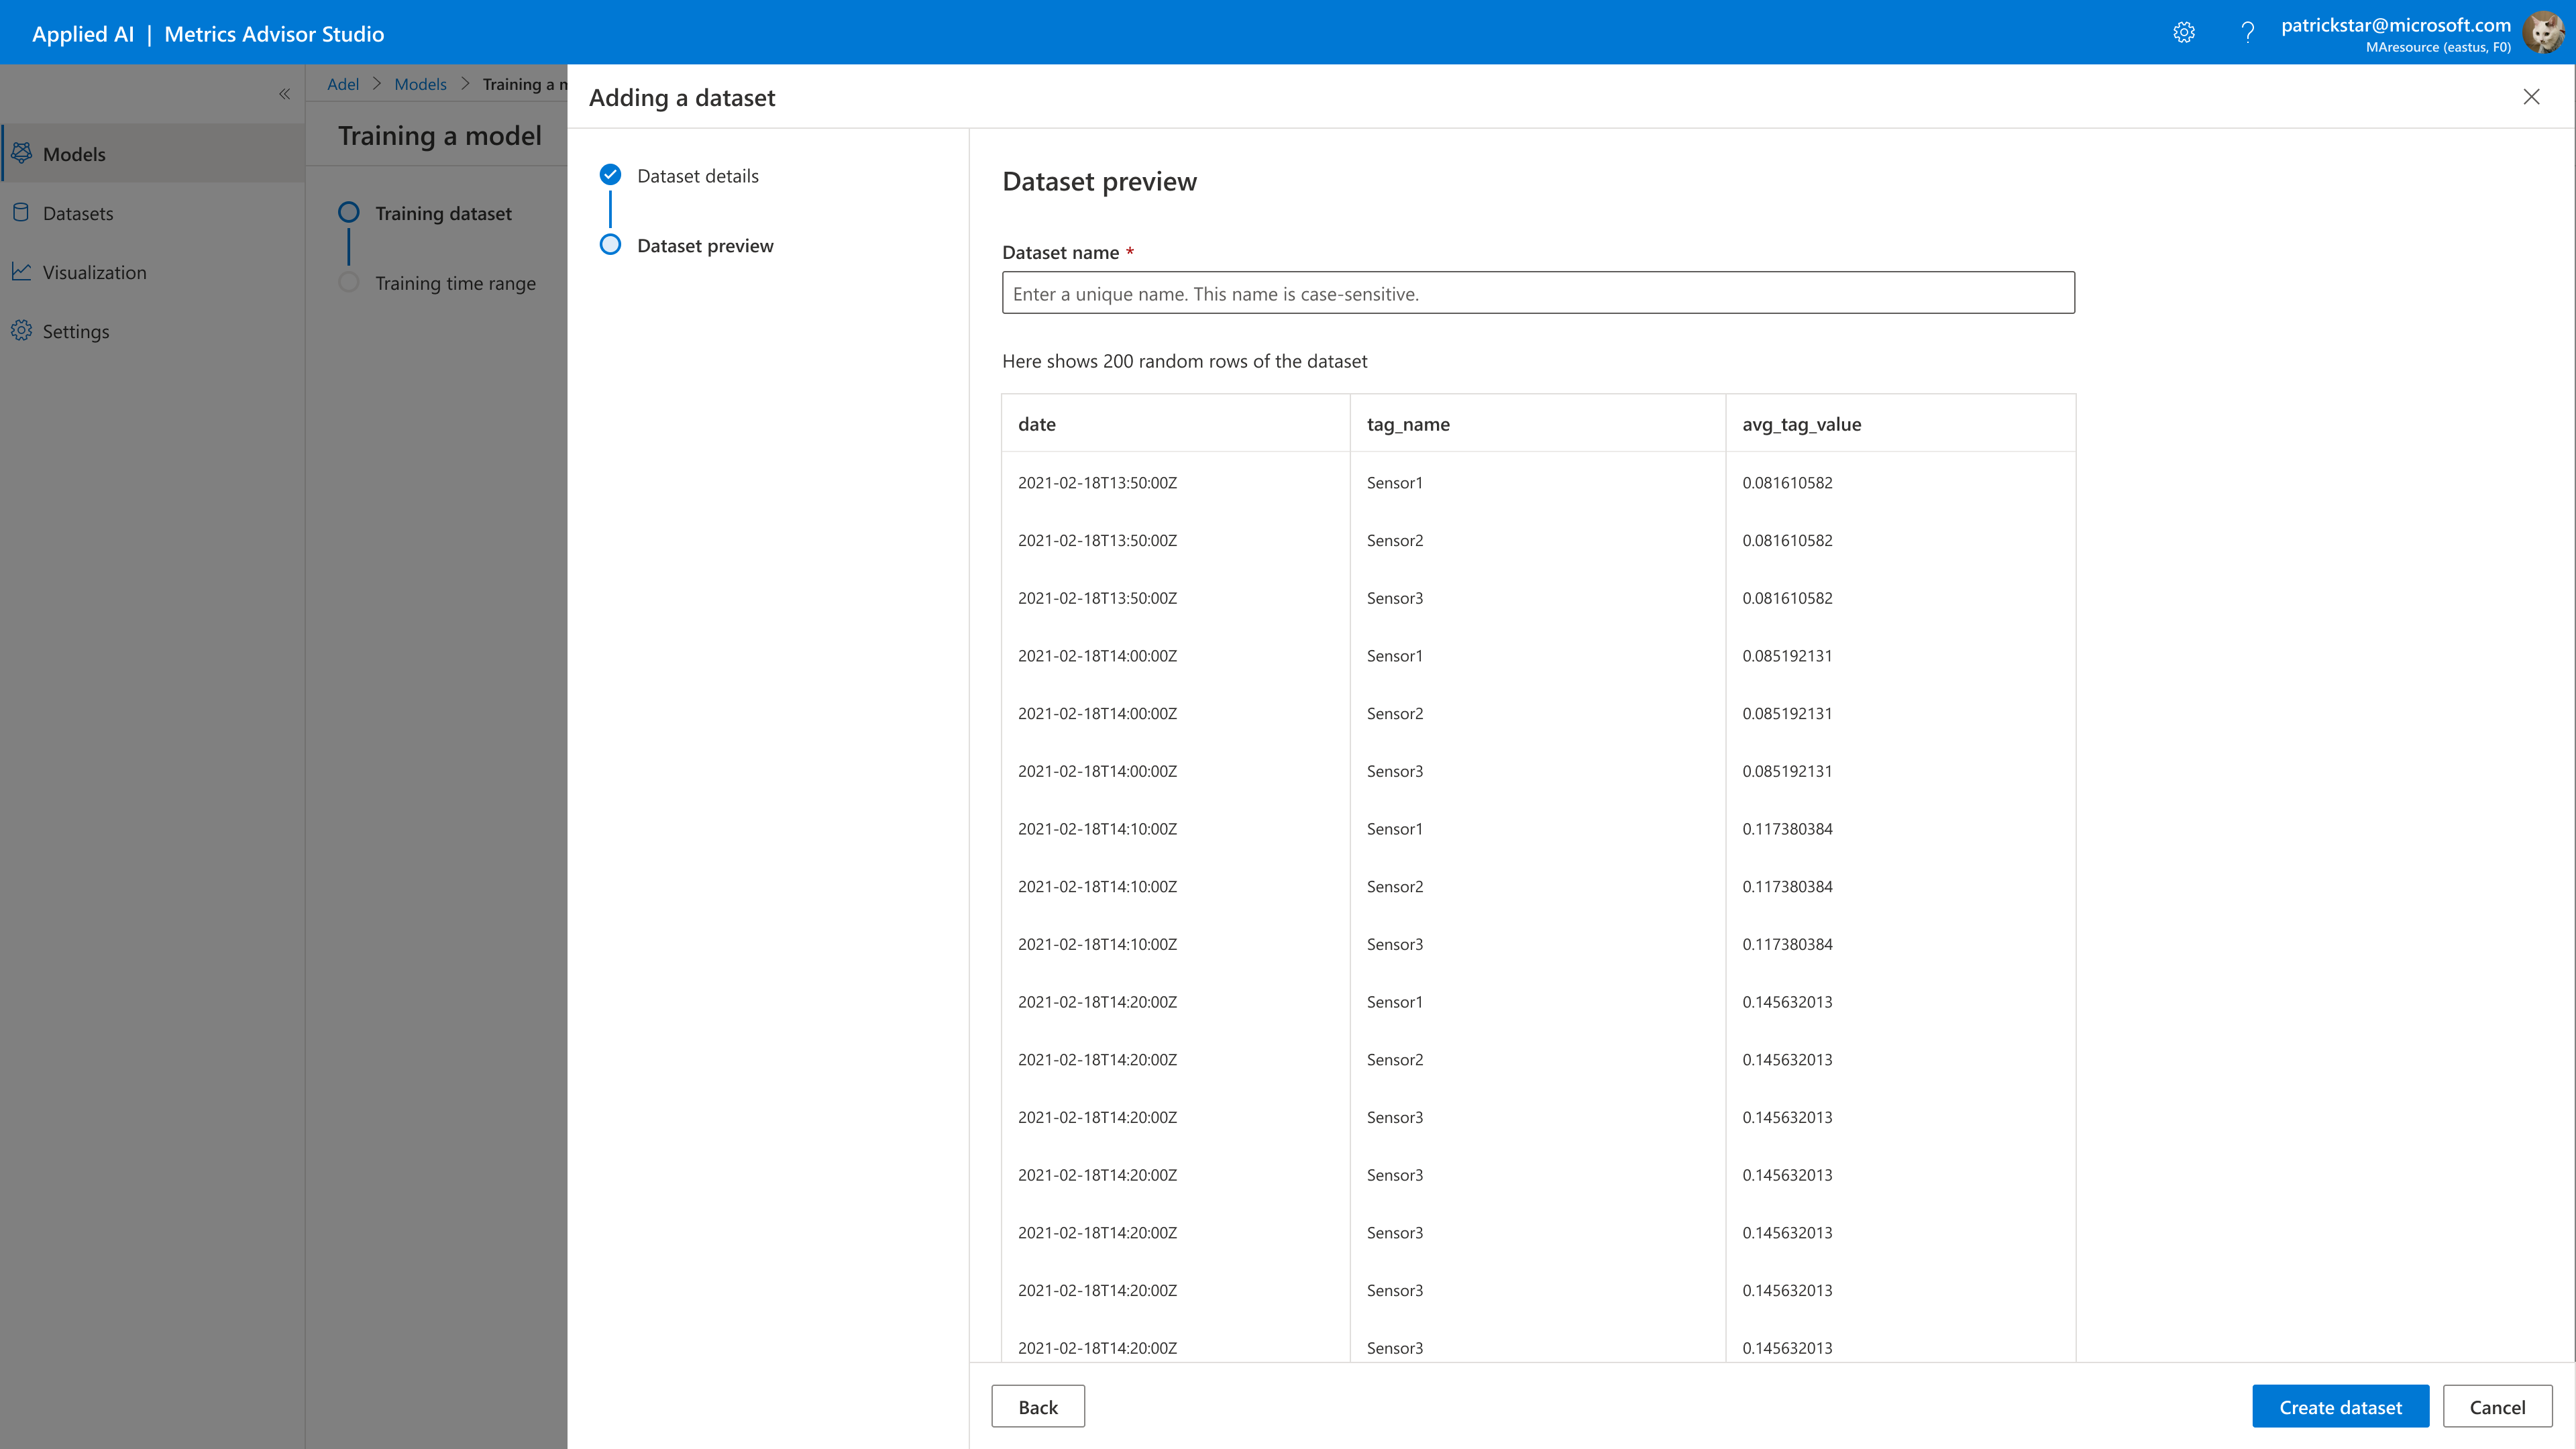
Preview dataset
Type your dataset name and verify that the dataset you specified can be loaded correctly.
-
Max character limit: 200 characters.
-
Valid characters: A-Z, a-z, 0-9, _(underscore), and -(hyphen). Do not start the name with an _(underscore) or -(hyphen).
-
Make sure that you don't have any duplicated names.
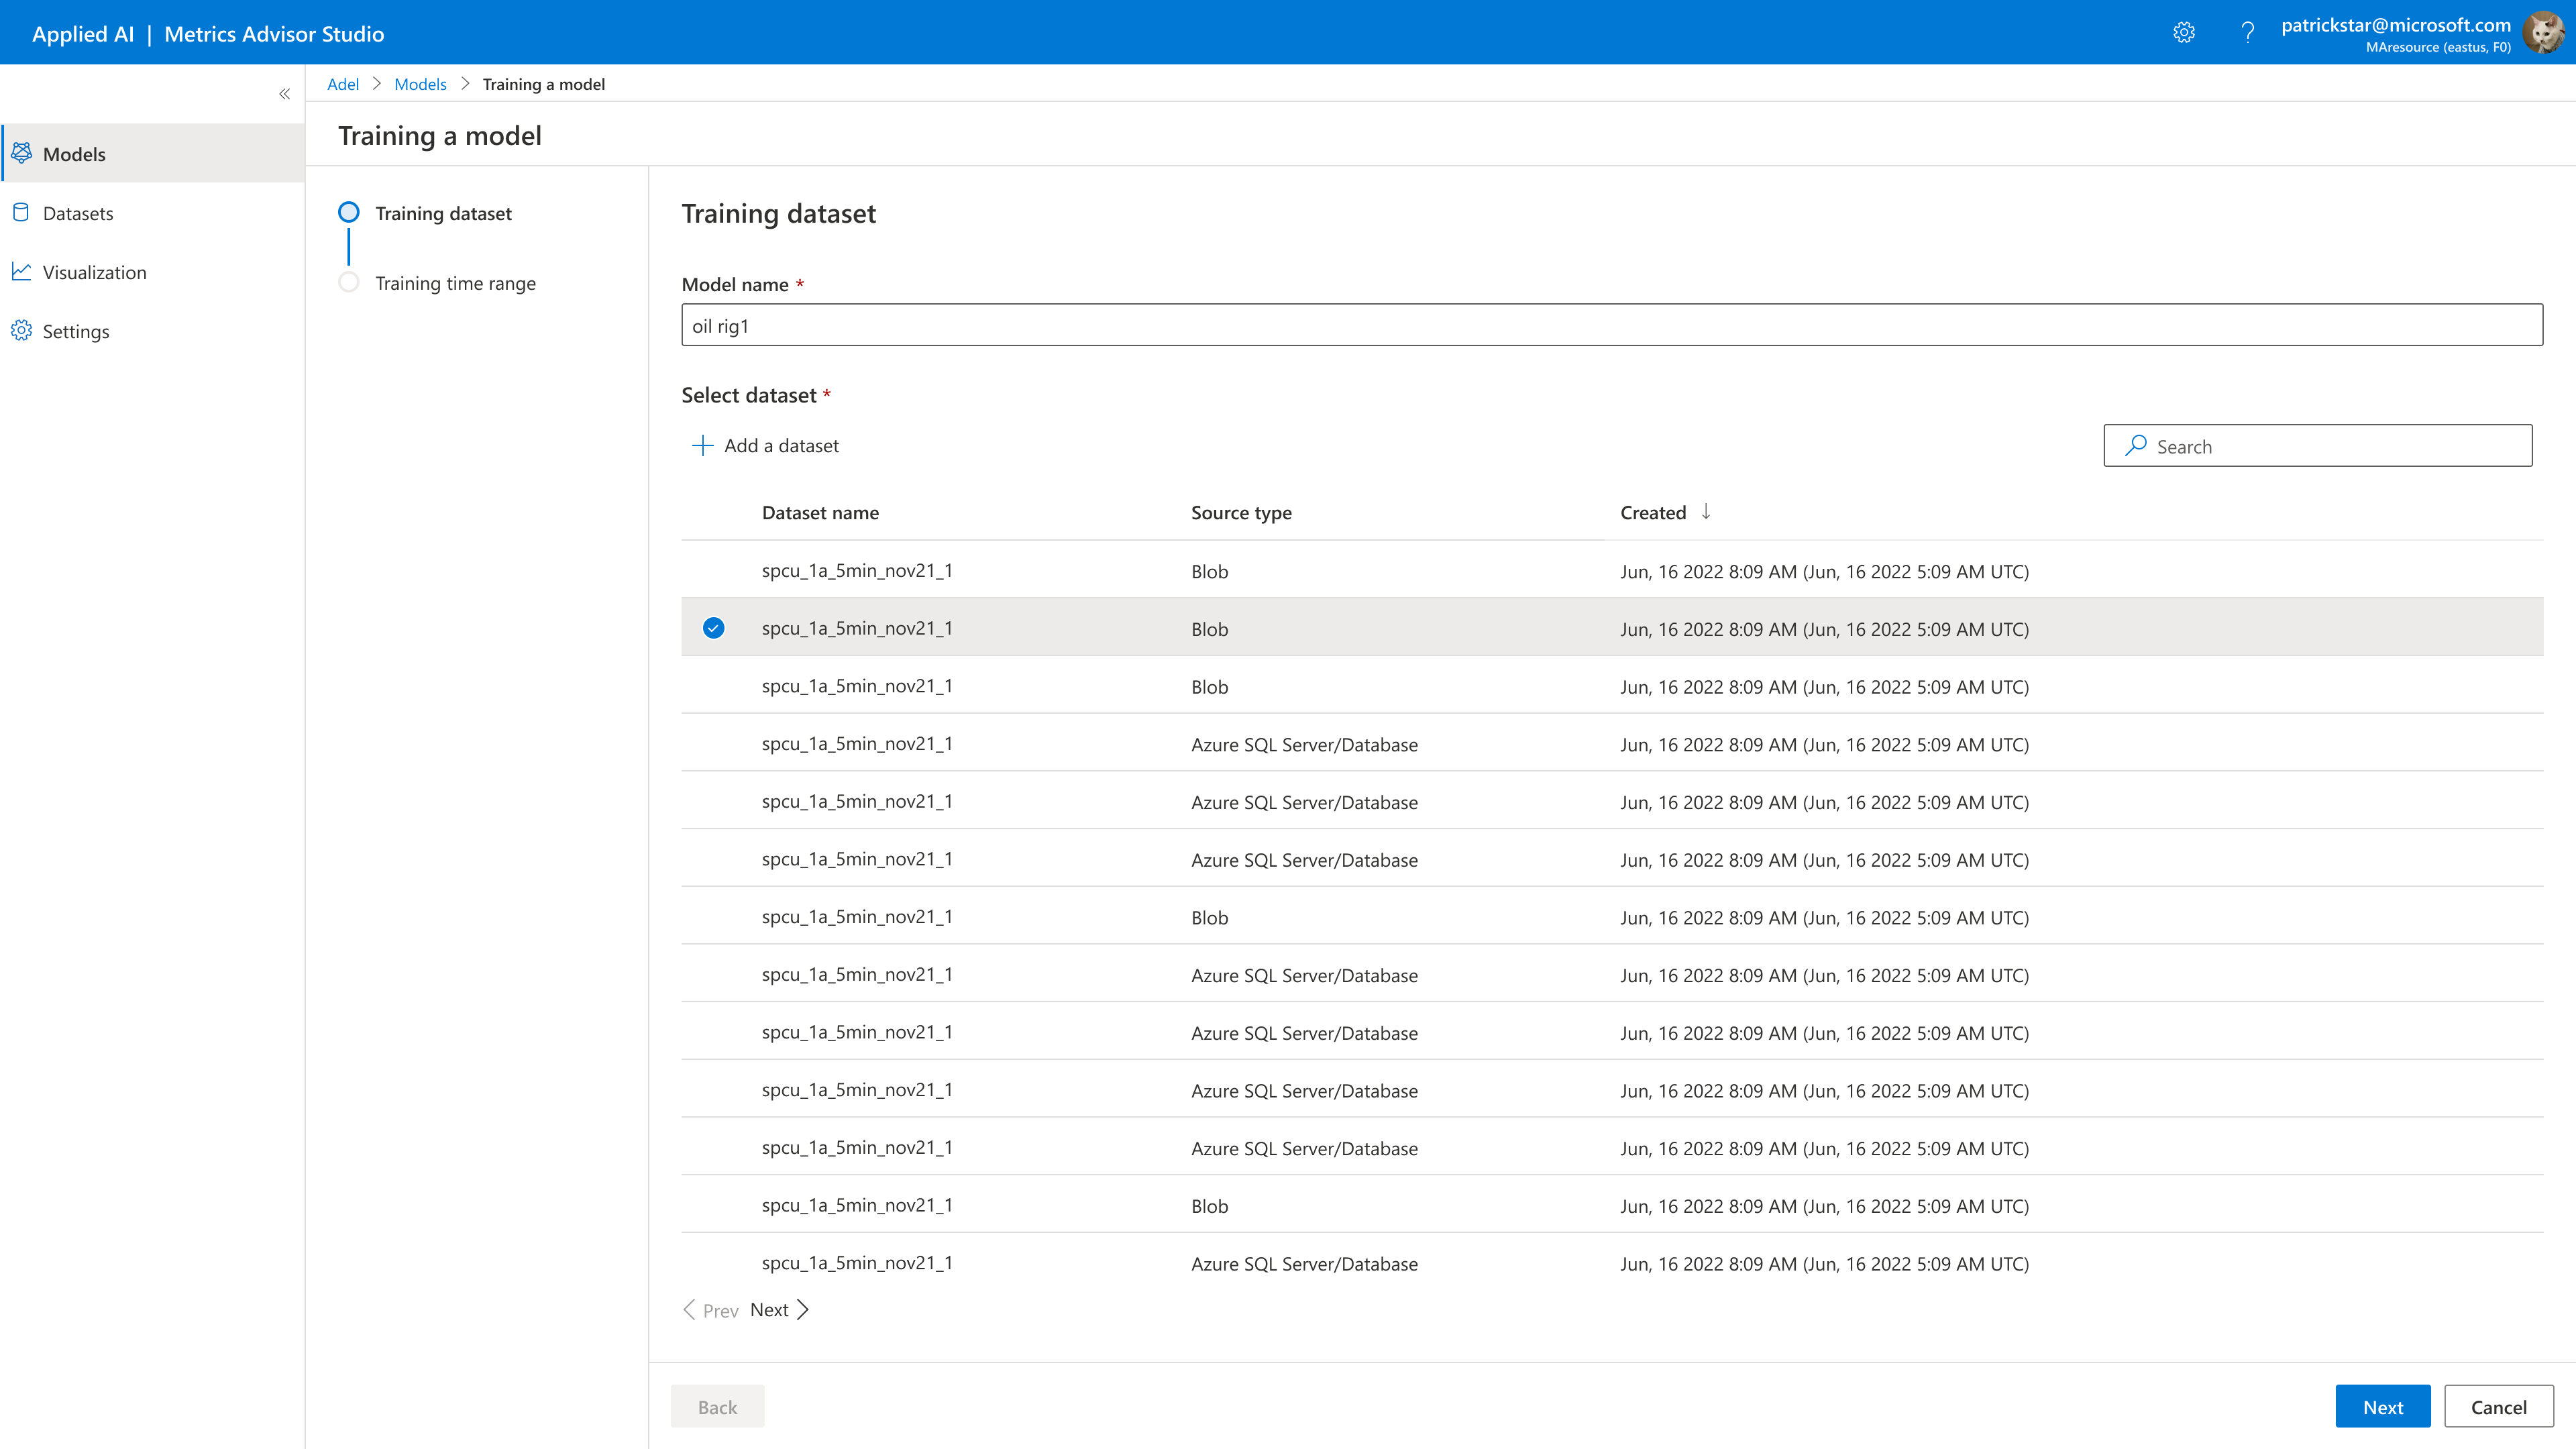
Select existing dataset
You can choose an existing dataset you created.
3. Training Parameters
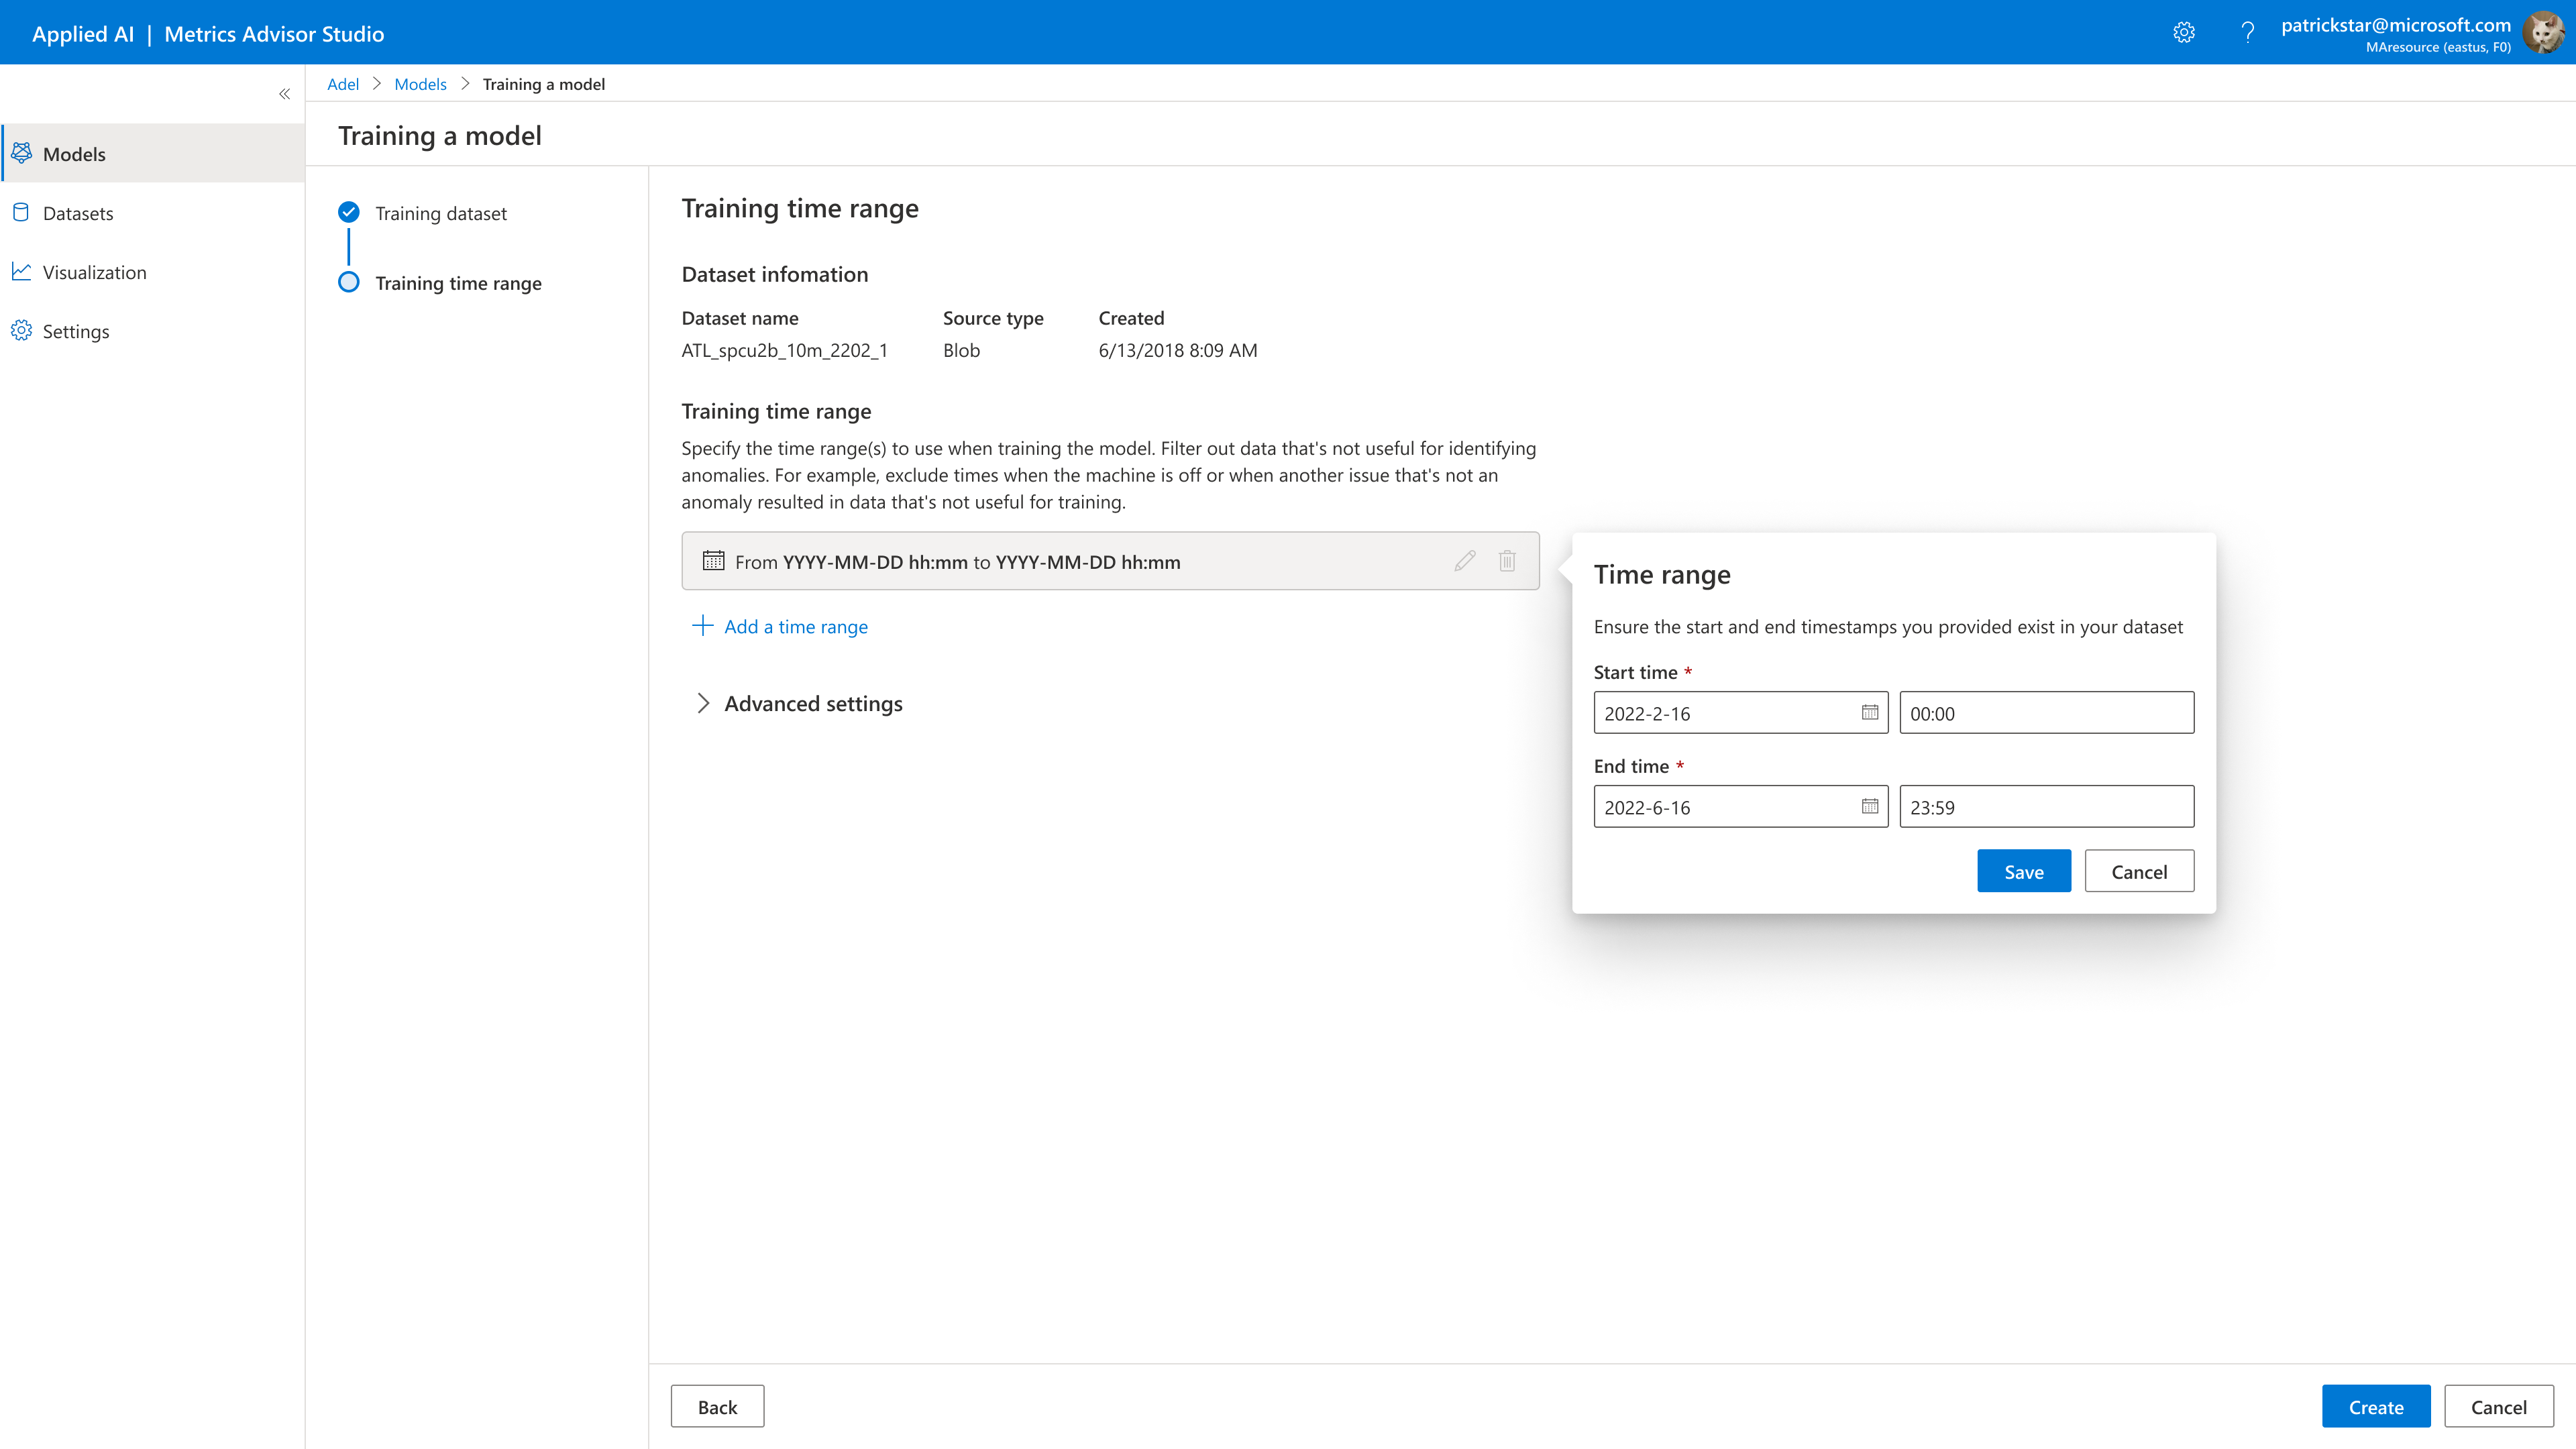
First, you'll specify the details of your model, such as its training time range and advanced settings.
-
When selecting a training time range, you'll need to specify a subset of data on which to train your model. Your specified training time ranges must fall within the first and last recorded timestamps of your dataset.
NOTE: During this process, you'll decide the balance between your training and evaluation datasets and whether to use data labels later.
-
Under the training time range, use the time selectors to select the training dates and times you want to include in your model. You could choose multiple training time ranges, especially when your machine is off or in a state where your sensors are not producing valuable data for identifying anomalies; you can filter out that date.
4. Advanced settings
Optionally, There are several advanced settings to enable data ingested in a customized way:
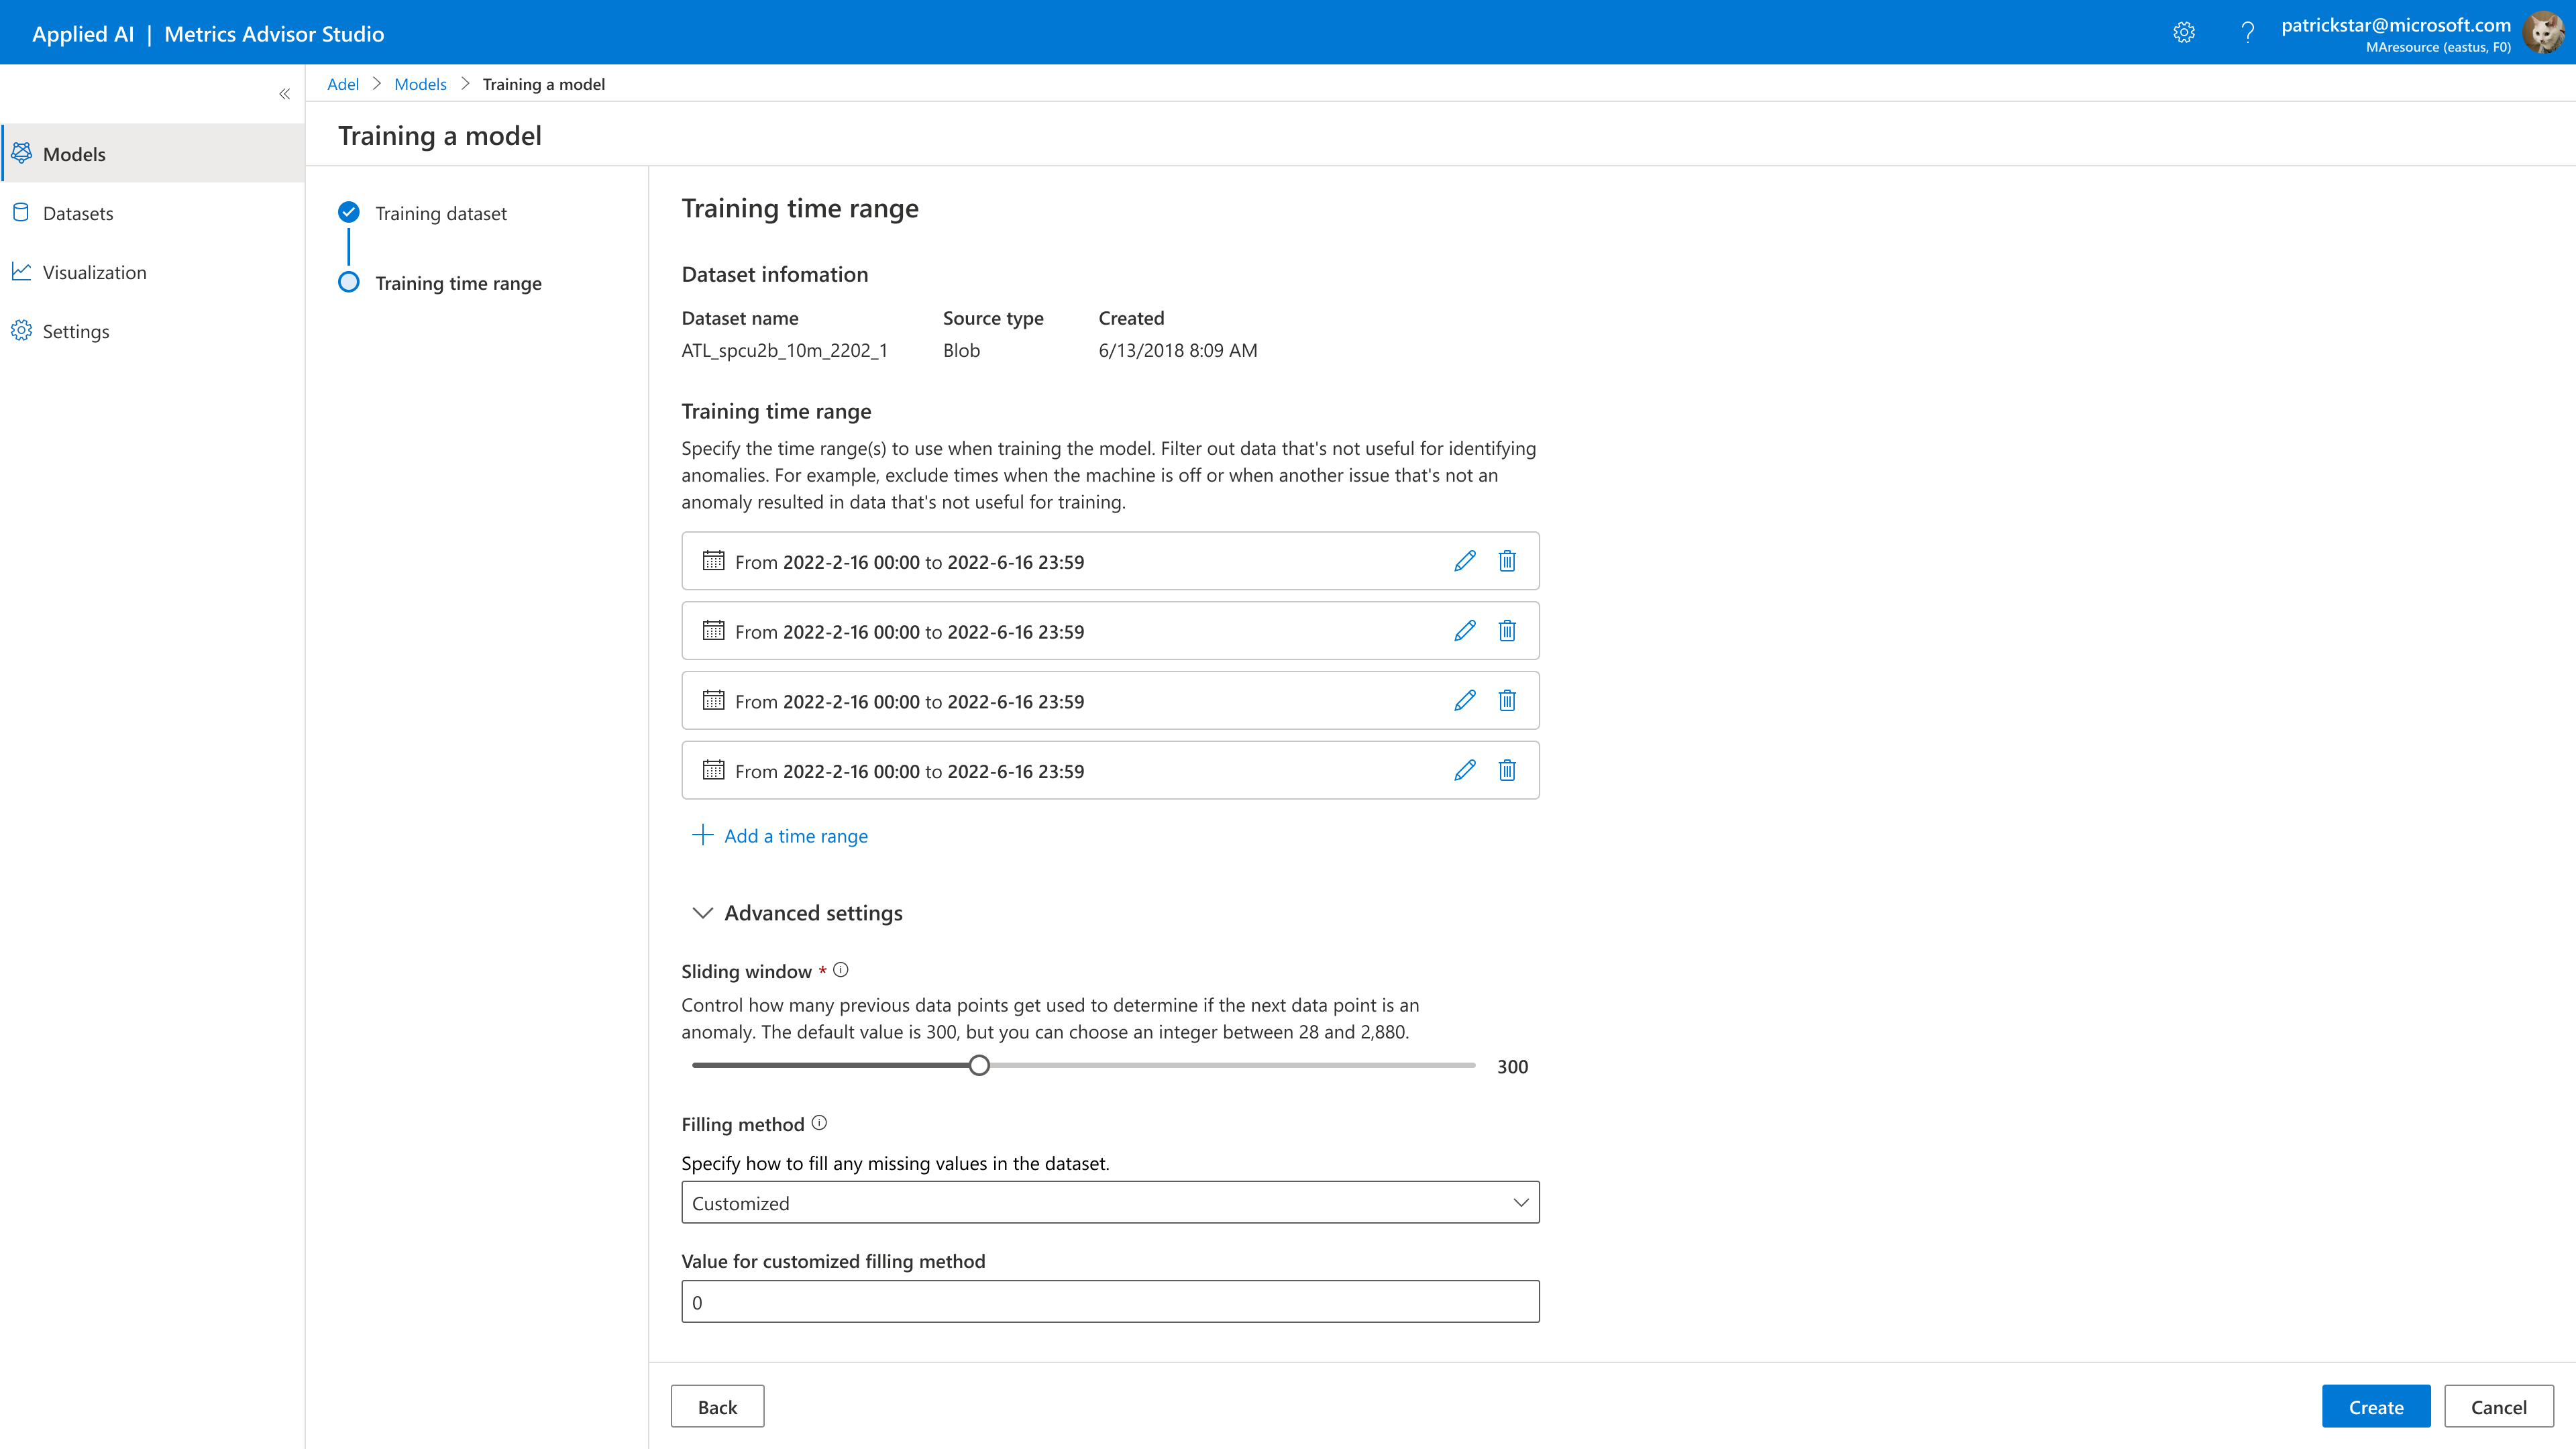
Sliding Window: How many data points are used to determine anomalies. Our model takes a segment of data points to decide if the following data point is an anomaly. The length of this segment is a sliding window. The default value is 300, but you can choose an integer between 28 and 2,880.
IMPORTANT NOTE: Please keep two things in mind when choosing a
sliding Windowvalue:
- When your data is at a high frequency (small granularity) like minute-level or second-level, you could set a relatively higher sliding window value.
- Too large of a window can slow down performance without improving accuracy. Too small of a window makes it harder to detect anomalies. For data with frequency at the minute or second level, it's safer to set a higher value here.
Missing data filling method:we will automatically fill in missing data. Options are Linear, Previous, Subsequent, and Custom, and the default value is Linear. If you choose custom, you must fill the value for the custom filling method. However, if too much original data is missing, it might affect your results.
Click Create.
IMPORTANT NOTE: Once the training is triggered, you cannot stop or cancel the training during the process.
5. Training model detail
Once start the training process. You will see a progress status update every one minute until the training is successful. Depending on the dataset used, the training can take up to multiple minutes or hours.
Click the model name, and then the Training model detail tab allows you to review model details such as the model name, the dataset, and the training time range.
There are three kinds of training model status.
| Status | Description |
|---|---|
| Running | Training is in processing. |
| Completed | Training is done and you can start inference. |
| Failed | Training is failed for some reason. |
You can click the View details button for the error messages when you find the training model status gets to Failed.
Once your model is trained, you can either check the results or configure an evaluation or inference scheduler.
Delete your models
To delete a model, you need to complete the following steps:
On the Training detail page, click ‘Delete'.

IMPORTANT NOTE:
- If training is running: Training must be completed before scheduling an inference and creating an evaluation.
- If training failed: Can't schedule an inference and evaluation on models with failed training.
6. Datasets lists and dataset detail
Delete your dataset
To delete a dataset, you need to complete the following steps:
- On the datasets list page, click ‘Delete' on the data feed.
- On the dataset details page, click ‘Delete'. Removing a dataset means it won't be available to training, evaluation, or inferences anymore. This doesn't delete the data in the source system and it can't be undone.
IMPORTANT NOTE:
Delete error will happen because datasets used in training, evaluation, or inference. Delete the dependencies first, then try again.
