Using Datadog as a Sidecar Extension for Azure App Service on Linux
Monitoring your applications is crucial for performance and reliability. With Datadog as a sidecar extension, you can seamlessly collect logs, metrics, and traces from your application—without modifying your app code.
In this blog, we’ll explore how to set it up in just a few steps. Let’s get started!
Configuring the Application to Use Datadog
For Code-Based Applications
If you’re deploying a code-based application, you’ll need to setup a startup script to download and initialize the Datadog tracer when the application starts. We have a sample .NET app here. You can use this sample or follow the steps for your own application.
1. Create a Startup File
For .NET applications, create a startup.sh script in the same folder as your application. This script ensures the Datadog tracer is downloaded and extracted before launching your app:
#!/bin/bash

# Create directories for Datadog tracer and .NET logs
mkdir -p /datadog/tracer
mkdir -p /home/LogFiles/dotnet

# Download the Datadog tracer tarball
wget -O /datadog/tracer/datadog-dotnet-apm-2.49.0.tar.gz https://github.com/DataDog/dd-trace-dotnet/releases/download/v2.49.0/datadog-dotnet-apm-2.49.0.tar.gz

# Navigate to the tracer directory, extract the tarball, and return to the original directory
pushd /datadog/tracer
tar -zxf datadog-dotnet-apm-2.49.0.tar.gz
popd

dotnet /home/site/wwwroot/<yourapp>.dll
Ensure this startup.sh file is included in your application’s root directory. If you are using the sample application, we have a startup file available here
2. Deploy to Azure App Service
Follow these steps to deploy your application with Datadog:
-
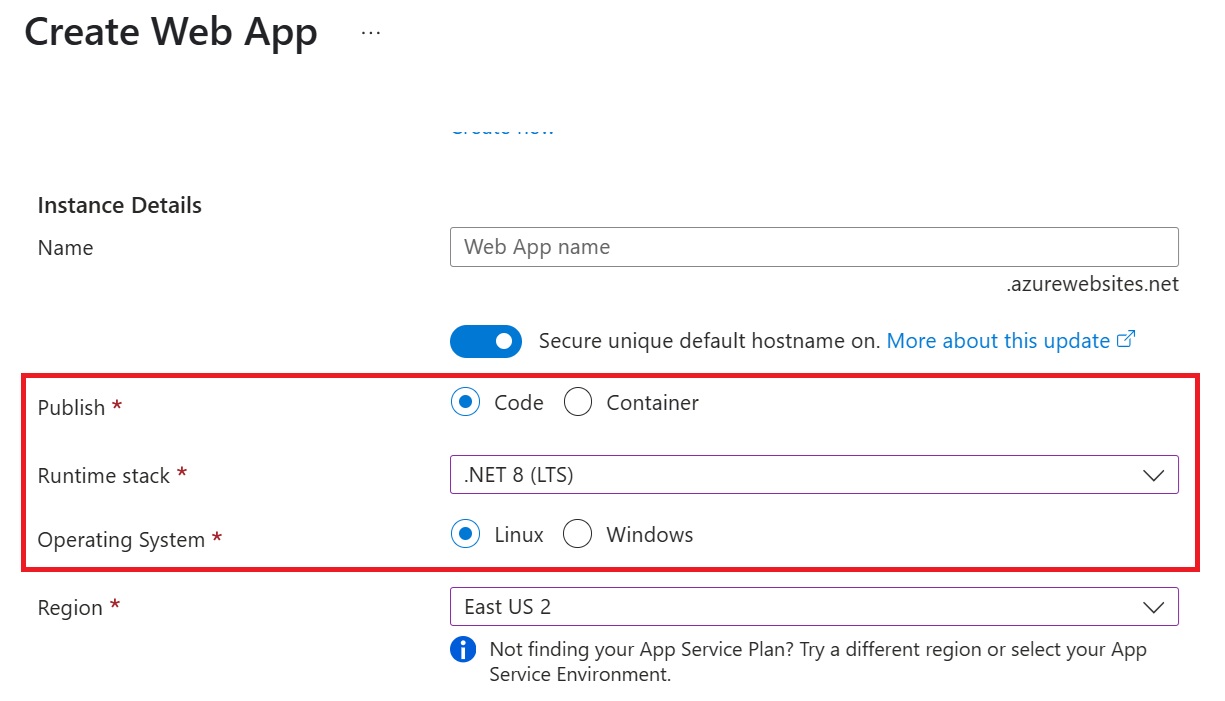
Create a .NET 8 Linux App Service in the Azure Portal.
- Set up CI/CD with GitHub to automate deployments. You can follow the GitHub Actions guide for Azure App Service.
Note: Sidecars for code-based applications currently support only GitHub Actions. Other deployment methods will be available soon.
-
Push your application code to your GitHub repository.
-
In the Azure Portal, go to Your Web App → Configuration and set the Startup Command to:
/home/wwwroot/startup.sh
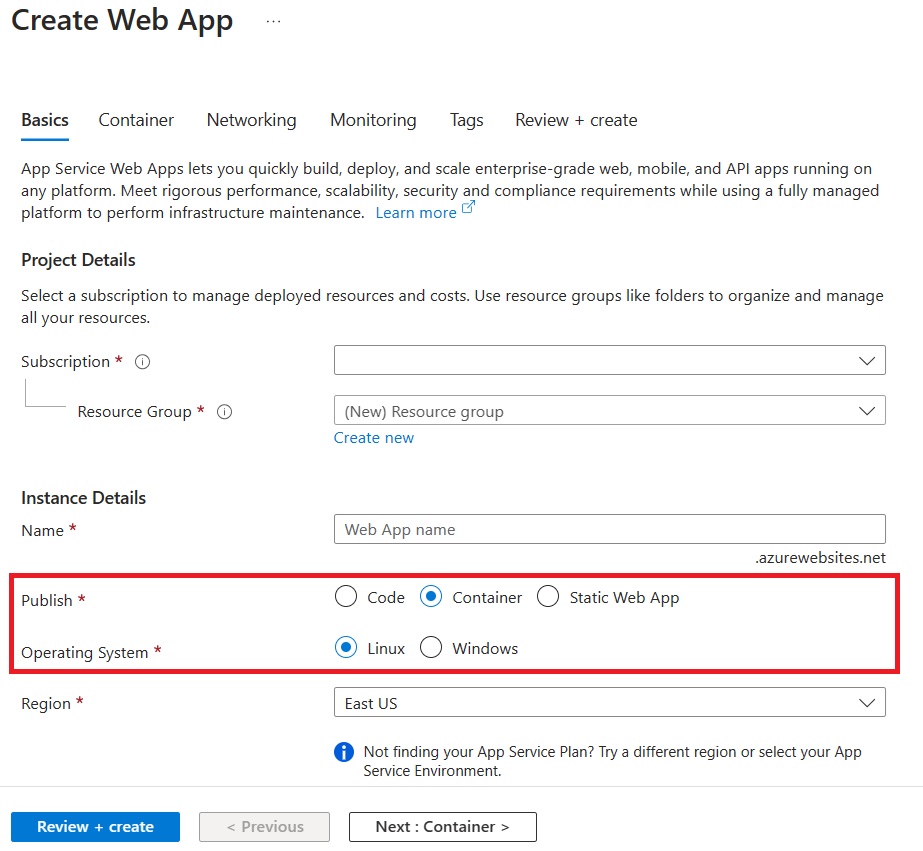
For container-based applications
-
Use the Dockerfile in your repository to build a container image of your application. In the Dockerfile, download and extract the Datadog tracer. We have a sample Dockerfile here
-
Build the image and push it to your preferred container registry, such as Azure Container Registry, Docker Hub, or a private registry.
-
Go to the Azure Portal and create a container-based App Service.
On the Container tab, make sure that Sidecar support is Enabled.
Specify the details of your application image.
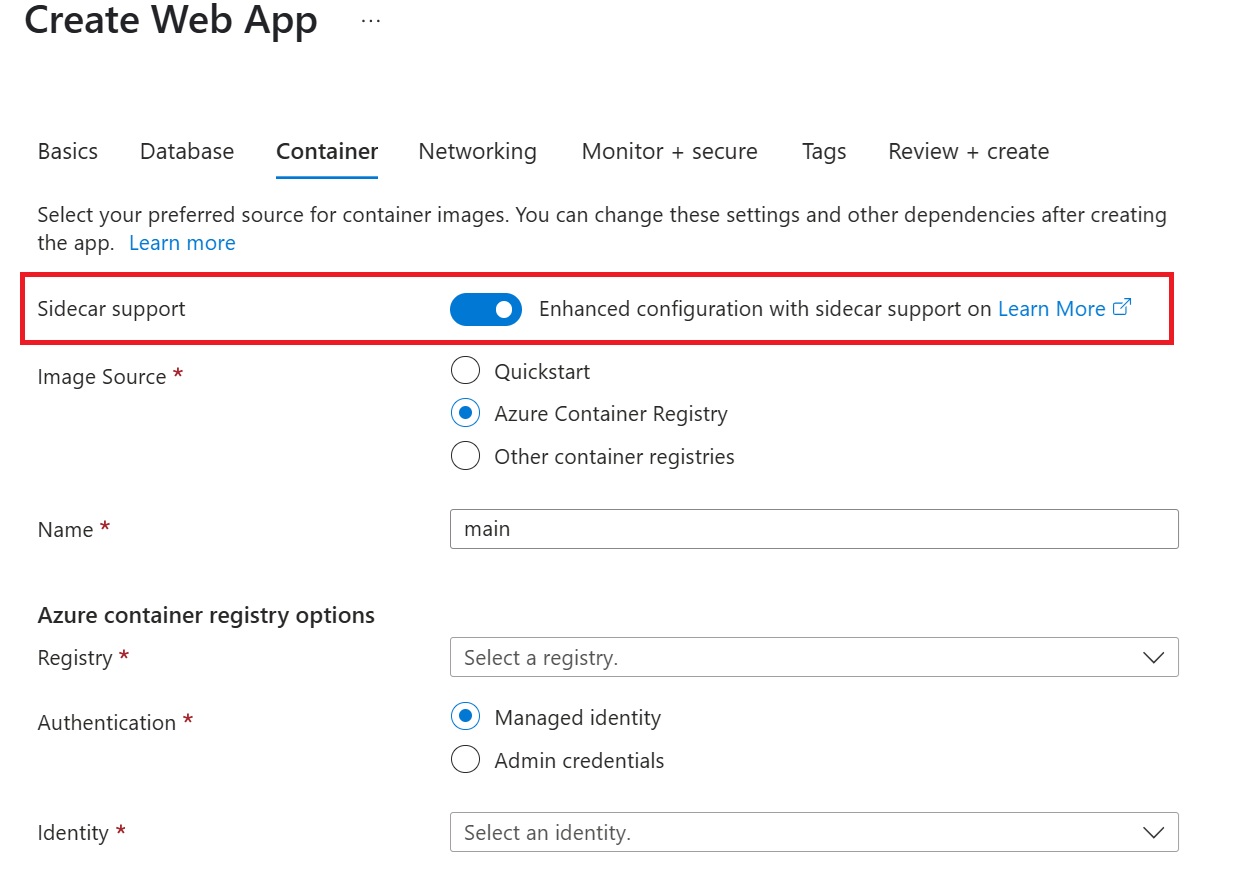
Note: We strongly recommend enabling Managed Identity for your Azure resources.
Setup your Datadog Account
If you don’t have a Datadog account, you can create an instance of Datadog on the Azure portal by following this QuickStart.
Create Datadog - Azure Native ISV Services
Alternatively, you can also create a service account on Datadog by following the steps in this tutorial.
Service Accounts (datadoghq.com)
Datadog offers a 14 days Free Trial if you would like to try out the service.
Add the Datadog sidecar extension
Once your application is deployed, follow these steps to enable the Datadog sidecar extension:
- Navigate to the Azure Portal and open your App Service resource.
-
Go to Deployment Center in the left-hand menu and navigate to the Containers tab.
Note: You might see a banner which says *Interested in adding containers to run alongside your app? Click here to give it a try. Clicking on the banner will enable the new Containers experience for you.*
-
Add the Datadog sidecar extension like this
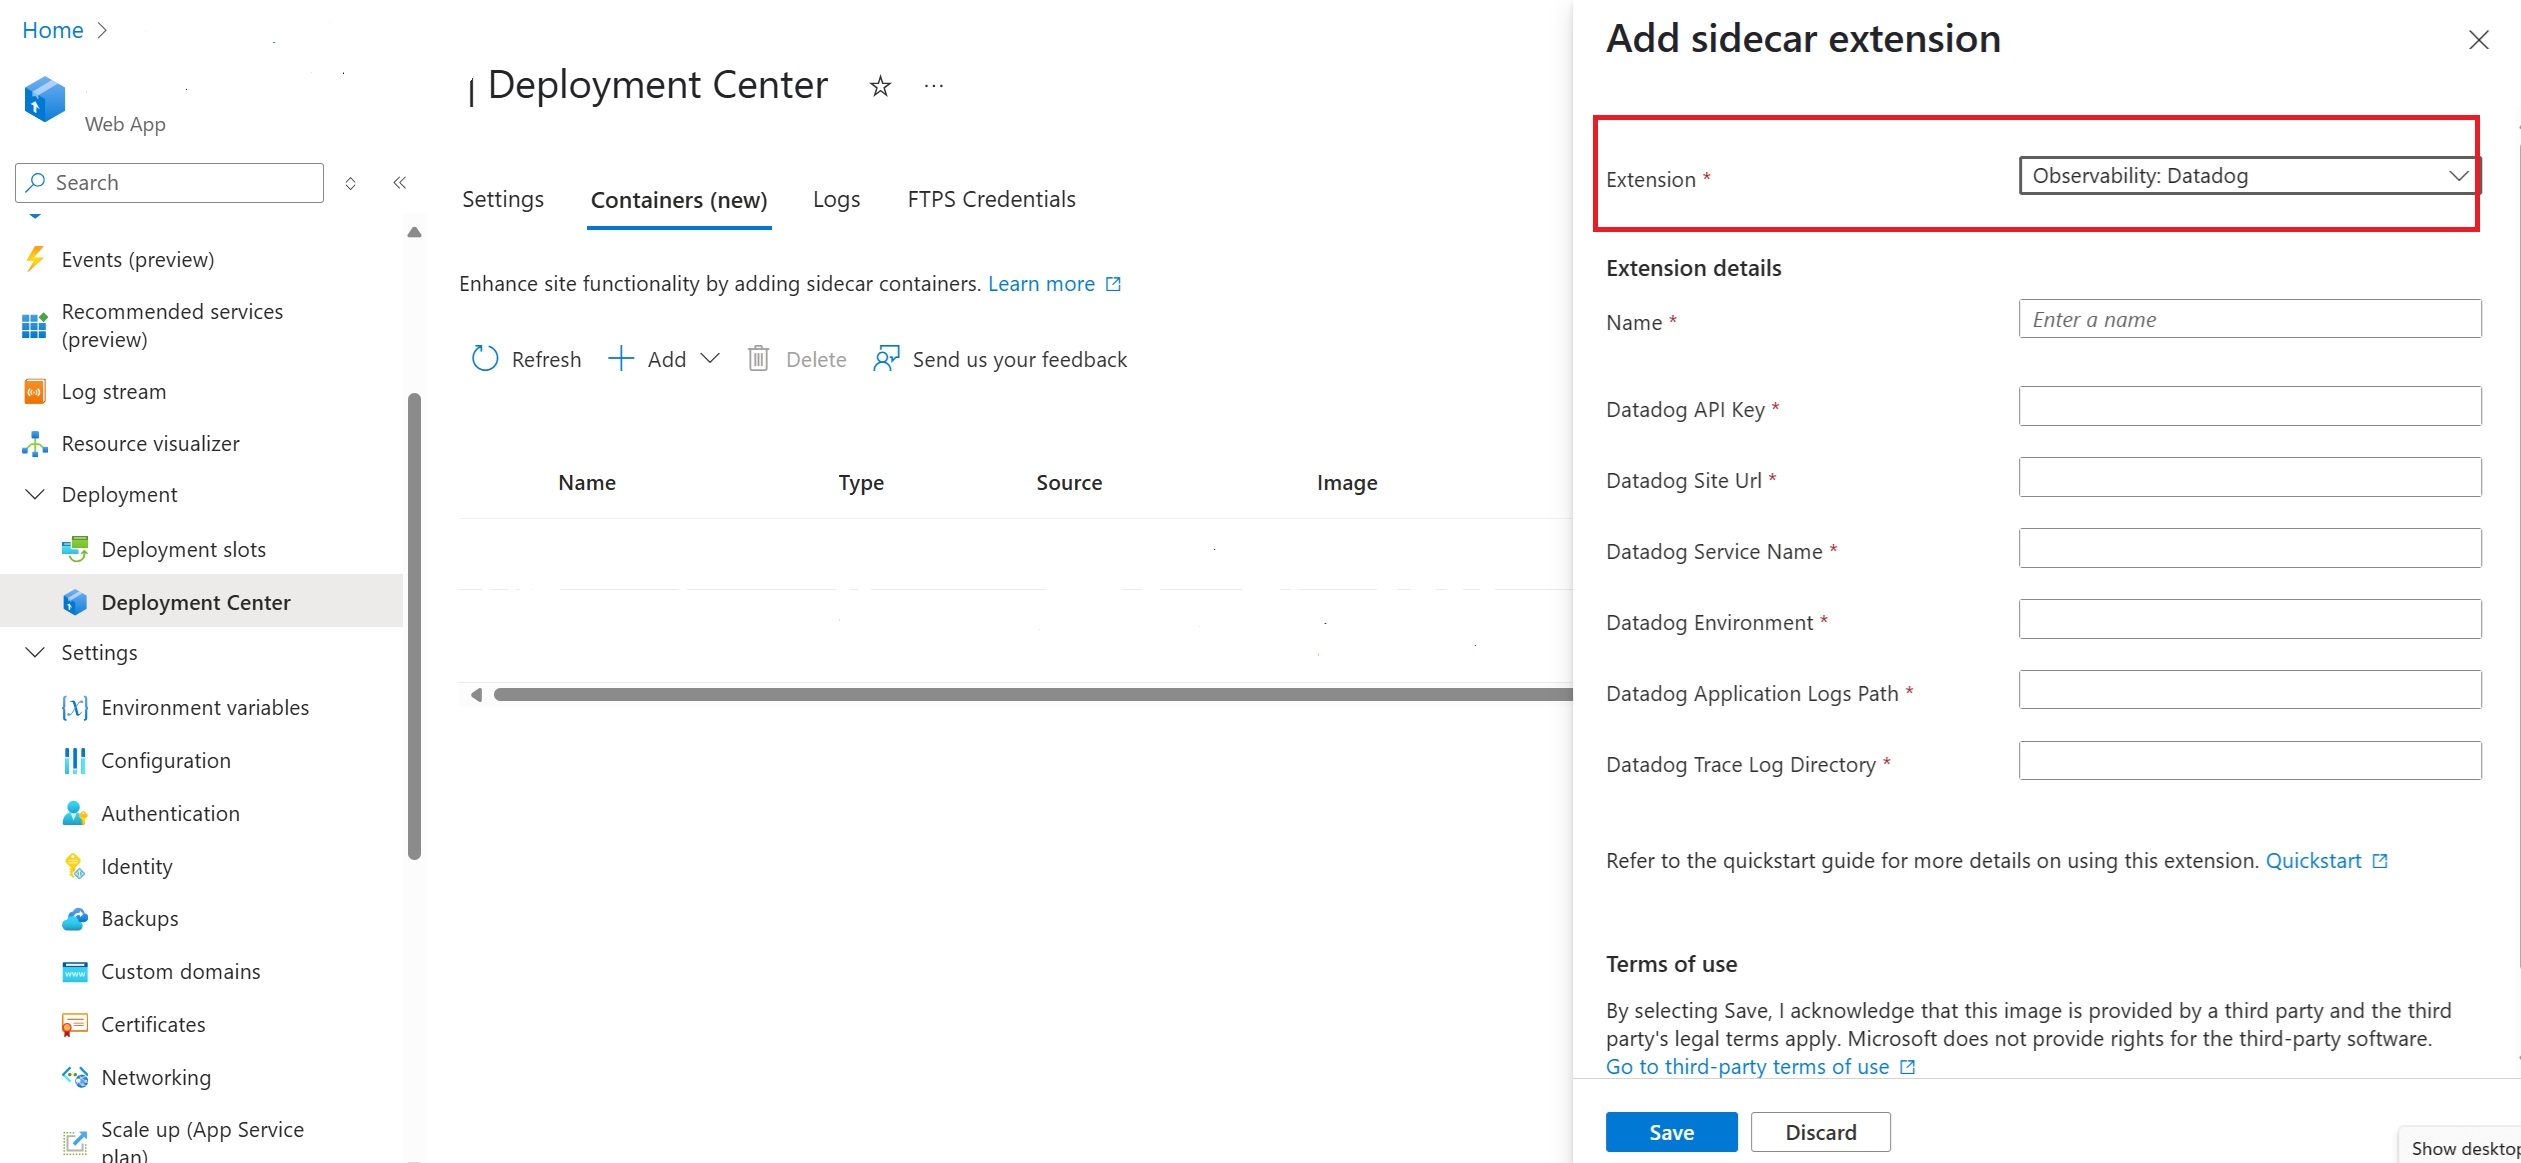
These are the Datadog settings that you would have to add
-
Name - Name for your Site extension. This could be anything you choose.
-
Datadog API Key – If you have created the Datadog resource on the Azure portal, you can manage your API keys like this.
Alternatively, you can create your API Key by following the steps here API and Application Keys.
We would encourage you to add sensitive information like API keys to Azure Key vault [Use Key Vault references - Azure App Service Microsoft Learn](https://learn.microsoft.com). -
Datadog Site URL – Datadog offers you different sites for your data. You can use
us3.datadoghq.comas this site is hosted in Azure. Therefore, the Observability data for your application stays in Azure. You can find more information about Datadog sites here. - Datadog Service Name: The name of the service that would be displayed in your Datadog Service Catalog.
- Datadog Environment: This is used to set the global environment, which allows you to differentiate data coming from various environments like staging or production.
- Datadog Application Logs path: This is the path where you write your application logs. Typically, this will be
/home/LogFiles/*.log, If you have changed the location for your application logs, you can specify that in this setting. - Datadog Trace Log Directory:
/home/LogFiles/dotnet
-
Disclaimer: Datadog Image Usage
It’s important to note that the Datadog image used here is sourced directly from Datadog and is provided ‘as-is.’ Microsoft does not own or maintain this image. Therefore, its usage is subject to the terms of use outlined by Datadog, which can be found here.
Visualizing Your Observability Data in Datadog
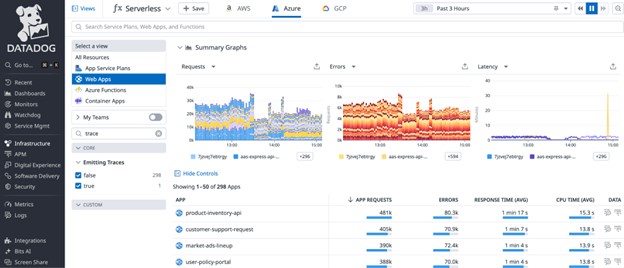
You are all set! You can now see your Observability data flow to Datadog backend. Take a look at the Azure serverless page for a complete view of your App Services.
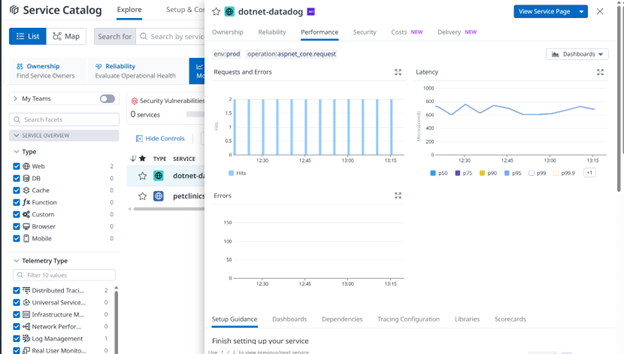
The Service Catalog gives you an overview of each service, such as the number of requests, latency, and more.
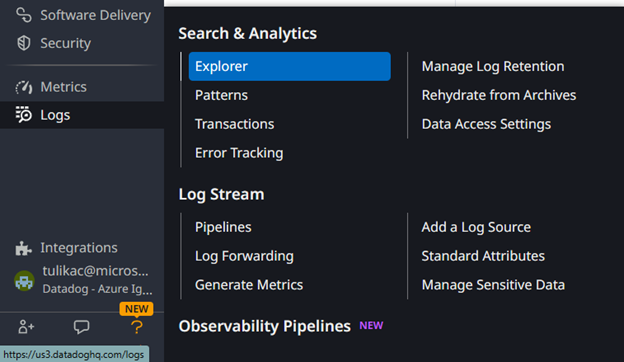
You can see your application logs by going to Logs -> Explorer
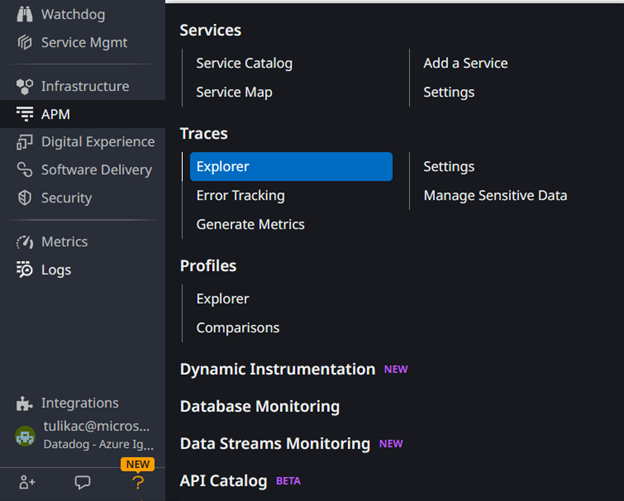
Your application traces will be under APM->Traces->Explorer
To learn more about Datadog dashboards, you can refer to the documentation.
Try It Out with a Sample Python App
If you want to try the Datadog sidecar extension with a Python application, we have a sample available here.