How-to setup Continuous Deployment using ACR Tasks with Windows containers
ACR Tasks are a set of Azure CLI command features in Azure Container Registry that can help you automate container image builds. This can be integrated as part of your continuous deployment work flow to quickly update your container images. It will automate the process of building and pushing your images to your Azure Container Registry based on a set of triggers.
The following tutorial walks you through setting up an ACR Task with a Windows container app in a GitHub repository that will automate a build to your App Service upon code commit. Prerequisites include having your code available in a GitHub repository, an Azure Container Registry and a Windows container App Service provisioned.
Create a GitHub Access Token
In order for you to create the task you will need to include a GitHub Personal Access Token (PAT) from the repository your code lives in. This PAT acts as authentication to access your repository.
- In the upper-right corner of your repository, click your profile photo, and click Settings.
- On the left-hand side menu, find and click on Developer Settings.
- On the following page, click on Personal access tokens.
- Then click Generate new token on the upper-right hand side of the page.
-
To generate a new token you will first need to fill out the required form.
Fill in the following:
- Note: name your token
- Expiration: 90 days
- Scope: repo
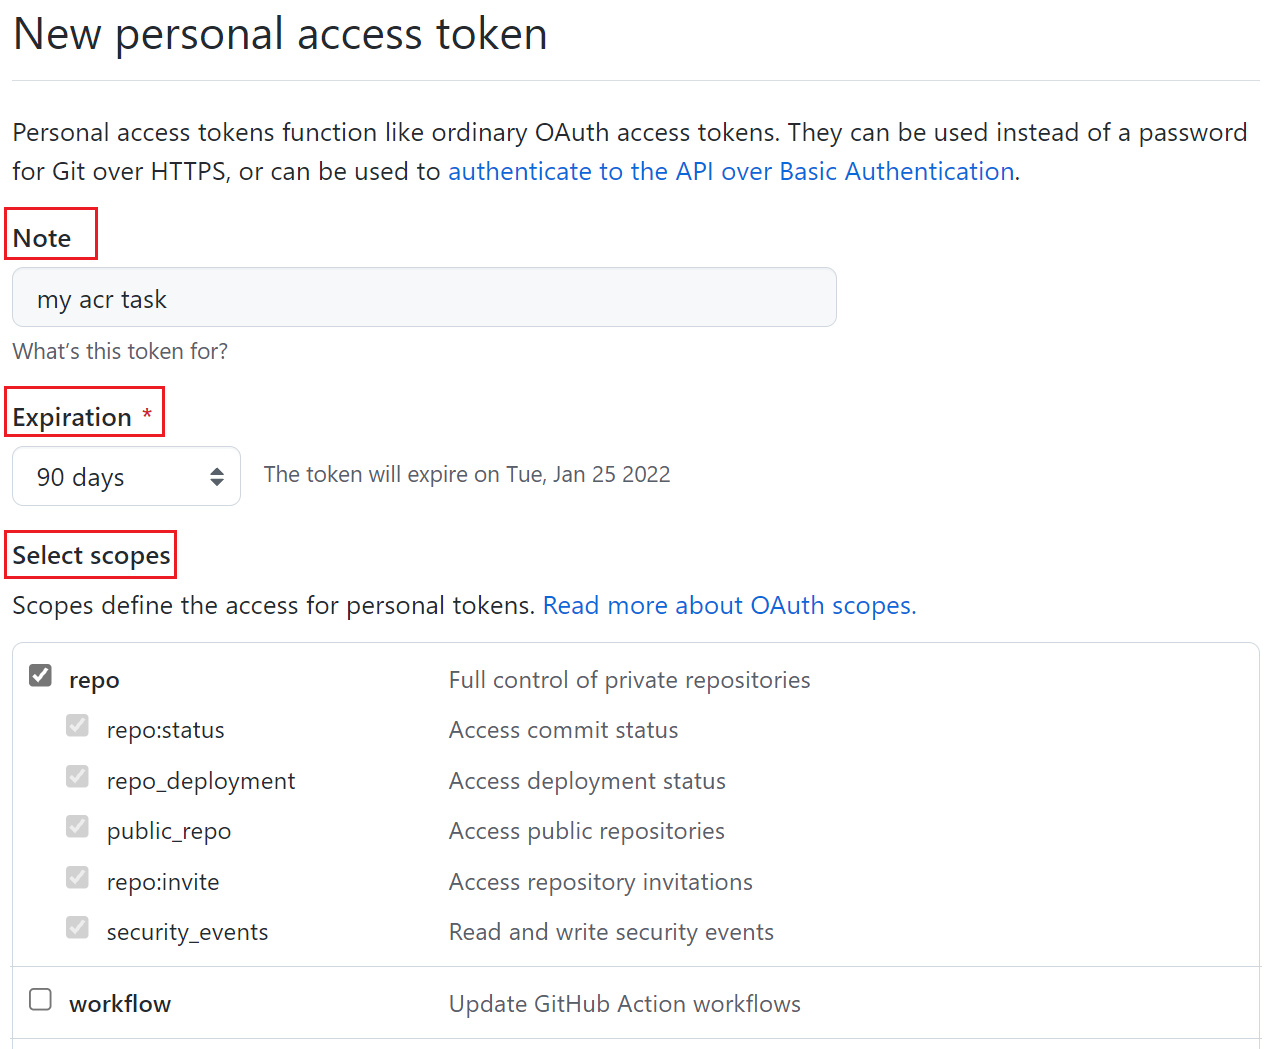
- Then, you can scroll to the bottom of the page and click Generate token.
- Copy your token on the next page and put it somewhere safe. You will not be shown this token again and we’ll need to use it when we create the task in a later step
For more information on creating a Personal Access Token, see this GitHub doc.
Enable Admin User in Azure Container Registry
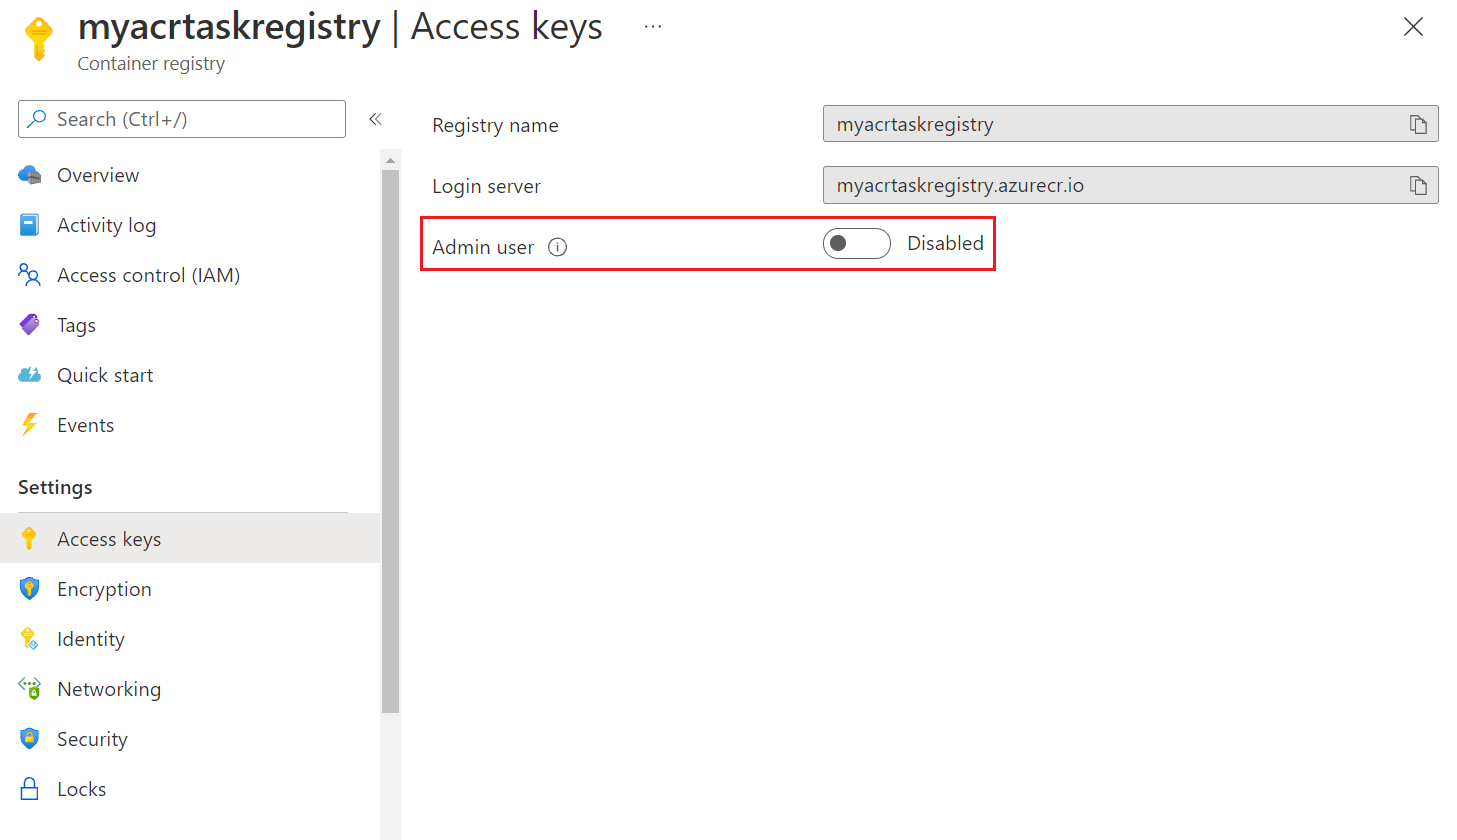
Before we create our task, we need to enable Admin user in your Container Registry. Enabling this will allow resource access when we add the webhook in a later step.
- Go to your Container Registry resource
- Go to Access Keys under Settings
- Go to Admin user and click on the toggle to enable Admin user
Build and Deploy with ACR build
Now that we have our container registry and GitHub repo setup, we can run the acr build command. This will require the use of the Azure CLI. Make sure you are on the latest version of az cli before starting.
The ACR Task uses both docker build and docker push to build your images. Using this command you will create your image name and tag, which will build from your GitHub repo Dockerfile, then push it to your container registry.
To run the command you will need the following:
- Azure Container Registry Name
- GitHub repository URL
-
Open Command Prompt or Azure Cloud Shell and enter the command below. Keep in mind, this is where you will define your image name and tag.
az acr build -r myacrregistry https://github.com/myusername/pdfsample.git -f PDFSample/Dockerfile --platform windows --image mypdfsample:latest
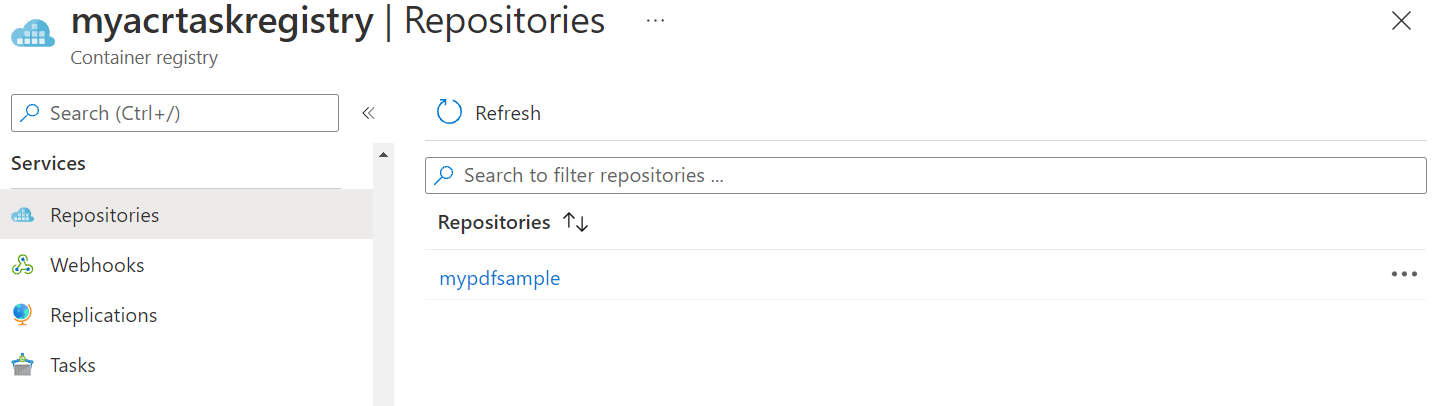
Once the command is finished running you’ll notice a set of dependencies are found in the output. This includes your image and runtime information. You can now visit your container registry resource to verify that your repository has been pushed to ACR.
Create the ACR Task
Next, we will create our Task. This task will setup an automated trigger on code commit which will run a docker build and push the container to your registry.
To run the command you will need the following:
- Azure Container Registry Name
- GitHub repository URL
- GitHub Personal Access Token
-
In your Command Prompt or Azure Cloud Shell enter the command below. Keep in mind, this is where you will define the name of your task.
az acr task create --registry myacrtaskregistry --name taskmypdfsample --image mypdfsample:latest --context
https://github.com/myusername/pdfsample.git
--file PDFSample/Dockerfile --git-access-token <access-token> --platform windows
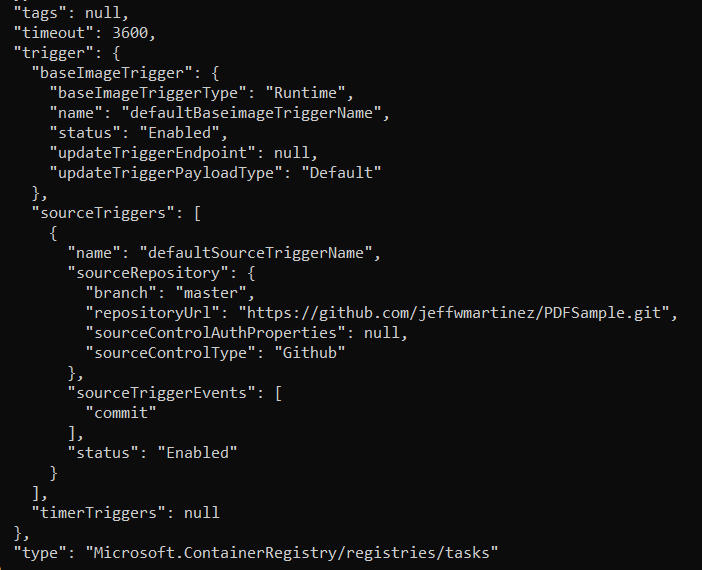
Once you create the task you’ll notice the json output has information about which triggers are enabled. By default, the base image trigger and the commit triggers are enabled.
At this point you can verify that your task will run. We can run a manual test trigger by using the following command:
az acr task run --registry myacrtaskregistry --name taskmypdfsample
This will run a manual test to trigger your build. Since our task is configured to trigger on code commit by default, you can also test triggering the task by committing code to your GitHub repository.
To verify that your tasks have run successfully use the below command
az acr task list-runs --registry acrtaskreg2 --output table
In this table you can verify the source of the Trigger, Platform, and Duration of the task.

Now that we know our task is working, we can setup continuous deployment in our next step.
Enable Continuoud deployment in your Web App
At this point if you haven’t already created your Web App, you can do that now with the container you pushed previously to ACR as your image source. Once your Web App is created or if you are working with an existing Web App, you can go through the following steps to setup continuous deployment between your container registry and web app.
- Go to your resource and click Deployment Center under Deployment
-
In the Settings tab, go to Continuous deployment and click On
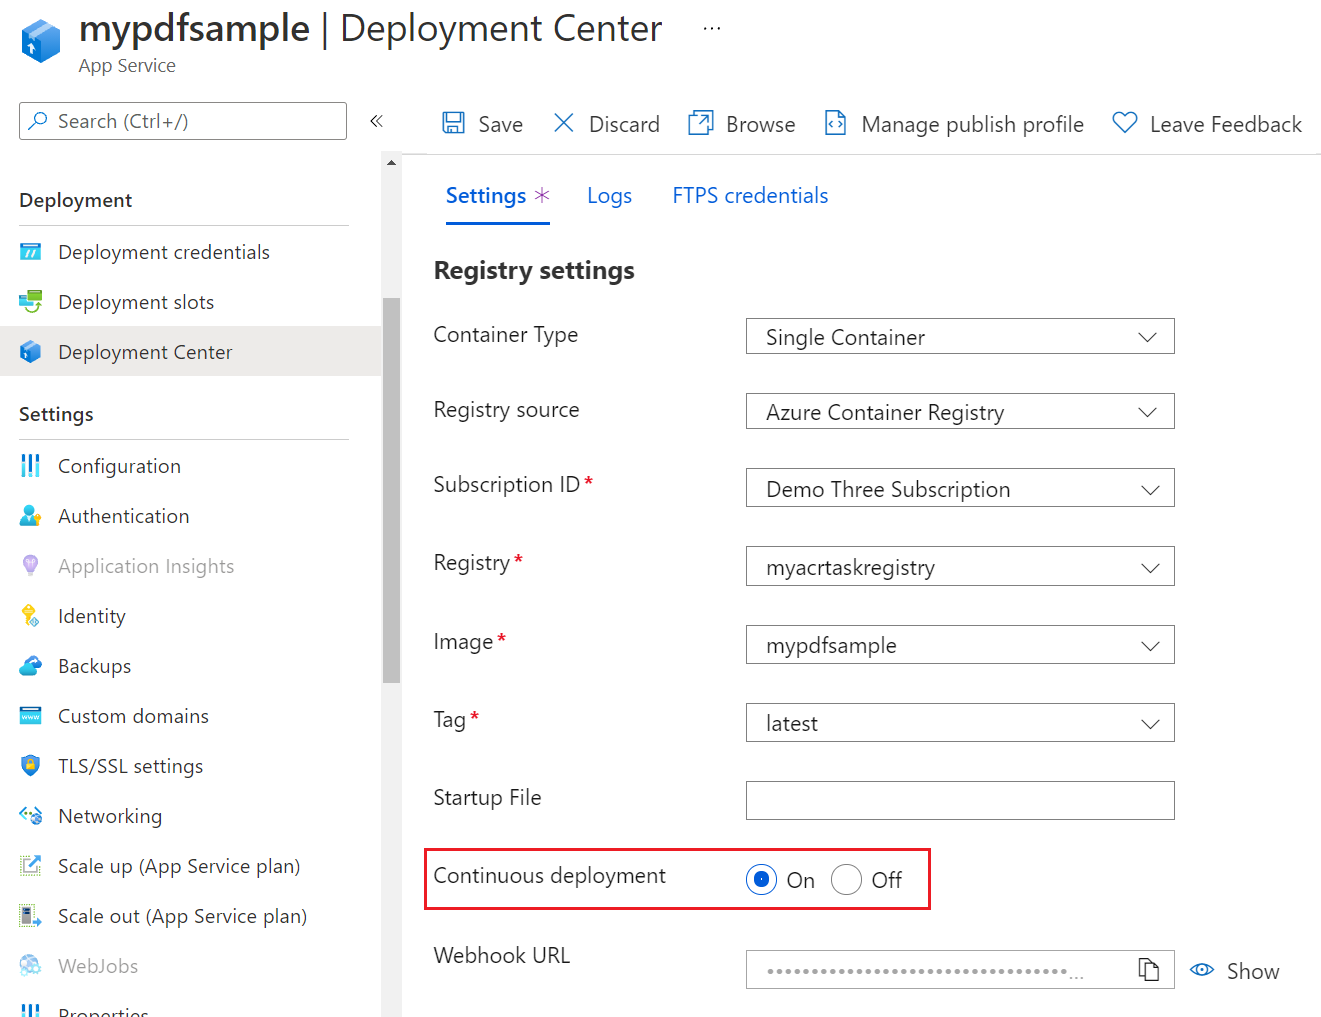
- Click Save at the top of the screen
Once it’s saved, a webhook will be added to your container registry resource. You can verify that it’s enabled by going to Webhooks under Services in your container registry resource.
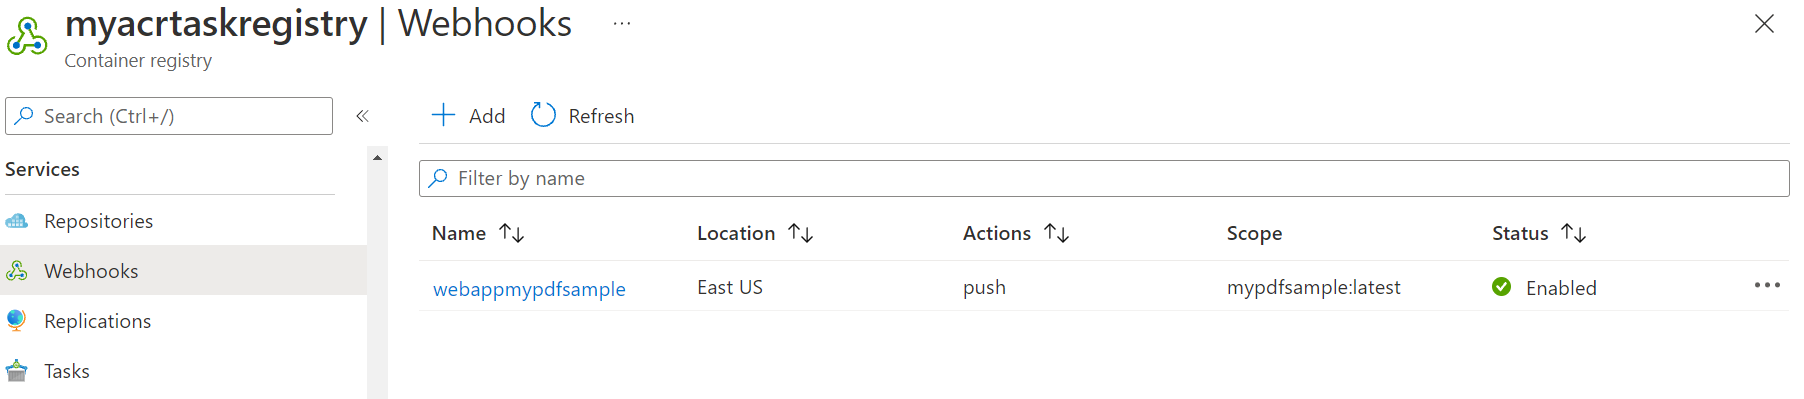
Now that your webhook is enabled, you can create a code commit to your repository which will trigger your task and run the webhook. Once the task has finished running you can click on the webhook name to view the latest push.

Since your webhook is scoped to your image, it will recognize changes made to the repository with the same tag. If you use a different tag than the one that is scoped, it will not recognize the change.
Another way to verify that your webhook has worked is to view your container logs in the Deployment Center. Go to the Deployment Center and view the Logs tab. Here you will see that it has downloaded a newer image and is creating the container.
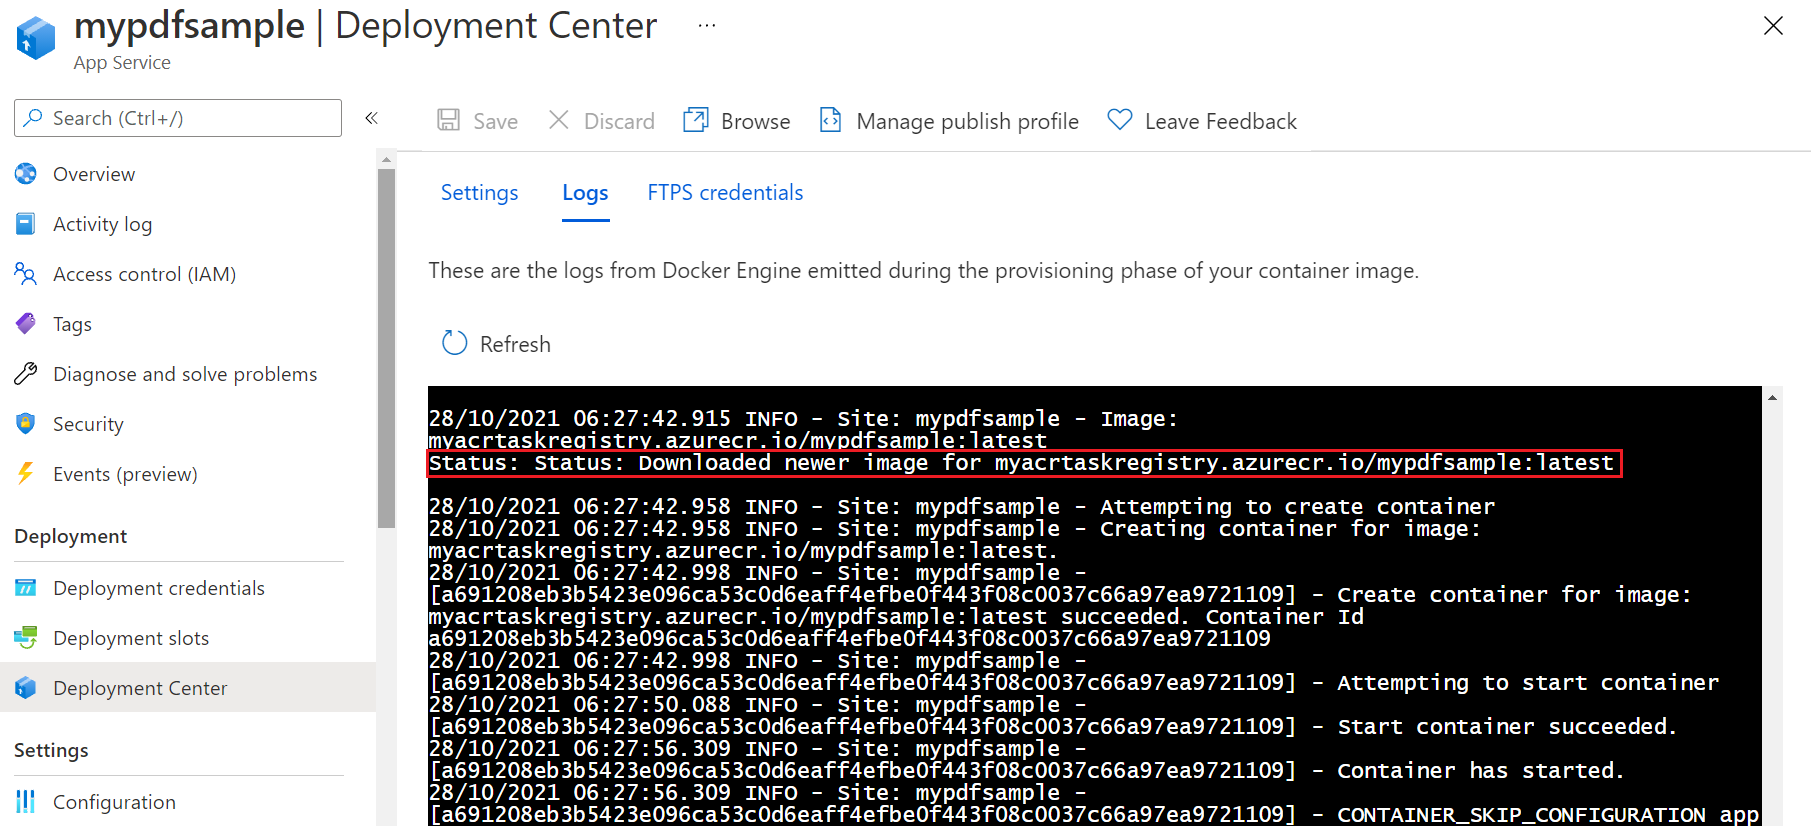
Once the newer image is downloaded and the container has started, you can browse to your application and view the code changes that you’ve committed from GitHub. You have now setup continuous deployment via ACR Task that triggers a build and updates your container image on code commit. Your scoped webhook to your specific image and tag will then continually update the image in App Service when a new image is recognized.