Hosting .NET 5 Applications on Azure App Service
With the newly announced launch of .NET 5 General Availability, App Service is offering immediate support for .NET 5 via Early Access stack. The new Early Access stack feature on app service enables faster and more frequent updates for new versions of supported languages. To learn more about Early Access, please visit the Early Access Runtime document. .NET 5 (Early Access) applications are supported across all public regions for both Windows and Linux scenarios. The following outlines how you can use .NET 5 with App Service via the Azure Portal, GitHub Actions, Azure DevOps, and custom containers.
For Sovereign cloud deployment progress, follow this GitHub issue for periodic updates
Local Setup
In order to develop with .NET 5 locally you will first need the newly released .NET 5 SDK . If you are using Visual Studio you will need to download and use the latest Visual Studio 2019 version(16.8) which will allow you to create a .NET 5 application from the Visual Studio UI and publish your code to your web app.
If you would like to upgrade an existing project to .NET 5, please see this announcement to get started.
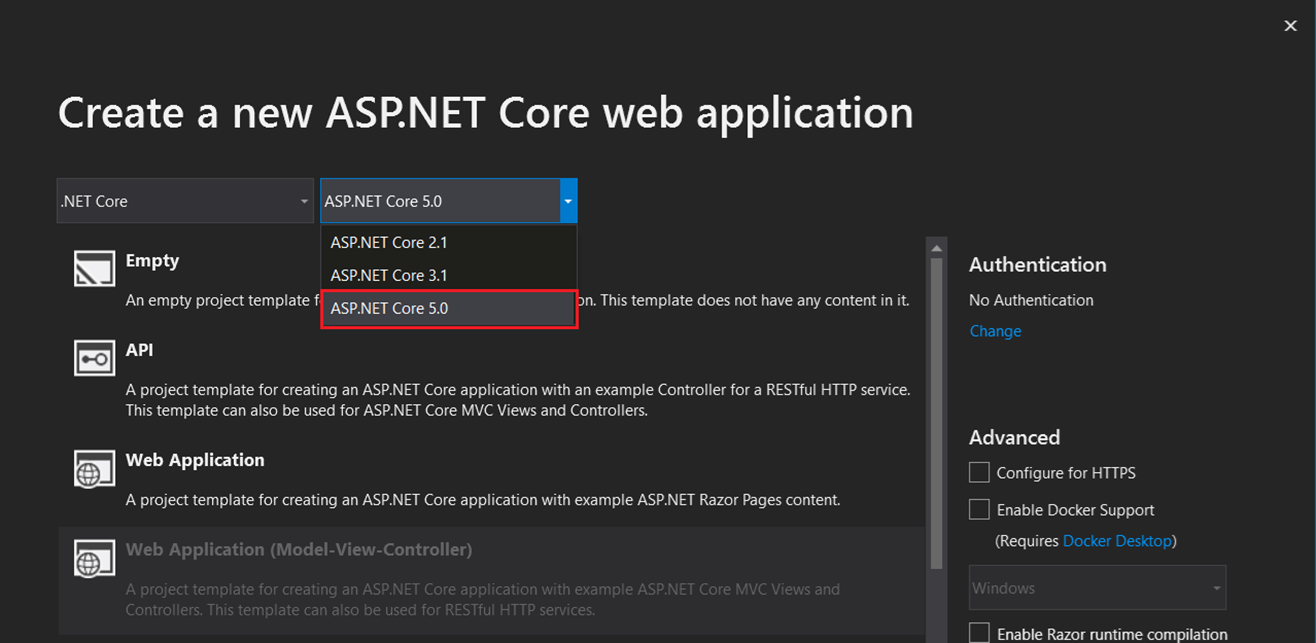
Create a .NET 5 Web App in the Portal
The first option you must create and deploy a .NET 5 application is directly through the portal for both Windows and Linux apps. You will create a Web App like you normally would (see our Quickstart for details).
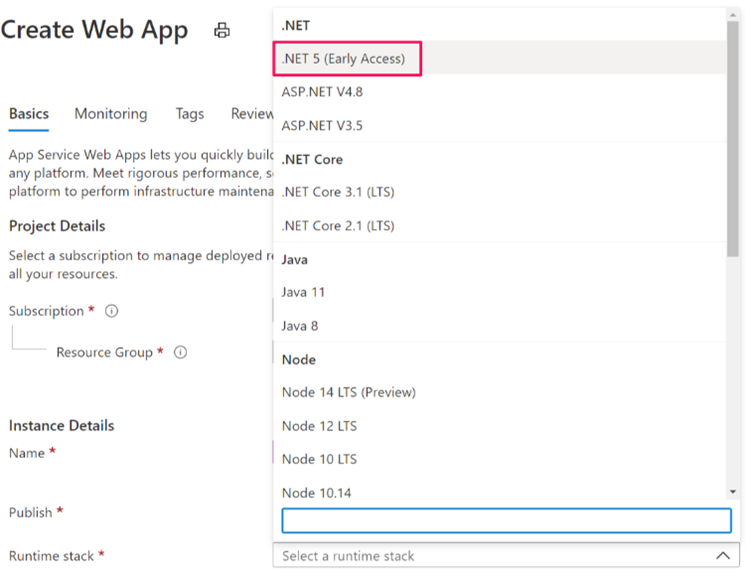
When selecting the runtime stack you will see an option to choose .NET 5 (Early Access).
Choose this option when creating your application, review your web app configuration and create the .NET 5 web app. When your web app is published you are now ready to deploy code to your application through Visual Studio or with continuous deployment via GitHub Actions and Azure DevOps. If deploying with Visual Studio using right-click Publish, you’ll need to create the web app in the portal first using the directions above. Full support with Visual Studio will be available by the end of the month.
Deploying via CLI
Another option to create a Web App with a .NET 5 runtime is through the Azure CLI with the az webapp create and az webapp up commands. Before you run these commands, make sure you are up to date on the most recent version of the Azure CLI first.
- Once you are on the latest version, you can run
az webapp list-runtimes -linuxoraz webapp list-runtimes(for windows) and you will find “DOTNET|5.0” in the list of available runtimes. -
Next run the follwing command to create a web app with a .NET 5 runtime.
az webapp create -g MyResourceGroup -p MyPlan -n MyUniqueAppName --runtime "DOTNET |5.0" --deployment-local-git - Verify that your web app was created on the Azure portal
You may also use the az webapp up command to deploy to App Service, which allows you to deploy your code quickly from a local workspace where the code is present.
- Use the
az logincommand to login into Azure -
Go to the source of where your code is and run the command where your code is located (for .NET apps, this is where the .csproj is located).
az webapp up -n myUniqueAppName
This will deploy your .NET 5 application directly to App Service. For more arguments and examples of az webapp up, please see the documentation.
Continuous deployment with GitHub Actions
GitHub Actions enables you to automate your deployment workflows through a defined YAML file added to your repository containing a collection of actions that run when triggered. Before the workflow file is setup, you will need to grab azure credentials by creating a service principal and save them as a secret in GitHub to add to your workflow file.
If you would like to setup GitHub Actions through the App Service Deployment Center to automatically generate a workflow file, see our documentation.
Create a Service Principal
Our workflow will use a Service Principal to authenticate with Azure when deploying the container to App Service. A service principal is an Active Directory Identity created for use with automation scenarios, such as GitHub Actions.
-
Run the following command in Azure CLI in PowerShell to get the credentials needed to run the login action. The output of this command will be a collection of key value pairs that you’ll need to add to your GitHub secrets.
az ad sp create-for-rbac --name "<appservice-name>" --role contributor \ --scopes /subscriptions/{subscription-id}/resourceGroups/{resource-group} \ --sdk-auth -
Copy the output into your GitHub secrets to use as your
AZURE_CREDENTIALSsecret.{ "clientId": "<GUID>", "clientSecret": "<GUID>", "subscriptionId": "<GUID>", "tenantId": "<GUID>" }
Secure Secrets
Since we are using sensitive information that you don’t want others to access, we will use GitHub secrets to protect our information. Create a secret by following the directions here. Add the GitHub secrets variables below with your own secrets appropriate from each resource.
AZURE_WEBAPP_NAME: web-app-nameAZURE_CREDENTIALS: the JSON output of theaz ad sp create-for-rbaccommand
Setup Workflow file
To setup your GitHub workflow file, go to the Actions tab in your repository and set up a workflow yourself. This will lead you to an editing page where you can add a workflow. At this point you can save and commit the code. Remove the default code in the workflow file and replace it with the yaml sample below.
name: .NET Core
on: [push]
env:
  AZURE_WEBAPP_PACKAGE_PATH: '.'      # set this to the path to your web app project, defaults to the repository root
  DOTNET_VERSION: '5.0.100'           # this is set to the GA version of .NET 5
jobs:
  build:
    runs-on: windows-latest
    steps:
      # Checkout the repo
      - uses: actions/checkout@master
      - uses: azure/login@v1
        with:
          creds: $

      # Setup .NET Core SDK
      - name: Setup .NET Core
        uses: actions/setup-dotnet@v1
        with:
          dotnet-version: $

      # Run dotnet build and publish
      - name: dotnet build and publish
        run: |
          dotnet restore
          dotnet build --configuration Release
          dotnet publish -c Release -o '$/myapp'

      # Deploy to Azure Web apps
      - name: 'Run Azure webapp deploy action using azure credentials'
        uses: azure/webapps-deploy@v2
        with:
          app-name: $ # Replace with your app name
          package: '$/myapp'

      - name: logout
        run: |
          az logout
Before you save and commit the code you will need to adjust the ‘runs-on:’ argument to either ‘windows-latest’ or ‘ubuntu-latest’ depending on your application. Once that is done you can hit Save and commit. The workflow file will use the secret you created earlier from ‘secrets.AZURE_CREDENTIALS’ and secrets.AZURE_WEBAPP_NAME’ to run the actions and deploy your code. Verify that it has deployed by going to your Web App in the Azure Portal and launching your application.
Continuous deployment with Azure DevOps
Azure DevOps is another option for deploying your code with continuous deployment to your .NET 5 Web App enabling you to host, build, plan and test your code through Azure Pipelines. To get started, you will need to first Create a new project and Import a Git repo. Once you have your code uploaded to your DevOps project, you can start building your Pipeline to deploy to your Web App.
- Go to Pipelines in the left menu and click the Create Pipeline button on the following page
- Connect to your Azure Repos Git, Select your repository and Configure your pipeline choosing the ASP.NET option. Azure DevOps will suggest a pipeline configuration, but we will be replacing it with the example below
-
After the above step you will be taken to the Review tab. Replace the suggested code with the template below:
If you are using Windows, replace the
vmImage:value withwindows-latesttrigger: - master pool: vmImage: 'ubuntu-latest' variables: buildConfiguration: 'Release' steps: - task: UseDotNet@2 inputs: packageType: 'sdk' version: '5.0.100' includePreviewVersions: true - task: DotNetCoreCLI@2 displayName: Build inputs: command: build projects: '**/*.csproj' arguments: '--configuration $(buildConfiguration)' # Update this to match your need)' - task: DotNetCoreCLI@2 inputs: command: publish publishWebProjects: True arguments: '--configuration $(BuildConfiguration) --output $(Build.ArtifactStagingDirectory)' zipAfterPublish: True # this code takes all the files in $(Build.ArtifactStagingDirectory) and uploads them as an artifact of your build. - task: PublishBuildArtifacts@1 inputs: pathtoPublish: '$(Build.ArtifactStagingDirectory)' artifactName: 'myWebsiteName' - Now Save and run your build pipeline. This will build your application and create an artifact that will be used for your release pipeline. After the run, you can create your release pipeline.
- Go to Releases in the left menu area and click the New Pipeline button on the following page
- Next, select the Azure App Service deployment template and hit Apply
-
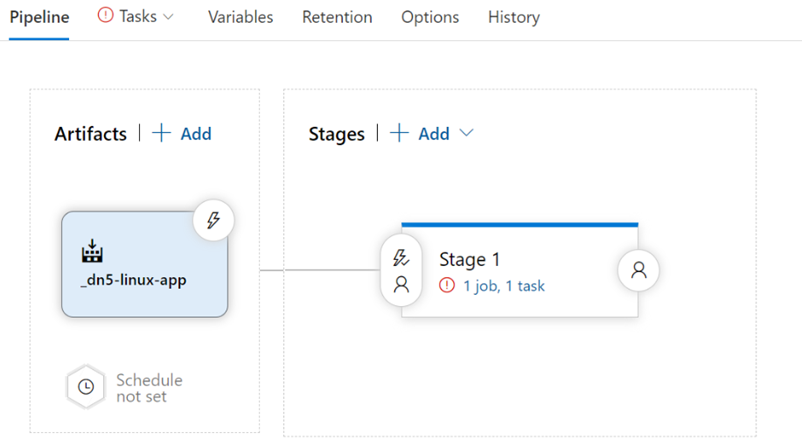
In the following page, select the +Add an artifact box on the left to add the artifact we previously created in the Build pipeline
- Choose your Source(build pipeline) and hit the Add button
- Once that is set you’ll want to setup the trigger by clicking the lightning bolt icon in the top right of your artifact
-
A new window will pop up. Switch the Continuous deployment trigger to Enabled and close the window
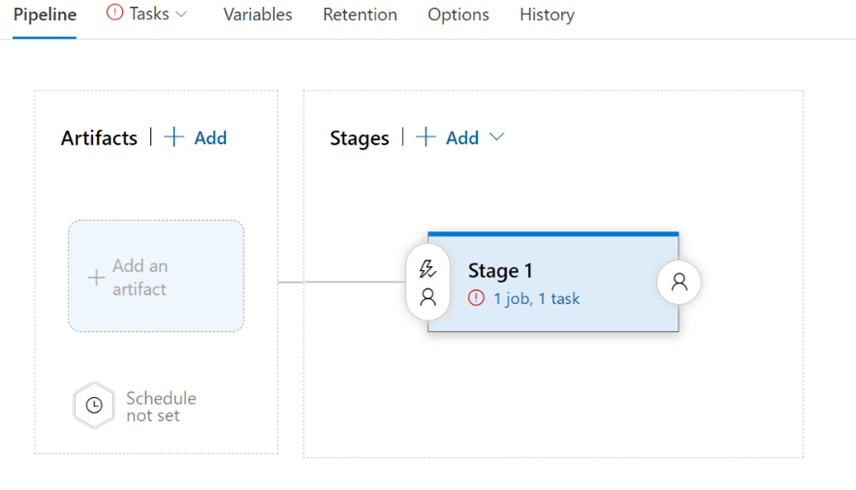
- Next, you can click on the 1 job, 1 task link to setup your deployment stage
- Fill in your Parameters under “Stage 1”
- Azure subscription: your azure subscription
- App type: Web App on Linux OR Web App on Windows
- App service name: your App Service name
- After your “Stage 1” parameters are filled in, click the Run on agent box and modify the Agent Specification to run the appropriate ubuntu or windows agent
- Now you can click the Deploy Azure App Service box and review the pre-filled parameters. Update any parameters if needed
- Click on the Save icon on the top right menu
- Click OK for the folder location and Create release
-
Select the “Stage 1” trigger from the drop down menu and click Create
- Once the release is created it will be named “Release-1” and you will be able to see a similar screen as above. Click Deploy under the Stage 1 and Deploy again on the next screen to start your deployment to your Azure App Service Web App.
- Verify that your application has been published by launching your Web App in the Azure Portal.
Container Deployment with .NET 5
.NET 5 applications are easily deployable to a custom container on App Service using Linux or Windows. When deploying a container, you are packaging the application and its dependencies into a Linux or Windows based image to run on the App Service platform enabling your application to be more portable.
The steps for containerizing a .NET 5 application are the same as it would be for other applications.
- Right-click your project
- Add -> Docker Support
Your .NET 5 project will have a new Dockerfile added with the .NET 5.0 base image and SDK ready for you to publish.
For more information on .NET 5 Docker images, please see the official images for ASP.NET Core runtimes on docker.
If you are using Windows your base image will be FROM mcr.microsoft.com/dotnet/aspnet:5.0 AS base using the FROM mcr.microsoft.com/dotnet/sdk:5.0 AS build SDK.
For Linux applications, your base image will be FROM mcr.microsoft.com/dotnet/aspnet:5.0-buster-slim AS base using the FROM mcr.microsoft.com/dotnet/sdk:5.0-buster-slim AS build SDK.
FROM mcr.microsoft.com/dotnet/aspnet:5.0 AS base  # For Windows apps
# FROM mcr.microsoft.com/dotnet/aspnet:5.0-buster-slim AS base # For Linux apps
WORKDIR /app
EXPOSE 80
EXPOSE 443

FROM mcr.microsoft.com/dotnet/sdk:5.0 AS build  # For Windows apps
# FROM mcr.microsoft.com/dotnet/sdk:5.0-buster-slim AS build # For Linux apps
WORKDIR /src
COPY ["dotnet5app/dotnet5app.csproj", "dotnet5app/"]
RUN dotnet restore "dotnet5app/dotnet5app.csproj"
COPY . .
WORKDIR "/src/dotnet5containerwindows"
RUN dotnet build "dotnet5app.csproj" -c Release -o /app/build

FROM build AS publish
RUN dotnet publish "dotnet5app.csproj" -c Release -o /app/publish

FROM base AS final
WORKDIR /app
COPY --from=publish /app/publish .
ENTRYPOINT ["dotnet", "dotnet5app.dll"]
After you have added Docker support, you will publish it to a registry, and create your App Service as usual. See our documentation for more detail on deploying a containerized application.