Identity Framework Setup - Manual
On this page, you will find instructions for how to manually setup the Identity Framework through a combination of the Azure Portal as well as relevant PowerShell commands
Setup Identity Framework - Manual (Advanced)
1. Requirements
- Azure CLI
- Open SSL
- Note: An OpenSSL executable is also bundled with Git for Windows at
C:\Program Files\Git\usr\bin\openssl.exe
- Note: An OpenSSL executable is also bundled with Git for Windows at
- Visual Studio Code
- Required Extensions:
- Azure AD B2C Custom Policy Extension
2. Instructions
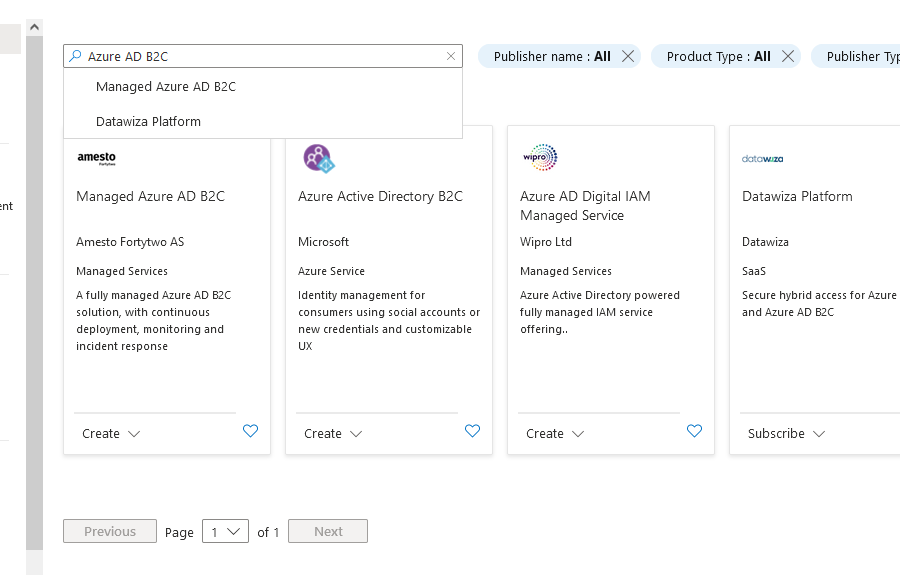
Step 1. Create B2C Tenant in Azure
- From the dashboard, click
Create a Resourceand selectAzure Active Directory B2C - Note: A reference is registered in your subscription at time of creation to associate the tenant with your subscription.
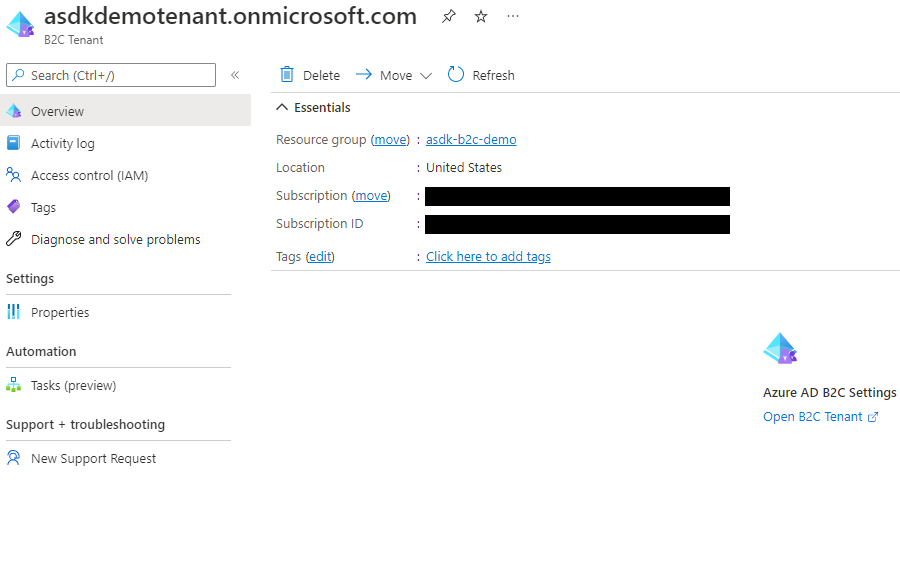
Step 2. Log into newly created Azure AD B2C tenant
- Click on
Open B2C Tenantquicklink to immediately change directory to your new Azure AD B2C tenant
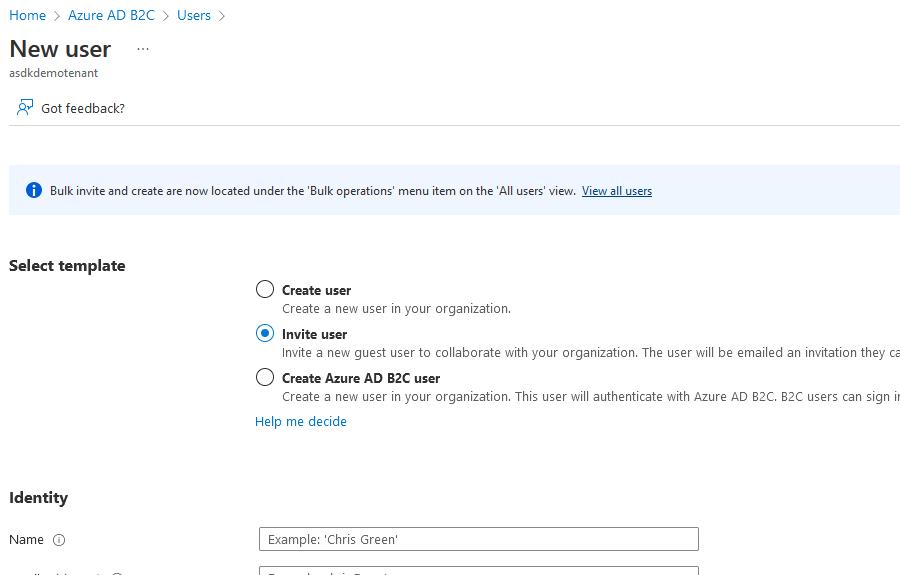
Step 3. (Optional) Invite collaborators to the new Azure AD B2C tenant
Note: Collaborators are other developers you wish to help manage your services, not customers
- Go to the
Azure AD B2Cdashboard while logged into your new Azure AD B2C tenant, clickUsersin the lefthand navbar - After navigating, you may create or invite guest users into your Azure AD B2C tenant allowing them access
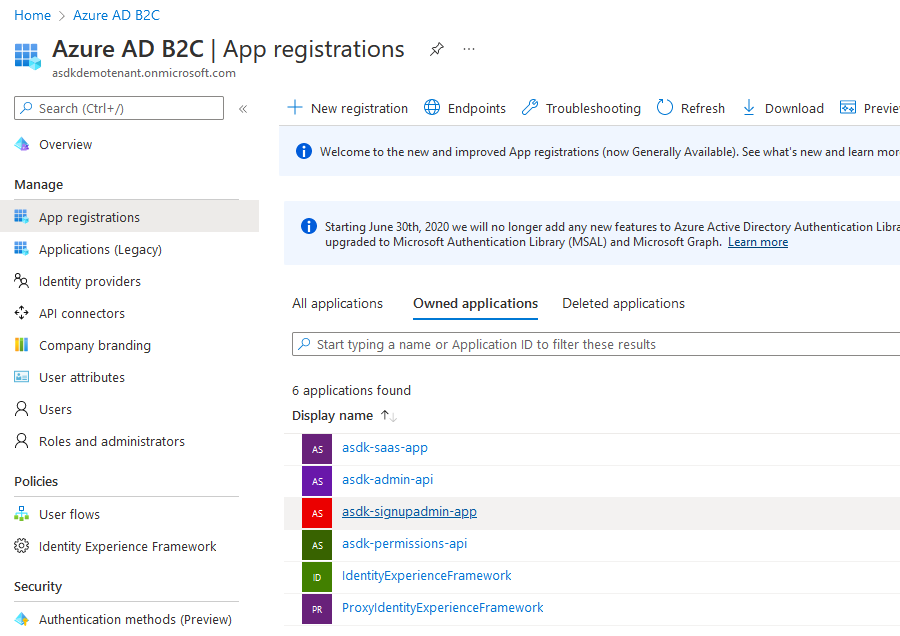
Step 4. Create necessary app registrations in Azure AD B2C tenant
- From the
Azure AD B2Cdashboard, clickApp registrations - Add new registrations corresponding for the following list of modules
- Instructions for adding client secrets, API scopes, and API permissions are detailed below
- Copy all client ids and secret values for reference later on in the setup steps
Modules
- asdk-admin-api
- Display Name: asdk-admin-api
- Account Type: Accounts in any identity provider or organizational directory
- Grant Admin Consent to openid and offline_access_permissions: true
- API Scopes:
| Scope Name | Description |
|---|---|
| tenant.read | Read a customer’s own Tenant data |
| tenant.global.read | Admin-level read permissions for all Tenants |
| tenant.write | Alter a customer’s own Tenant data |
| tenant.global.write | Admin-level write permissions for all Tenants |
| tenant.delete | Delete a customer’s own Tenant data |
| tenant.global.delete | Admin-level delete permissions for all Tenants |
- asdk-signupadmin-app
- Display Name: asdk-signupadmin-app
- Account Type: Accounts in any identity provider or organizational directory
- Redirect URI: [Single-page application]
https://appsignup{providerName}{environmentName}.azurewebsites.net/signin-oidc - Grant Admin Consent to openid and offline_access_permissions: true
- Create Client Secrets?: Yes
- Required API Permissions:
- asdk-admin-api
- tenant.read
- tenant.global.read
- tenant.write
- tenant.global.write
- tenant.delete
- tenant.global.delete
- asdk-admin-api
- asdk-saas-app
- Display Name: asdk-saas-app
- Account Type: Accounts in any identity provider or organizational directory
- Redirect URI: [Single-page application]
https://appapplication{providerName}{environmentName}.azurewebsites.net/signin-oidc - Grant Admin Consent to openid and offline_access_permissions: true
- Create Client Secrets?: Yes
- Required API Permissions:
- asdk-admin-api
- tenant.read
- asdk-admin-api
- asdk-permissions-api
- Display Name: asdk-permissions-api
- Account Type: Accounts in any identity provider or organizational directory
- Grant Admin Consent to openid and offline_access_permissions: true
- IdentityExperienceFramework
- Display Name: IdentityExperienceFramework
- Account Type: Accounts in any identity provider or organizational directory
- Grant Admin Consent to openid and offline_access_permissions: true
- ProxyIdentityExperienceFramework
- Display Name: ProxyIdentityExperienceFramework
- Account Type: Accounts in any identity provider or organizational directory
- Grant Admin Consent to openid and offline_access_permissions: true
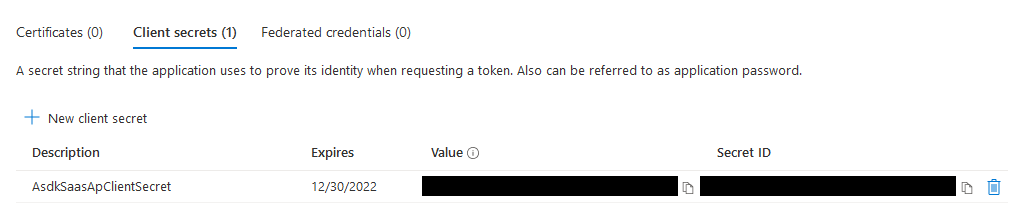
Module Client Secrets
- From the
App registrationview - For the apps that need a secret created (listed above), navigate to them, then navigate to
Certificates & secretsin their navbars - Add a new client secret and copy the generated value for later reference, giving it an appropriate expiration and description
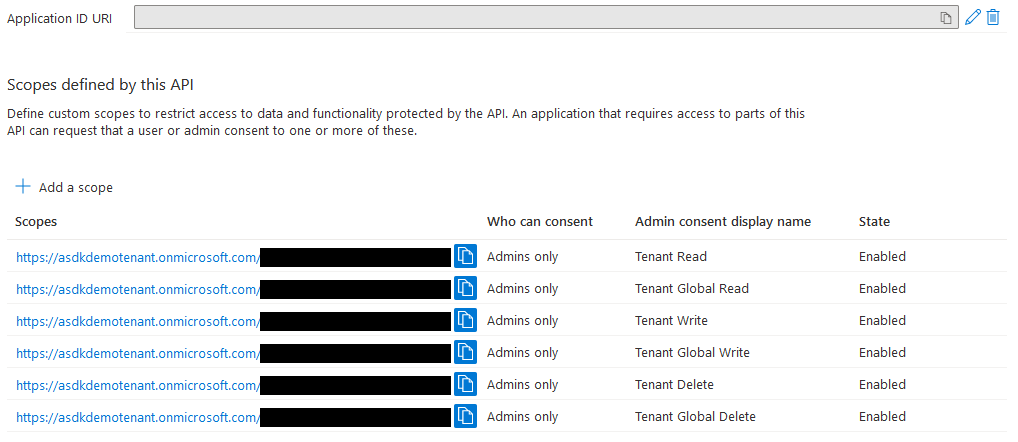
Module API Scopes
- From the
App registrationview - For the apps that need a scope exposed (listed above), navigate to them, then navigate to
Expose an APIin their navbars - The first time you add a scope, you will be prompted to define the
Application ID URI, do so and save the domain and identifier each independently for later reference
Module API Permissions
- From the
App registrationview - For the apps that need permissions granted to another app registration (listed above), navigate to them, then navigate to
API permissionsin their navbars - After adding all the permissions, click the “Grant Admin Consent” button. You must do this on each app registration.
Step 5. Create a random API Key
An API Key is required to secure communication with the Permissions API. We suggest using a random string at least 20 characters in length consisting of a good mix of uppercase, lowercase, numbers and special characters.
Step 6. Create Policy Keys in Azure AD B2C Tenant
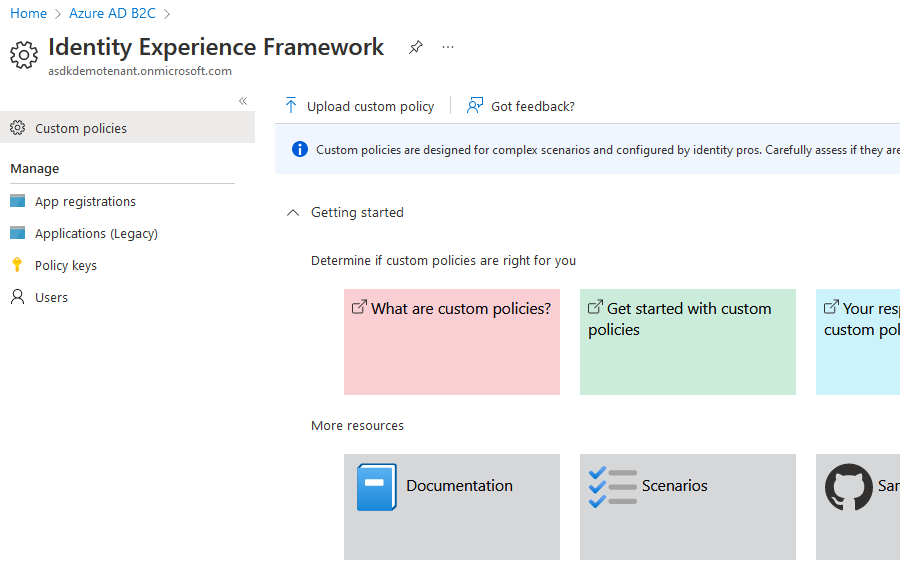
- Find
Policy keysinAzure AD B2C Serviceby navigating toIdentity Experience Framework - Click Add and select the following options to generate the system policy keys
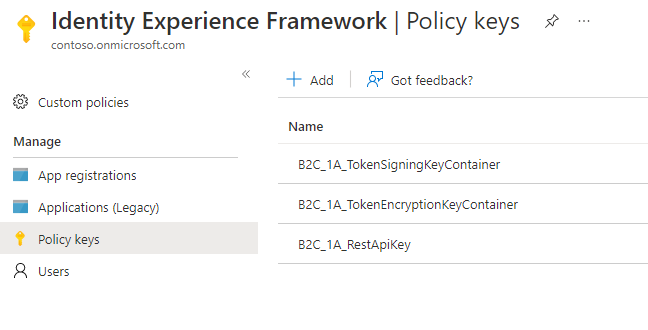
- TokenSigningKeyContainer
- Options: Generate
- Name: TokenSigningKeyContainer
- Key type: RSA
- Key usage: Signature
- TokenEncryptionKeyContainer
- Options: Generate
- Name: TokenEncryptionKeyContainer
- Key type: RSA
- Key usage: Encryption
- RestApiKey
- Options: Manual
- Name: RestApiKey
- Secret: (The API Key you created in step 5)
- Key usage: Signature
Step 7. Clone ASDK repo
- Clone the latest release of the ASDK
Step 8. Initiate identity Bicep deployment with parameters from previous few steps
- Generate a standard Bicep parameters file using the parameters below
- Navigate to
Saas.Identity/Saas.Identity.IaCfor theaz deployto work correctly - Deploy identity Bicep with the following parameters
- You may reference or fill out
main.parameters.jsonin the Saas.Identity.IaC directory - (Note: some parameters are referenced in step 13 and must match what is selected here, such as the chosen saasProviderName)
- You may reference or fill out
-
az deployment group create --name "IdentityBicepDeployment" --resource-group <#YourAzureResourceGroupName#> template-file ./main.bicep --parameters ./main.parameters.json
Parameters
| Parameter Name | Value |
|---|---|
| AppSettings:AdminServiceBaseUrl | (URL for downstream admin service) |
| azureAdB2cDomainSecretValue | (Your Tenant domain found on your AD B2C dashboard) |
| azureAdB2cInstanceSecretValue | (The B2C login endpoint in format of https://(Tenant Name).b2clogin.com) |
| azureAdB2cTenantIdSecretValue | (Your Tenant Subscription ID found on your AD B2C dashboard) |
| azureAdB2cPermissionsApiClientIdSecretValue | (The Client ID found on your registered Permissions API app page) |
| azureAdB2cPermissionsApiClientSecretSecretValue | (The Client Secret Value created in step 8) |
| permissionsApiApiKeySecretValue | (API Key created in step 5) |
| saasProviderName | (Select a provider name. This name will be used to name the Azure Resources. (e.g. contoso, myapp). Max Length is 8 characters.) |
| saasEnvironment | (Select an environment name. (e.g. ‘prd’, ‘stg’, ‘dev’, ‘tst’)) |
| saasInstanceNumber | (Select an instance number. This number will be appended to most Azure Resources created. (e.g. 001, 002, 003)) |
| sqlAdministratorLogin | (Select an admin account name used for resource creation) |
| sqlAdministratorLoginPassword | (Select a password for the admin account) |
Example Parameters Json
{
  "$schema": "https://schema.management.azure.com/schemas/2019-04-01/deploymentParameters.json#",
  "contentVersion": "1.0.0.0",
  "parameters": {
    "AppSettings:AdminServiceBaseUrl": {
      "value": "asdk-demo-admin.com"
    },
    "azureAdB2cDomainSecretValue": {
      "value": "asdkdemotenant.onmicrosoft.com"
    },
    "azureAdB2cInstanceSecretValue": {
      "value": "https://asdkdemotenant.b2clogin.com"
    },
    "azureAdB2cTenantIdSecretValue": {
      "value": "00000000-0000-0000-0000-000000000000"
    },
    "azureAdB2cPermissionsApiClientIdSecretValue": {
      "value": "00000000-0000-0000-0000-000000000000"
    },
    "azureAdB2cPermissionsApiClientSecretSecretValue": {
      "value": "FooBar"
    },
    "permissionsApiApiKeySecretValue": {
      "value": "FooBar"
    },
    "saasProviderName": {
      "value": "contoso"
    },
    "saasEnvironment": {
      "value": "tst"
    },
    "saasInstanceNumber": {
      "value": "001"
    },
    "sqlAdministratorLogin": {
      "value": "sqlAdmin"
    },
    "sqlAdministratorLoginPassword": {
      "value": "FooBar1"
    }
  }
}
Step 9. Configure transform IEF Policies with config values from previous few steps
- Launch PowerShell and navigate to project directory
src\Saas.Identity\Saas.IdentityProvider\policies - Launch VS Code using:
-
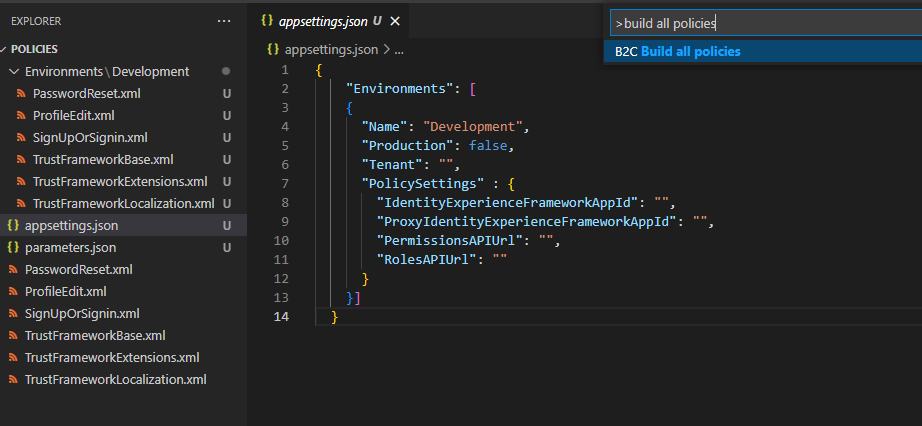
code . - Open or create
appsettings.json - Note: You may reference
sample.appsettings.jsonfor basic parameter setup - Complete the settings for the following attributes:
| Parameter Name | Value |
|---|---|
| Name | (Select a name for the environment (e.g. Development)) |
| Production | (a boolean indicating production status) |
| Tenant | (Name of Tenant) |
| PolicySettings:IdentityExperienceFrameworkAppId | (App ID of IdentityExperienceFramework app created in step 4) |
| PolicySettings:ProxyIdentityExperienceFrameworkAppId | (App ID of ProxyIdentityExperienceFramework app created in step 4) |
| PolicySettings:PermissionsAPIUrl | (URL for the permissions endpoint in the Permission module (e.g. (PermissionsApiFQDN)/api/CustomClaims/permissions)) |
| PolicySettings:RolesAPIUrl | (URL for the roles endpoint in the Permission module (e.g. (PermissionsApiFQDN)/api/CustomClaims/roles)) |
- Open the VS Code command palette (shortcut: ctrl + shift + p)
- Execute
B2C Build All Policies - Navigate to
Environmentsdropdown in VS Code Explorer for generated policies
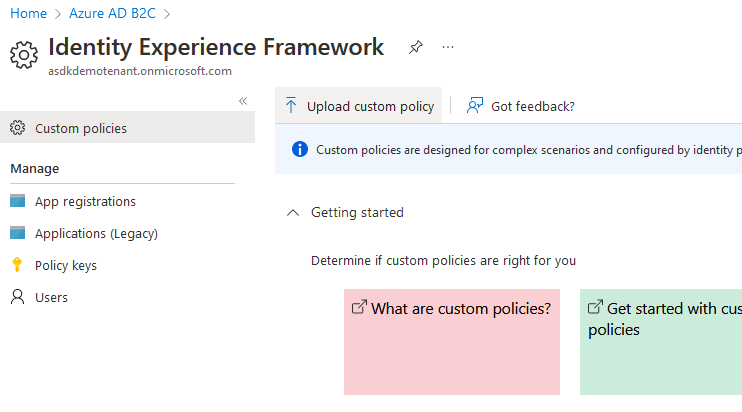
Step 10. Upload IEF Policies to Azure AD B2C Tenant
- In your Azure dashboard, navigate to
Azure AD B2Cservice, then toIdentity Framework Experiencein the nav bar - Select
Upload custom policyand upload each of the generated policy files
Step 11. Create parameters.json for input into main Bicep deployment
- Generate a standard Bicep parameters file using the parameters below
- Place file into any folder (you will need it on step 2.b of the Quick Start guide)
Parameters
| Parameter Name | Value |
|---|---|
| adminApiScopes | (space delimited string of admin scope names (e.g. “test.scope tenant.delete tenant.global.delete tenant.global.read tenant.global.write tenant.read tenant.write”)) |
| adminApiScopeBaseUrl | (Reference your Tenant domain and the registered Admin app identifier, format of |
| azureAdB2cAdminApiClientIdSecretValue | (Admin Api Client Id found under its Registered App entry) |
| azureAdB2cDomainSecretValue | (Your Tenant domain found on your AD B2C dashboard) |
| azureAdB2cInstanceSecretValue | (The B2C login endpoint in format of https://{TENANT_NAME}.b2clogin.com) |
| azureAdB2cSaasAppClientIdSecretValue | (SaaS App Api Client Id found under its Registered App entry) |
| azureAdB2cSaasAppClientSecretSecretValue | (Secret value created in step 4) |
| azureAdB2cSignupAdminClientIdSecretValue | (SaaS App Api Client Id found under its Registered App entry) |
| azureAdB2cSignupAdminClientSecretSecretValue | (Secret value created in step 4) |
| azureAdB2cTenantIdSecretValue | (Your Tenant Subscription ID found on your AD B2C dashboard) |
| permissionsApiHostName | (The FQDN of the Permissions API) |
| permissionsApiApiKeySecretValue | (API Key generated in step 5) |
| saasAppApiScopes | (space delimited string of SaaS App Api scope names (e.g. “test.scope tenant.delete tenant.global.delete tenant.global.read tenant.global.write tenant.read tenant.write”)) |
| saasProviderName | (created in step 8) |
| saasEnvironment | (created in step 8) |
| saasInstanceNumber | (created in step 8) |
| sqlAdministratorLogin | (created in step 8) |
| sqlAdministratorLoginPassword | (created in step 8) |
Example
{
  "$schema": "https://schema.management.azure.com/schemas/2019-04-01/deploymentParameters.json#",
  "contentVersion": "1.0.0.0",
  "parameters": {
	"adminApiScopes": {
      "value": "test.scope tenant.delete tenant.global.delete tenant.global.read tenant.global.write tenant.read tenant.write"
    },
	"adminApiScopeBaseUrl": {
      "value": "https://asdkdemotenant.onmicrosoft.com/00000000-0000-0000-0000-000000000000"
    },
	"azureAdB2cAdminApiClientIdSecretValue": {
      "value": "00000000-0000-0000-0000-000000000000"
    },
    "AppSettings:AdminServiceBaseUrl": {
      "value": "asdk-demo-admin.com"
    },
    "azureAdB2cDomainSecretValue": {
      "value": "asdkdemotenant.onmicrosoft.com"
    },
    "azureAdB2cInstanceSecretValue": {
      "value": "https://asdkdemotenant.b2clogin.com"
    },
	"azureAdB2cSaasAppClientIdSecretValue": {
      "value": "00000000-0000-0000-0000-000000000000"
    },
	"azureAdB2cSaasAppClientSecretSecretValue": {
      "value": "FooBar"
    },
	"azureAdB2cSignupAdminClientIdSecretValue": {
      "value": "00000000-0000-0000-0000-000000000000"
    },
	"azureAdB2cSignupAdminClientSecretSecretValue": {
      "value": "FooBar"
    },
    "azureAdB2cTenantIdSecretValue": {
      "value": "00000000-0000-0000-0000-000000000000"
    },
    "azureAdB2cPermissionsApiClientIdSecretValue": {
      "value": "00000000-0000-0000-0000-000000000000"
    },
    "azureAdB2cPermissionsApiClientSecretSecretValue": {
      "value": "FooBar"
    },
    "permissionsApiHostName": {
      "value": "https://asdkdemopermissions.com"
    },
    "permissionsApiApiKeySecretValue": {
      "value": "FooBar"
    },
    "saasAppApiScopes": {
      "value": "test.scope tenant.delete tenant.global.delete tenant.global.read tenant.global.write tenant.read tenant.write"
    },
    "saasProviderName": {
      "value": "contoso"
    },
    "saasEnvironment": {
      "value": "tst"
    },
    "saasInstanceNumber": {
      "value": "001"
    },
    "sqlAdministratorLogin": {
      "value": "sqlAdmin"
    },
    "sqlAdministratorLoginPassword": {
      "value": "FooBar1"
    }
  }
}
Last modified July 21, 2022: Update documentation to add in api key and remove reference of certificate (76162ee6)