SaaS.Notifications
Overview
The SaaS.Notifications module is a relatively simple Azure Logic App that gets deployed to enable email sending from the rest of the solution. It is deployed with an HTTP trigger that takes in a JSON payload with fields required to send an email.
Design
Dependencies
- Email provider of choice, once configured
Consumers
Authentication
The logic app is using the default SAS Token that gets generated with the HTTP trigger. Take care to not commit this SAS token into your repo, as it is considered a secret. Anyone with access to this URL with the SAS token will have permission to call your logic app. If you deploy the Azure SaaS Dev Kit using the Quick Start guide, this will be automatically uploaded to a keyvault for reference via the applications.
Logic App Configuration
Input
The logic app comes pre-configured with a default JSON schema with some common email data fields. You may edit this to your liking by going to the logic app designer for the logic app that is deployed in your environment. Here is the default JSON schema that gets deployed:
{
    "properties": {
        "HTML": {
            "type": "string"
        },
        "emailFrom": {
            "type": "string"
        },
        "emailTo": {
            "type": "string"
        },
        "emailToName": {
            "type": "string"
        },
        "subject": {
            "type": "string"
        }
    },
    "type": "object"
}
Email Provider
By default, the logic app that gets deployed does not come with an email provider configured. If you POST to the endpoint, the logic app will take in the data and simply return a 200 OK response. To enable actual email sending, you must first configure an email provider connector.
To do this, follow these instructions:
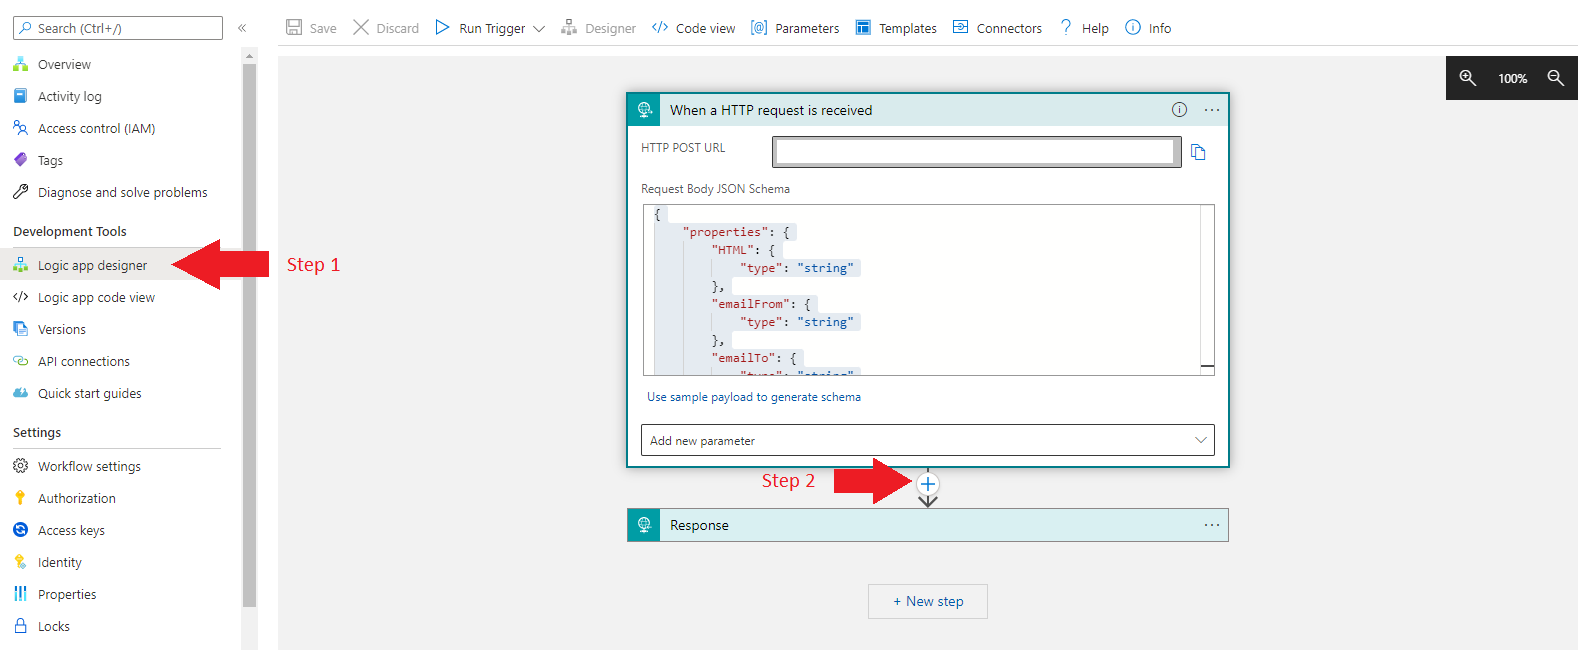
- Navigate to the deployed logic app and click into the “Logic app designer” menu
- Click the + button underneath the defined HTTP trigger and click “Add an action”
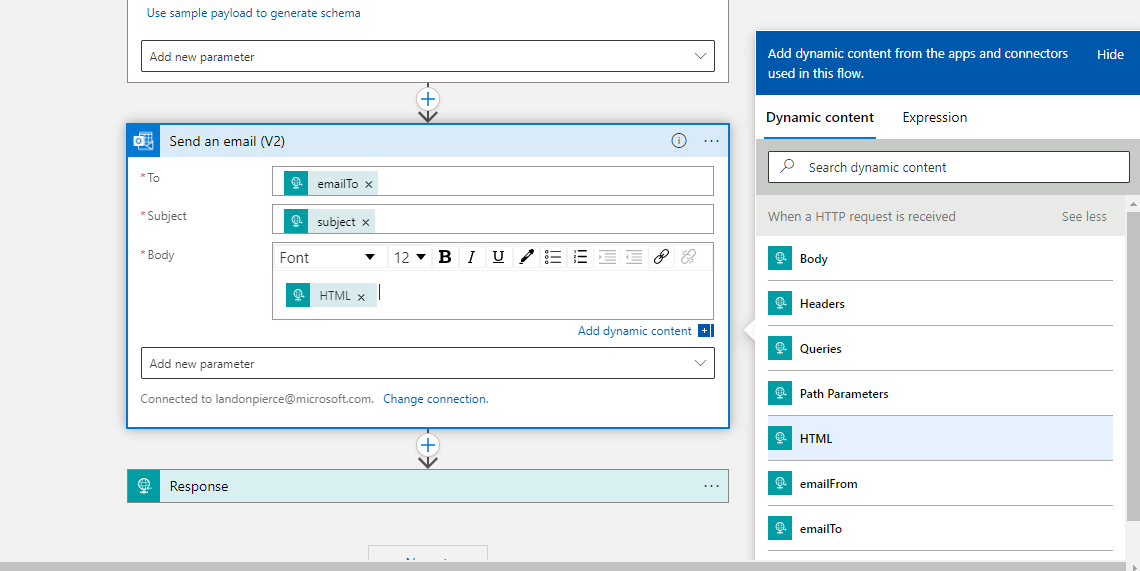
- Search for your email connector of choice and choose the action for sending an email (ex, for Office 365 it is “Send an Email (V2)")
- Fill in the required fields with data from the “Dynamic content” section. This will pass data from the input HTTP trigger to the email connector
- Click “Save”
- You may now test using the application, or by clicking “Run trigger” at the top of the logic app designer
Additional Reading
- Connect to Office 365 Outlook using Azure Logic Apps
- Connect to SendGrid from Azure Logic Apps
- Tutorial: Send email and invoke other business processes from App Service