
Welcome to Day 28 of #30DaysOfServerless!
Since it's the serverless end-to-end week, I'm going to discuss how to use a serverless application – Azure Functions with OpenAPI extension – to be seamlessly integrated with Power Platform custom connector through Azure API Management - in a post I call "Where am I? My GPS Location with Serverless Power Platform Custom Connector"
OK. Are you ready? Let's get started!
What We'll Cover
- What is Power Platform custom connector?
- Proxy app to Google Maps and Naver Map API
- API Management integration
- Two ways of building custom connector
- Where am I? – Power Apps app
- Exercise: Try this yourself!
- Resources: For self-study!

Want to follow along? Check out the sample app on GitHub repository used in this post.
What is Power Platform custom connector?
Power Platform is a low-code/no-code application development tool for fusion teams that consist of a group of people. Those people come from various disciplines, including field experts (domain experts), IT professionals and professional developers, to draw business values successfully. Within the fusion team, the domain experts become citizen developers or low-code developers by Power Platform. In addition, Making Power Platform more powerful is that it offers hundreds of connectors to other Microsoft 365 and third-party services like SAP, ServiceNow, Salesforce, Google, etc.
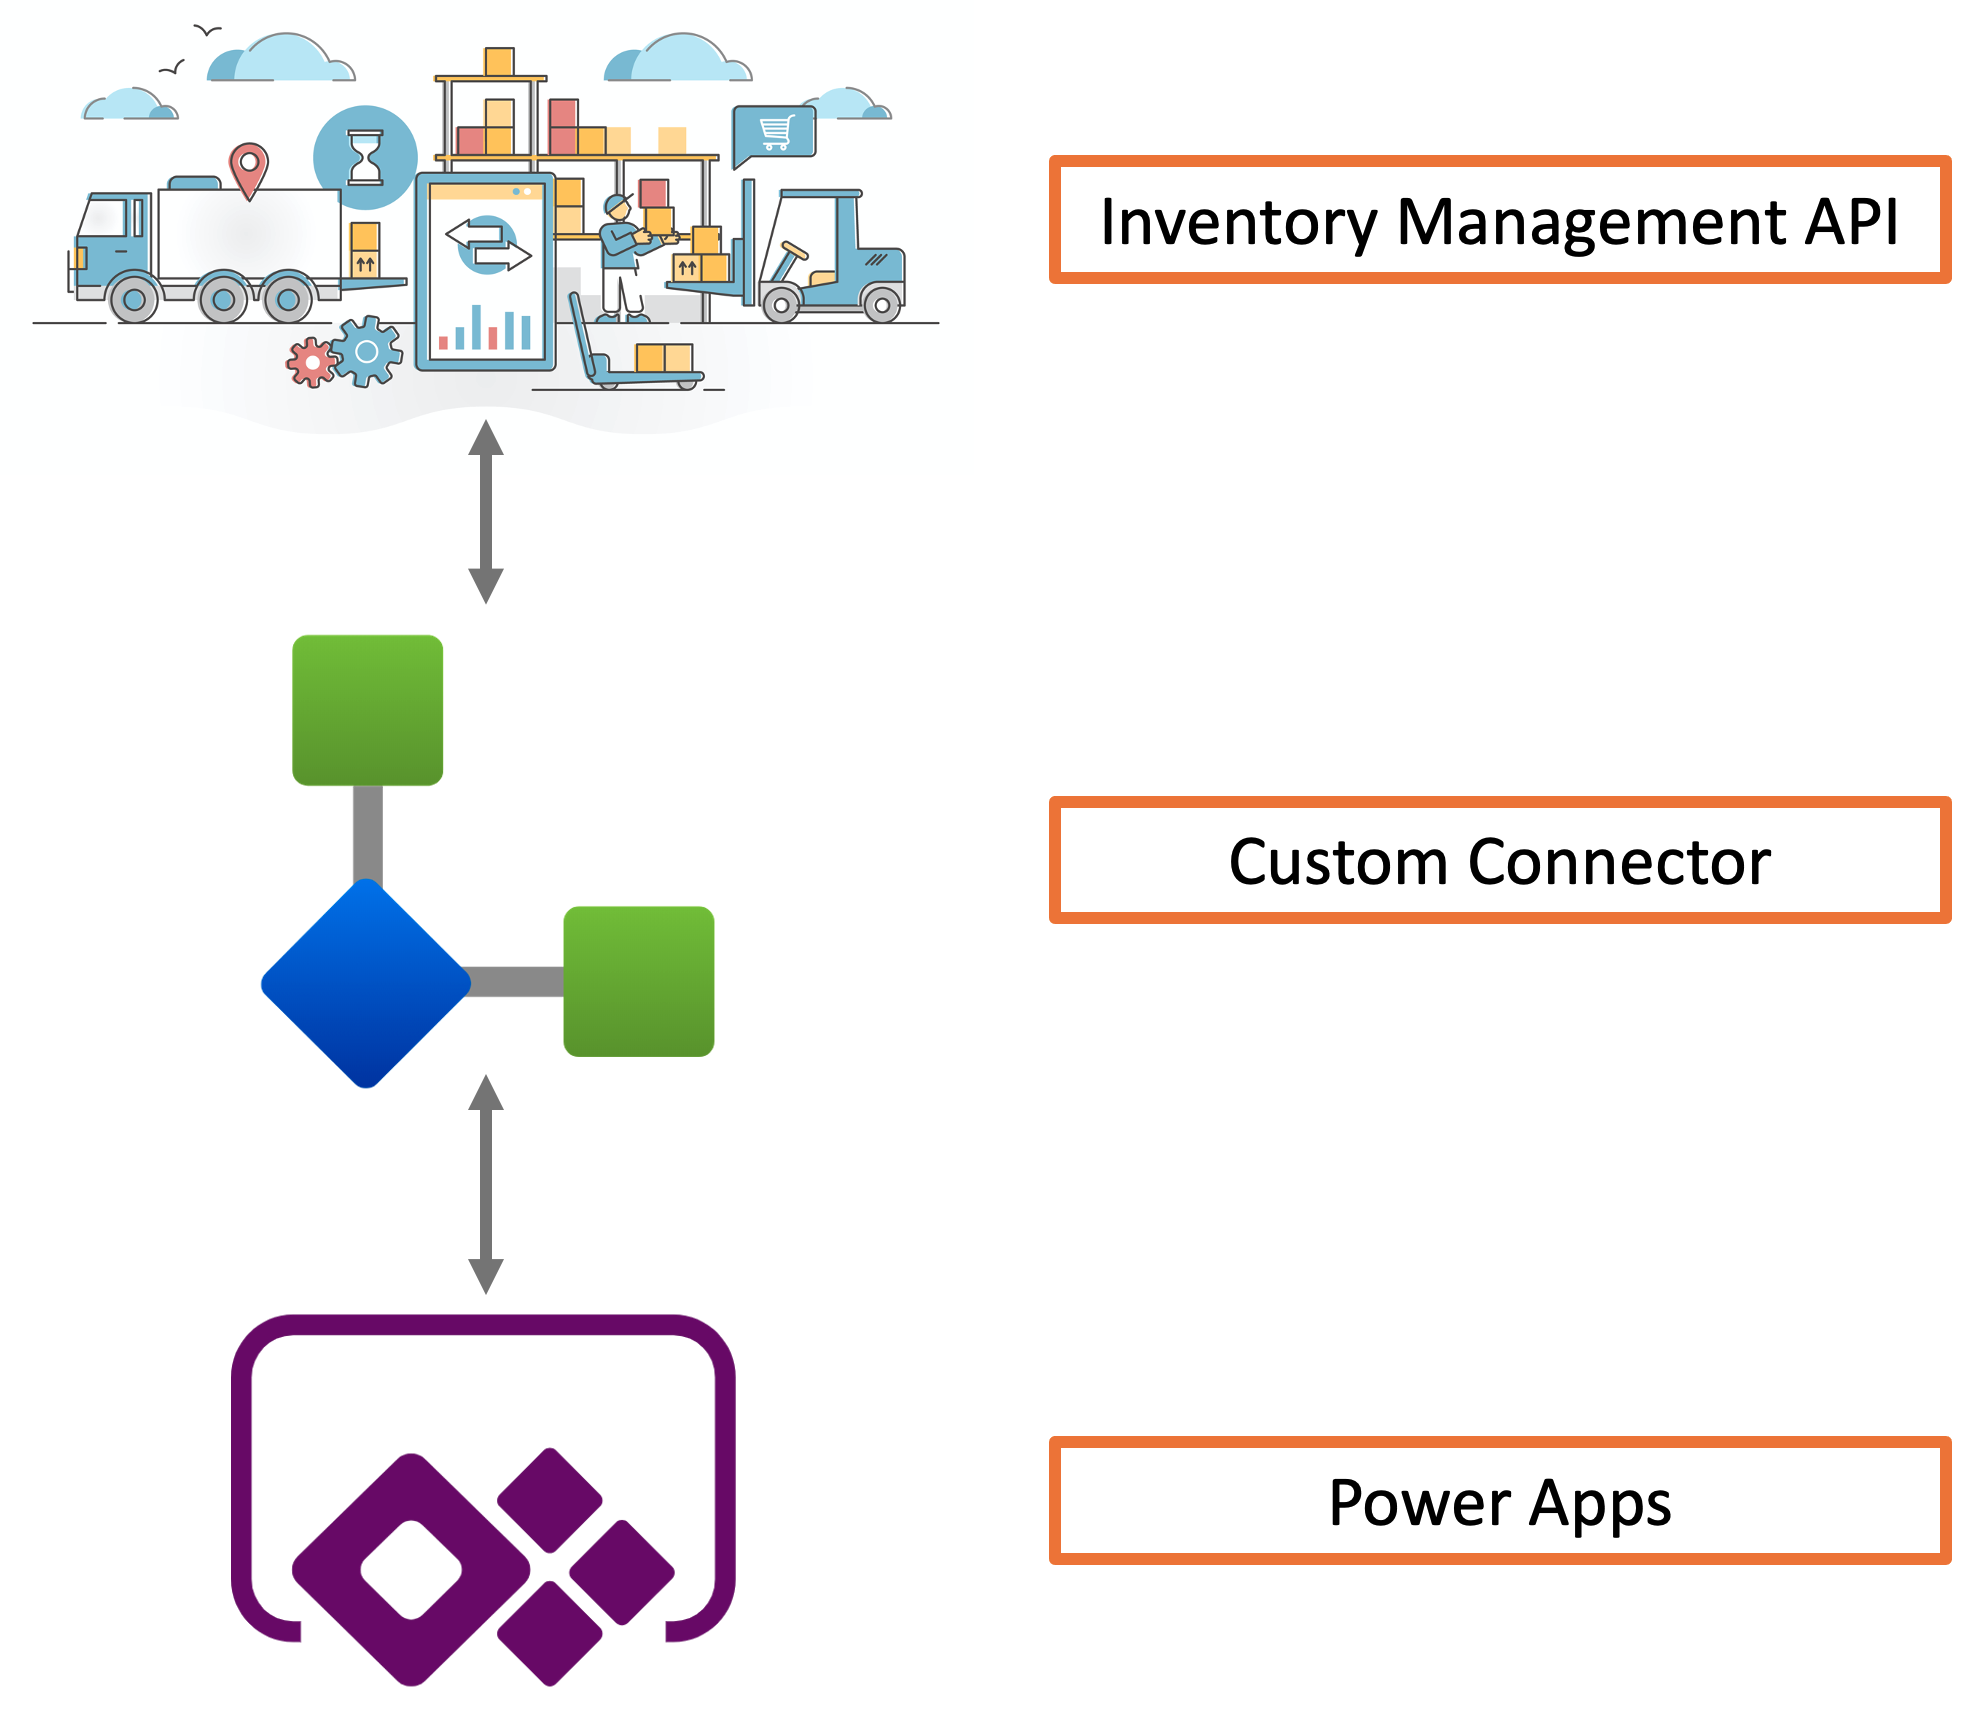
However, what if you want to use your internal APIs or APIs not yet offering their official connectors? Here's an example. If your company has an inventory management system, and you want to use it within your Power Apps or Power Automate. That point is exactly where Power Platform custom connectors is necessary.
Therefore, Power Platform custom connectors enrich those citizen developers' capabilities because those connectors can connect any API applications for the citizen developers to use.
In this post, let's build a custom connector that provides a static map image generated by Google Maps API and Naver Map API using your GPS location.
Proxy app to Google Maps and Naver Map API
First, let's build an Azure Functions app that connects to Google Maps and Naver Map. Suppose that you've already got the API keys for both services. If you haven't yet, get the keys first by visiting here for Google and here for Naver. Then, store them to local.settings.json within your Azure Functions app.
{
  "Values": {
    ...
    "Maps__Google__ApiKey": "<GOOGLE_MAPS_API_KEY>",
    "Maps__Naver__ClientId": "<NAVER_MAP_API_CLIENT_ID>",
    "Maps__Naver__ClientSecret": "<NAVER_MAP_API_CLIENT_SECRET>"
  }
}
Here's the sample logic to get the static image from Google Maps API. It takes the latitude and longitude of your current location and image zoom level, then returns the static map image. There are a few hard-coded assumptions, though:
- The image size should be 400x400.
- The image should be in
.pngformat. - The marker should show be red and show my location.
public class GoogleMapService : IMapService
{
    public async Task<byte[]> GetMapAsync(HttpRequest req)
    {
        var latitude = req.Query["lat"];
        var longitude = req.Query["long"];
        var zoom = (string)req.Query["zoom"] ?? "14";

        var sb = new StringBuilder();
        sb.Append("https://maps.googleapis.com/maps/api/staticmap")
          .Append($"?center={latitude},{longitude}")
          .Append("&size=400x400")
          .Append($"&zoom={zoom}")
          .Append($"&markers=color:red|{latitude},{longitude}")
          .Append("&format=png32")
          .Append($"&key={this._settings.Google.ApiKey}");
        var requestUri = new Uri(sb.ToString());

        var bytes = await this._http.GetByteArrayAsync(requestUri).ConfigureAwait(false);

        return bytes;
    }
}
The NaverMapService class has a similar logic with the same input and assumptions. Here's the code:
public class NaverMapService : IMapService
{
    public async Task<byte[]> GetMapAsync(HttpRequest req)
    {
        var latitude = req.Query["lat"];
        var longitude = req.Query["long"];
        var zoom = (string)req.Query["zoom"] ?? "13";

        var sb = new StringBuilder();
        sb.Append("https://naveropenapi.apigw.ntruss.com/map-static/v2/raster")
          .Append($"?center={longitude},{latitude}")
          .Append("&w=400")
          .Append("&h=400")
          .Append($"&level={zoom}")
          .Append($"&markers=color:blue|pos:{longitude}%20{latitude}")
          .Append("&format=png")
          .Append("&lang=en");
        var requestUri = new Uri(sb.ToString());

        this._http.DefaultRequestHeaders.Clear();
        this._http.DefaultRequestHeaders.Add("X-NCP-APIGW-API-KEY-ID", this._settings.Naver.ClientId);
        this._http.DefaultRequestHeaders.Add("X-NCP-APIGW-API-KEY", this._settings.Naver.ClientSecret);

        var bytes = await this._http.GetByteArrayAsync(requestUri).ConfigureAwait(false);

        return bytes;
    }
}
Let's take a look at the function endpoints. Here's for the Google Maps and Naver Map. As the GetMapAsync(req) method returns a byte array value, you need to transform it as FileContentResult, with the content type of image/png.
// Google Maps
public class GoogleMapsTrigger
{
    [FunctionName(nameof(GoogleMapsTrigger.GetGoogleMapImage))]
    public async Task<IActionResult> GetGoogleMapImage(
        [HttpTrigger(AuthorizationLevel.Anonymous, "GET", Route = "google/image")] HttpRequest req)
    {
        this._logger.LogInformation("C# HTTP trigger function processed a request.");

        var bytes = await this._service.GetMapAsync(req).ConfigureAwait(false);

        return new FileContentResult(bytes, "image/png");
    }
}

// Naver Map
public class NaverMapsTrigger
{
    [FunctionName(nameof(NaverMapsTrigger.GetNaverMapImage))]
    public async Task<IActionResult> GetNaverMapImage(
        [HttpTrigger(AuthorizationLevel.Anonymous, "GET", Route = "naver/image")] HttpRequest req)
    {
        this._logger.LogInformation("C# HTTP trigger function processed a request.");

        var bytes = await this._service.GetMapAsync(req).ConfigureAwait(false);

        return new FileContentResult(bytes, "image/png");
    }
}
Then, add the OpenAPI capability to each function endpoint. Here's the example:
// Google Maps
public class GoogleMapsTrigger
{
[FunctionName(nameof(GoogleMapsTrigger.GetGoogleMapImage))]
// ⬇️⬇️⬇️ Add decorators provided by the OpenAPI extension ⬇️⬇️⬇️
[OpenApiOperation(operationId: nameof(GoogleMapsTrigger.GetGoogleMapImage), tags: new[] { "google" })]
[OpenApiParameter(name: "lat", In = ParameterLocation.Query, Required = true, Type = typeof(string), Description = "The **latitude** parameter")]
[OpenApiParameter(name: "long", In = ParameterLocation.Query, Required = true, Type = typeof(string), Description = "The **longitude** parameter")]
[OpenApiParameter(name: "zoom", In = ParameterLocation.Query, Required = false, Type = typeof(string), Description = "The **zoom level** parameter – Default value is `14`")]
[OpenApiResponseWithBody(statusCode: HttpStatusCode.OK, contentType: "image/png", bodyType: typeof(byte[]), Description = "The map image as an OK response")]
// ⬆️⬆️⬆️ Add decorators provided by the OpenAPI extension ⬆️⬆️⬆️
public async Task<IActionResult> GetGoogleMapImage(
[HttpTrigger(AuthorizationLevel.Anonymous, "GET", Route = "google/image")] HttpRequest req)
{
...
}
}
// Naver Map
public class NaverMapsTrigger
{
[FunctionName(nameof(NaverMapsTrigger.GetNaverMapImage))]
// ⬇️⬇️⬇️ Add decorators provided by the OpenAPI extension ⬇️⬇️⬇️
[OpenApiOperation(operationId: nameof(NaverMapsTrigger.GetNaverMapImage), tags: new[] { "naver" })]
[OpenApiParameter(name: "lat", In = ParameterLocation.Query, Required = true, Type = typeof(string), Description = "The **latitude** parameter")]
[OpenApiParameter(name: "long", In = ParameterLocation.Query, Required = true, Type = typeof(string), Description = "The **longitude** parameter")]
[OpenApiParameter(name: "zoom", In = ParameterLocation.Query, Required = false, Type = typeof(string), Description = "The **zoom level** parameter – Default value is `13`")]
[OpenApiResponseWithBody(statusCode: HttpStatusCode.OK, contentType: "image/png", bodyType: typeof(byte[]), Description = "The map image as an OK response")]
// ⬆️⬆️⬆️ Add decorators provided by the OpenAPI extension ⬆️⬆️⬆️
public async Task<IActionResult> GetNaverMapImage(
[HttpTrigger(AuthorizationLevel.Anonymous, "GET", Route = "naver/image")] HttpRequest req)
{
...
}
}
Run the function app in the local. Here are the latitude and longitude values for Seoul, Korea.
- latitude: 37.574703
- longitude: 126.978519

It seems to be working! Let's deploy it to Azure.
API Management integration
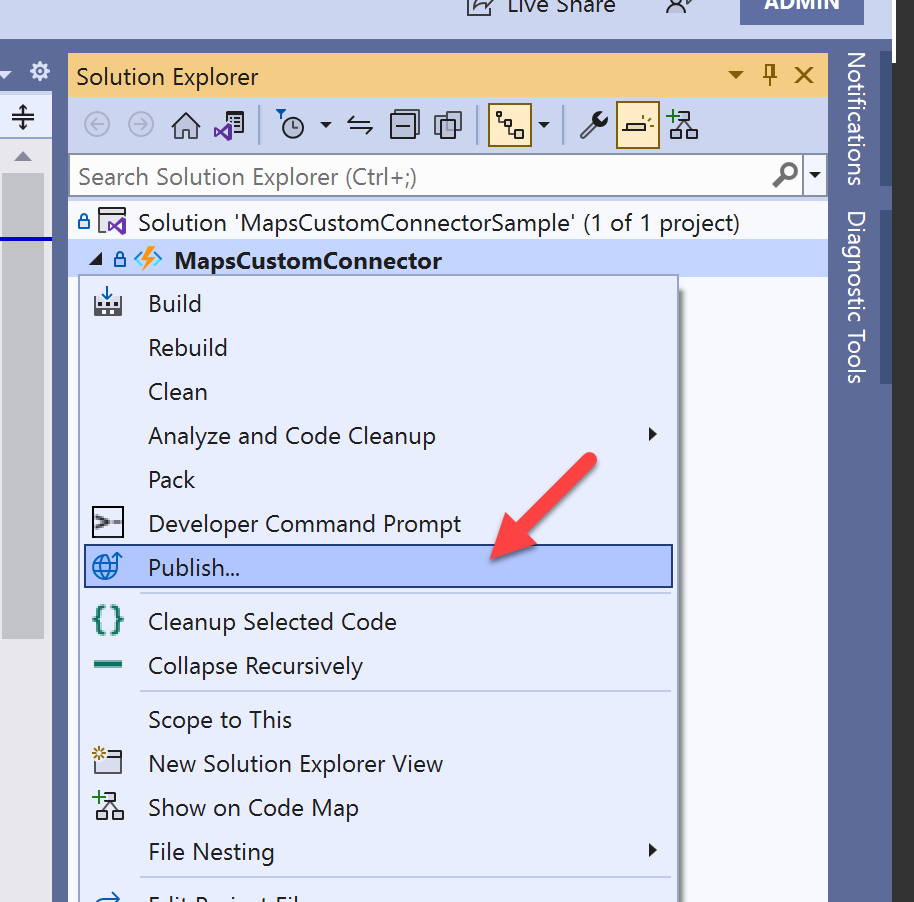
Visual Studio 2022 provides a built-in deployment tool for Azure Functions app onto Azure. In addition, the deployment tool supports seamless integration with Azure API Management as long as your Azure Functions app enables the OpenAPI capability. In this post, I'm going to use this feature. Right-mouse click on the Azure Functions project and select the "Publish" menu.
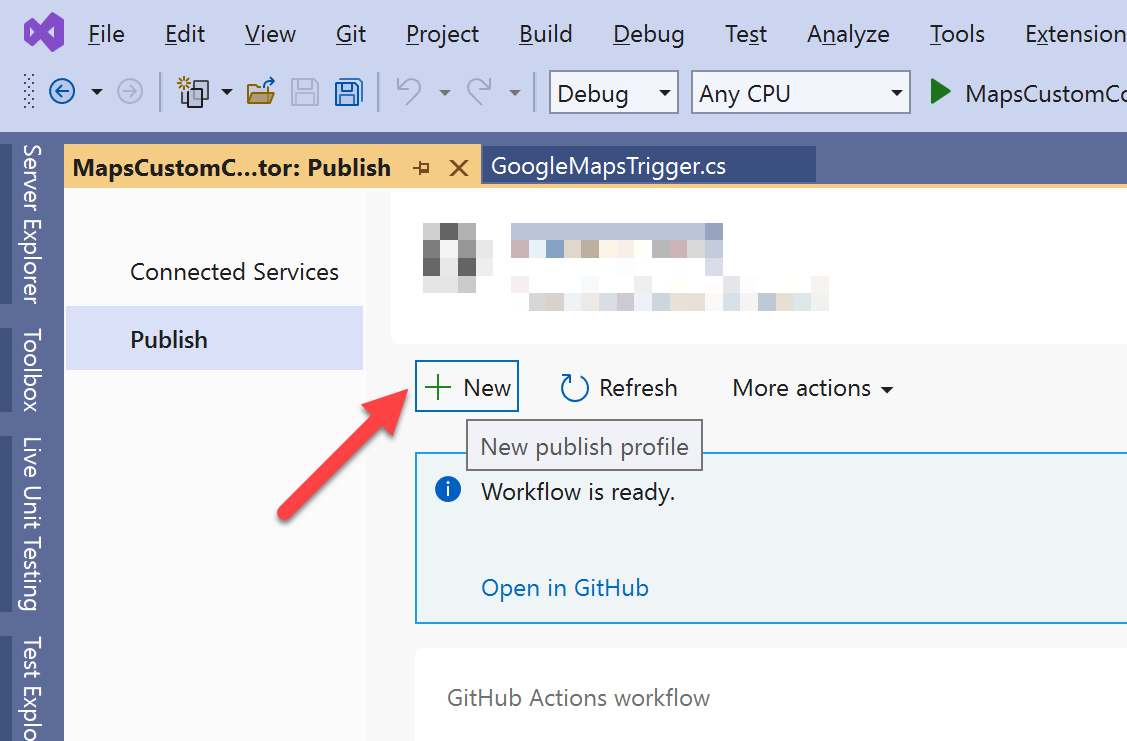
Then, you will see the publish screen. Click the "➕ New" button to create a new publish profile.
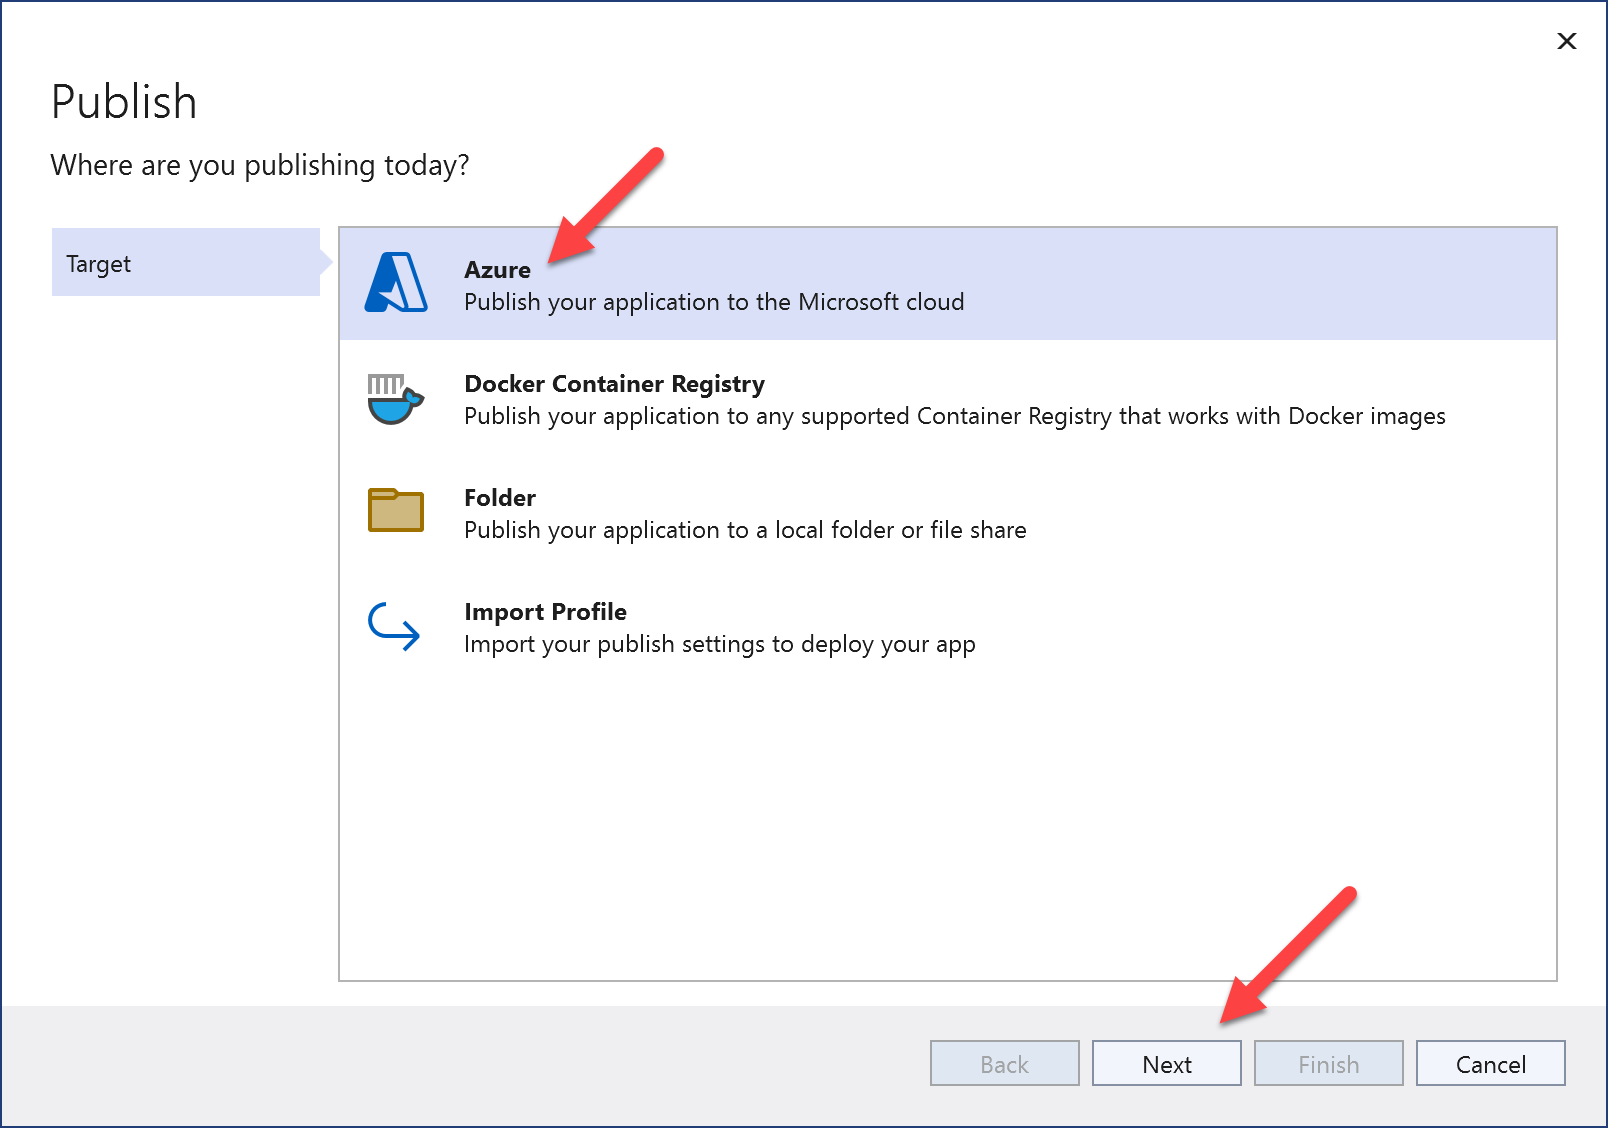
Choose "Azure" and click the "Next" button.
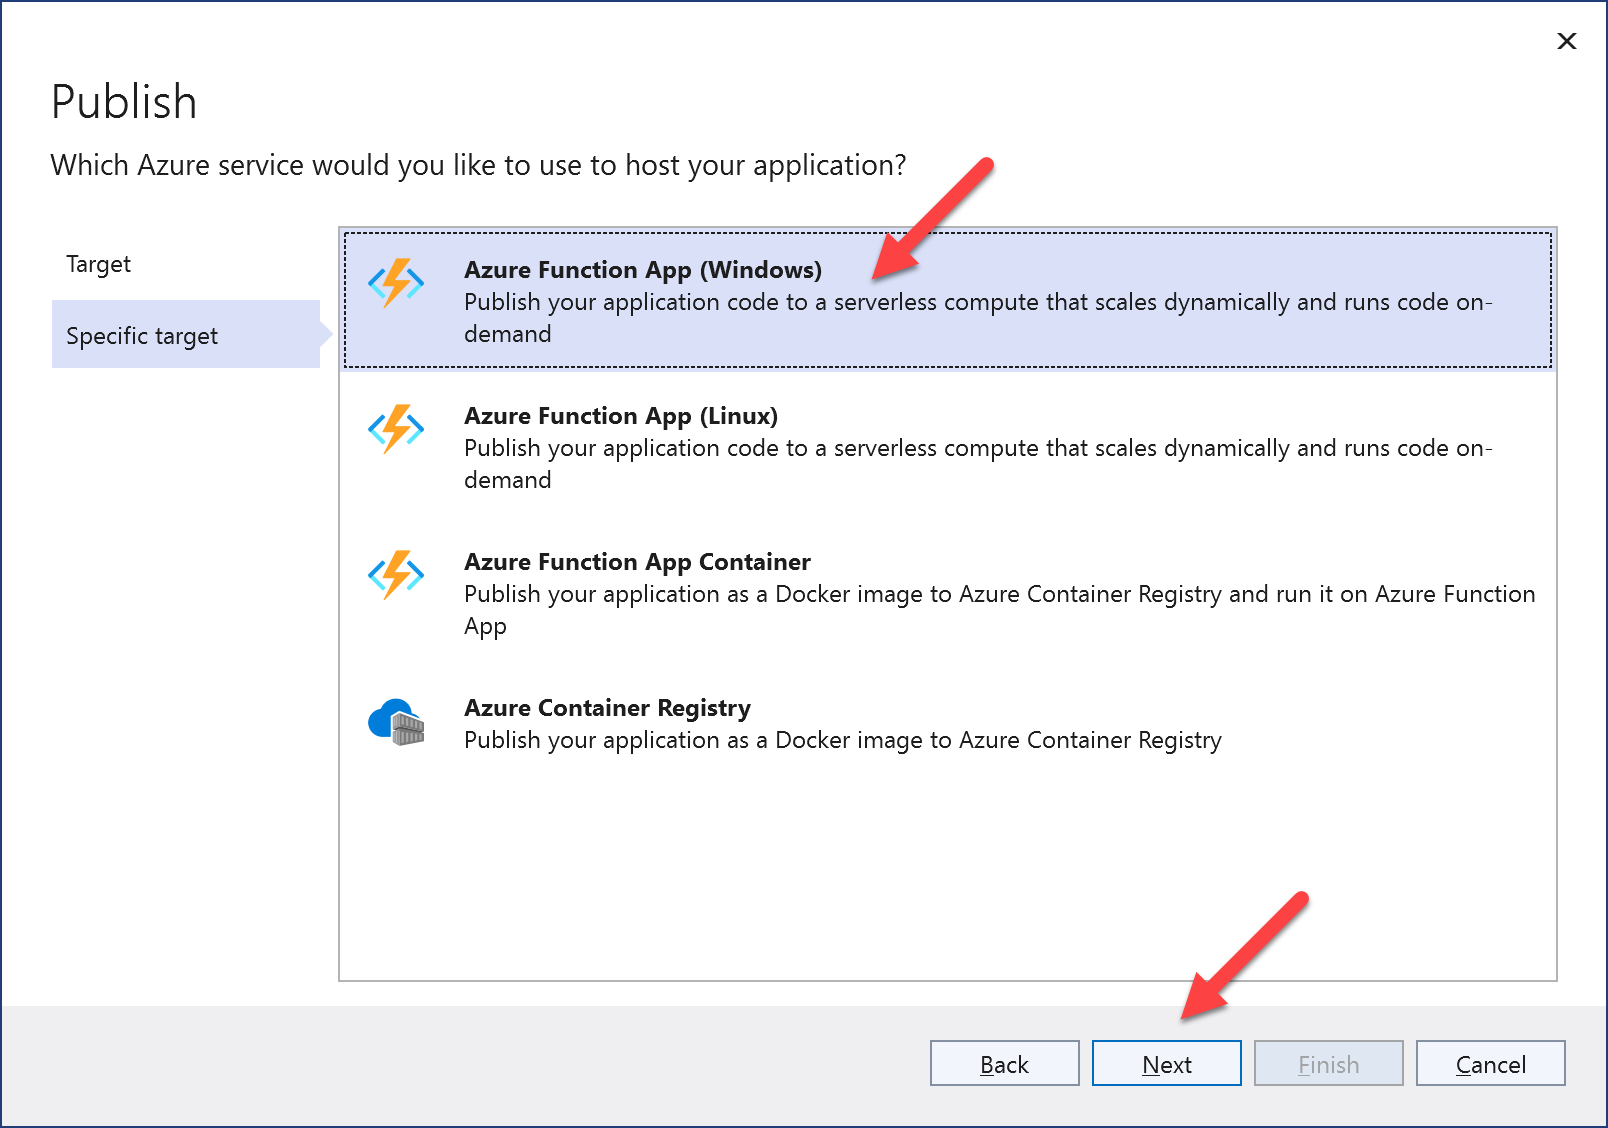
Select the app instance. This time simply pick up the "Azure Function App (Windows)" option, then click "Next".
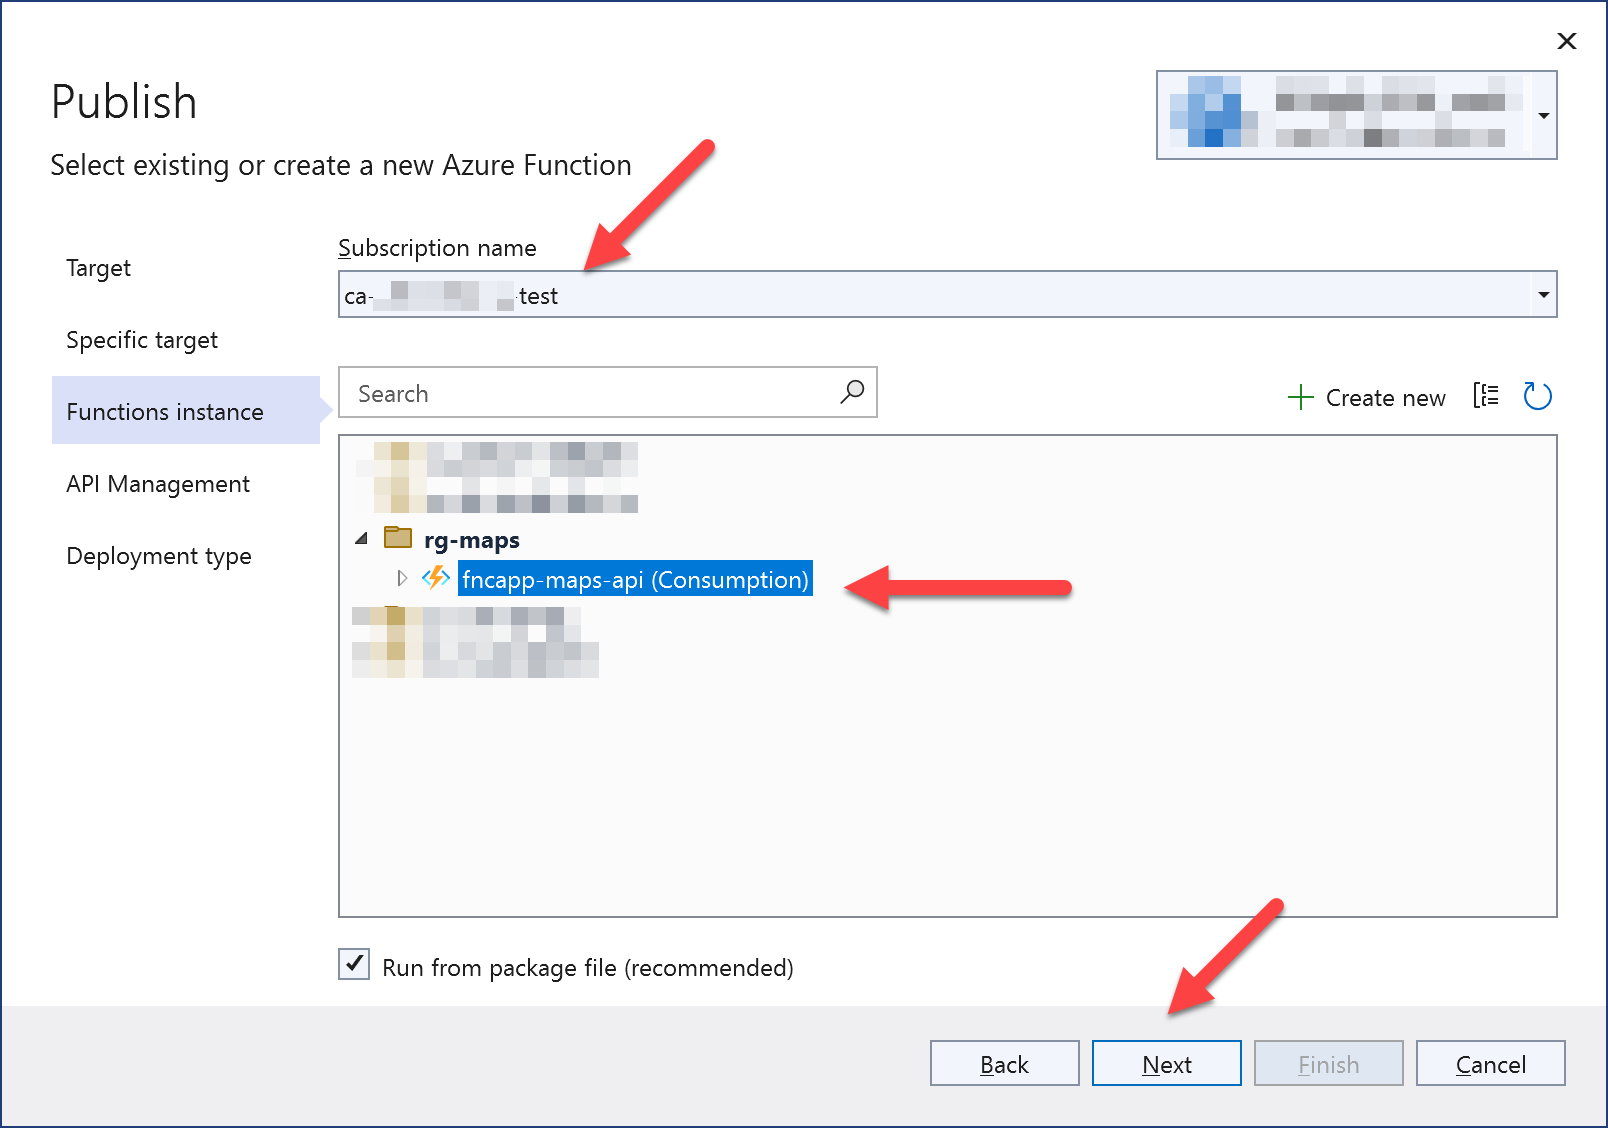
If you already provision an Azure Function app instance, you will see it on the screen. Otherwise, create a new one. Then, click "Next".
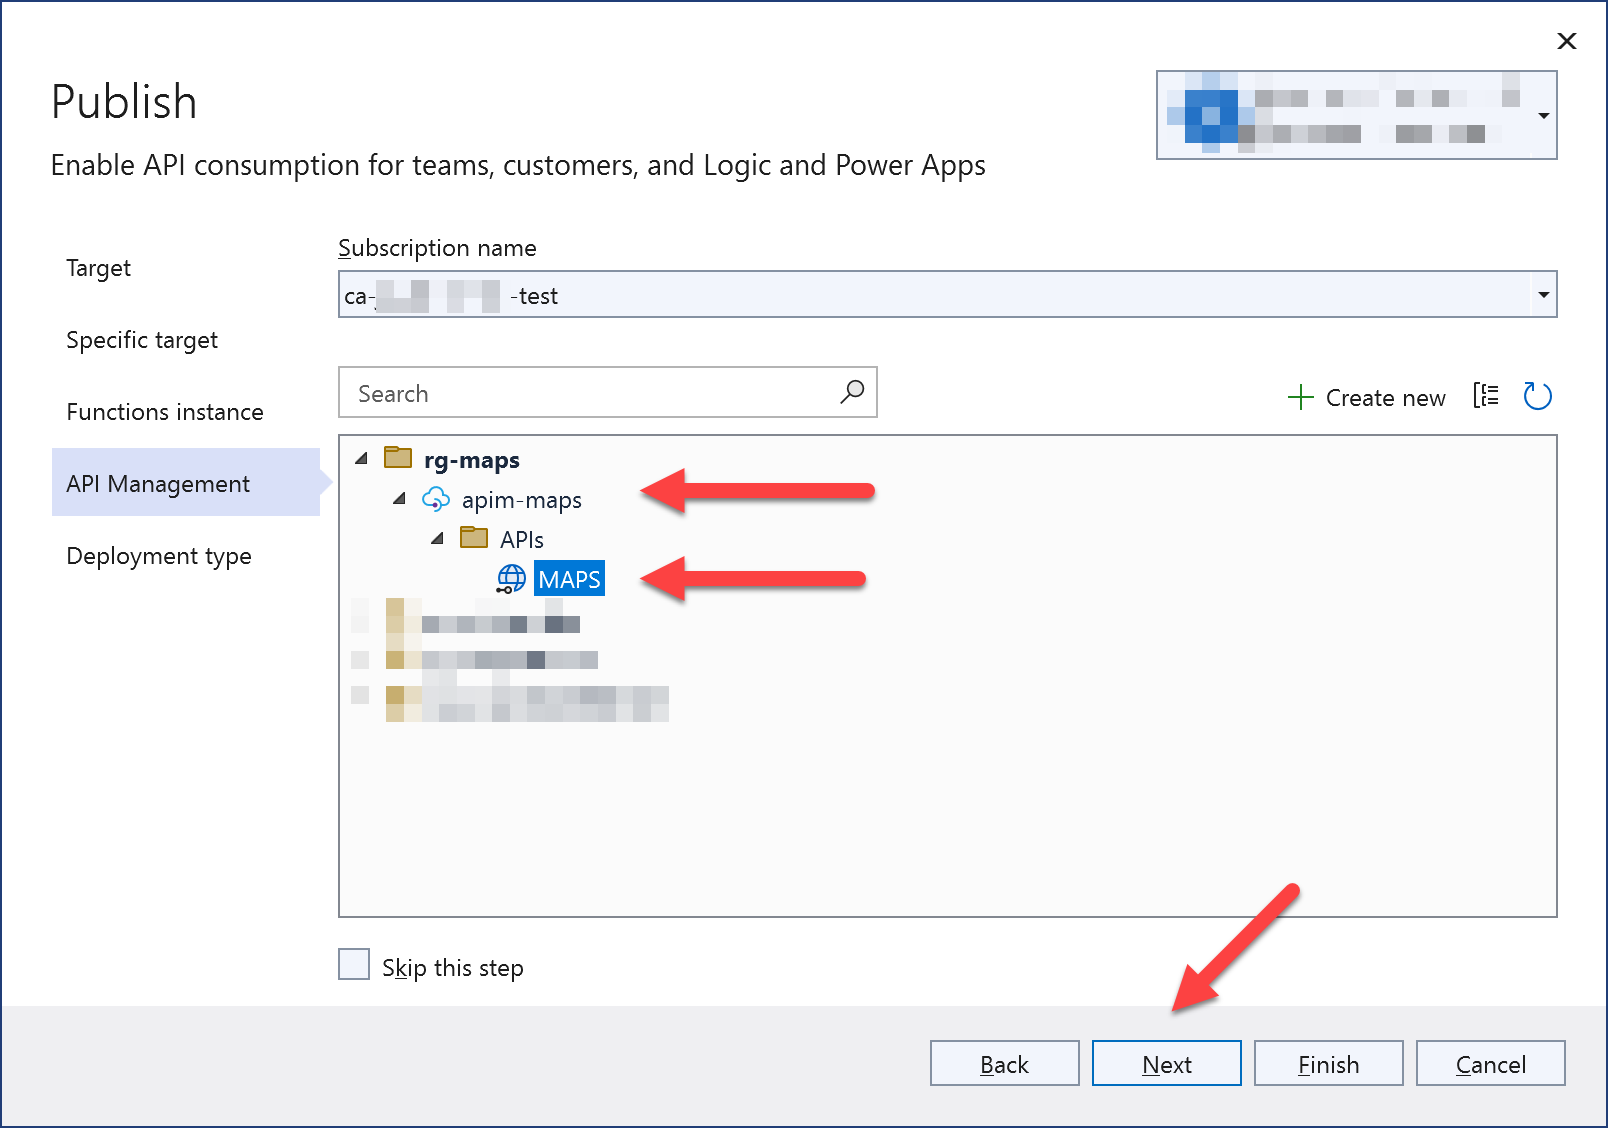
In the next step, you are asked to choose the Azure API Management instance for integration. Choose one, or create a new one. Then, click "Next".
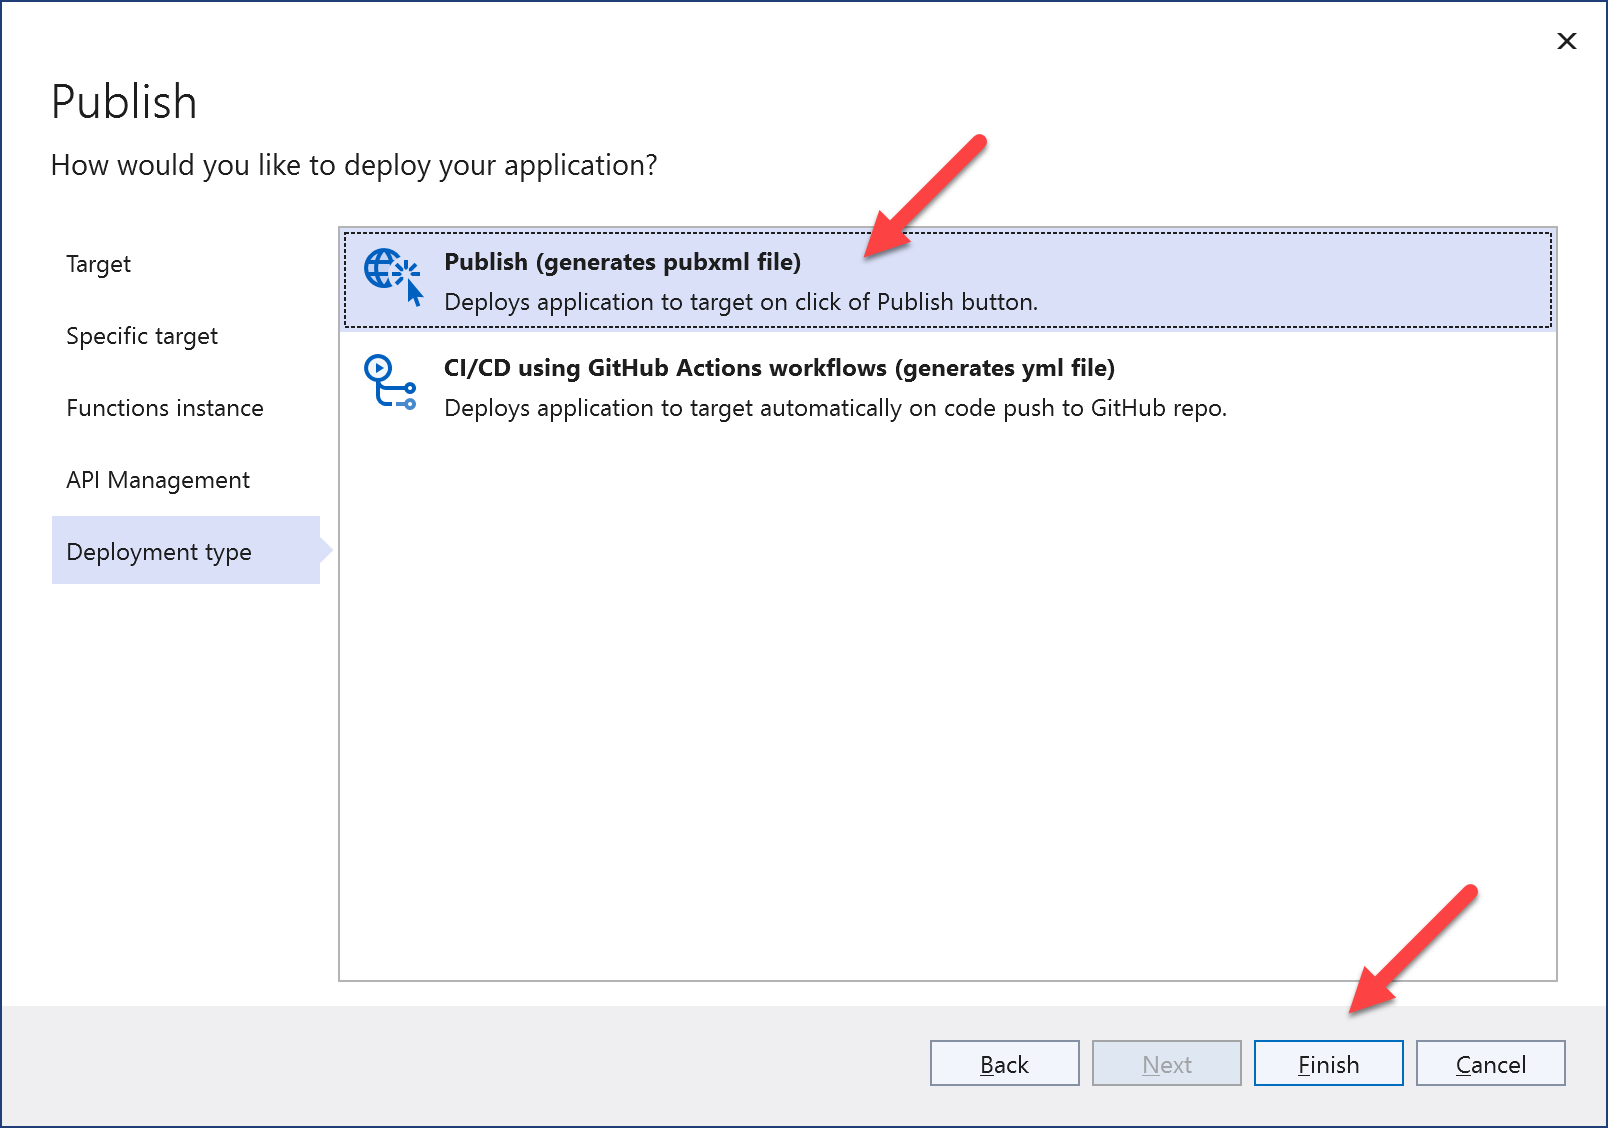
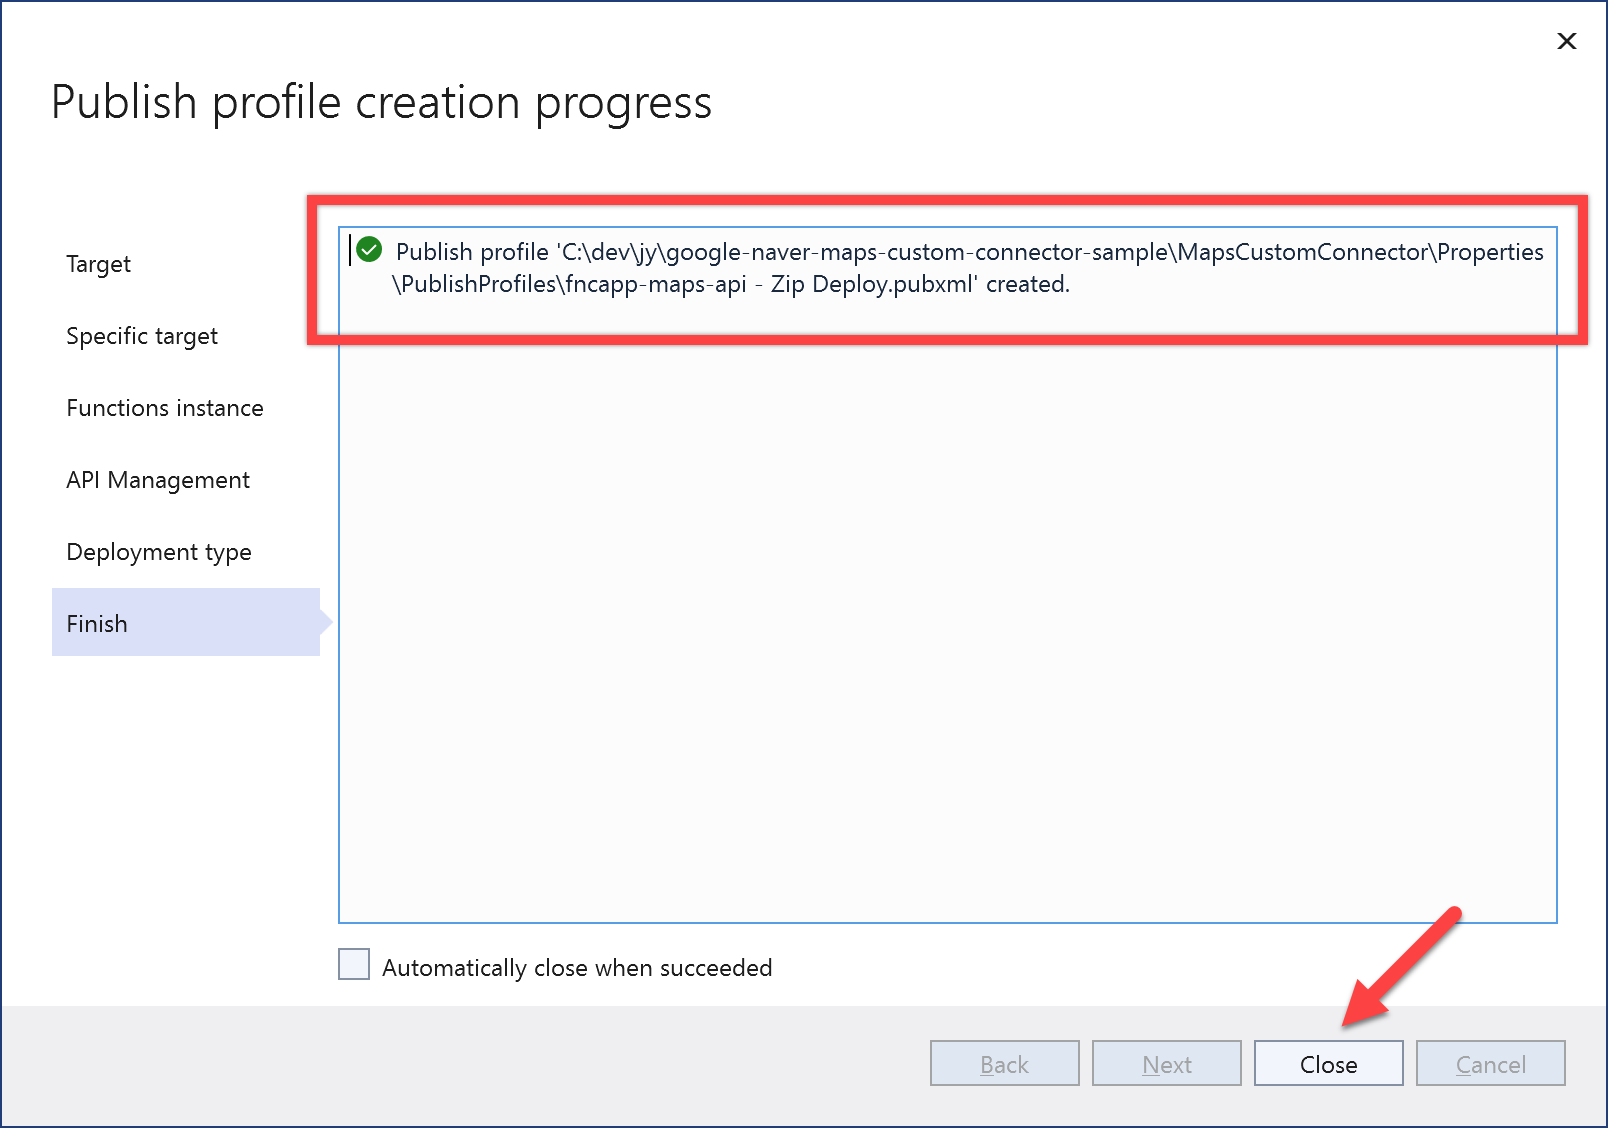
Finally, select the publish method – either local publish or GitHub Actions workflow. Let's pick up the local publish method for now. Then, click "Finish".
The publish profile has been created. Click "Close" to move on.
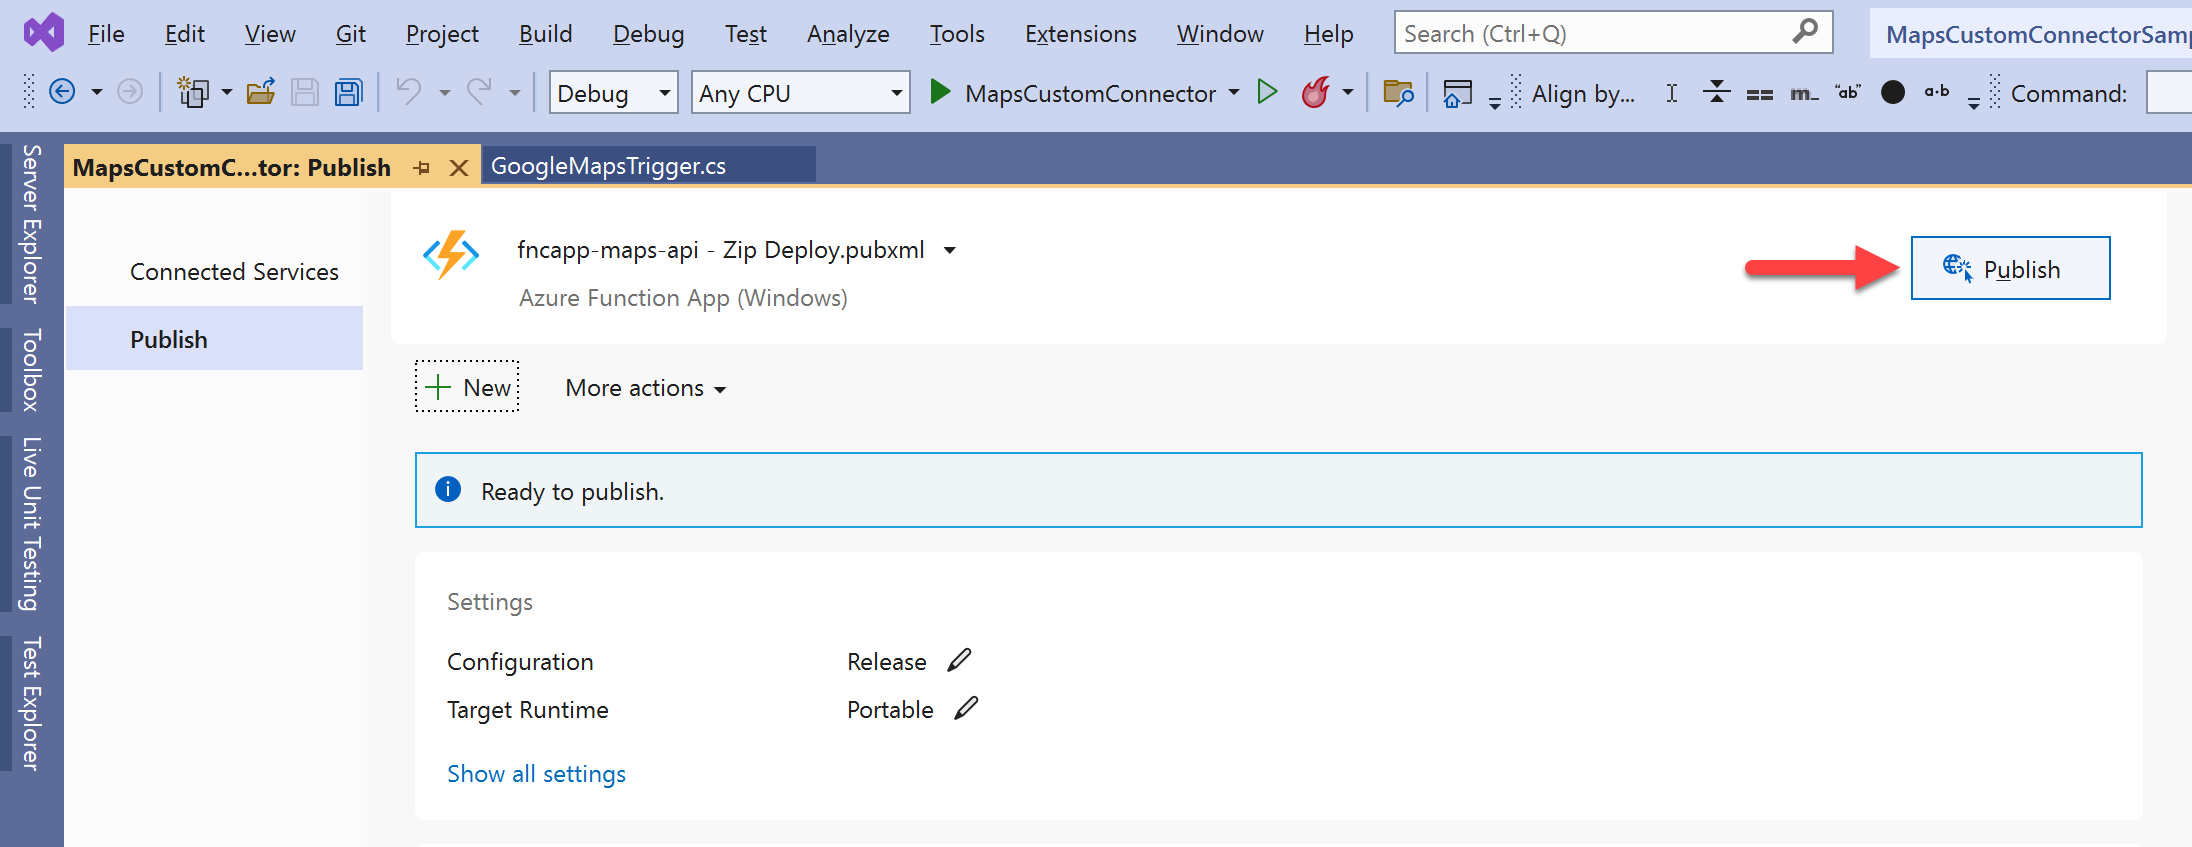
Now the function app is ready for deployment. Click the "Publish" button and see how it goes.
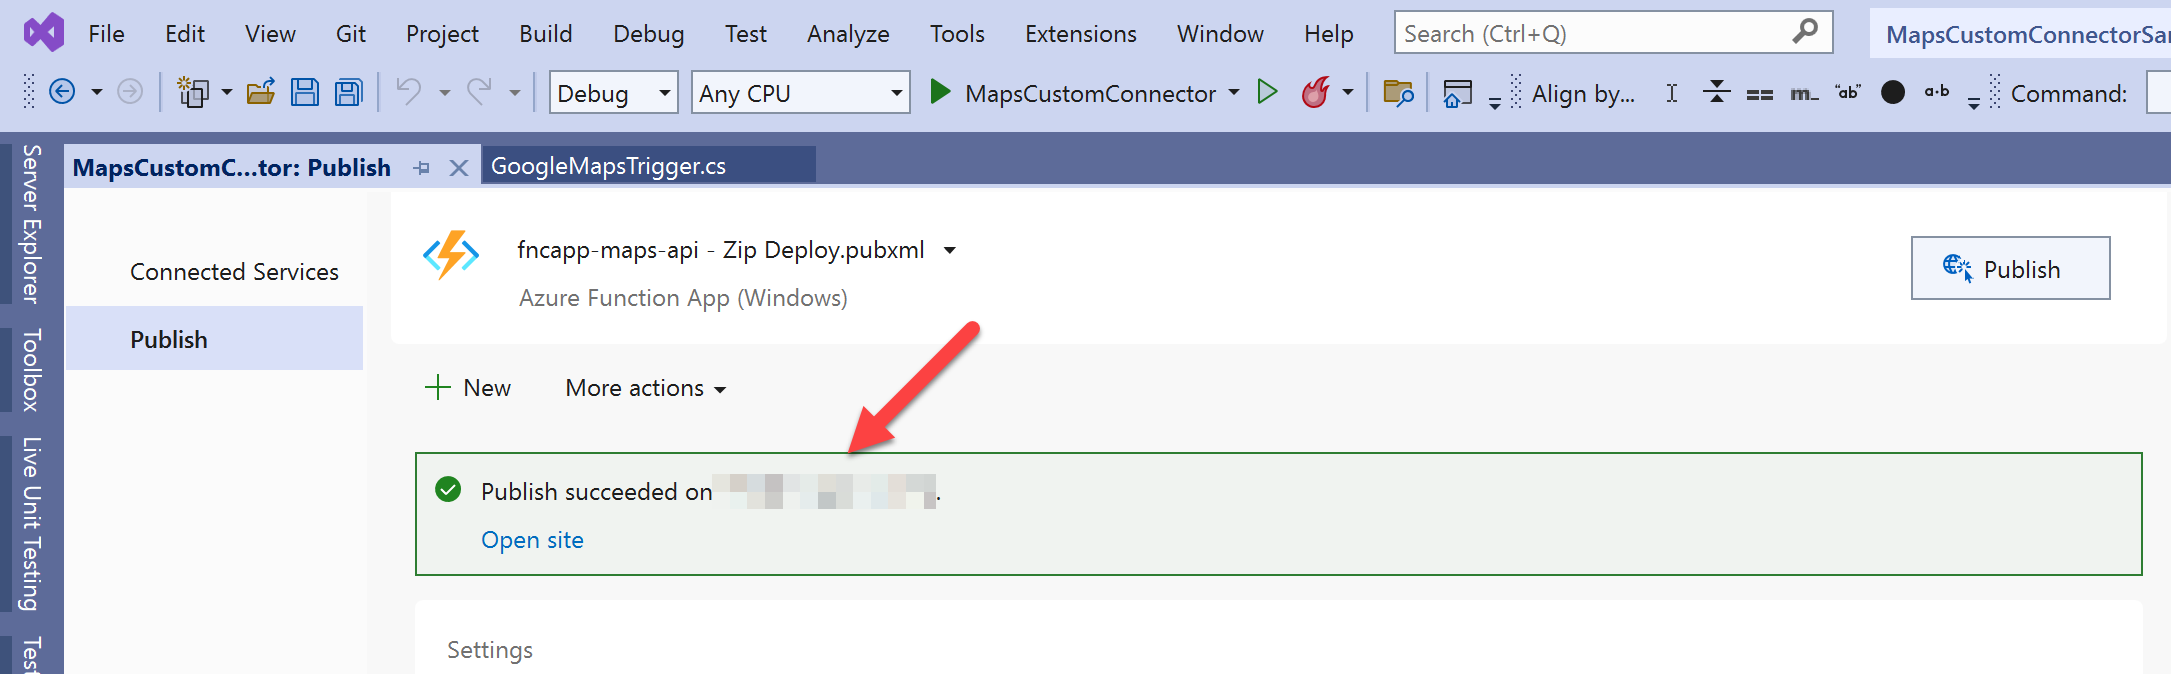
The Azure function app has been deployed and integrated with the Azure API Management instance.
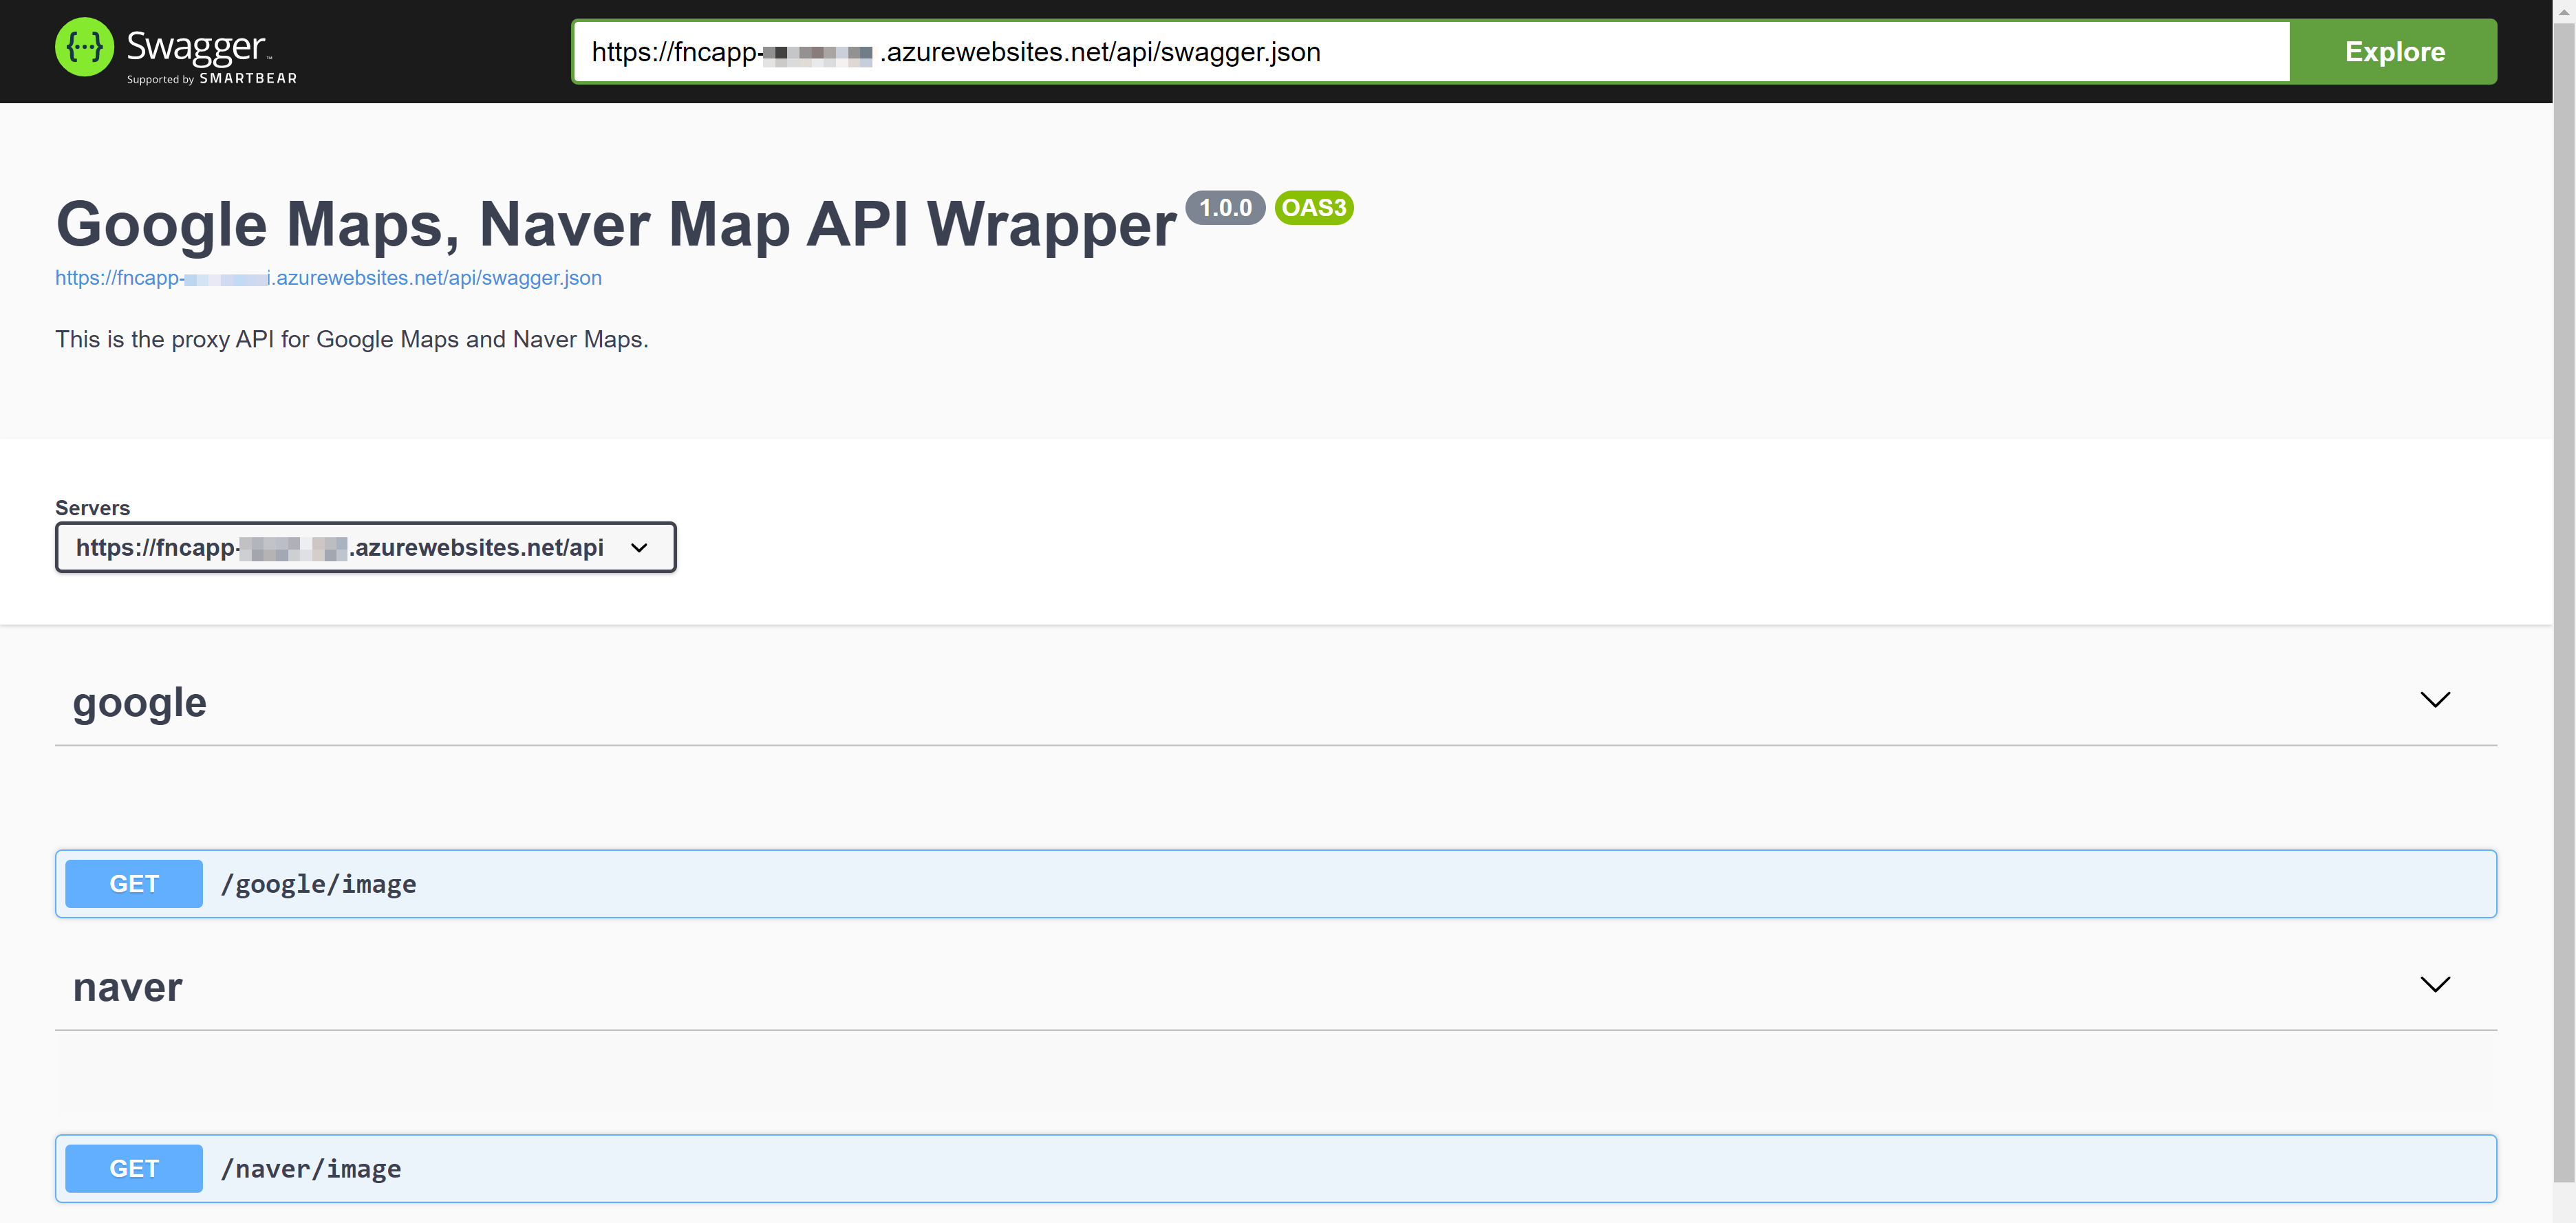
Go to the published function app site, and everything looks OK.
And API Management shows the function app integrated perfectly.
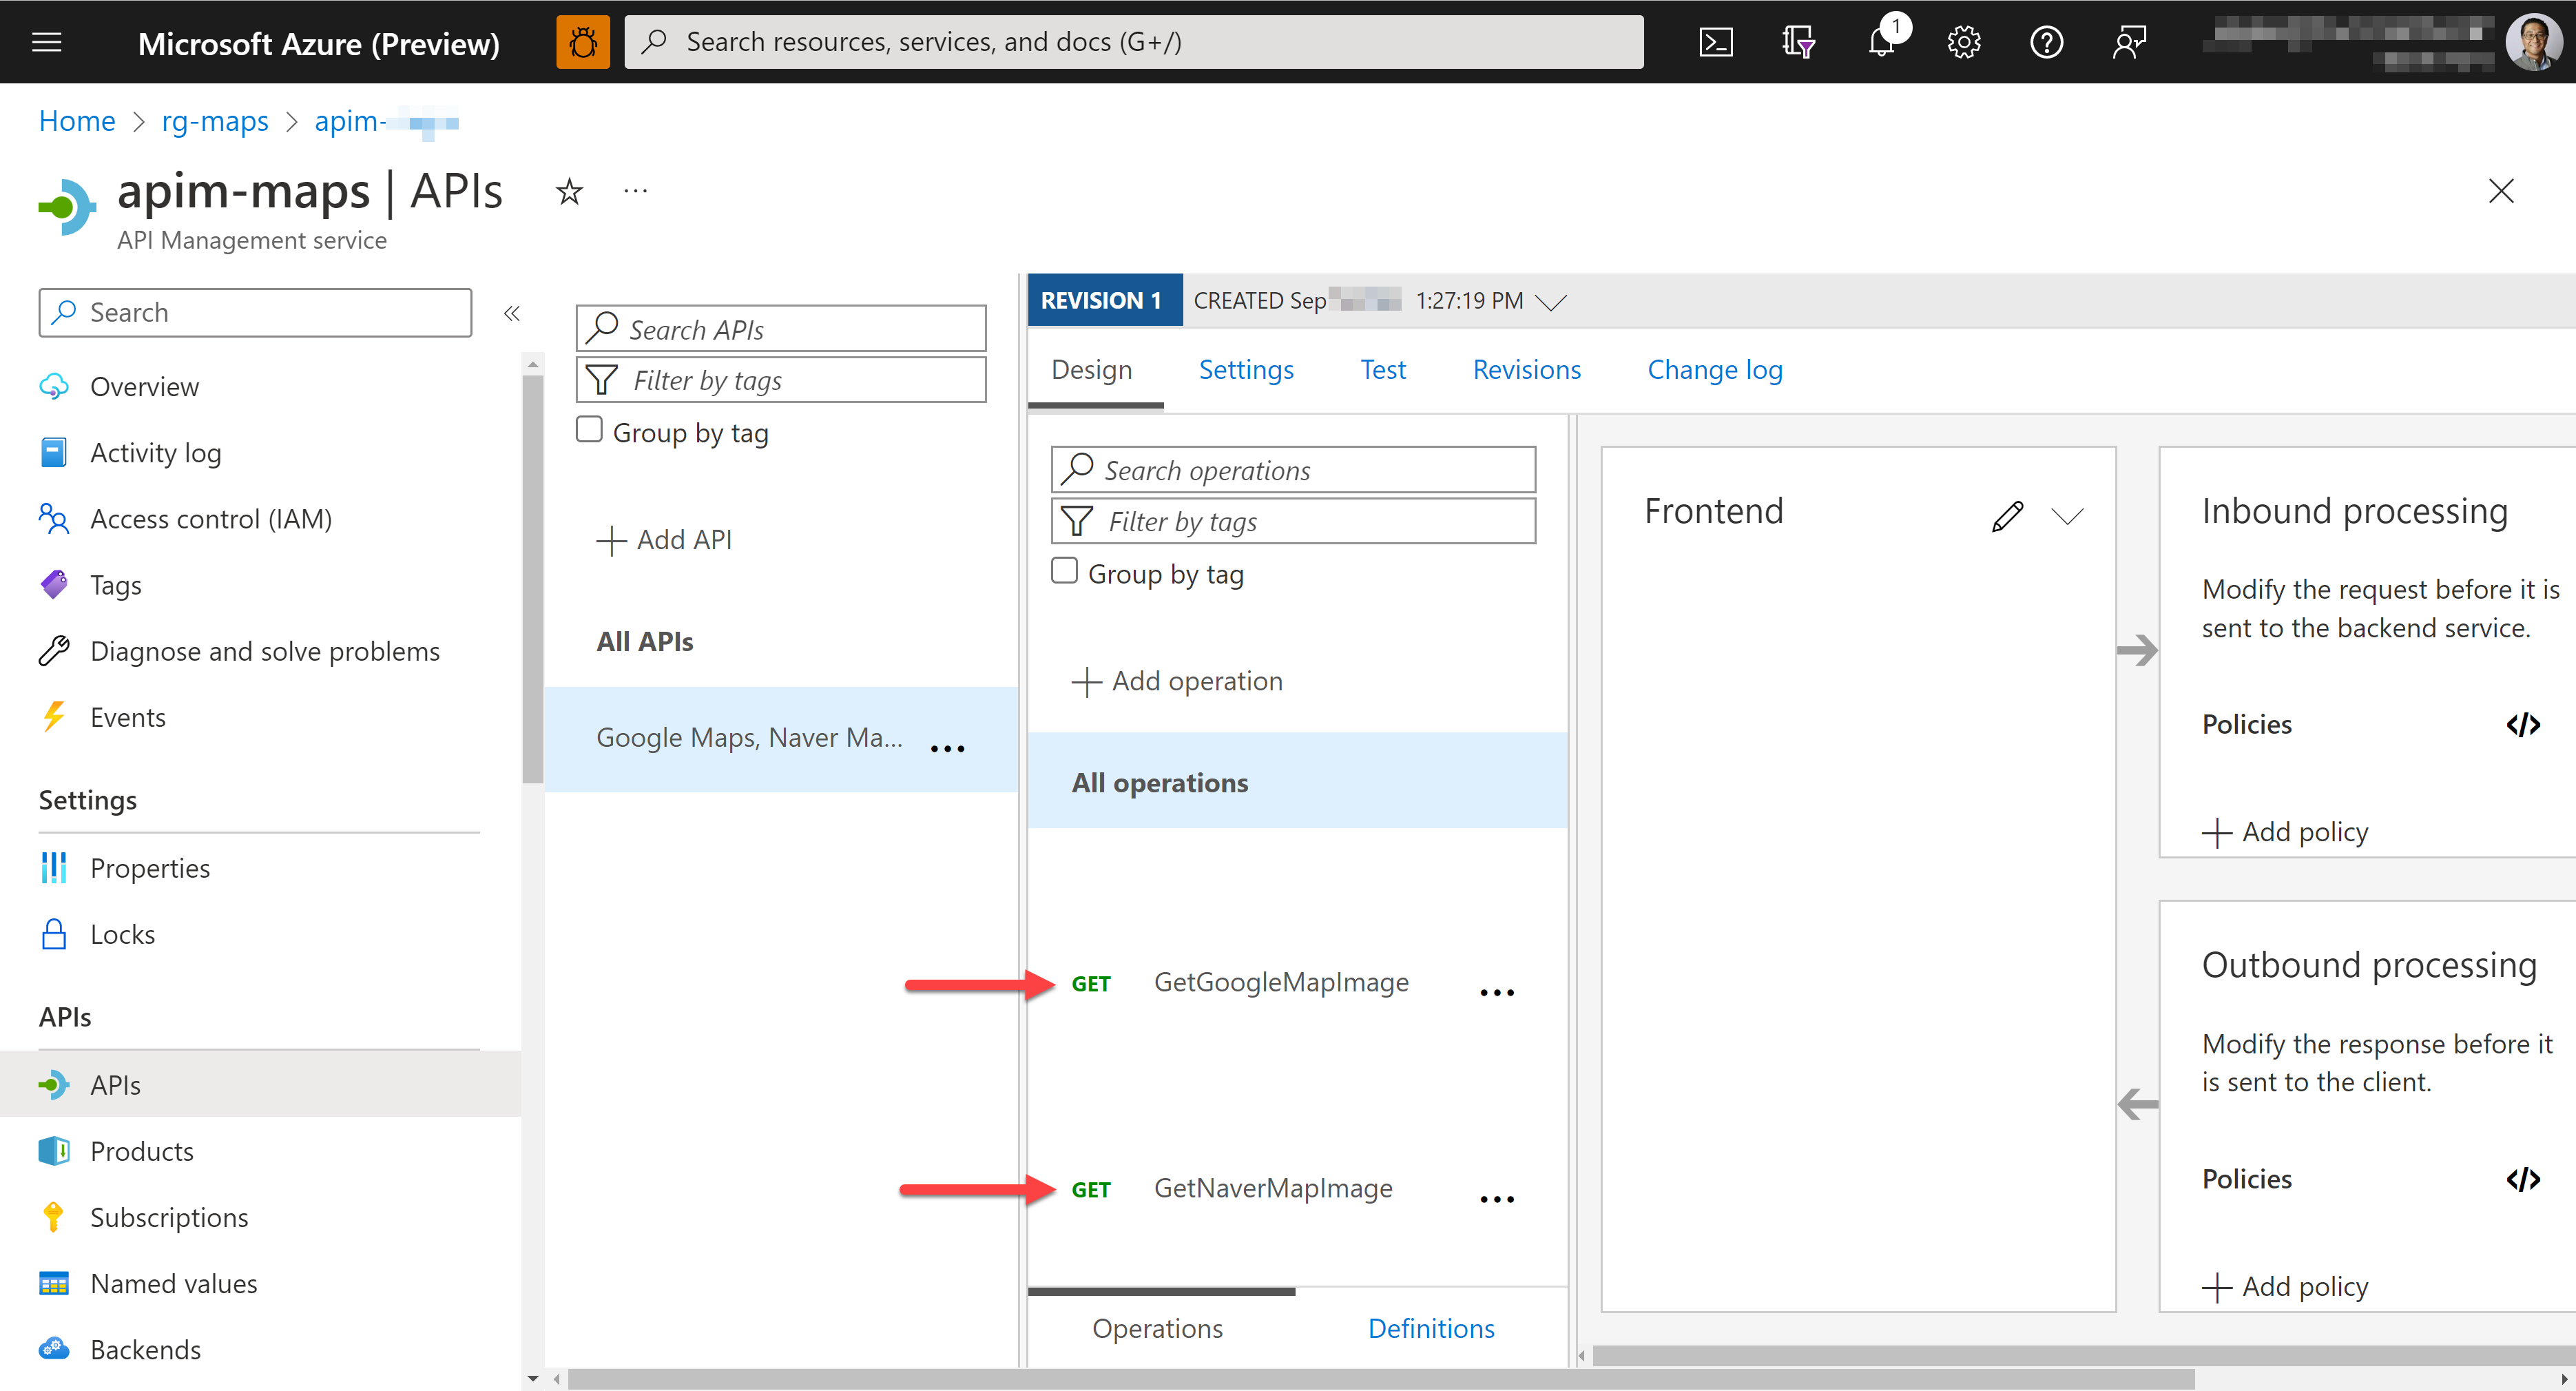
Now, you are ready to create a custom connector. Let's move on.
Two ways of building custom connector
There are two ways to create a custom connector.
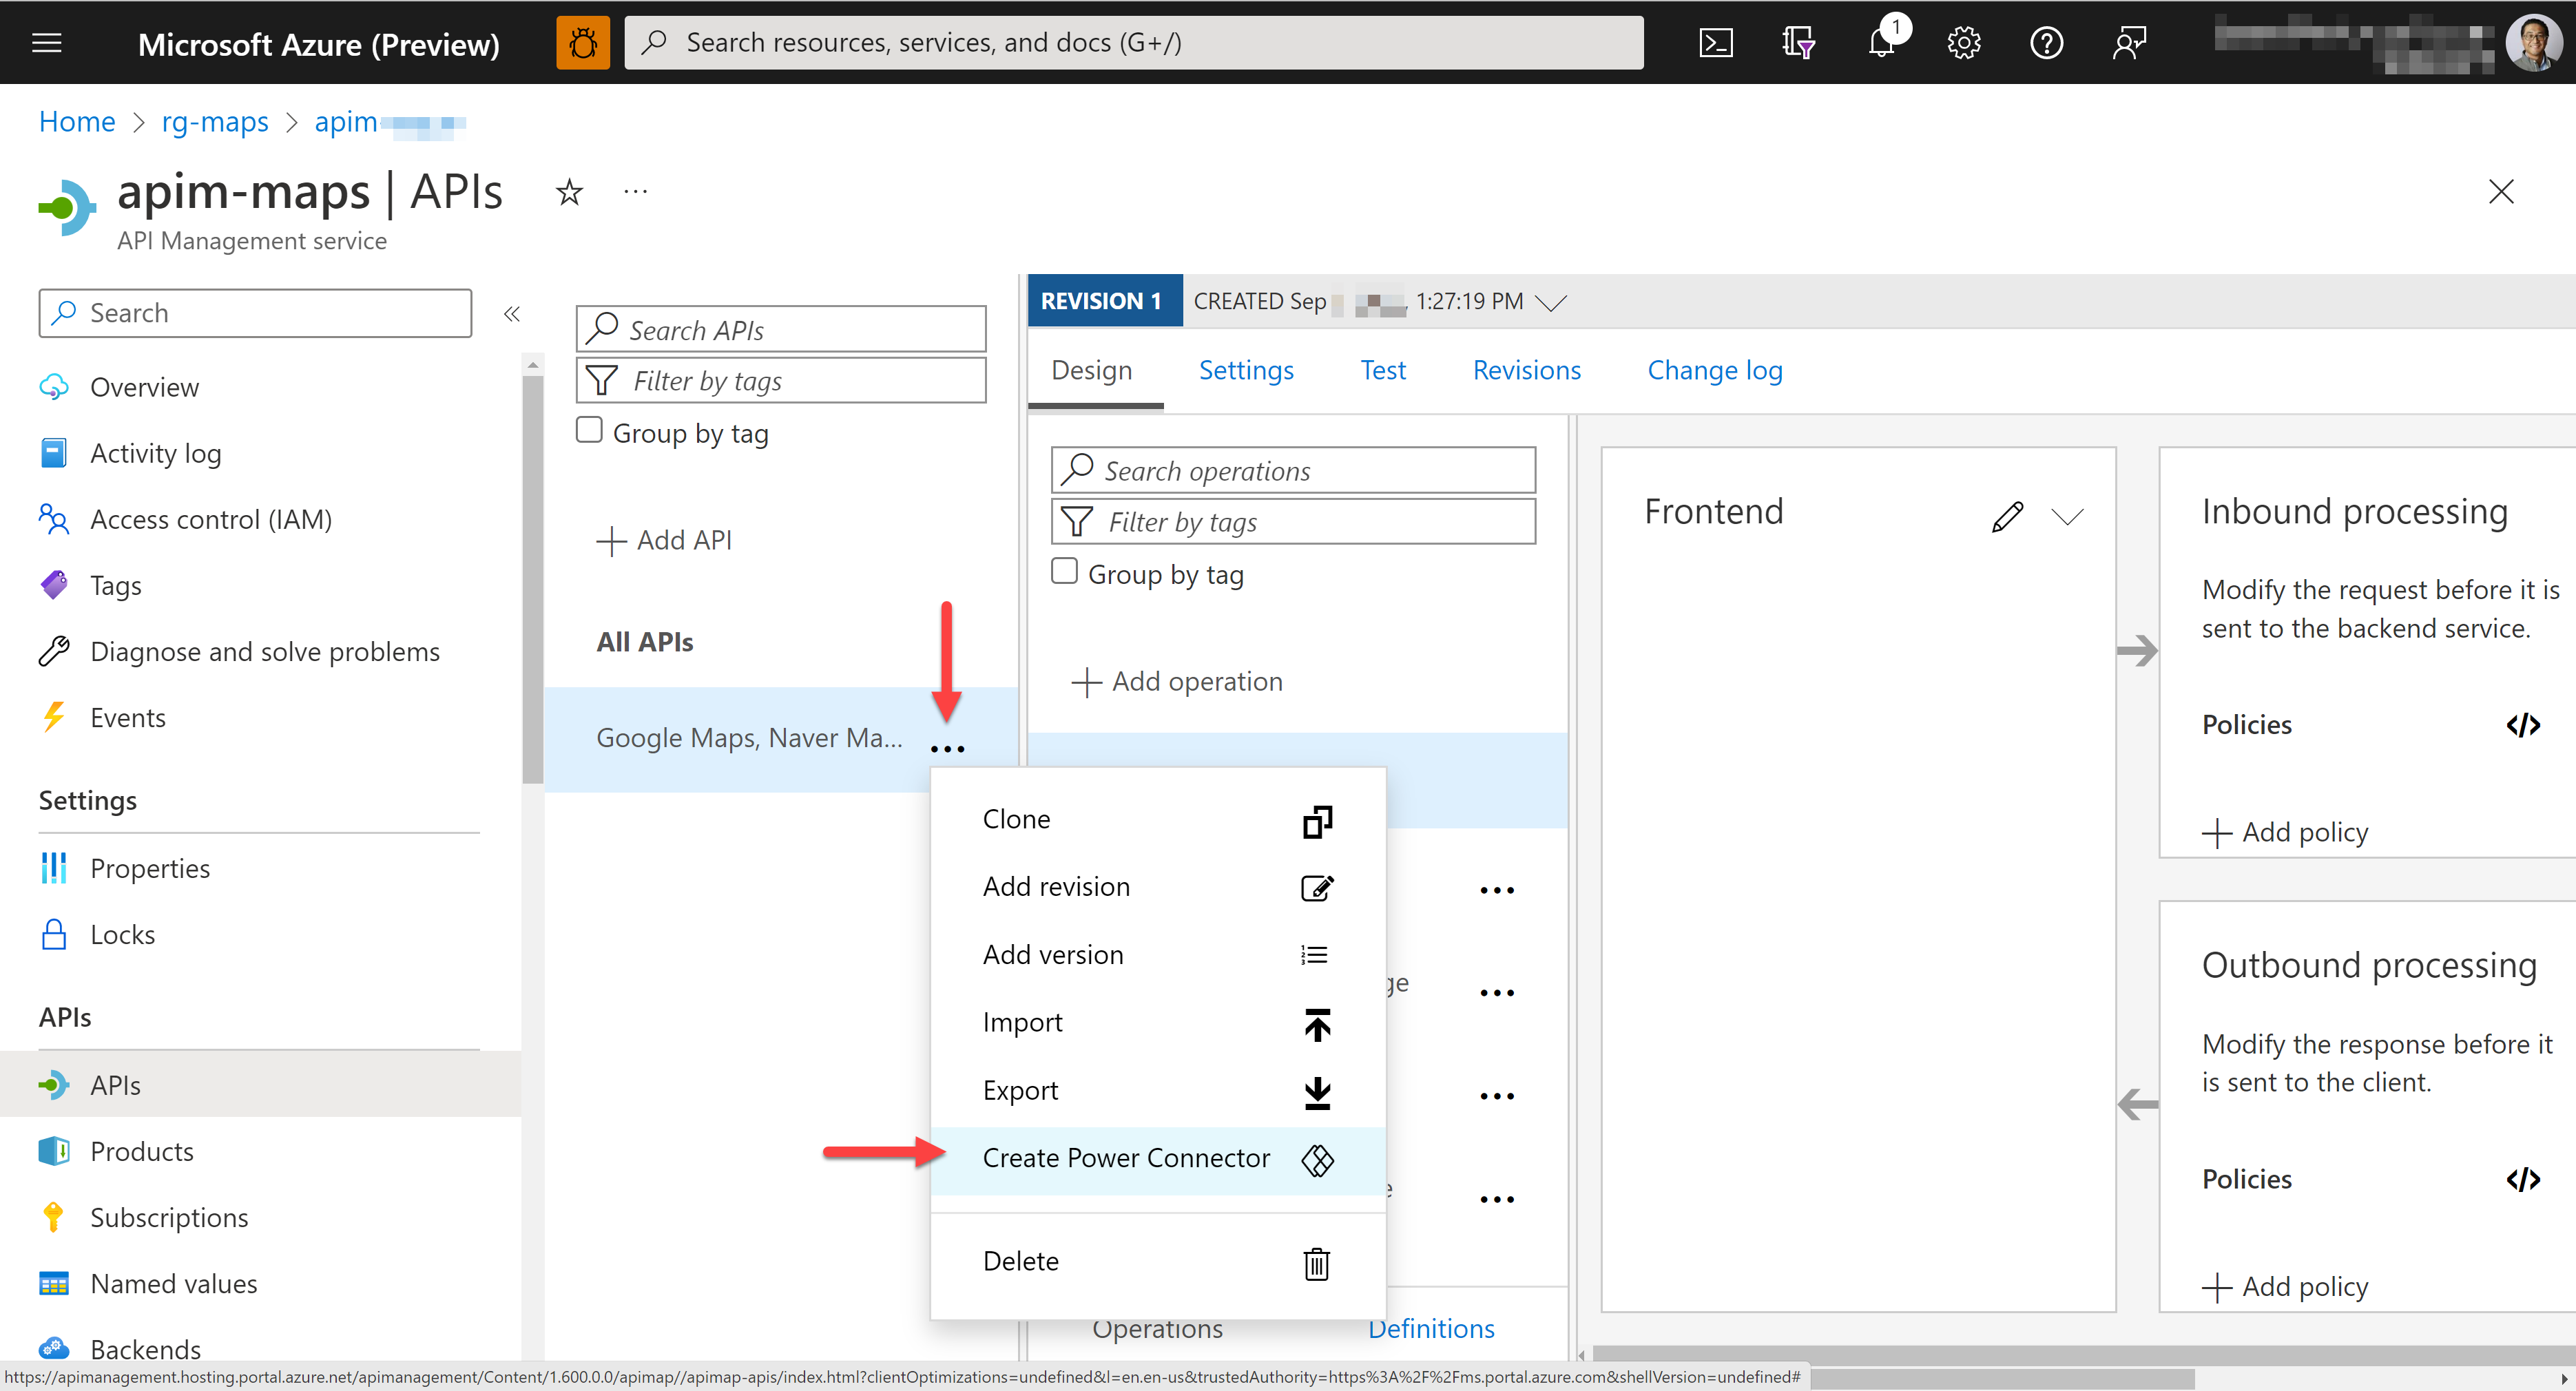
Export custom connector from API Management
First, you can directly use the built-in API Management feature. Then, click the ellipsis icon and select the "Create Power Connector" menu.
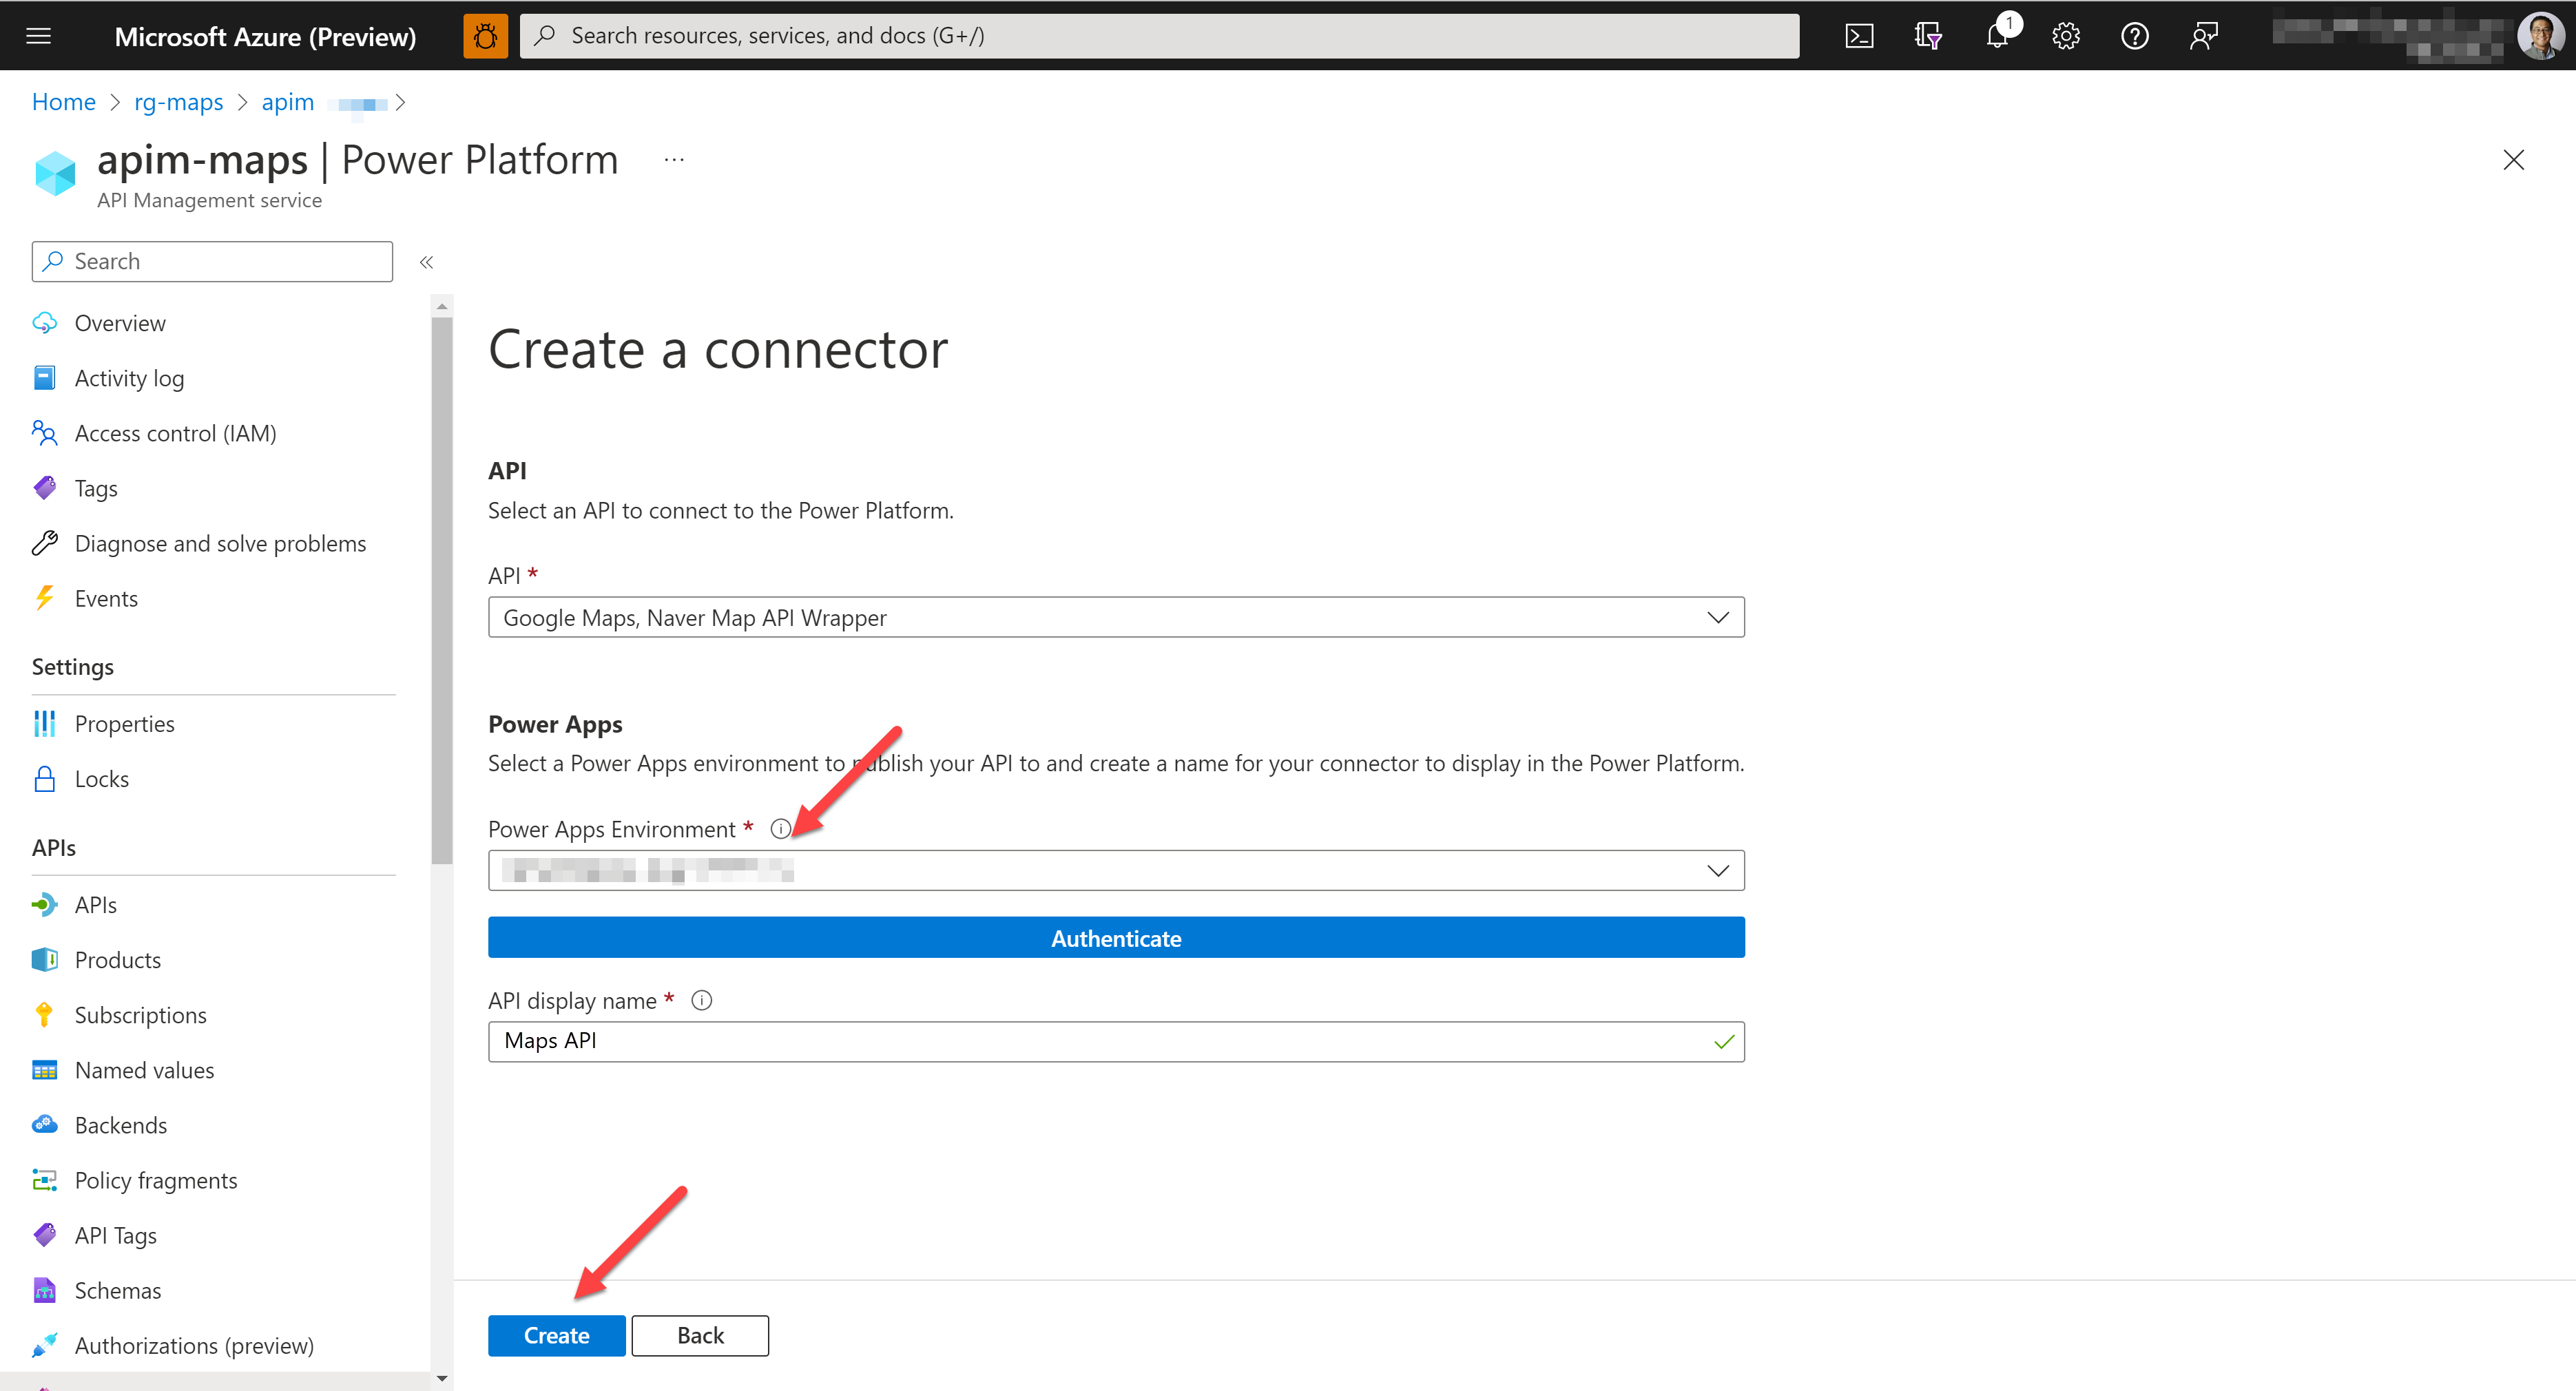
Then, you are redirected to this screen. While the "API" and "API display name" fields are pre-populated, you need to choose the Power Platform environment tied to your tenant. Choose an environment, click "Authenticate", and click "Create".
Check your custom connector on Power Apps or Power Automate side.

However, there's a caveat to this approach. Because it's tied to your tenant, you should use the second approach if you want to use this custom connector on the other tenant.
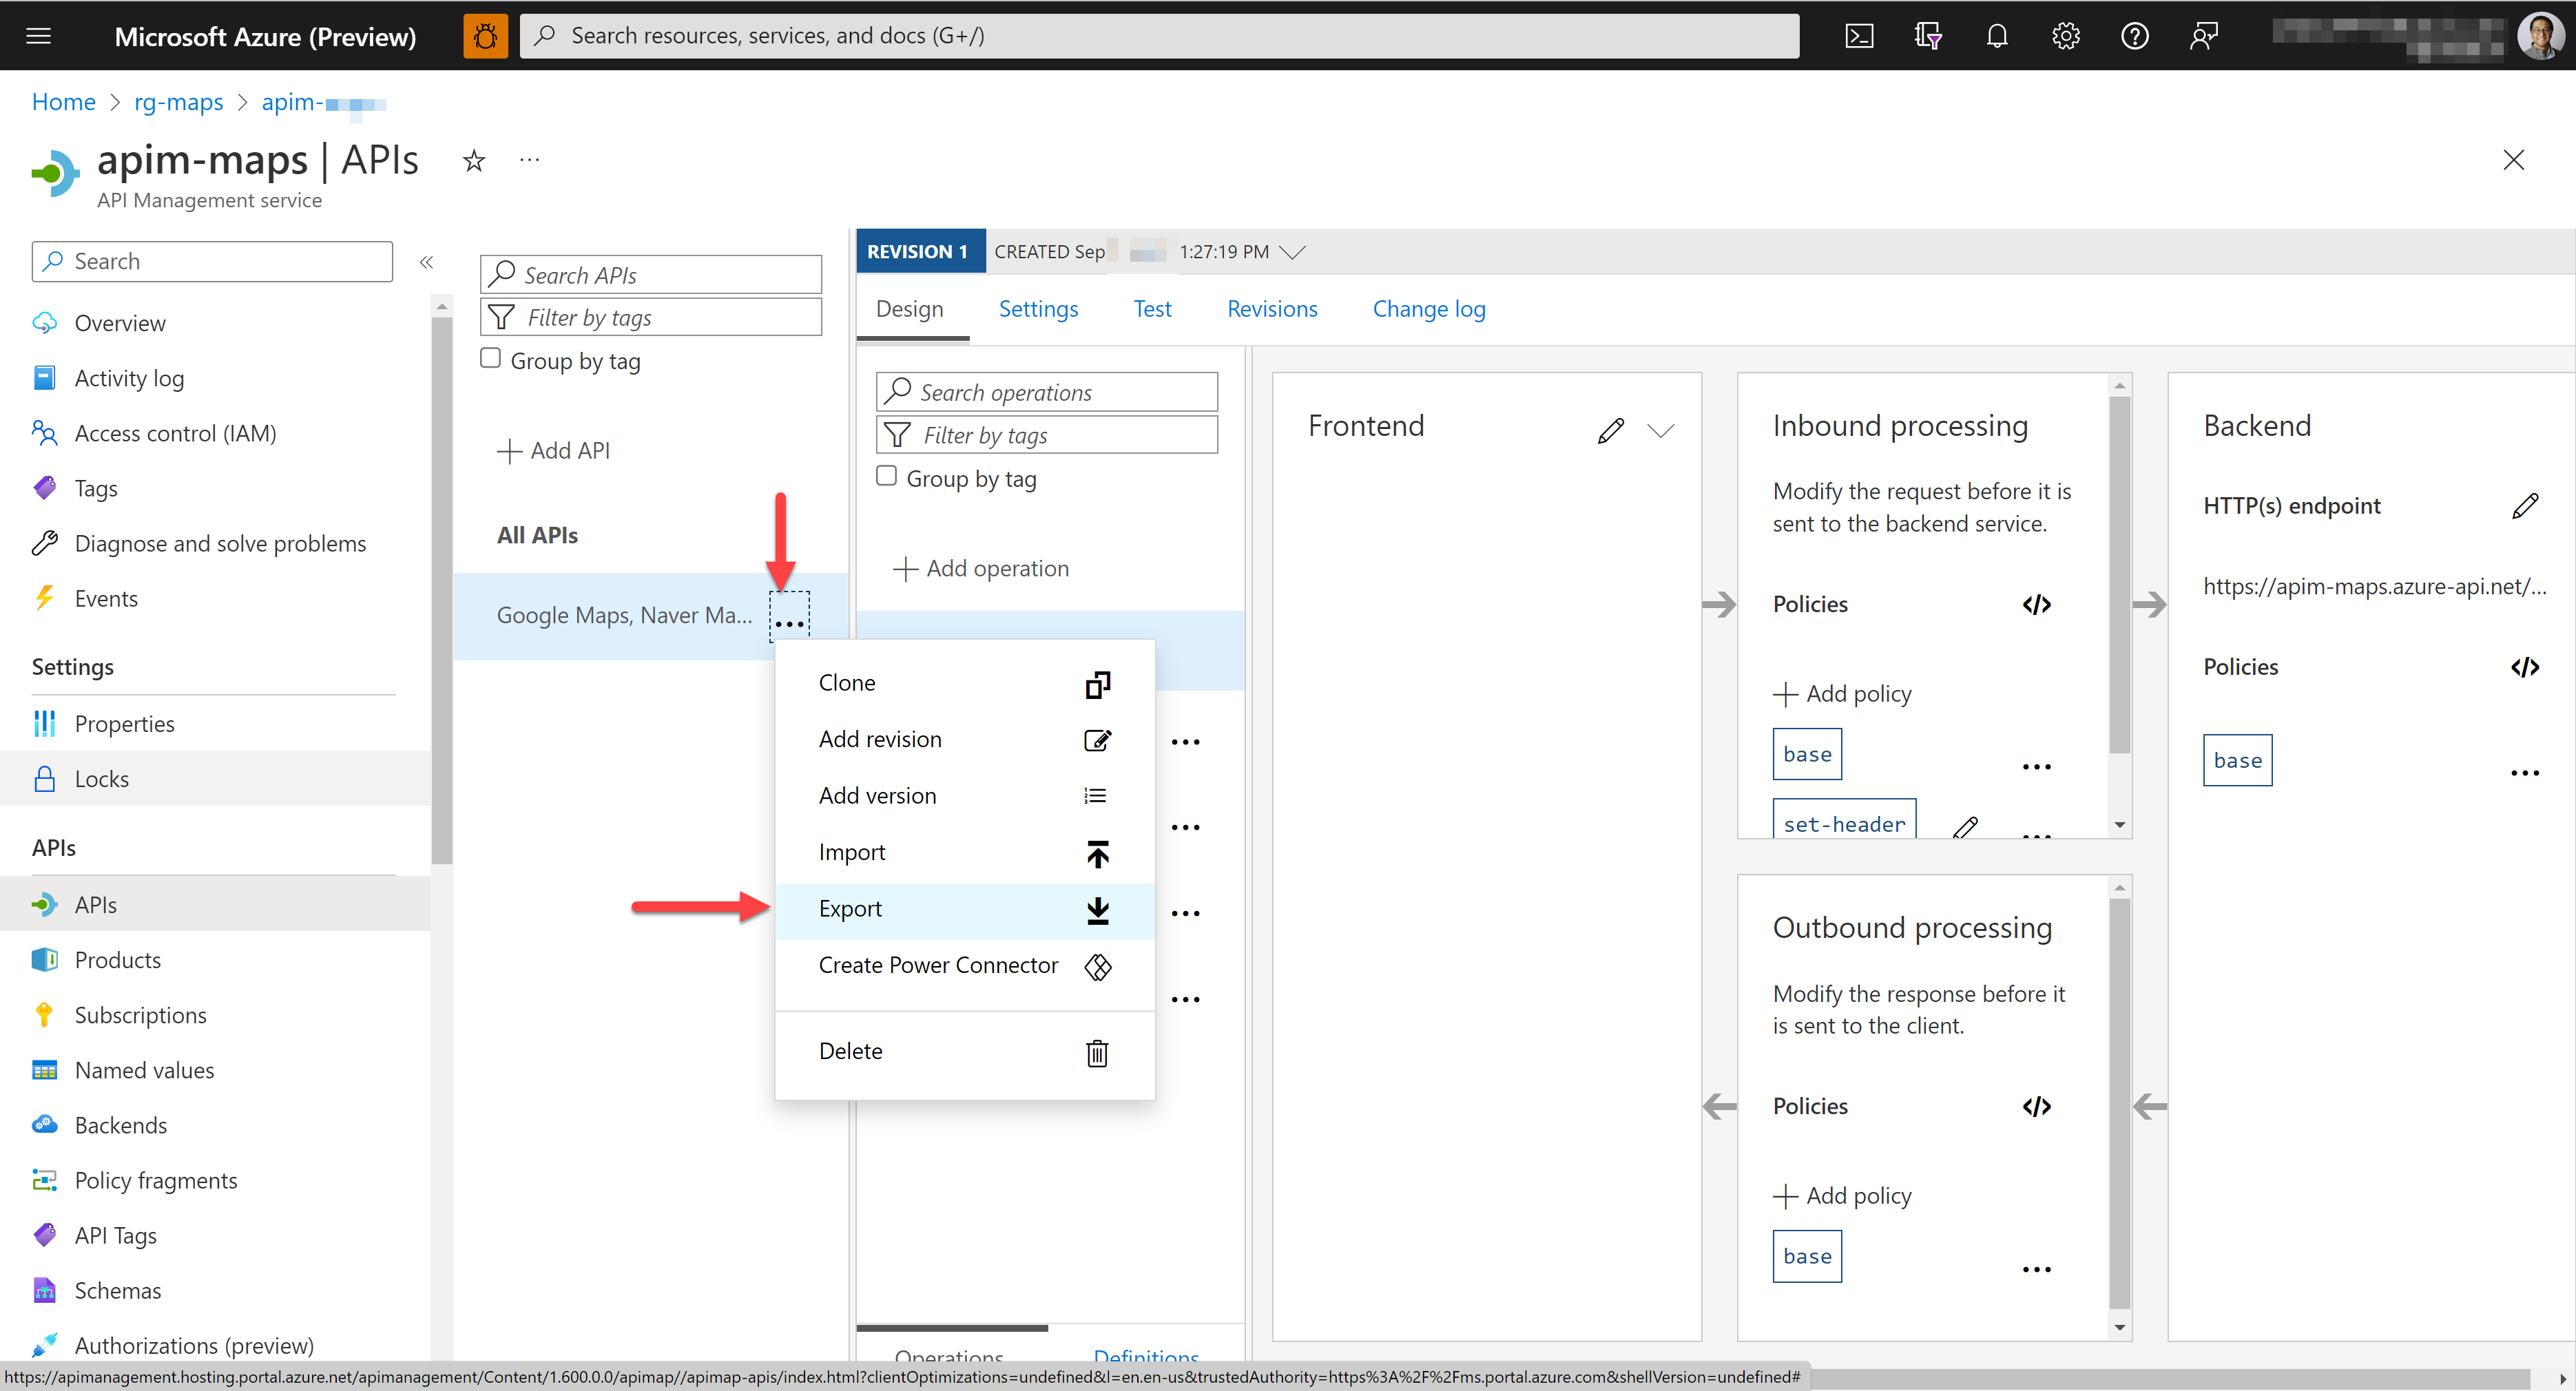
Import custom connector from OpenAPI document or URL
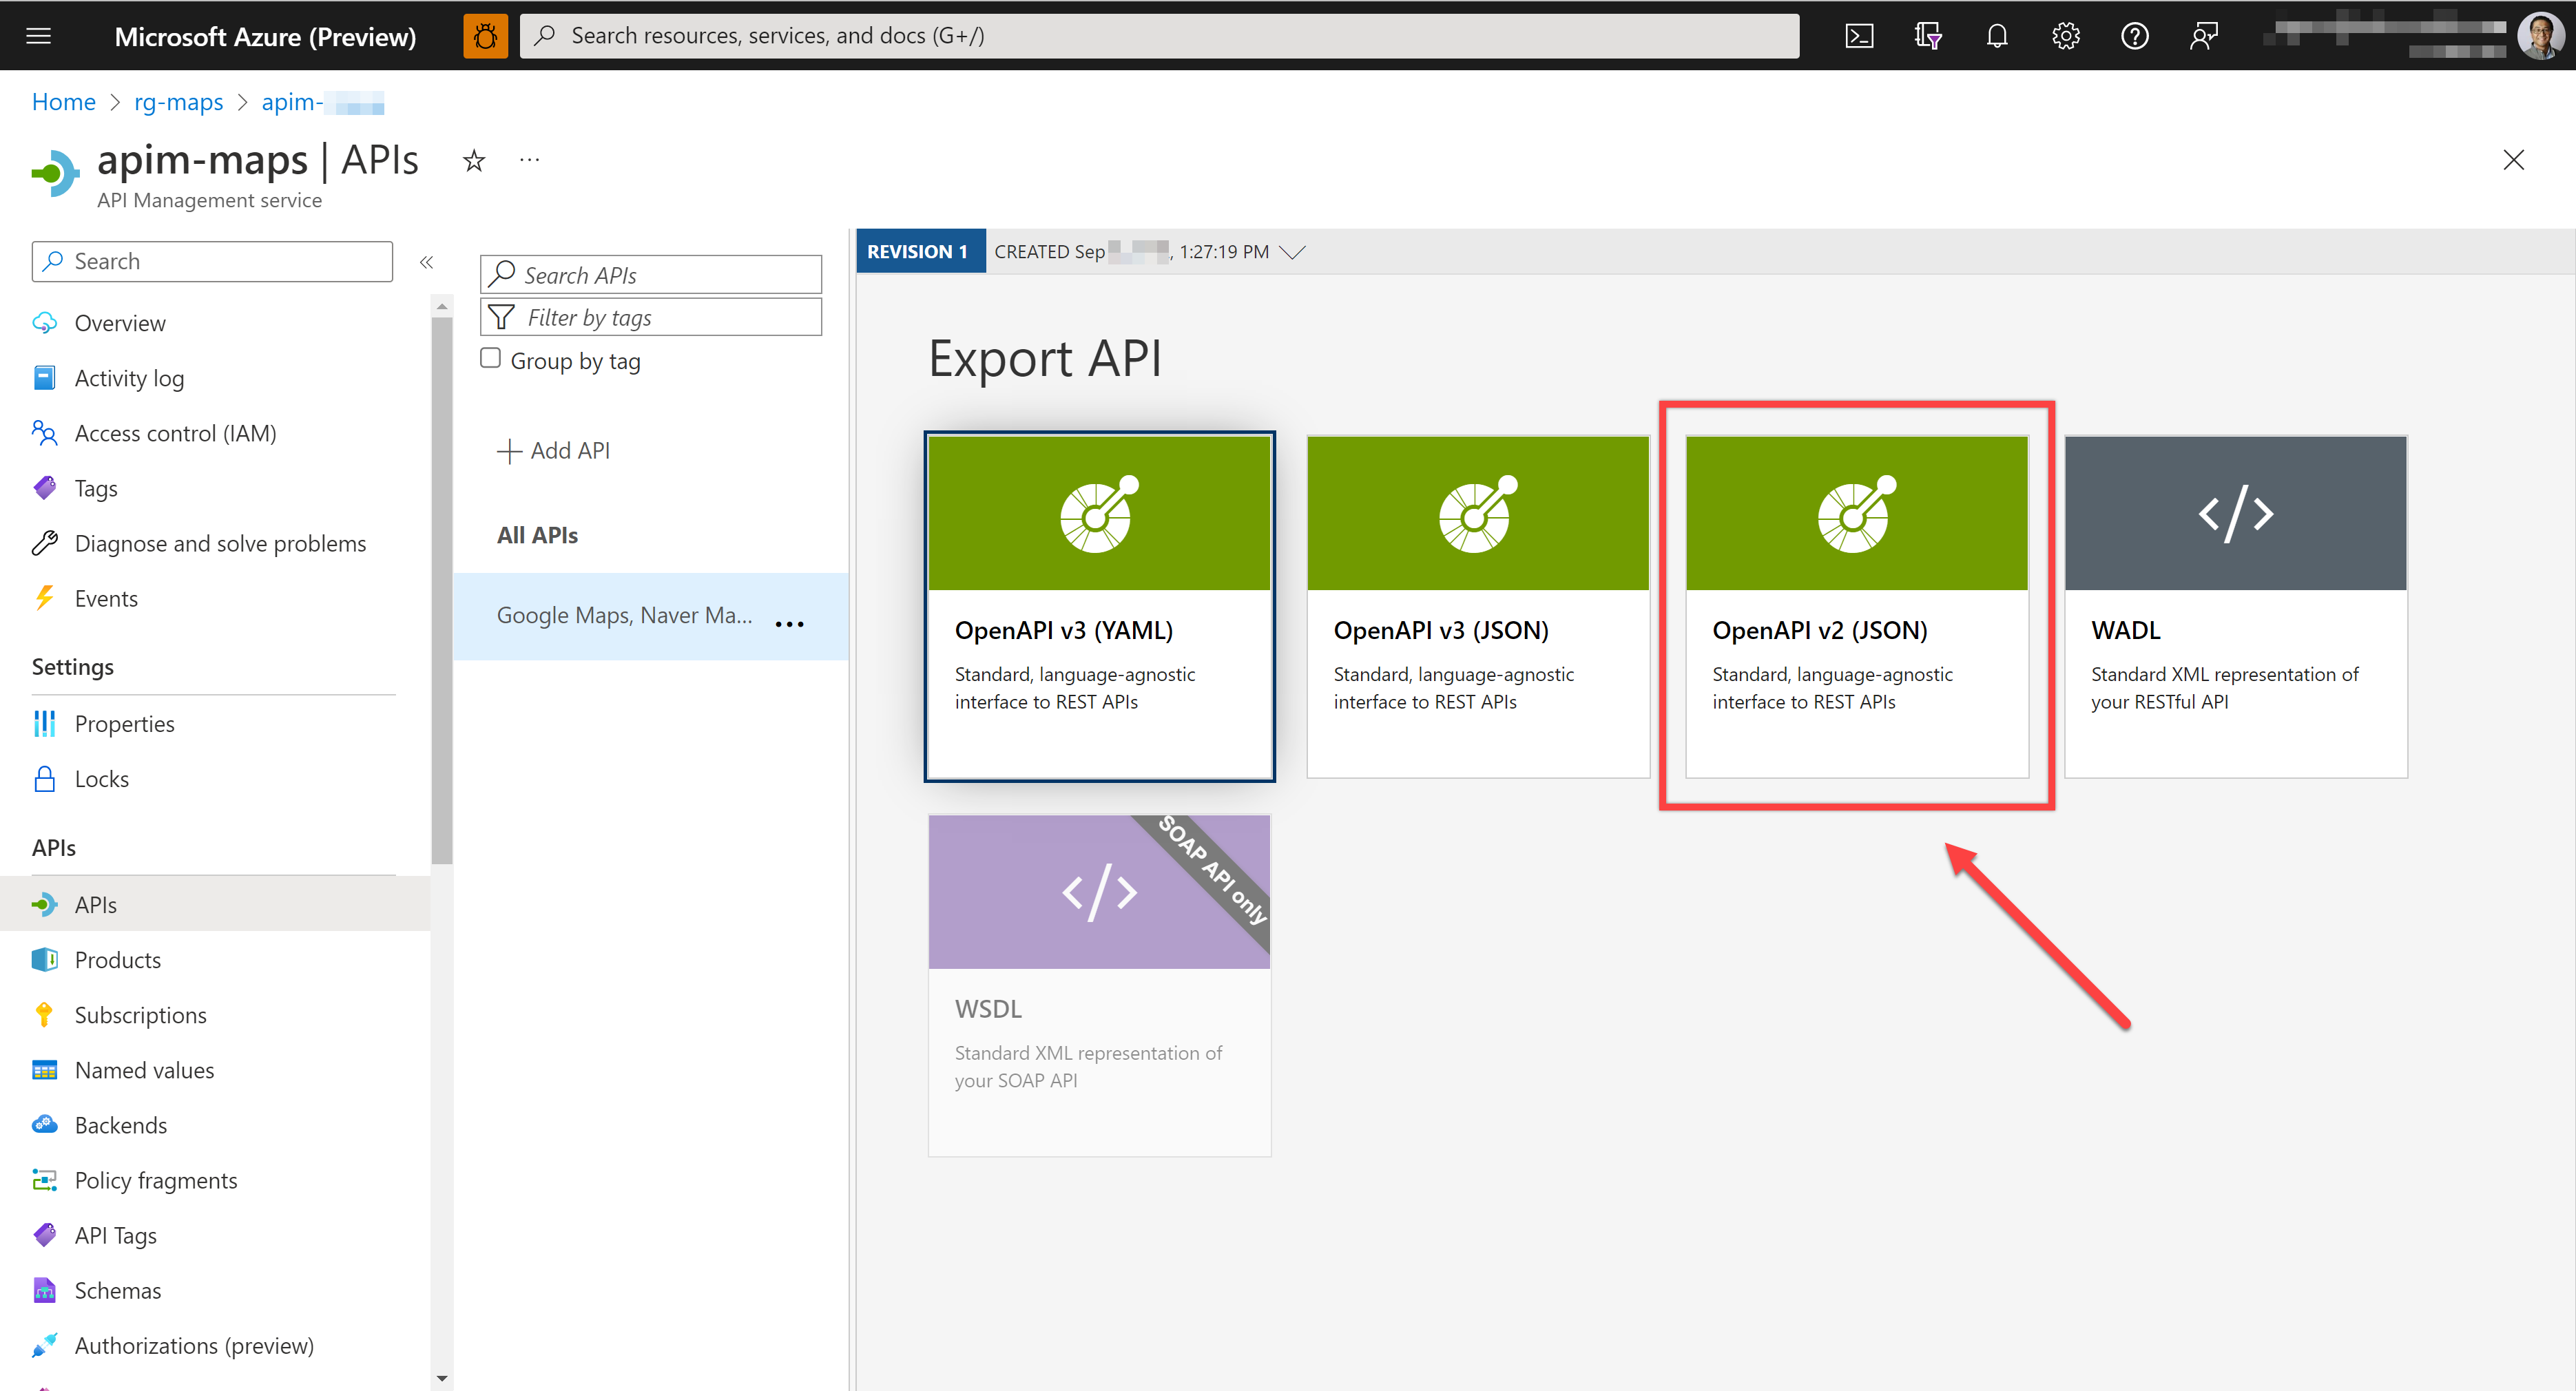
Click the ellipsis icon again and select the "Export" menu.
On the Export API screen, choose the "OpenAPI v2 (JSON)" panel because Power Platform custom connector currently accepts version 2 of the OpenAPI document.
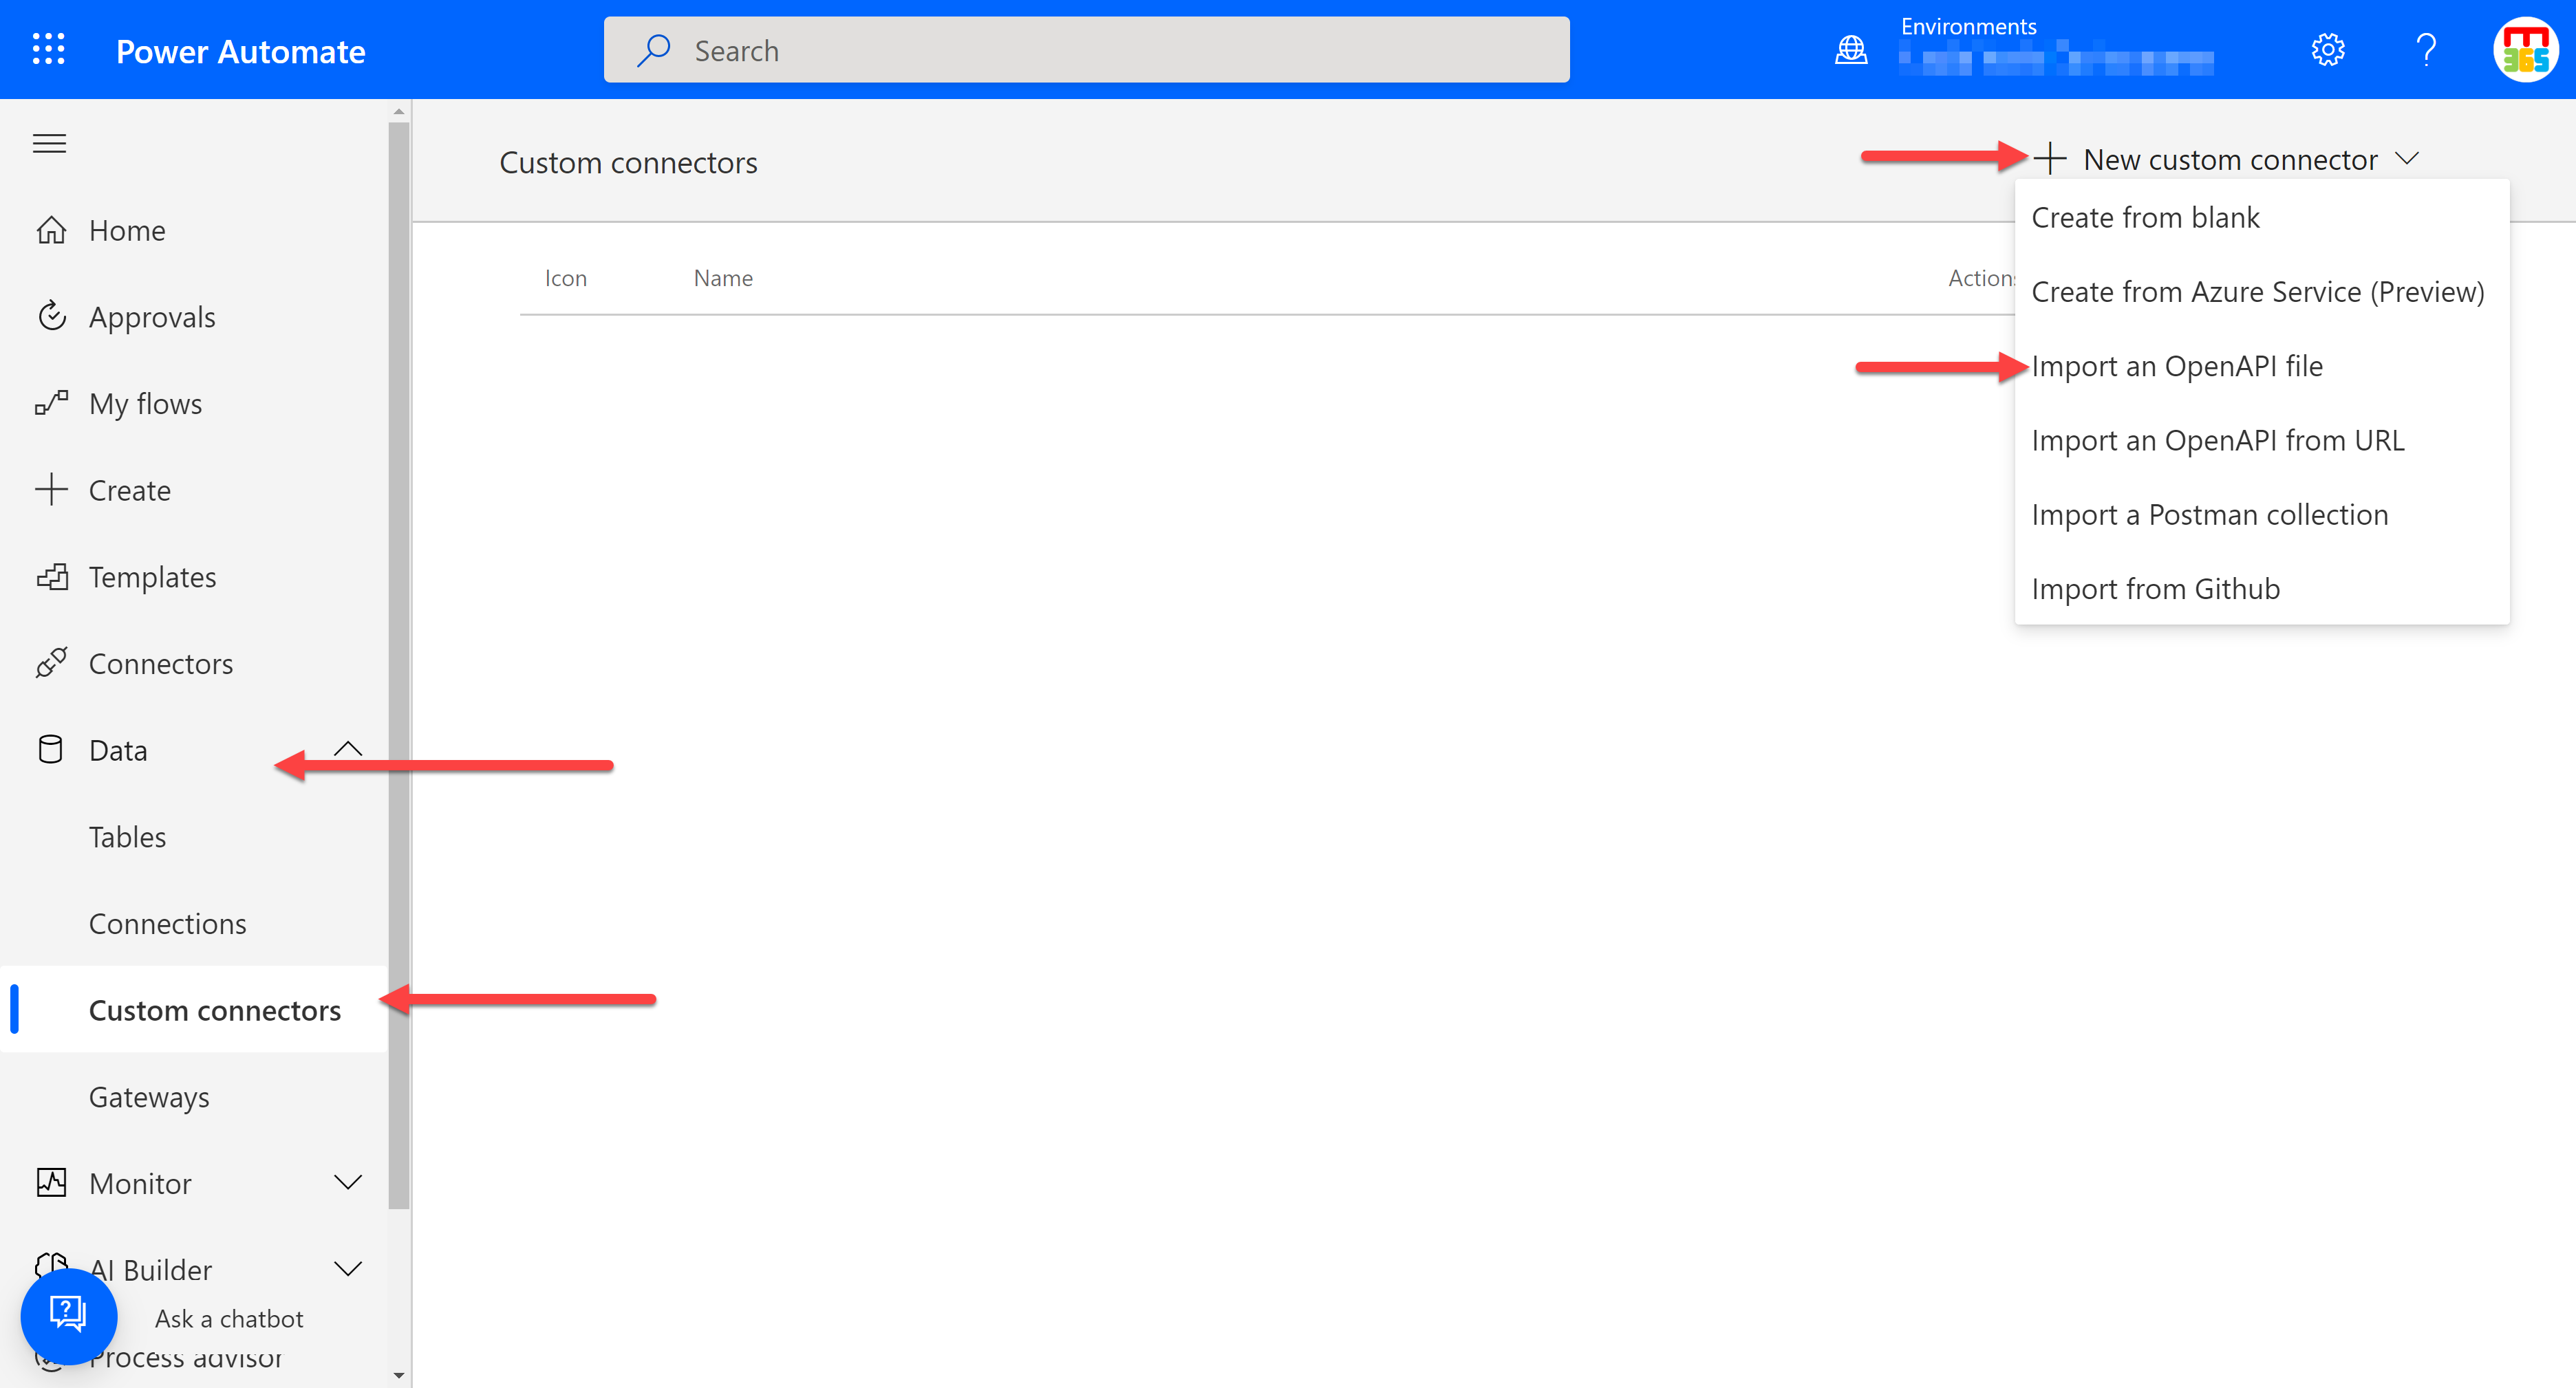
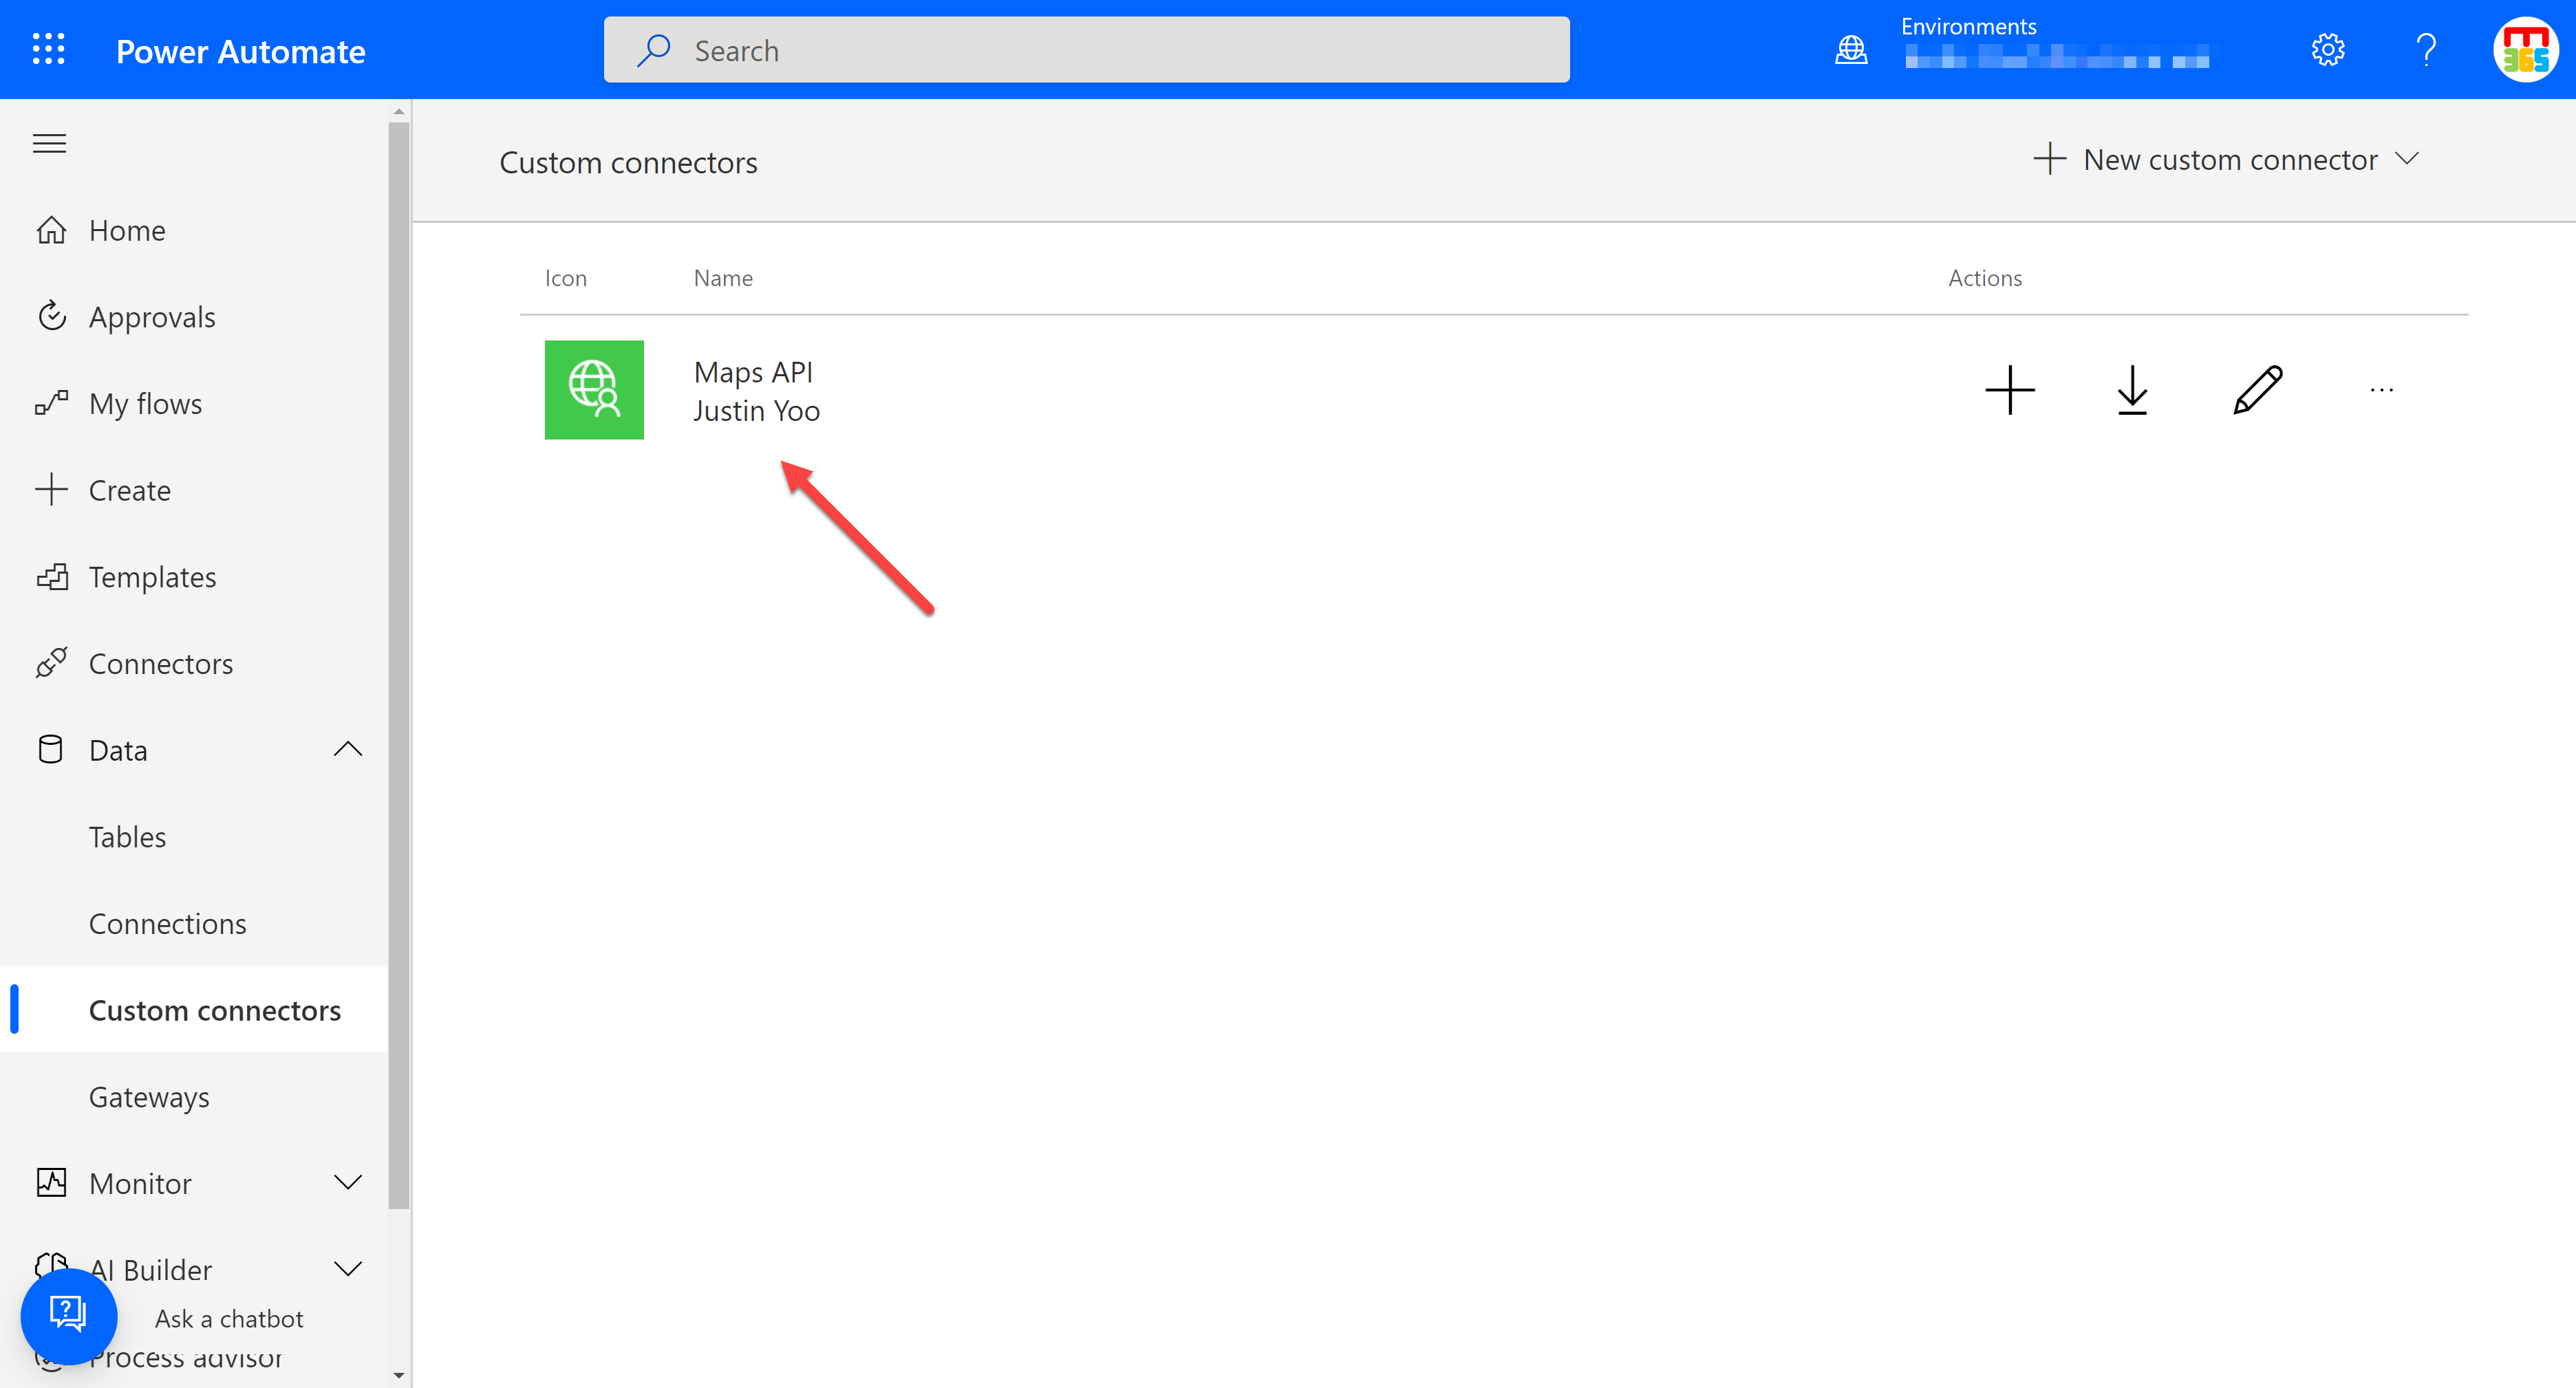
Download the OpenAPI document to your local computer and move to your Power Apps or Power Automate page under your desired environment. I'm going to use the Power Automate page. First, go to the "Data" ➡️ "Custom connectors" page. Then, click the "➕ New custom connector" ➡️ "Import an OpenAPI file" at the top right corner.
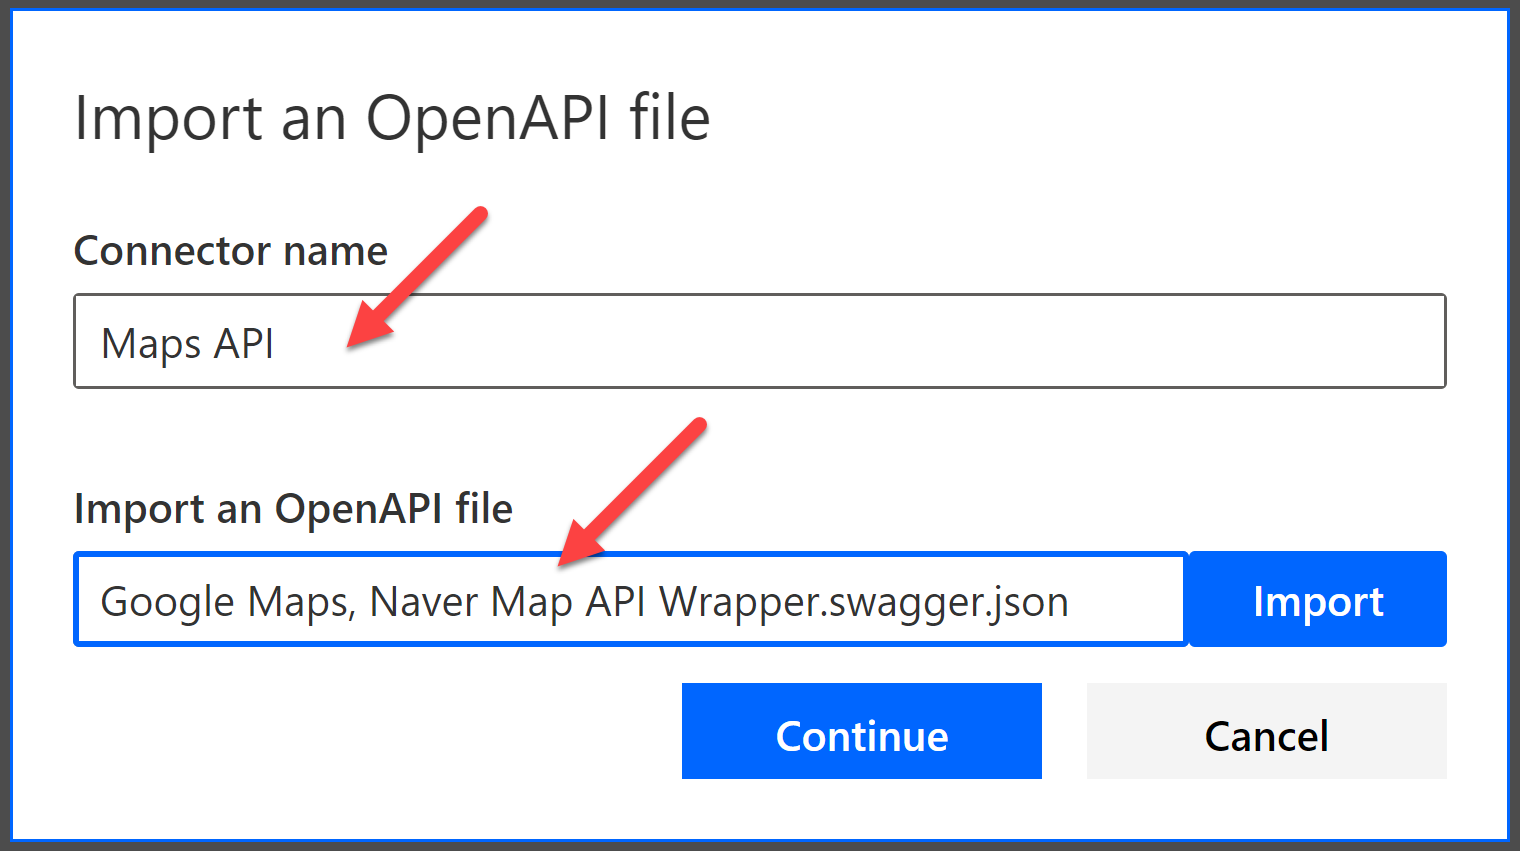
When a modal pops up, give the custom connector name and import the OpenAPI document exported above. Then, click "Continue".
Actually, that's it! Next, click the "✔️ Create connector" button to create the connector.
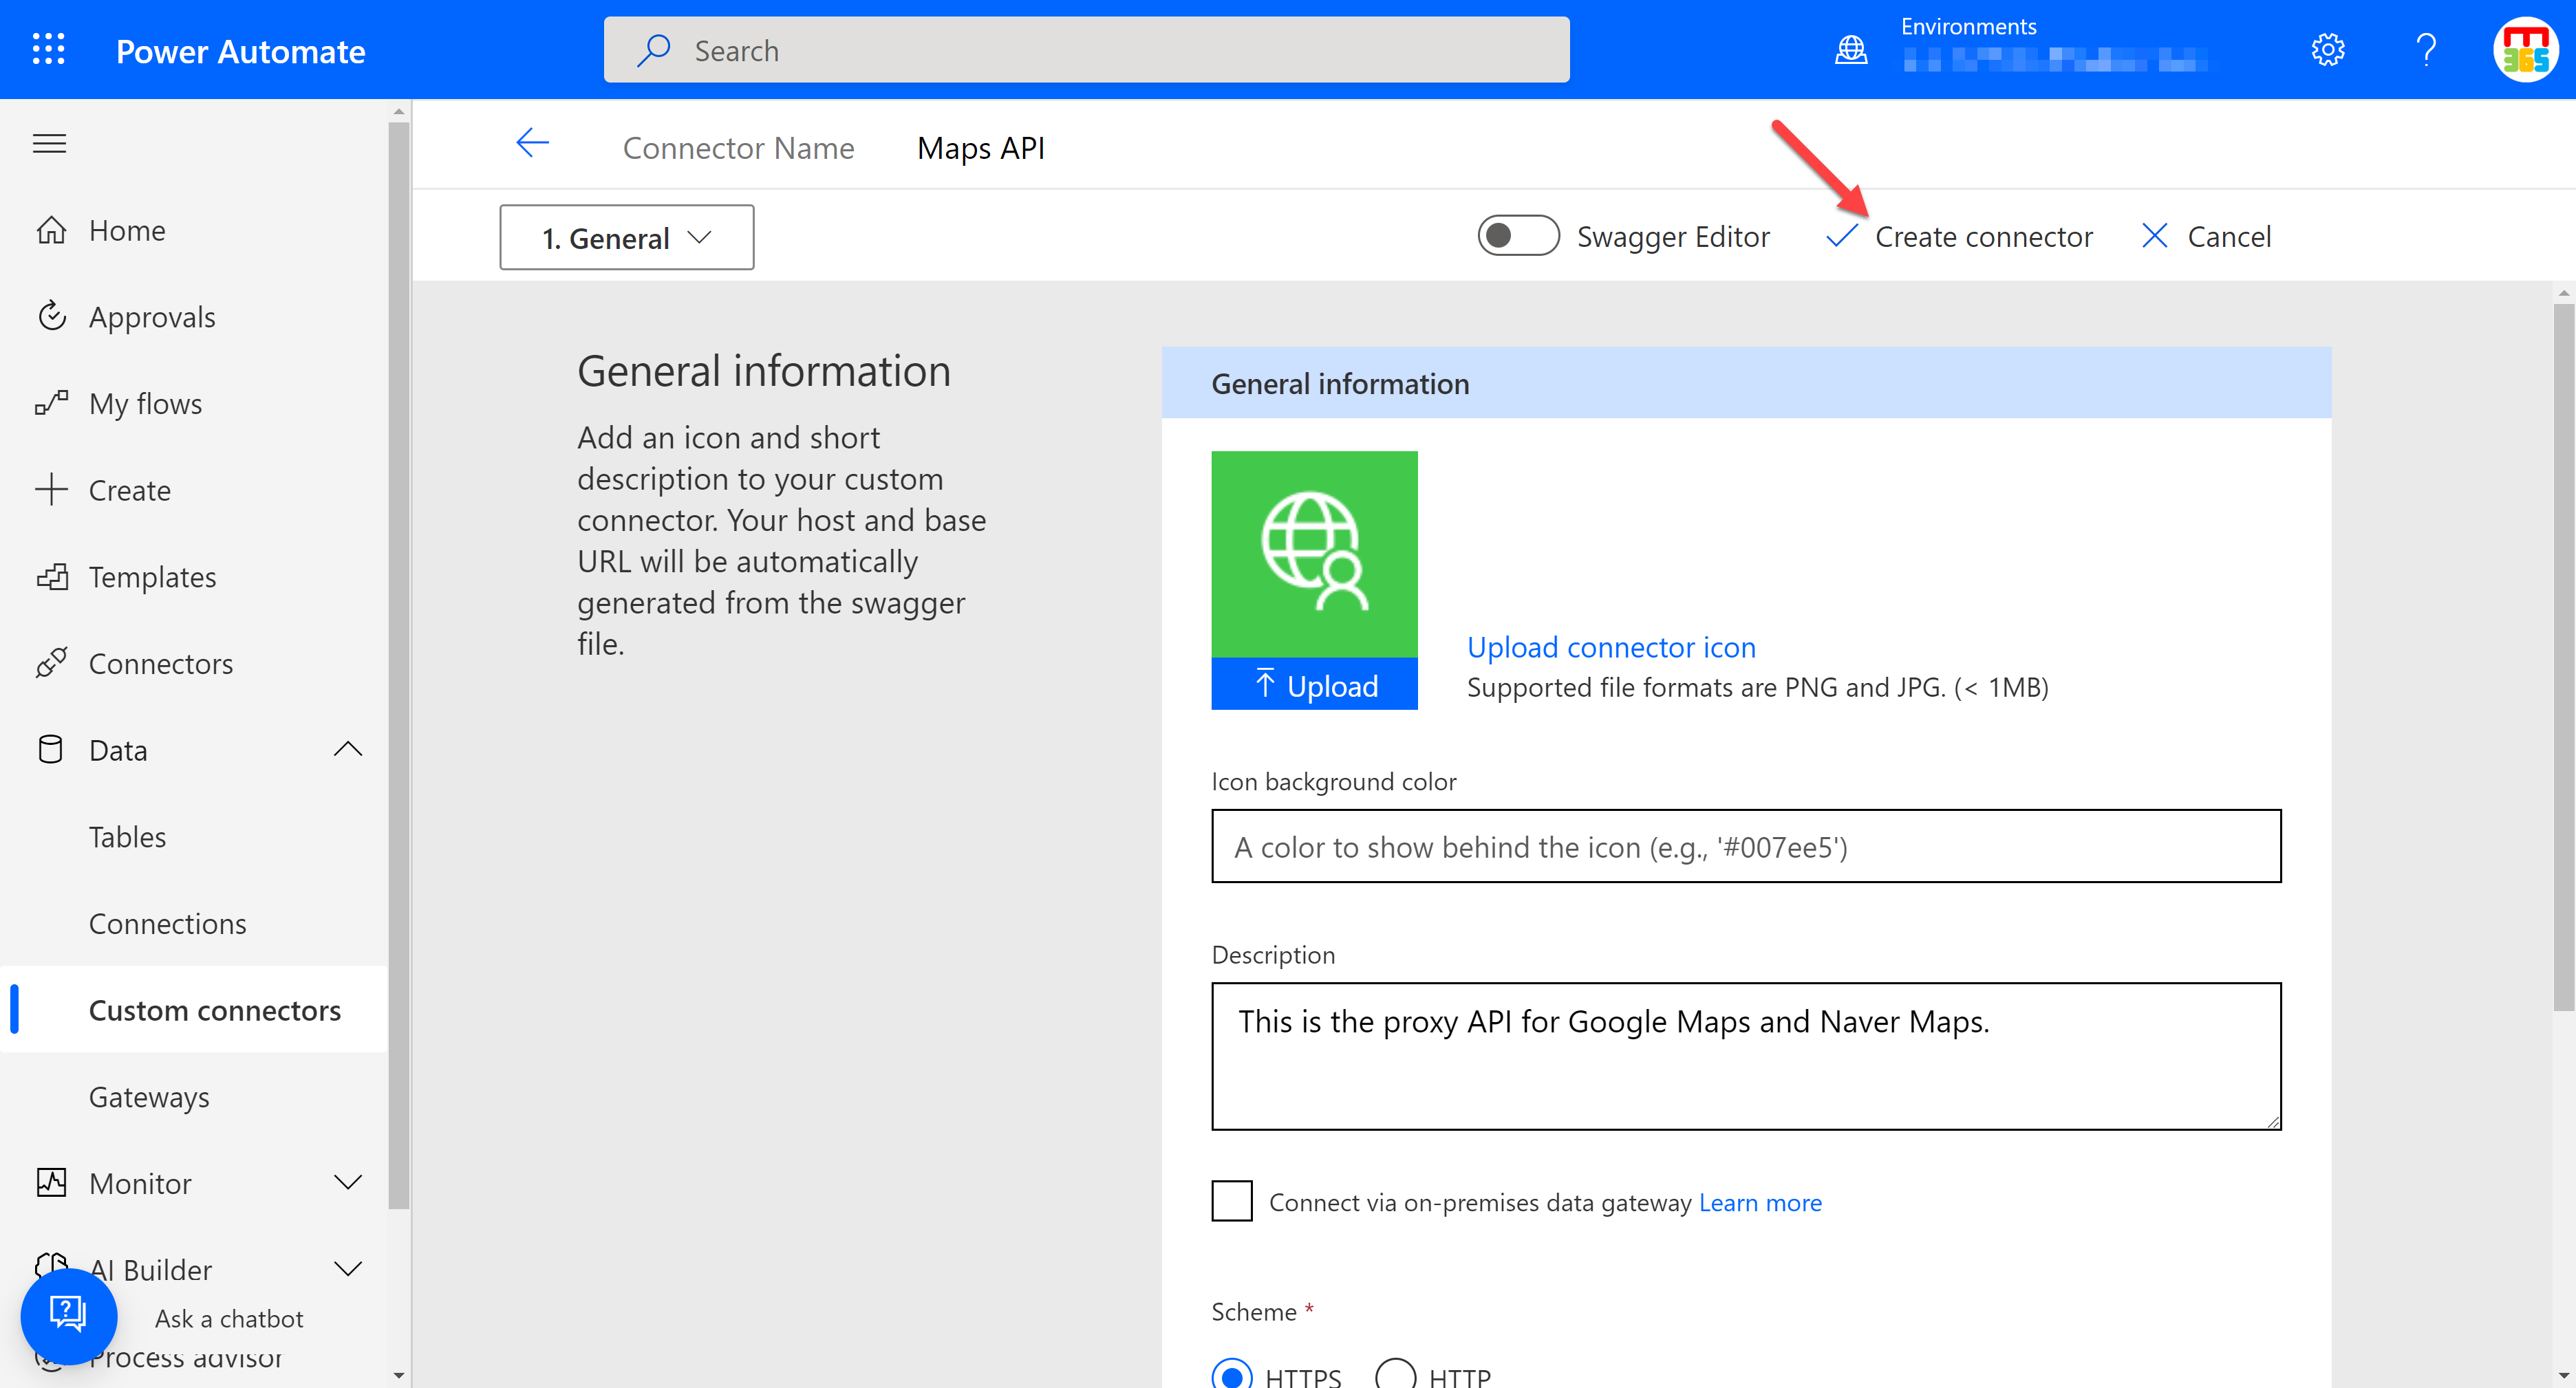
Go back to the custom connector page, and you will see the "Maps API" custom connector you just created.
So, you are ready to create a Power Apps app to display your location on Google Maps or Naver Map! Let's move on.
Where am I? – Power Apps app
Open the Power Apps Studio, and create an empty canvas app, named Who am I with a phone layout.
Custom connector integration
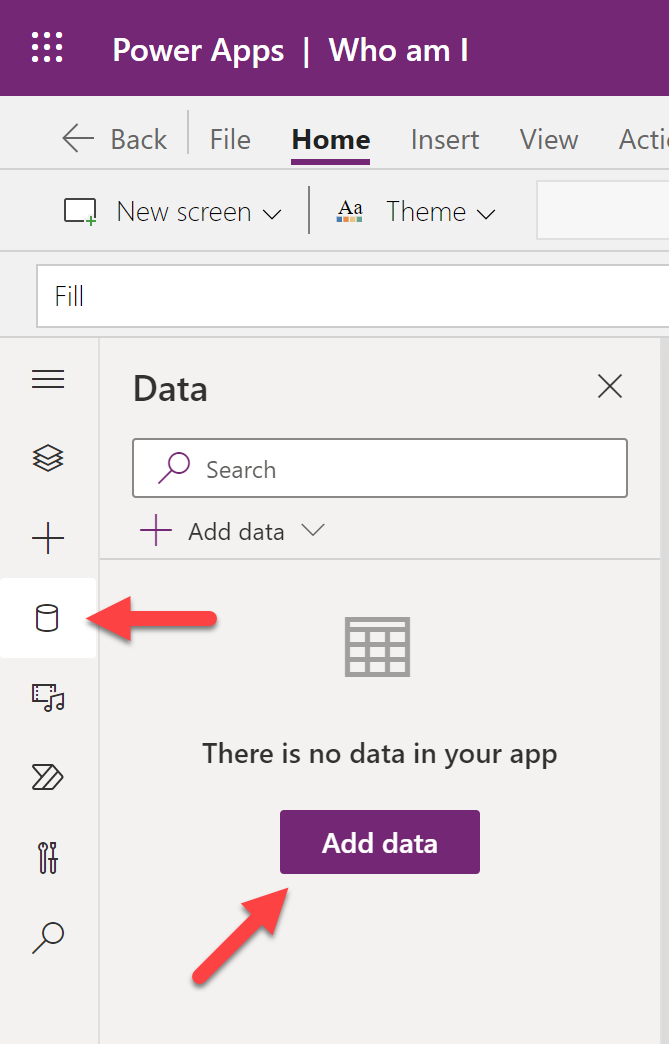
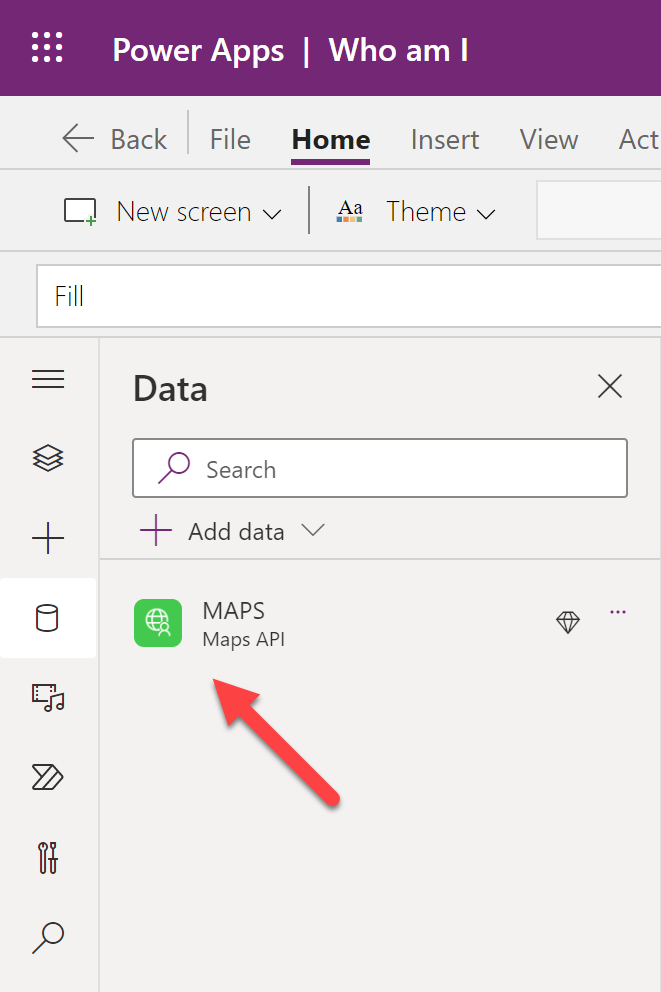
To use the custom connector created above, you need to add it to the Power App. Click the cylinder icon on the left and click the "Add data" button.
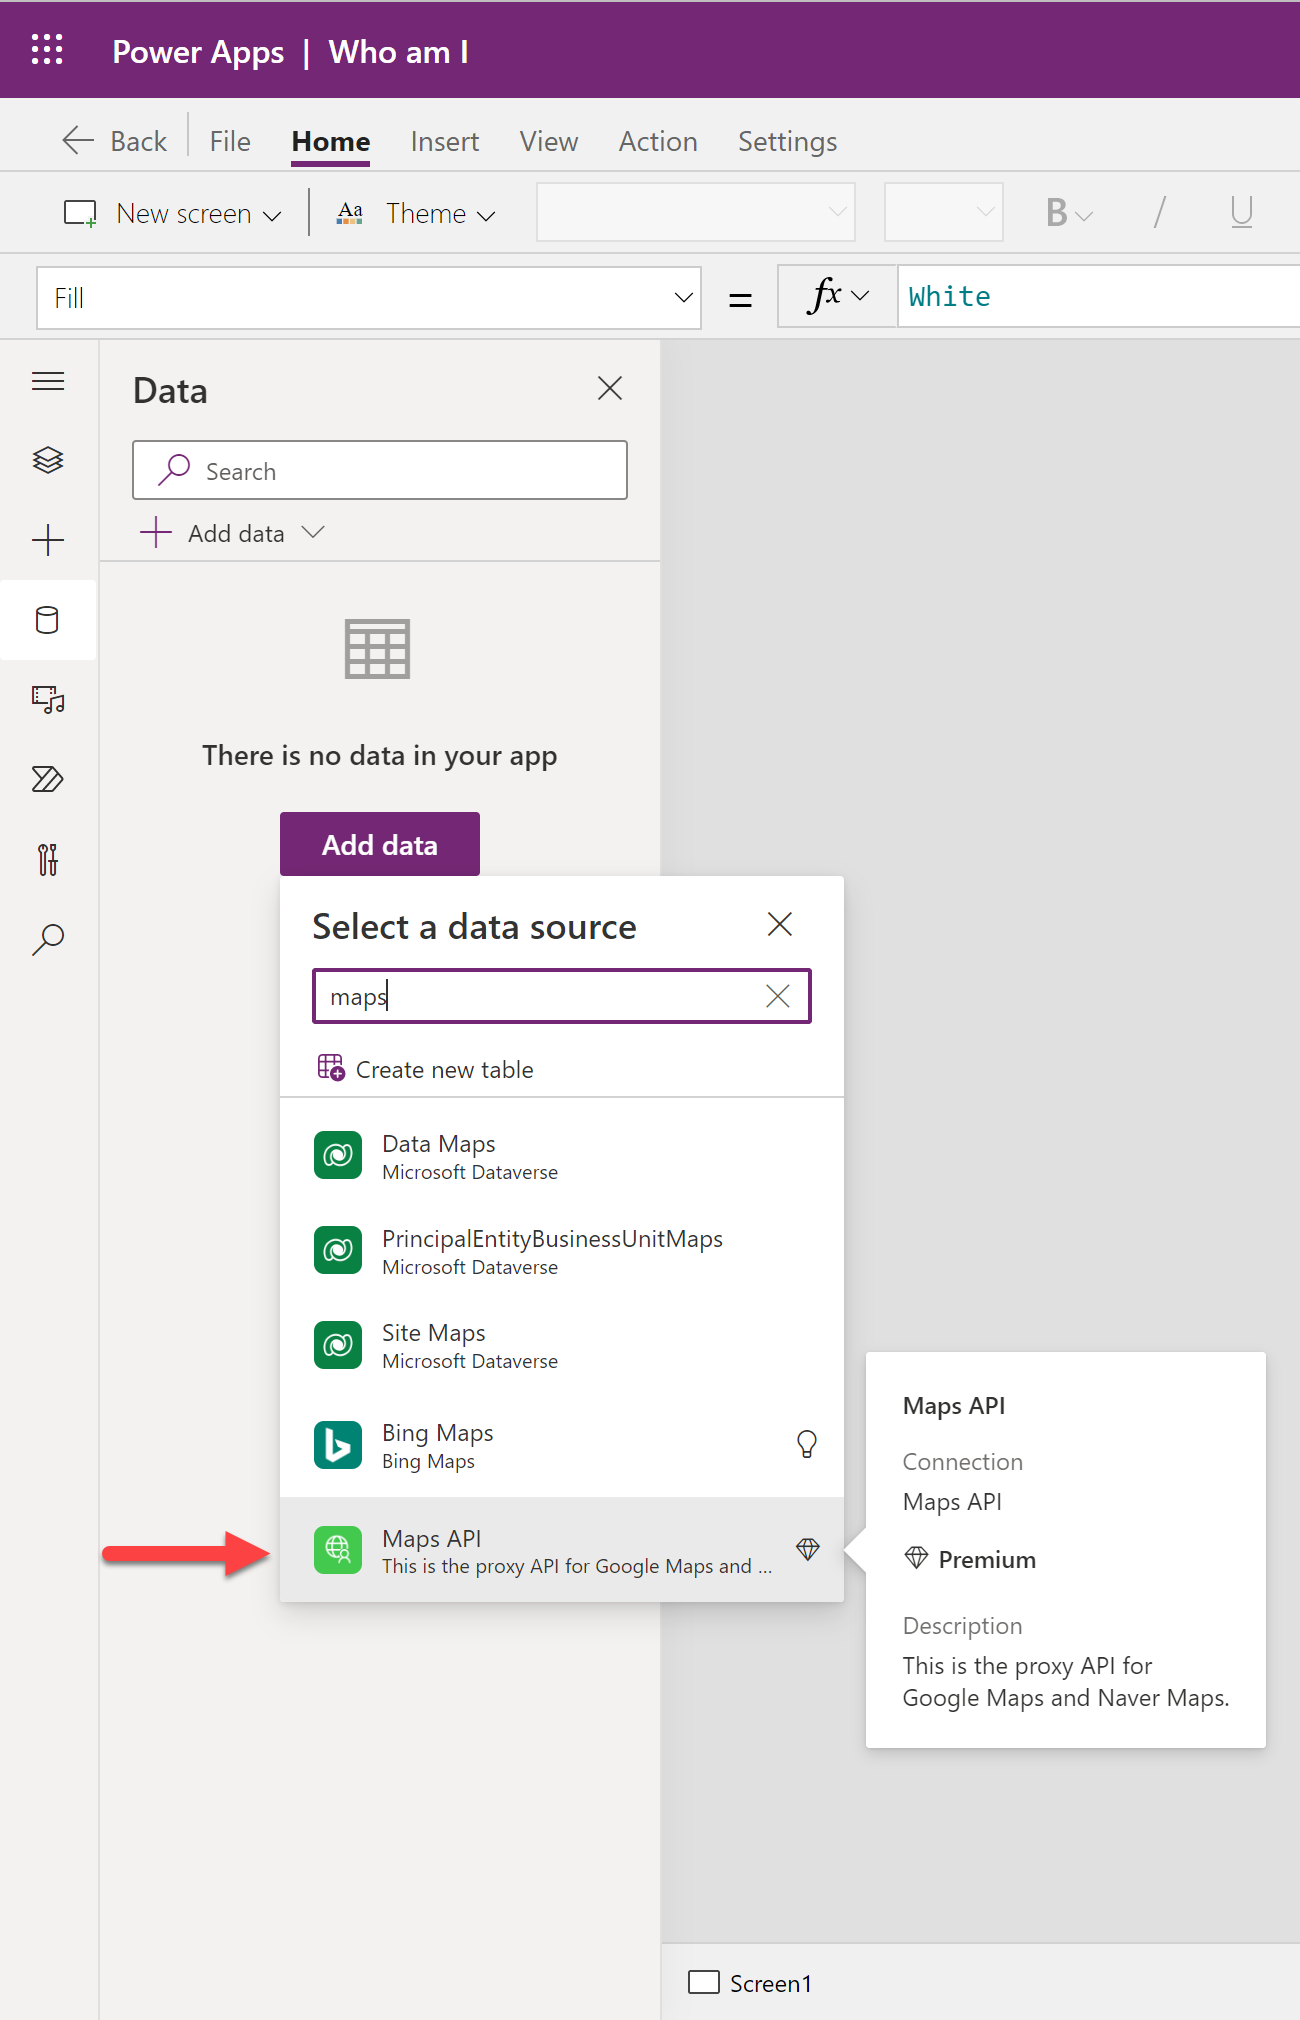
Search the custom connector name, "Maps API", and click the custom connector to add.
To use the custom connector, you also need to create a connection to it. Click the "Connect" button and move on.
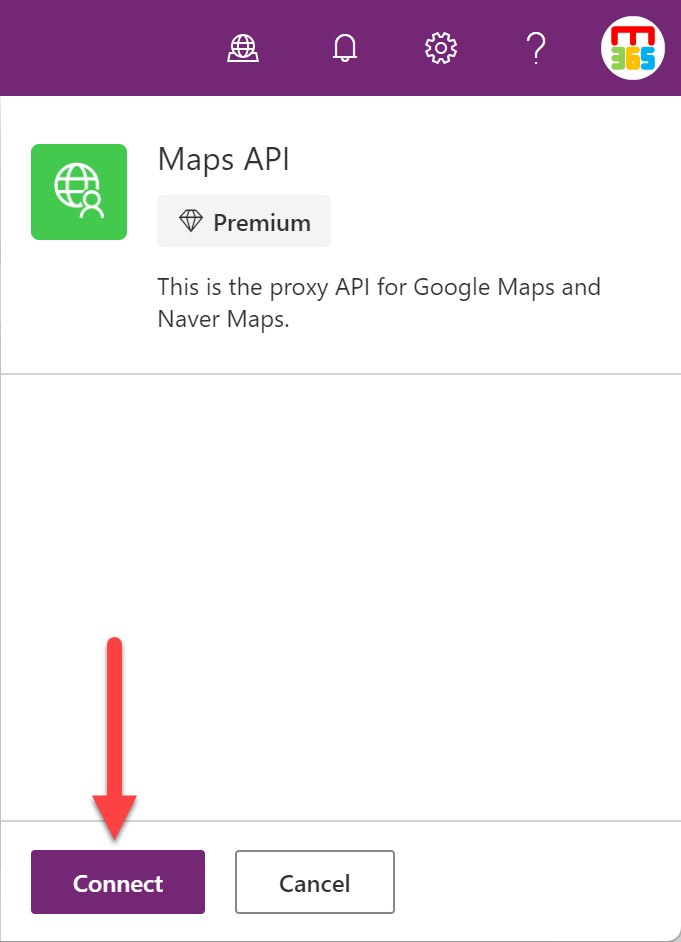
Now, you've got the connection to the custom connector.
Controls
Let's build the Power Apps app. First of all, put three controls – Image, Slider and Button onto the canvas.

Click the "Screen1" control and change the value on the property "OnVisible" to the formula below. The formula stores the current slider value in the zoomlevel collection.
ClearCollect(
    zoomlevel,
    Slider1.Value
)
Click the "Botton1" control and change the value on the property "OnSelected" to the formula below. It passes the current latitude, longitude and zoom level to the custom connector and receives the image data. The received image data is stored in the result collection.
ClearCollect(
    result,
    MAPS.GetGoogleMapImage(
        Location.Latitude,
        Location.Longitude,
        { zoom: First(zoomlevel).Value }
    )
)
Click the "Image1" control and change the value on the property "Image" to the formula below. It gets the image data from the result collection.
First(result).Url
Click the "Slider1" control and change the value on the property "OnChange" to the formula below. It stores the current slider value to the zoomlevel collection, followed by calling the custom connector to get the image data against the current location.
ClearCollect(
    zoomlevel,
    Slider1.Value
);
ClearCollect(
    result,
    MAPS.GetGoogleMapImage(
        Location.Latitude,
        Location.Longitude,
        { zoom: First(zoomlevel).Value }
    )
)
That seems to be OK. Let's click the "Where am I?" button. But it doesn't show the image. The First(result).Url value is actually similar to this:
appres://blobmanager/1090a86393a843adbfcf428f0b90e91b/1
It's the image reference value somewhere you can't get there.
Workaround – Power Automate workflow
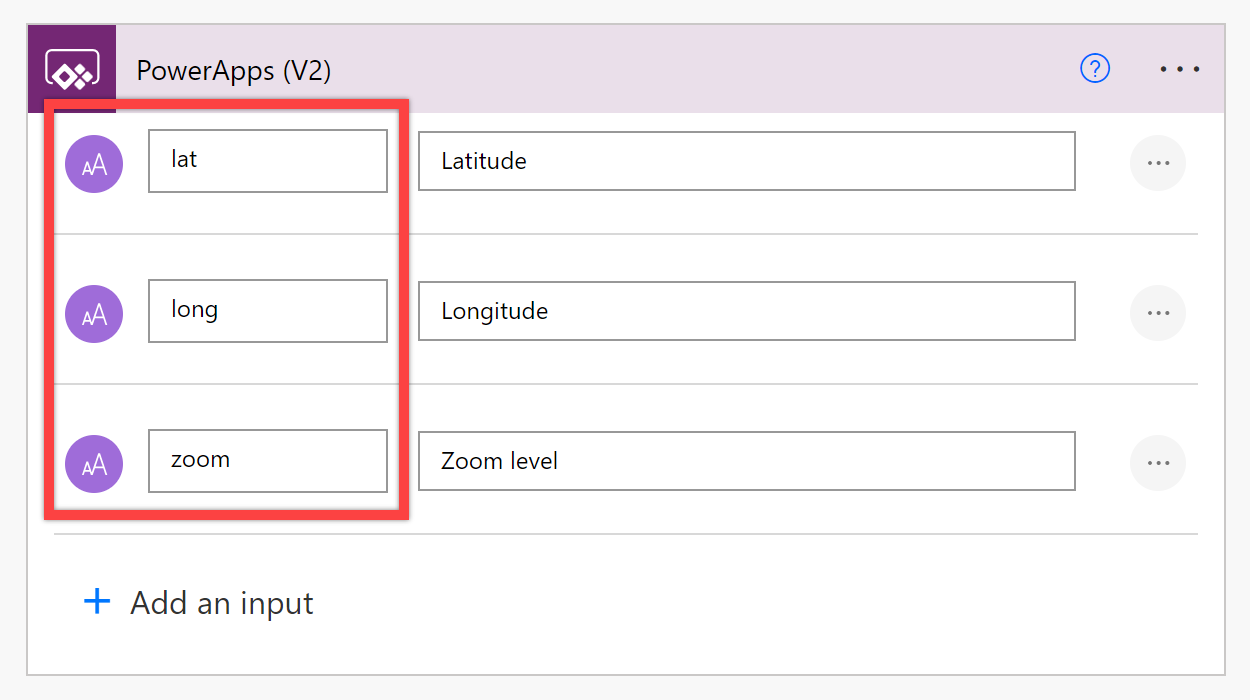
Therefore, you need a workaround using a Power Automate workflow to sort out this issue. Open the Power Automate Studio, create an instant cloud flow with the Power App trigger, and give it the "Where am I" name. Then add input parameters of lat, long and zoom.
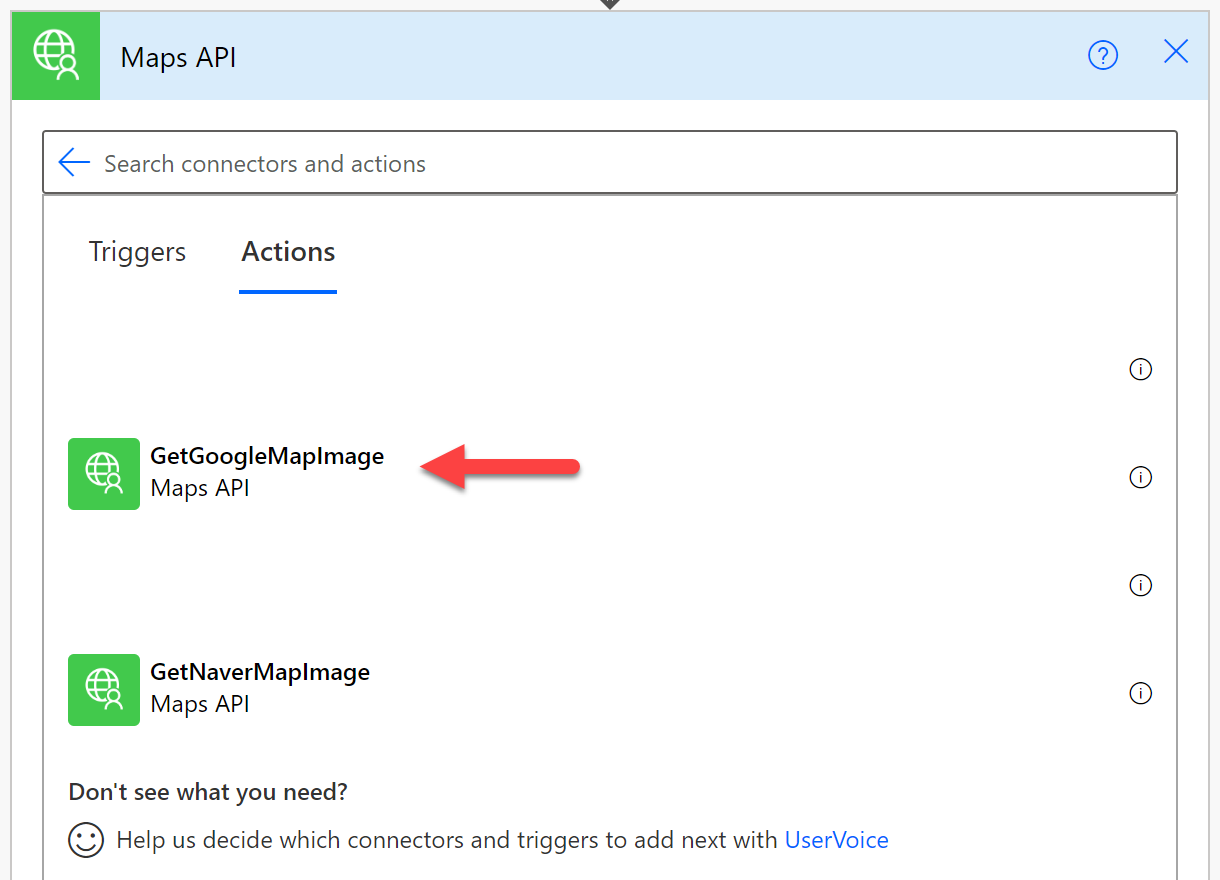
Add custom connector action to get the map image.
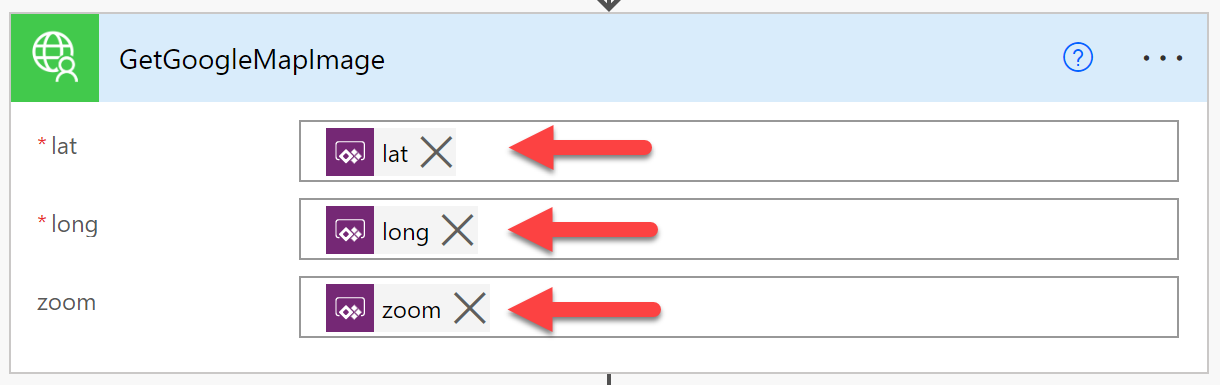
In the action, pass the appropriate parameters to the action.
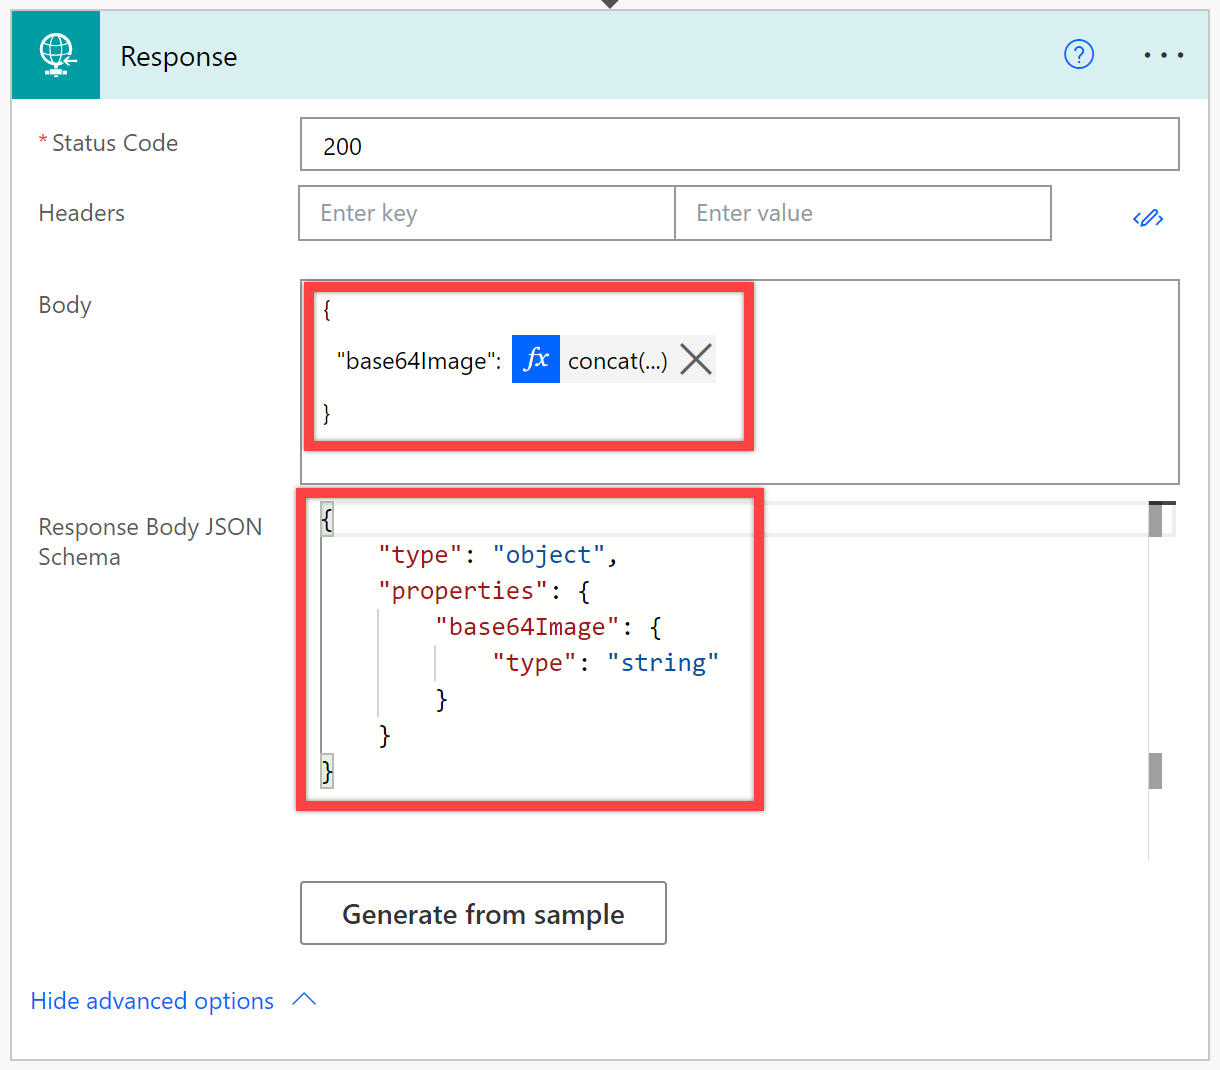
Add a "Response" action and put the following values into each field.
-
"Body" field:
{
  "base64Image": <power_automate_expression>
}
The
<power_automate_expression>should beconcat('data:', body('GetGoogleMapImage')?['$content-type'], ';base64,', body('GetGoogleMapImage')?['$content']). -
"Response Body JSON Schema" field:
{
  "type": "object",
  "properties": {
    "base64Image": {
      "type": "string"
    }
  }
}
Let's return to the Power Apps Studio and add the Power Automate workflow you created.
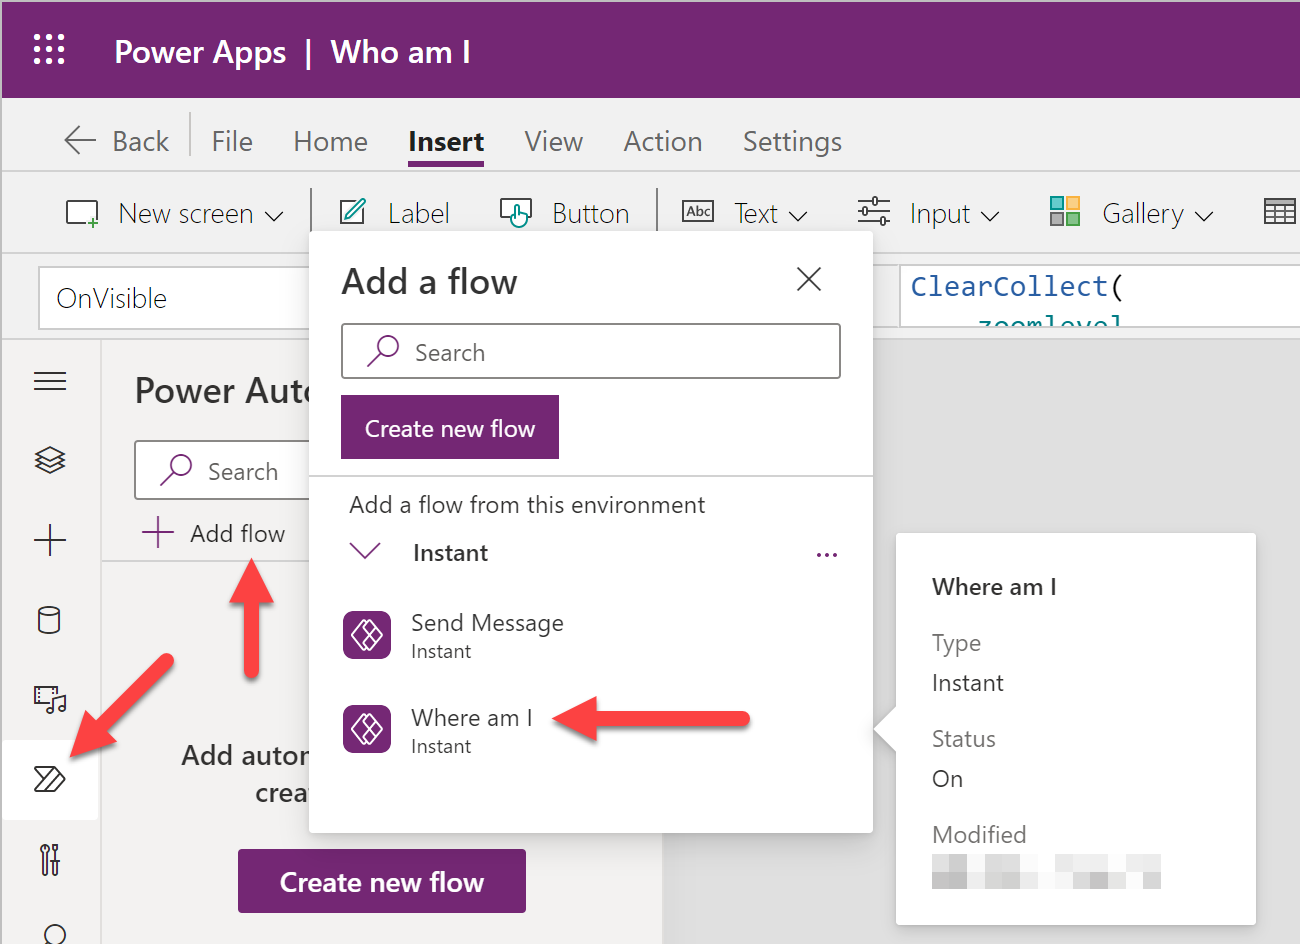
Select "Button1" and change the value on the property "OnSelect" below. It replaces the direct call to the custom connector with the Power Automate workflow.
ClearCollect(
    result,
    WhereamI.Run(
        Location.Latitude,
        Location.Longitude,
        First(zoomlevel).Value
    )
)
Also, change the value on the property "OnChange" of the "Slider1" control below, replacing the custom connector call with the Power Automate workflow call.
ClearCollect(
    zoomlevel,
    Slider1.Value
);
ClearCollect(
    result,
    WhereamI.Run(
        Location.Latitude,
        Location.Longitude,
        First(zoomlevel).Value
    )
)
And finally, change the "Image1" control's "Image" property value below.
First(result).base64Image
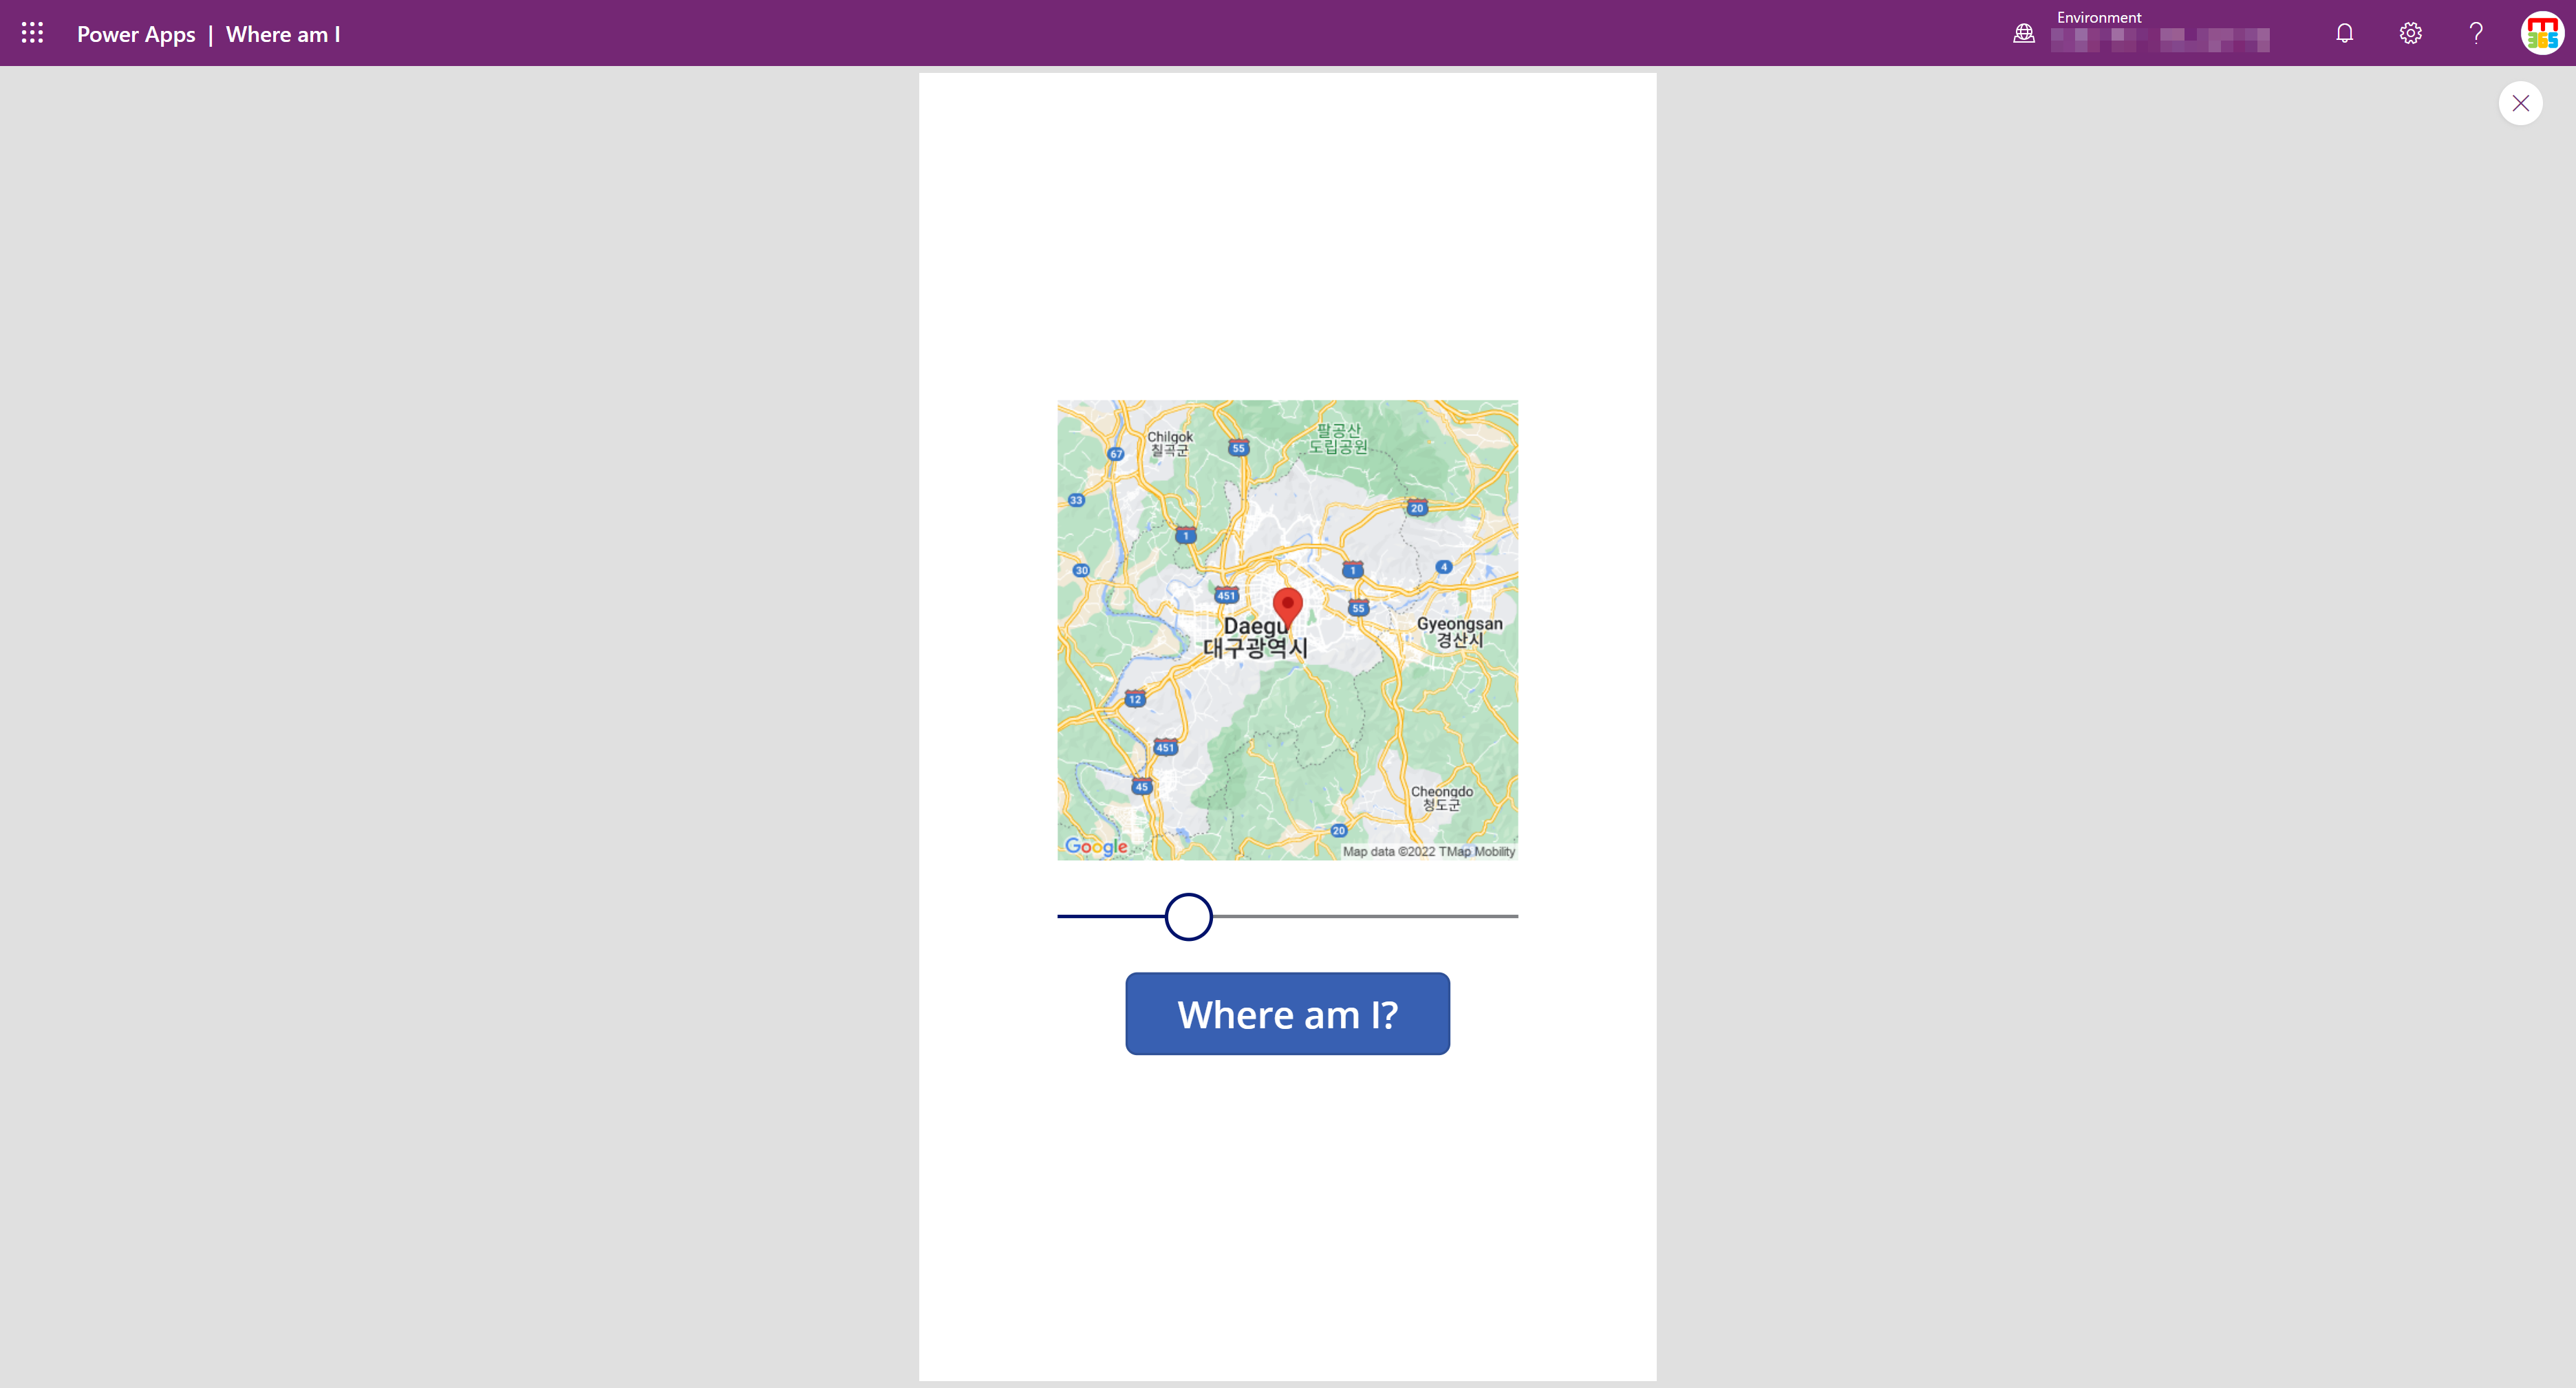
The workaround has been applied. Click the "Where am I?" button to see your current location from Google Maps.

If you change the slider left or right, you will see either the zoomed-in image or the zoomed-out image.
Now, you've created a Power Apps app to show your current location using:
- Google Maps API through the custom connector, and
- Custom connector written in Azure Functions with OpenAPI extension!
Exercise: Try this yourself!
You can fork this GitHub repository to your account and play around with it to see how the custom connector works. After forking the repository, make sure that you create all the necessary secrets to your repository documented in the README file.
Then, click the "Deploy to Azure" button, and it will provision all necessary Azure resources and deploy an Azure Functions app for a custom connector.

Once everything is deployed successfully, try to create a Power Apps app and Power Automate workflow to see your current location in real-time!
Resources: For self-study!
Want to know more about Power Platform custom connector and Azure Functions OpenAPI extension? Here are several resources you can take a look at: