Personalizing Education with Generative AI and Retrieval Augmented Generation Part 1: Laying the Groundwork with Azure Container Apps
Tired of one-size-fits-all learning? Imagine a virtual tutor that adjusts to your specific needs and helps you understand complex topics. That’s the power of Intelligent Apps — apps that leverage machine learning (ML), data analytics, and predictive/generative artificial intelligence (AI) to create dynamic, interactive user experiences.
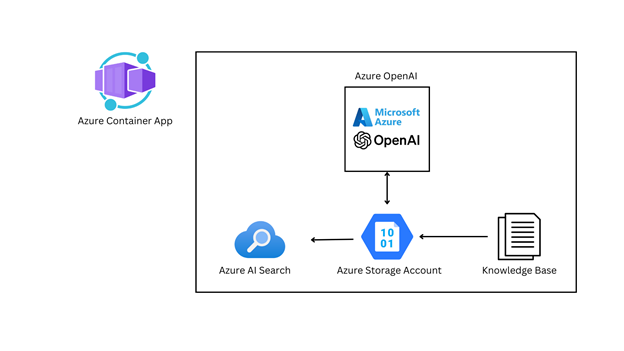
In this three-part series, you’ll build an education app that uses generative AI and Retrieval Augmented Generation (RAG) to create customized lessons, answer users’ questions in detail, and generate quizzes that adapt to their progress. You’ll use several exciting Azure technologies:
- Azure OpenAI Service — Provides the core AI capabilities for your app
- Azure AI Search — Offers a knowledge base that your app can access using RAG, allowing the large language model (LLM) to provide more accurate explanations
- Azure Container Apps — Lets you easily package and run apps in a flexible and scalable environment.
Let’s get started!
Prerequisites
To follow this tutorial, ensure you have the following:
- Python 3.10 or later
- Dave Kuhlman’s open-source Python knowledge base downloaded as an HTML file
- An Azure subscription with access to the Azure OpenAI Service. Note that you need to request access to this service.
- The Azure command-line interface (CLI) installed
- An Azure resource group
Build a Personal Tutor with AI and Azure Container Apps
In this first part of the series, you’ll build the foundation for an AI-powered Python tutor. This tutor will use a knowledge base to answer your Python questions of varying difficulties and create tailored quizzes.
Creating an Azure Storage Account for RAG Data
Start by creating a space to store the knowledge base that your chatbot will use for RAG. Sign in to the Azure portal and search “Storage accounts” in the search bar. Click + Create to start a new storage account.
On the Basics tab, set the following configurations:
- Subscription — Select the same subscription as your resource group.
- Resource group — Select the resource group you created earlier.
- Storage account name — Enter a unique name for your storage account.
- Region — Choose a region according to your preference.
- Pricing tier — Select Standard S0.
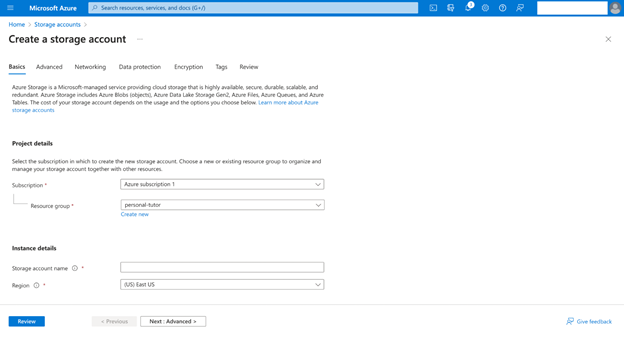
For the other tabs, keep the default settings.
Finally, click Review + Create, and then Create.
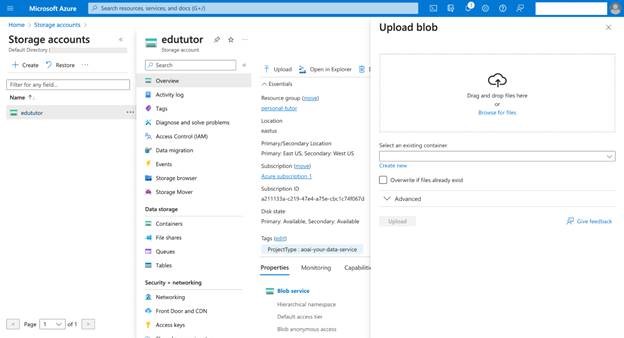
Next, you’ll upload the knowledge base linked in this tutorial’s prerequisites. Use HTML formatting for this project.
Once you have created your storage account, navigate to it from the Azure portal and click Upload. In the window that appears, create a new container, give it a descriptive name, and check Private (no anonymous access). Select the newly created container and click Browse for files. Select the file or folder you want to upload. Then, click Upload to upload the blob.
Register for Episode 4 of the new learning series on Intelligent Apps with Serverless on Azure.
Join the community along with MVPs, and the Azure Product Group on how to leverage AI with Serverless on Azure technologies—Azure Container Apps and Azure Functions—to build intelligent applications.
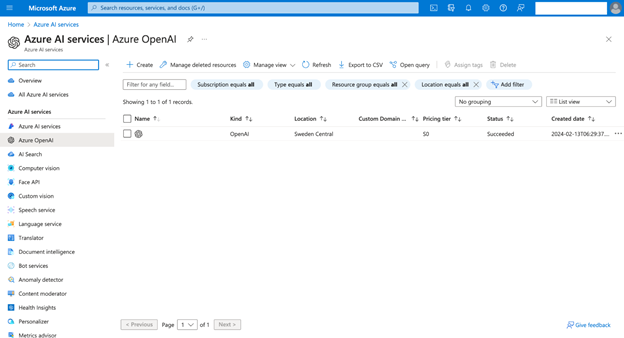
Creating an Azure OpenAI Service
With your knowledge base ready, you’ll now set up the core AI component: an Azure OpenAI service that uses RAG to access this knowledge base and generate customized lessons and quizzes.
In the Azure portal search bar, search “Azure OpenAI.” Click + Create to start a new service.
Match the Basics tab configurations to the following:
- Subscription and Resource group — Ensure these match your previous Azure resources for consistency.
- Region — This demonstration uses Sweden Central as the region. Note that some models are only available in limited regions, so be sure to select the right region.
- Name — Create a unique name for your OpenAI resource.
- Pricing tier — Select Standard S0.
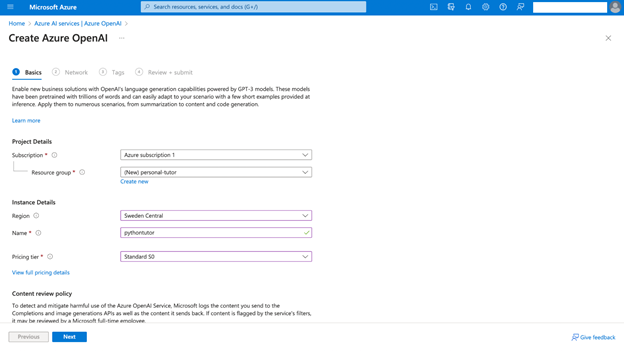
Click Next.
On the Networking tab, select All networks, including the internet, can access this resource.
Finally, click Review + Create, and then Create.
Once your Azure OpenAI service is ready, you’ll set up the necessary AI models. Within your Azure OpenAI resource, click Go to Azure OpenAI Studio. Then, under Management on the left pane, select Deployments.
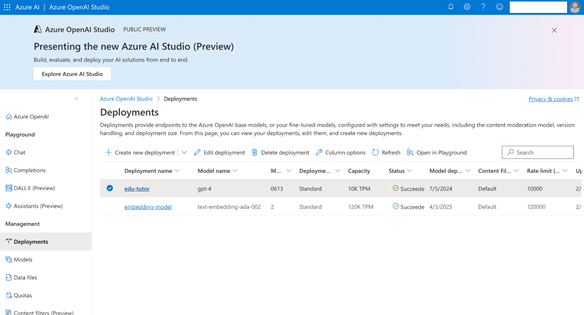
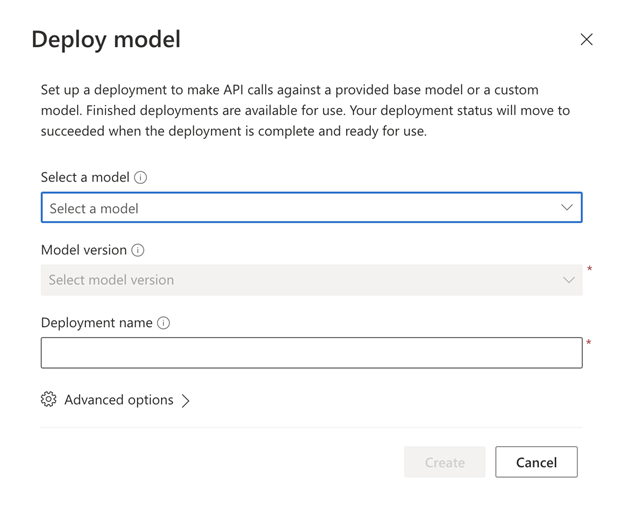
Click + Create new deployment. You’ll deploy two models for your application:
text-embedding-ada-002to create the embeddings of the knowledge base- GPT-4 to generate personalized courses and quizzes
Creating an Azure AI Search Resource
With your AI models in place, it’s time to make your knowledge base easily accessible to them.
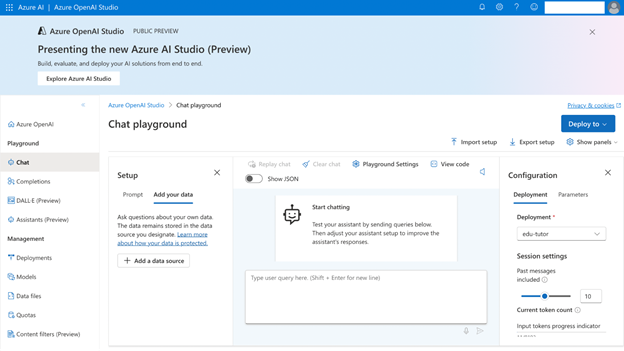
In the Azure OpenAI Studio, navigate to Playground and select Chat. Locate the Add your data option and click + Add a data source.
A window will open where you can connect to the Azure Blob Storage you created earlier. Use the following configurations for the data source:
- Select data source — Select Azure Blob Storage.
- Subscription — Choose the same subscription as your other services.
- Select Azure Blob storage resource — Select the storage account you created.
- Select storage container — Select the container that has your knowledge base.
- Select Azure AI Search resource — Create a new Azure AI Search resource.
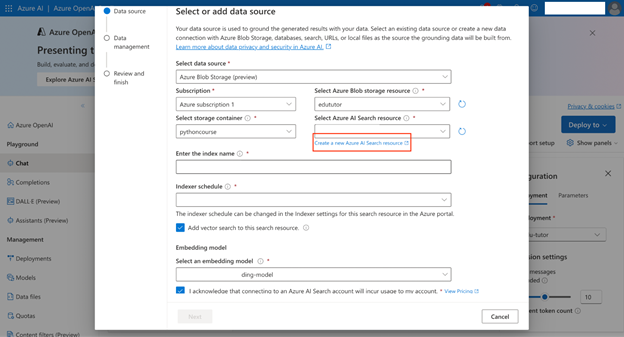
Since you don’t have an existing Search resource, select Create a new Azure AI Search resource, hyperlinked under the Select Azure AI Search resource dropdown. Azure AI Search makes the content of your knowledge base searchable by converting the data into numeric representations called vectors. These vectors capture the meaning and relationships between words.
On the Basics tab, configure the resource as follows:
- Subscription and Resource Group — Choose the same subscription and resource group as your other services.
- Service name — Enter a name for your search service.
- Location — Choose a location according to your preference.
- Pricing tier — Select Basic.
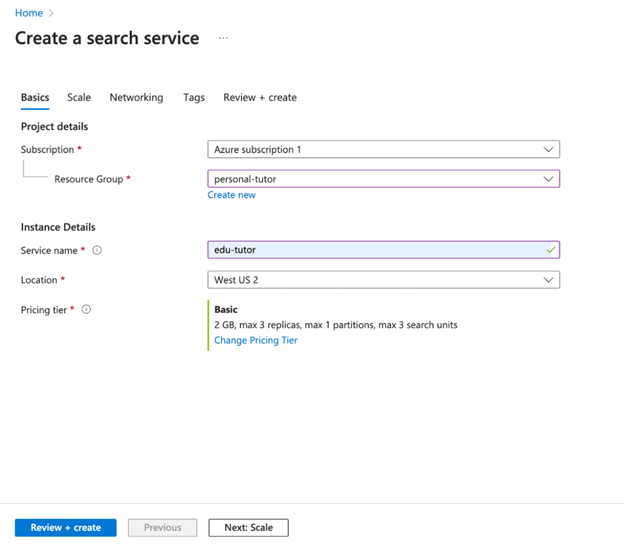
Click Review + create.
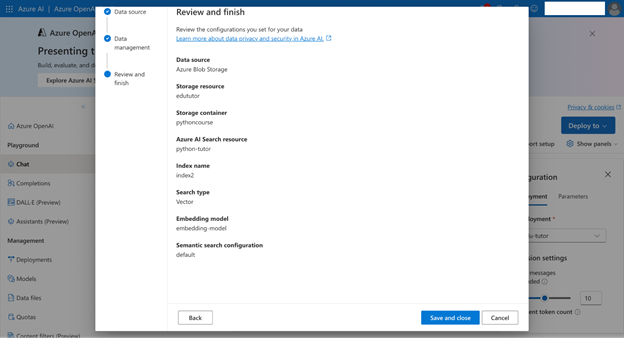
Return to the Select or add data source window. Configure the rest of the options as follows:
- Enter the index name — Provide an index name that will reference your data source.
- Indexer schedule — Choose Once.
- Enable the Add vector search to this search resource option.
- Select an embedding model — Choose the text-embedding-ada-002 model that you deployed earlier.
Check the acknowledgment box and click Next.
Then, in the Data management window, select Vector as the Search type. Check the acknowledgment and click Next.
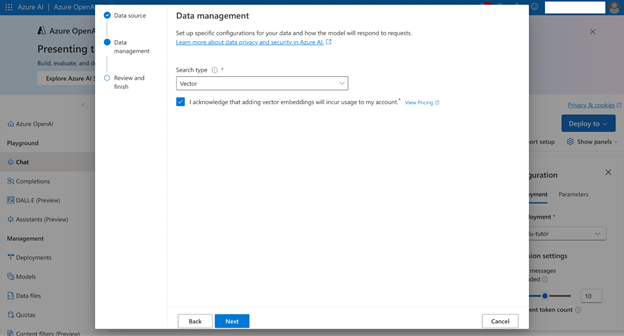
Finally, click Save and close.
Now that your data and services are connected, the next tutorial will focus on building the core application logic and creating a web interface to interact with your chatbot.
Next Steps
And with that, you’ve reached the end of the first tutorial of this series. You’ve established a solid Azure foundation and connected your knowledge base to powerful AI services. In the next part of this series, you’ll use Python to build a chatbot that enables dynamic interaction and personalized learning experiences for your users. See you there!
To build on the skills you’ve gained here, explore more AI and cloud topics by registering for Serverless on Azure Learn Live series. Then, put your knowledge to the test — and earn a Microsoft Learn badge — by joining our Cloud Skills Challenge.