Creating a Virtual Stylist Chatbot — Part 2: Adding a Chatbot Interface
Welcome to part 2 of this tutorial series on creating a virtual stylist chatbot using Azure OpenAI Service.
In part 1, you built the chatbot app’s back end using Azure Functions, Azure AI Services, and GPT-4 Vision with Azure OpenAI Service. That tutorial covered using these services to analyze an image of a fashion item or outfit and generate natural language responses and recommendations based on it.
In this second installment, you’ll create a chatbot interface for your virtual stylist app using Vite, Vue, TypeScript, and vue-advanced-chat. You’ll learn how to use these tools to build a web application that allows you to interact with your stylist bot conversationally.
Prerequisites
Before you begin, ensure you have:
- An Azure subscription with access to Azure OpenAI Service
- Azure command-line interface (CLI) installed
- Azure Functions Core Tools installed
- An Azure OpenAI Service resource with a GPT-4 Vision model deployed
- The deployment name, endpoint, and API key for your OpenAI Service
- The Fashion Product Images dataset from Kaggle
- Node.js 20 or later installed on your local machine
- A text editor that supports Vue and TypeScript. If you use Visual Studio Code, consider installing the TypeScript Vue Plugin to ensure the editor understands all the files you’re about to create.
For a preview of this tutorial, check out the project code available on GitHub.
Creating a Chatbot Interface for Your Virtual Stylist
In this section, you’ll create a chatbot interface for the virtual stylist app using Vue and vue-advanced-chat. You’ll use Vue to create the main components of the app, including the header, the footer, the chat window, and the image upload button. You’ll also use the vue-advanced-chat library to create the chat messages, chat input, and other chat options, using Tailwind CSS to style the app.
Complete the Intelligent Apps Skills Challenge to compete for the leaderboard and earn a Microsoft Learn Badge.
Setting Up the Project
The first step is creating a new Vue project using Vite. Vite is a fast and lightweight build tool that provides a smooth developer experience and supports features like hot module replacement, code splitting, and tree shaking.
To create a new Vue project with Vite, run the following command in your terminal:
npm init vite@latest virtual-stylist-chat -- --template vue-ts
This builds a new folder, virtual-stylist-chat, with the following structure:
virtual-stylist-chat
├── index.html
├── package.json
├── public
│   └── favicon.svg
├── src
│   ├── App.vue
│   ├── assets
│   │   └── logo.svg
│   ├── components
│   │   └── HelloWorld.vue
│   ├── main.ts
│   └── shims-vue.d.ts
└── tsconfig.json
Next, add a few dependencies:
- vue-advanced-chat, a feature-rich and highly customizable Vue chat component library that provides many out-of-the-box features for chat interfaces. These include images, videos, files, voice messages, emojis, link previews, typing indicators, reactions, markdown text formatting, online presence indicators, delivery and read receipts, theming and customization options, and responsive design.
- Tailwind CSS, PostCSS, and autoprefixer to simplify styling the app
- uuid to generate unique IDs for each message
To install the required packages, run the following command:
npm install --save vue-advanced-chat tailwindcss@latest postcss@latest autoprefixer@latest uuid @types/uuid
This command adds vue-advanced-chat, Tailwind, and PostCSS as dependencies in the package.json file.
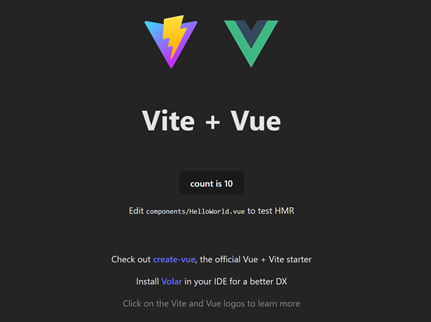
Now that you’ve set up the project and installed the dependencies, check that it builds as expected by running npm run dev. The app should build and provide an address to view it in a web browser. Load it, and you should see the default welcome screen:
Next, generate the tailwind.config.js and postcss.config.js files using the following command:
npx tailwindcss init -p
Edit the tailwind.config.js file and add the paths to your template files in the content property:
// tailwind.config.js
export default {
  content: ["./index.html", "./src/**/*. {vue,js,ts,jsx,tsx}"],
  theme: {
    extend: {},
  },
  plugins: [],
};
Then, replace the content of style.css file in the src folder with the following code to import Tailwind CSS using the @tailwind directives:
@tailwind base;
@tailwind components;
@tailwind utilities;
Then, import the styles.css file in the main.ts file and remove the unused import:
import { createApp } from "vue";
import App from "./App.vue";
import "./styles.css"; // import Tailwind CSS

createApp(App).mount("#app");
Finally, copy the images from the dataset you downloaded in the first part of this series. Using your preferred CLI or file manager, create a new folder called Images inside the project’s public folder, and then copy all the images from the dataset’s images_compressed folder to the Images folder. The stylist bot will use these images to make recommendations based on the image IDs it returns.
The result should look like this:
virtual-stylist-chat
├── index.html
├── package.json
├── public
│   ├── favicon.svg
│   └── images
│       ├── 10001.jpg
│       ├── 10002.jpg
│       ├── 10003.jpg
│       ├── ...
│       ├── 19998.jpg
│       ├── 19999.jpg
│       └── 20000.jpg
├── src
│   ├── App.vue
│   ├── assets
│   │   └── logo.svg
│   ├── components
│   │   └── HelloWorld.vue
│   ├── main.ts
│   ├── styles.css
│   ├── tailwind.config.js
│   ├── postcss.config.js
│   └── shims-vue.d.ts
└── tsconfig.json
Now, it’s time to start coding the chatbot interface.
Coding the Chatbot Interface
In this section, you’ll prepare your virtual stylist app’s chatbot interface. You’ll use Vue to create the main components, including the header, the footer, the chat window, and the image upload button. Then, you’ll use the vue-advanced-chat component to create the chat messages, input, and options.
To keep things simple, we’ll link to the code of non-essential components like the header and footer. Since these aren’t critical to how the app functions, feel free to copy and paste them into your codebase.
Header and Footer
Start by creating two files in the src/components folder: Header.vue and Footer.vue. Next, copy the code from the header and footer files in the GitHub repository into the files you just created.
These files are simple Vue components that use HTML and CSS to create a stylish header and footer for the app. If you’d like to customize them, replace the logo image link in the header with a link to an image of your own.
Now, it’s time to dive into the chat interface that makes this app work.
Creating the Chat Window Component
The chat window component displays the messages between the user and the stylist bot. To start, create a new file called ChatWindow.vue inside the project’s src/components folder. Then, add the following code to it:
<template>
  <div class="chat-window h-screen">
    <vue-advanced-chat
      .messages="messages"
      .options="options"
      .rooms="[{ roomId: 'main', roomName: 'Stylist Chat', avatar: '/images/logo.svg', users: [currentUser]}]"
      :rooms-list-opened="false"
      :rooms-loaded="true"
      :messages-loaded="true"
      :current-user-id="currentUser._id"
      accepted-files=".png, .jpg, .jpeg"
      show-audio="false"
      @send-message="onInputSubmit"
      .message-actions="[{
        label: 'Send',
        action: (message: Message) => {
          console.log('Send message ' + message.content);
        },
      }]"
      v-bind="{
        'current-user-id': currentUser?._id || '',
        'room-info-enabled': false,
       }"

       />
  </div>
</template>

<script lang="ts">
import { defineComponent, ref, Ref } from "vue";
import { VueAdvancedChat, Message, register, RoomUser } from "vue-advanced-chat";
register();
import { v4 as uuidv4 } from "uuid";

function toTimeString(date: Date): string {
  let month = date.toLocaleString('default', { month: 'short' });
  return `${date.getFullYear()}-${month}-${date.getDate()} ${date.getHours()}:${date.getMinutes()}`;
}

export default defineComponent({
  name: "ChatWindow",
  components: {
    VueAdvancedChat,
  },
  setup() {
    // Define the current user, the messages, and the options for the chat component
    const currentUser: Ref<RoomUser> = ref({
      _id: "user",
      username: "User",
      avatar: "",
      status: { state: "online", lastChanged: new Date().toDateString()},
    });
    const messages: Ref<Array<Message>> = ref([]);
    const options = ref({
      enableVoiceMessages: false,
      enableReactions: false,
      enableSeenBy: false,
      enableLinkPreview: false,
      enableUploads: true,
      enableAttachments: false,
      enableReply: true,
      enableEdit: false,
      enableDelete: false,
      enableGroup: false,
      enableSearch: false,
      enableOptions: false,
      enableScrollToBottom: true,
      enableScrollToTop: false,
      enableLoadMore: false,
      enableComposer: true,
      enableInput: true,
      enableSendButton: true,
      enableEmojis: false,
      enableRecording: false,
      enableMarkdown: true,
      enableTypingIndicator: true,
      enableOnlinePresence: false,
      enableCustomTheme: true,
      enableRooms: false,
      customTheme: {
        primaryColor: "#333333",
        secondaryColor: "#f0f0f0",
        tertiaryColor: "#ffffff",
        quaternaryColor: "#e0e0e0",
        quinaryColor: "#999999",
        senaryColor: "#666666",
        septenaryColor: "#333333",
        octonaryColor: "#f0f0f0",
        nonaryColor: "#ffffff",
        denaryColor: "#e0e0e0",
      },
    });

    // Update the image preview in the chat message after it's uploaded
    const updateMessageImage = (newMessage: Message, url: string) => {
      const existingMessage = messages.value.find(m => m._id === newMessage._id);
      // Update the URL of the first message file
      const message = existingMessage || newMessage;

      if(message && message.files && message.files.length > 0) {
        message.files[0].url = url;
        const existingMessages = messages.value.filter(m => m._id !== message._id);
        //set a new message ID to prevent file from being overwritten
        message._id = uuidv4();
        messages.value = [...existingMessages, message];
      }
    }

    const onInputSubmit = async (event: CustomEvent) => {
      // Create a new message object with the content and the current user
      console.log("called!")
      let content = event.detail[0].content;
      let files = event.detail[0].files;
      const newMessage: Message = {
        // generate uuid
        _id: uuidv4(),
        content,
        senderId: currentUser.value._id,
        date: new Date().toLocaleString('default', { year: 'numeric', month: 'short', day: 'numeric' }),
        timestamp: toTimeString(new Date()),
      };

      if(files) {
        newMessage.files = [...files.map((file: any) => {
          var messageFile = {
            name: file.name,
            size: file.size,
            type: file.type,
            url: file.url || file.localUrl,
            extension: file.extension,
            preview: file.localUrl,
          }
          const reader = new FileReader();
          reader.readAsDataURL(file.blob);

          reader.onload = () => {
            // Get the base64-encoded string from the reader result
            messageFile.url = reader.result as string;
            // reload messages so UI updates
            messages.value = [...messages.value];
            updateMessageImage(newMessage, messageFile.url!);
            callBackendFunction(content, reader.result as string);
          };
          return messageFile;
        })];
      } else {

        // Push the new message to the messages array
        messages.value = [...messages.value, newMessage];
        // Call the backend function to get the response from the stylist bot
        callBackendFunction(content, "");
      }
    };

    const callBackendFunction = async (prompt: string, image: string) => {
      // Get the previous prompts and responses from the messages array
      const context = messages.value
        .filter((message) => message.content || message.replyMessage)
        .map((message) => ({
          prompt: message.content,
          response: message.replyMessage,
        }));
      // Create a JSON object with the prompt, the image, and the context
      const data = {
        prompt,
        image,
        context,
      };
      // Send a POST request to the backend function URL with the data
      const response = await fetch("<backend function URL>", {
        method: 'POST',
        headers: {
          'Content-Type': 'application/json',
        },
        body: JSON.stringify(data),
      });
      // Get the response data from the fetch response
      const responseData = await response.json();
      // Create a new message object with the response data and the stylist bot
      const newMessage: Message = {
        _id: uuidv4(),
        content: responseData.response,
        files: responseData.images,
        senderId: "stylist-bot",
        date: new Date().toLocaleString('default', { year: 'numeric', month: 'short', day: 'numeric' }),
        timestamp: toTimeString(new Date()),
      };
      // Push the new message to the messages array
      messages.value = [...messages.value, newMessage];
    };

    // Return the current user, the messages, the options, and the event handlers
    return {
      currentUser,
      messages,
      options,
      onInputSubmit,
    };
  },

  mounted() {
    // Add a welcome message from the stylist bot when the component is mounted
    this.messages = [...this.messages, { _id: "stylist-bot", content: "Hello! I'm your virtual stylist chatbot. You can ask me for fashion advice, recommendations, and more. You can also upload images of clothing items and accessories to get personalized suggestions. How can I help you today?", senderId: "stylist-bot", date: new Date().toTimeString()}];
  },
});

</script>

<style scoped>
.chat-window {
  @apply h-screen flex-1 overflow-y-auto;
}
</style>
This code defines a chat window component that uses the vue-advanced-chat component to display the messages between the user and the stylist bot. It also defines some data and methods to handle the chat logic, such as the current user, messages, options, input submit event, file upload event, and the back-end function call.
currentUser and messages are reactive objects that store information about the chat participant and chat history. The currentUser object represents the app user while the messages array contains the Message objects with the following properties:
_id—A unique identifier for the messagecontent—The text content of the message (optional)files—Contains any files attached to the image (optional)senderId—The ID of the message senderdate—The date of the messagetimestamp—The time and date that appear with every message
The options object contains the configuration options for the vue-advanced-chat component. It allows you to enable or disable various features of the chat interface, including:
- Voice messages
- Reactions
- Seen by
- Link preview
- Uploads and attachments
- Reply and send button
- Edit and delete
- Group and search
- Options
- Scroll to bottom and scroll to top
- Load more
- Composer
- Input
- Emojis
- Recording
- Markdown
- Typing indicator
- Online presence/status
- Custom theme
You can learn more about the options and their meanings in the documentation.
The onInputSubmit method is the event handler for the input submit event. It’s triggered when the user types a text message and presses the Enter key or clicks the Send button. This method creates a new message object with the text content and the current user, then pushes it to the messages array.
If the message contains an attached image file, the function loads it into a base64-encoded string, which is what the back-end Azure function expects to receive. Finally, it calls the back-end function to prompt a response from the stylist bot.
The callBackendFunction method calls the back-end Azure function to retrieve the stylist bot’s reply. It takes the prompt and the image as parameters and sends a POST request to the back-end function URL with the data and the options. The data object contains the prompt, image, and context.
The context is an array of objects that store the previous prompts and responses from the messages array. The options object contains the headers for the request, such as the content type. The response object contains the response data from the back-end function, including the response, images, and context.
Finally, the function creates a new message object with the response data and the stylist bot’s ID, and then adds it to the messages array.
Register for Episode 2 of the new learning series on Intelligent Apps with Serverless on Azure. Join the community along with MVPs, and the Azure Product Group on how to leverage AI with Serverless on Azure technologies—Azure Functions and Azure Container Apps—to build intelligent applications.
Integrating Components into the App Component
In this section, you’ll integrate the components you just created into the src/App.vue file—your main app component. You’ll import the header, footer, chat window, and image upload button components and display them in a simple layout.
To start, open the App.vue file in the project’s src folder and replace the existing code with the following:
<template>
  <div class="app">
    <Header />
    <div class="main">
      <ChatWindow ref="chat" />
      <ImageUploadButton :chat="chat" />
    </div>
    <Footer />
  </div>
</template>

<script lang="ts">
import { defineComponent, ref } from "vue";
import Header from "./components/Header.vue";
import Footer from "./components/Footer.vue";
import ChatWindow from "./components/ChatWindow.vue";

export default defineComponent({
  name: "App",
  components: {
    Header,
    Footer,
    ChatWindow
  },
  setup() {
    // Define a ref for the chat component
    const chat = ref(ChatWindow);
    // Return the ref
    return {
      chat,
    };
  },
});
</script>
<style>
.app {
  @apply min-h-screen flex flex-col;
}

.main {
  @apply flex-1 flex flex-col;
}
</style>
This code defines the app component that uses the header, footer, chat window, and image upload button components. It also defines a ref for the chat component and passes it as a prop to the image upload button component. This action allows the image upload button component to access the chat component’s methods, such as onFileUpload.
With that, you’re ready to deploy!
Next Steps
Part 2 of this series equipped you with the necessary skills to create a dynamic chatbot interface for your virtual stylist app. By setting up your project, installing dependencies, and coding the chatbot interface, you laid the groundwork for the final deployment and testing phase. Now, you’re ready to see your virtual stylist in action.
Jump to the third part of this series, where you’ll deploy and test your Intelligent App.