Control and automate planned maintenance for App Service Environment v3 part 2
Introduction
This is part 2 of a 2-part series about automation for planned maintenance in App Service Environment v3. In this 2-part series, I will walk you through building a demo environment, setting up manual upgrade preference option for App Service Environment and configure automation using Logic App. In the first scenario you have deployed a simple environment, in the second scenario the environment will be more complex.
The first article uses one Azure App Service Environment, which will be configured with the manual upgrade preference option. When an upgrade is ready, an alert will be triggered that will start your Logic App. The Logic App will send you an email asking you to confirm the upgrade process.
The second article uses two Azure App Service Environments in two different regions. The first App Service Environment will be for the production workload, and the second for disaster recovery purposes. The Web App will be published using Azure Front Door Standard service. When an upgrade is ready, an alert will be triggered that will start your Logic App. The Logic App will send you an email asking you to confirm traffic redirection from the primary region to the disaster recovery region, when you accept this workflow, Logic App will redirect the traffic and start the upgrade process of your production Azure App Service Environment. Using this approach you can avoid cold start of the applications. Usually the upgrade process should be invisible for your application but if you have an application that needs more time to start or you want to decide when the upgrade should start then this approach will be perfect for you.
Info You can also use the Logic App from this article to redirect the traffic before migrating from App Service Environment v2 to App Service Environment v3. When Logic App does not detect an available upgrade, it will send you an email asking you to confirm only the traffic redirection from the primary region to the secondary region without starting upgrade process of the App Service Environment. Another place where you can use this example to build a production version of your Logic App may be the disaster recovery procedure.
Remember Now you can change Upgrade preference option to Manual and decide for yourself when you want to upgrade App Service Environment v3. After an update is available, you’ll have 15 days to start the upgrade process. If you don’t start the upgrade within the 15 days, the upgrade will be processed with the remaining automatic upgrades in the region. You can find more information about upgrade preference for App Service Environments v3 on this site upgrade preference for App Service Environments
Requirements:
- Access to Azure Subscription
- Access to Office 365 account
- Successful completion of the first article
Second scenario is organized into five steps:
- Deploy second App Service Environment using Azure CLI
- Deploy second sample app using Azure CLI
- Deploy Azure Front Door using CLI
- Deploy new version of Logic App using ARM template
- Change Alert rules in Monitor
Decide where you will execute commands
The best option to walk through this guide and execute commands would be to use Azure Cloud Shell with Bash environment. Azure Cloud Shell is an interactive, authenticated, browser-accessible shell for managing Azure resources. It provides the flexibility of choosing the shell experience that best suits the way you work, either Bash or PowerShell. For information on how to use Azure Cloud Shell, please visit this page Azure Cloud Shell. You can also install Azure CLI on your machine. The Azure CLI is available to install in Windows, macOS and Linux environments. It can also be run in a Docker container. For information on how to install the Azure CLI, please visit this page Azure CLI.
If you decide to use Azure Cloud Shell, please use Bash environment.
Getting Started with the second scenario
Remember To deploy the second scenario, you must first go through the first scenario - Control and automate planned maintenance for App Service Environment v3 part 1.
Create folder for you data
You can use the name below for your folder. You just need to replace asedemo with your environment name.
mkdir asedemo-upgrade-preference-ase-s2
cd asedemo-upgrade-preference-ase-s2
Choose the right subscription
If you have many subscriptions you must select the subscription in which you want to deploy the resources.
Using this command you can find and copy the SubscriptionId in which you want to create resources for this scenario.
az account list -o table
Using this command you can set a subscription to be the current active subscription.
az account set -s YourSubscriptionID
You can find more information about the az account command on this site az account.
Prepare parameters
When you construct your naming convention, identify the key pieces of information that you want to reflect in the resource names. Different information is relevant for different resource types. The following sites are useful when you construct resource names Define your naming convention and Recommended abbreviations for Azure resource types.
You can use the names below. You just need to replace asedemo with your environment name (please use the same environment name that you used in scenario 1), change SubscriptionId, EmailAddress, LocationRegionPROD and change LocationRegionDR parameters.
Copy and paste your parameters to your shell.
ASEsubscriptionID=11111111-1111-1111-1111-111111111111
EmailAddress=YourEmailAddress
LocationRegionPROD=northeurope
LocationRegionDR=westeurope
ASENamePROD=ase-asedemo-prod-01
ASENameDR=ase-asedemo-dr-01
ASEPlanNamePROD=plan-asedemo-linux-prod-01
ASEPlanNameDR=plan-asedemo-linux-dr-01
WEBAPPNamePROD=app-asedemo-prod-01
WEBAPPNameDR=app-asedemo-dr-01
ResourceGroupNameSHARED=rg-asedemo-shared-01
ASEResourceGroupNamePROD=rg-asedemo-prod-01
ASEResourceGroupNameDR=rg-asedemo-dr-01
VirtualNetworkNamePROD=vnet-asedemo-prod-$LocationRegionPROD-01
VirtualNetworkNameDR=vnet-asedemo-dr-$LocationRegionDR-01
SubnetNameVnetPROD=snet-asedemo-prod-$LocationRegionPROD-01
SubnetNameVnetDR=snet-asedemo-dr-$LocationRegionDR-01
VnetPrefixPROD=192.168.10.0/24
SubnetVnetPrefixPROD=192.168.10.0/24
VnetPrefixDR=192.168.100.0/24
SubnetVnetPrefixDR=192.168.100.0/24
LogicAppName=logic-asedemo-prod-02
FDName=fd-asedemo-01
OriginGroup=origin-group-asedemo
OriginNamePrimary=primary
OriginNameSecondary=secondary
Create basic infrastructure
Create Resource Group
The demo environment will be organized using three resource groups. The first resource group is for App Service Environment in primary region, the second is for App Service Environment in secondary region and the third resource group is for the Logic App automation. Two resource groups were created during the first scenario, now you need to create a resource group for Azure App Service Environment is the secondary region.
az group create -l $LocationRegionDR -n $ASEResourceGroupNameDR
Create virtual network with subnet for App Service Environment
A virtual network is required to create an App Service Environment. This command will create a virtual network with a subnet.
az network vnet create -g $ASEResourceGroupNameDR -n $VirtualNetworkNameDR --address-prefix $VnetPrefixDR --subnet-name $SubnetNameVnetDR --subnet-prefix $SubnetVnetPrefixDR
Create App Service Environment - this process may take a while
An App Service Environment is a single-tenant deployment of Azure App Service that runs in your virtual network. This command will create an App Service Environment.
az appservice ase create -n $ASENameDR -g $ASEResourceGroupNameDR --vnet-name $VirtualNetworkNameDR --subnet $SubnetNameVnetDR --kind asev3 --virtual-ip-type External
For more information about Azure CLI for App Service Environment, visit Azure CLI ASE Create.
Create App Service Plan in App Service Environment - this process may take a while
Applications are hosted in App Service plans, which are created in an App Service Environment. An App Service plan is essentially a provisioning profile for an application host. This command will create an App Service plan.
az appservice plan create -g $ASEResourceGroupNameDR -n $ASEPlanNameDR --app-service-environment $ASENameDR --is-linux --sku I1v2
For more information about Azure CLI for App Service Environment Plan, visit Azure CLI ASE Plan Create
Create and deploy sample application
Create a web app
To create a PHP app in your App Service Environment, use this command.
az webapp create -g $ASEResourceGroupNameDR -p $ASEPlanNameDR -n $WEBAPPNameDR --runtime "PHP:8.0"
Tip: To check the list of available runtimes in format Framework:Version, use the command
az webapp list-runtimes.
Create variables with the URLs of your websites. You will use these variables later with the curl command to check if your websites is working correctly.
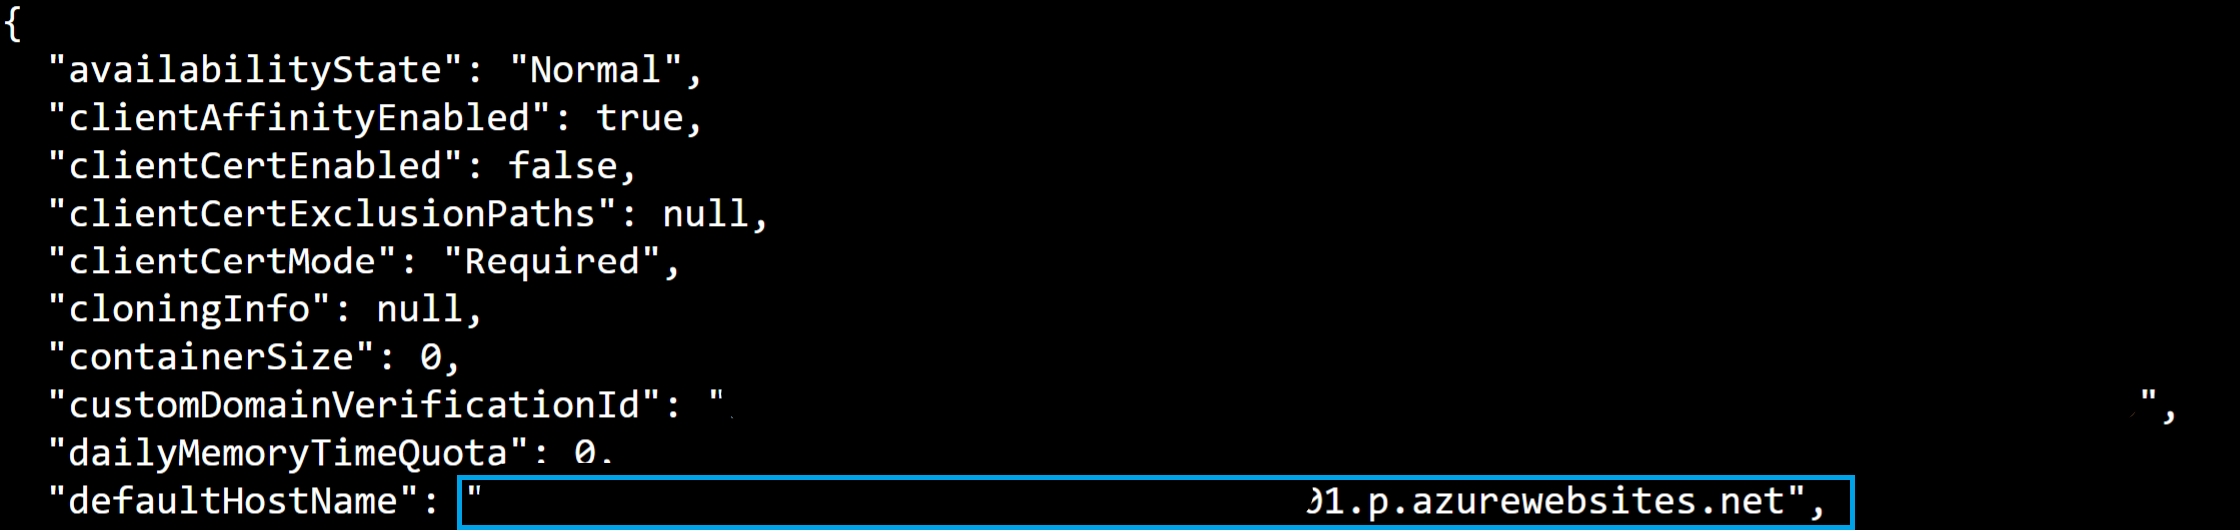
URLofYourPrimaryWebsite=$(az webapp show --name $WEBAPPNamePROD --resource-group $ASEResourceGroupNamePROD --query defaultHostName -o tsv)
URLofYourSecondaryWebsite=$(az webapp show --name $WEBAPPNameDR --resource-group $ASEResourceGroupNameDR --query defaultHostName -o tsv)
You can also write down the URL of your websites.
Create index.php file for primary website
Sample code for your secondary website:
echo '<?php
 echo "Secondary Website";
?>' > index.php
Create zip file for primary website
In the next step you will use ZIP Deploy to deploy the application. You need a ZIP utility for this. Fortunately, ZIP utility is pre-installed in Azure Cloud Shell.
zip secondaryapp.zip index.php
Deploy sample app
To deploy a sample application using ZIP Deploy, use this command:
az webapp deployment source config-zip --resource-group $ASEResourceGroupNamePROD --name $WEBAPPNamePROD --src ./secondaryapp.zip
Check if your app is running
Use your browser or use curl command to check if your secondary app is working correctly.
curl https://$URLofYourSecondaryWebsite
Planned maintenance - Change the upgrade preference
To change the Upgrade preference setting to Manual on your App Service Environment v3, use this command:
az resource update --name $ASENameDR -g $ASEResourceGroupNameDR --resource-type "Microsoft.Web/hostingEnvironments" --set properties.upgradePreference=Manual
Deploy Azure Front Door
Create Azure Front Door profile
Run az afd profile create to create an Azure Front Door profile.
az afd profile create \
    --profile-name $FDName \
    --resource-group $ResourceGroupNameSHARED \
    --sku Standard_AzureFrontDoor
Add an endpoint
Run az afd endpoint create to create an endpoint in your profile.
az afd endpoint create \
    --resource-group $ResourceGroupNameSHARED \
    --endpoint-name endpoint-$FDName \
    --profile-name $FDName \
    --enabled-state Enabled
Create a variable with the URL of your Azure Front Door endpoint. You will use this variable later with the curl command to check if your Azure Front Door endpoint is working correctly.
URLofYourFrontDoorEndpoint=$(az afd endpoint show \
    --resource-group $ResourceGroupNameSHARED \
    --profile-name $FDName \
    --endpoint-name endpoint-$FDName \
    --query hostName -o tsv)
You can also write down the URL of your Azure Front Door endpoint.

Create an origin group
Run az afd origin-group create to create an origin group that contains your two web apps.
az afd origin-group create \
    --resource-group $ResourceGroupNameSHARED \
    --origin-group-name $OriginGroup \
    --profile-name $FDName \
    --probe-request-type GET \
    --probe-protocol Https \
    --probe-interval-in-seconds 60 \
    --probe-path / \
    --sample-size 4 \
    --successful-samples-required 3 \
    --additional-latency-in-milliseconds 50
Add an origin to the group - primary website
Run az afd origin create to add an origin to your origin group.
az afd origin create \
    --resource-group $ResourceGroupNameSHARED \
    --host-name $URLofYourPrimaryWebsite \
    --profile-name $FDName \
    --origin-group-name $OriginGroup \
    --origin-name primary \
    --origin-host-header $URLofYourPrimaryWebsite \
    --priority 1 \
    --weight 1000 \
    --enabled-state Enabled \
    --http-port 80 \
    --https-port 443
Repeat this step and add your second origin - secondary website.
az afd origin create \
    --resource-group $ResourceGroupNameSHARED \
    --host-name $URLofYourSecondaryWebsite \
    --profile-name $FDName \
    --origin-group-name $OriginGroup \
    --origin-name secondary \
    --origin-host-header $URLofYourSecondaryWebsite \
    --priority 2 \
    --weight 1000 \
    --enabled-state Enabled \
    --http-port 80 \
    --https-port 443
Add a route
Run az afd route create to map your endpoint to the origin group. This route forwards requests from the endpoint to your origin group.
az afd route create \
    --resource-group $ResourceGroupNameSHARED  \
    --profile-name $FDName \
    --endpoint-name endpoint-$FDName \
    --forwarding-protocol MatchRequest \
    --route-name route \
    --https-redirect Enabled \
    --origin-group $OriginGroup \
    --supported-protocols Http Https \
    --link-to-default-domain Enabled
For more information about Azure CLI for Azure Front Door, visit Front Door CLI.
In a production environment you will probably need to implement a WAF policy for you application. For more information about Azure CLI for Azure Front Door WAF Policy, visit Front Door WAF Policy.
Check if your Azure Front Door Endpoint is running - this process may take a while
Use your browser or use curl command to check if your app is working correctly.
curl https://$URLofYourFrontDoorEndpoint
Deploy Logic App
This sample code is intended to show you what the Logic App can do to automate your processes. This sample Logic App shows how to use various connectors and functions to build you own Logic App in a production environment.
Logic App ARM Template
You can use the curl command in Azure Cloud Shell to download the template_scenario_2.json file from the GitHub repository.
curl https://raw.githubusercontent.com/bmis/azure-logic-app-upgrade-preference/main/templates/template_scenario_2.json --output template_scenario_2.json
You can use the code editor in Azure Cloud Shell to check the template_scenario_2.json file.
code template_scenario_2.json
Use ctrl + q to close code editor.
Logic App ARM Parameters file
The echo command will create a parameters_scenario_2.json file for you.
echo '{
    "$schema": "https://schema.management.azure.com/schemas/2015-01-01/deploymentParameters.json#",
    "contentVersion": "1.0.0.0",
    "parameters": {
        "logicapp_name": {
            "value": "'"$LogicAppName"'"
        },
        "SubscriptionID": {
            "value": "'"$ASEsubscriptionID"'"
        },
        "ResourceGroupName": {
            "value": "'"$ResourceGroupNameSHARED"'"
        },
        "webapp_name_primary_region": {
            "value": "'"$URLofYourPrimaryWebsite"'"
        },
        "webapp_name_secondary_region": {
            "value": "'"$URLofYourSecondaryWebsite"'"
        },
        "ase_name_primary_region": {
            "value": "'"$ASENamePROD"'"
        },
        "ase_name_secondary_region": {
            "value": "'"$ASENameDR"'"
        },
        "frontdoor_name": {
            "value": "'"$FDName"'"
        },
        "frontdoor_OriginGroup_name": {
            "value": "'"$OriginGroup"'"
        },
        "frontdoor_OriginNamePrimary": {
            "value": "'"$OriginNamePrimary"'"
        },
        "frontdoor_OriginNameSecondary": {
            "value": "'"$OriginNameSecondary"'"
        },
        "connections_office365_name": {
            "value": "office365"
        },
        "EmailAddress": {
            "value": "'"$EmailAddress"'"
        }
    }
}' > parameters_scenario_2.json
You can use the code editor in Azure Cloud Shell to check parameters_scenario_2.json file.
code parameters_scenario_2.json
Use ctrl + q to close code editor.
Deploy Logic App template
To start the deployment, execute the command below.
az deployment group create --name $LogicAppName --resource-group $ResourceGroupNameSHARED --template-file template_scenario_2.json --parameters parameters_scenario_2.json
Authorize Office 365 connection
Before you can use the Office 365 connector in your Logic App you must authorize the Office365 connection.
- Open Azure portal, sign in with your credentials
- Go to your Logic App using for example the search box at the top, search for logic-asedemo-prod-02 - change asedemo to your environment name
- Click API connections and then select office365 API Connection
- Check the status, if status is Connected everything is ok, if it’s Unauthorized, click Edit API connection and then click Authorize
- Sign in to your account
- Click Save
Check out the app via Logic App designer:
- Open Azure portal, sign in with your credentials
- Go to your Logic App using for example the search box at the top, search for logic-asedemo-prod-02 - change asedemo to your environment name
- Click Logic app designer
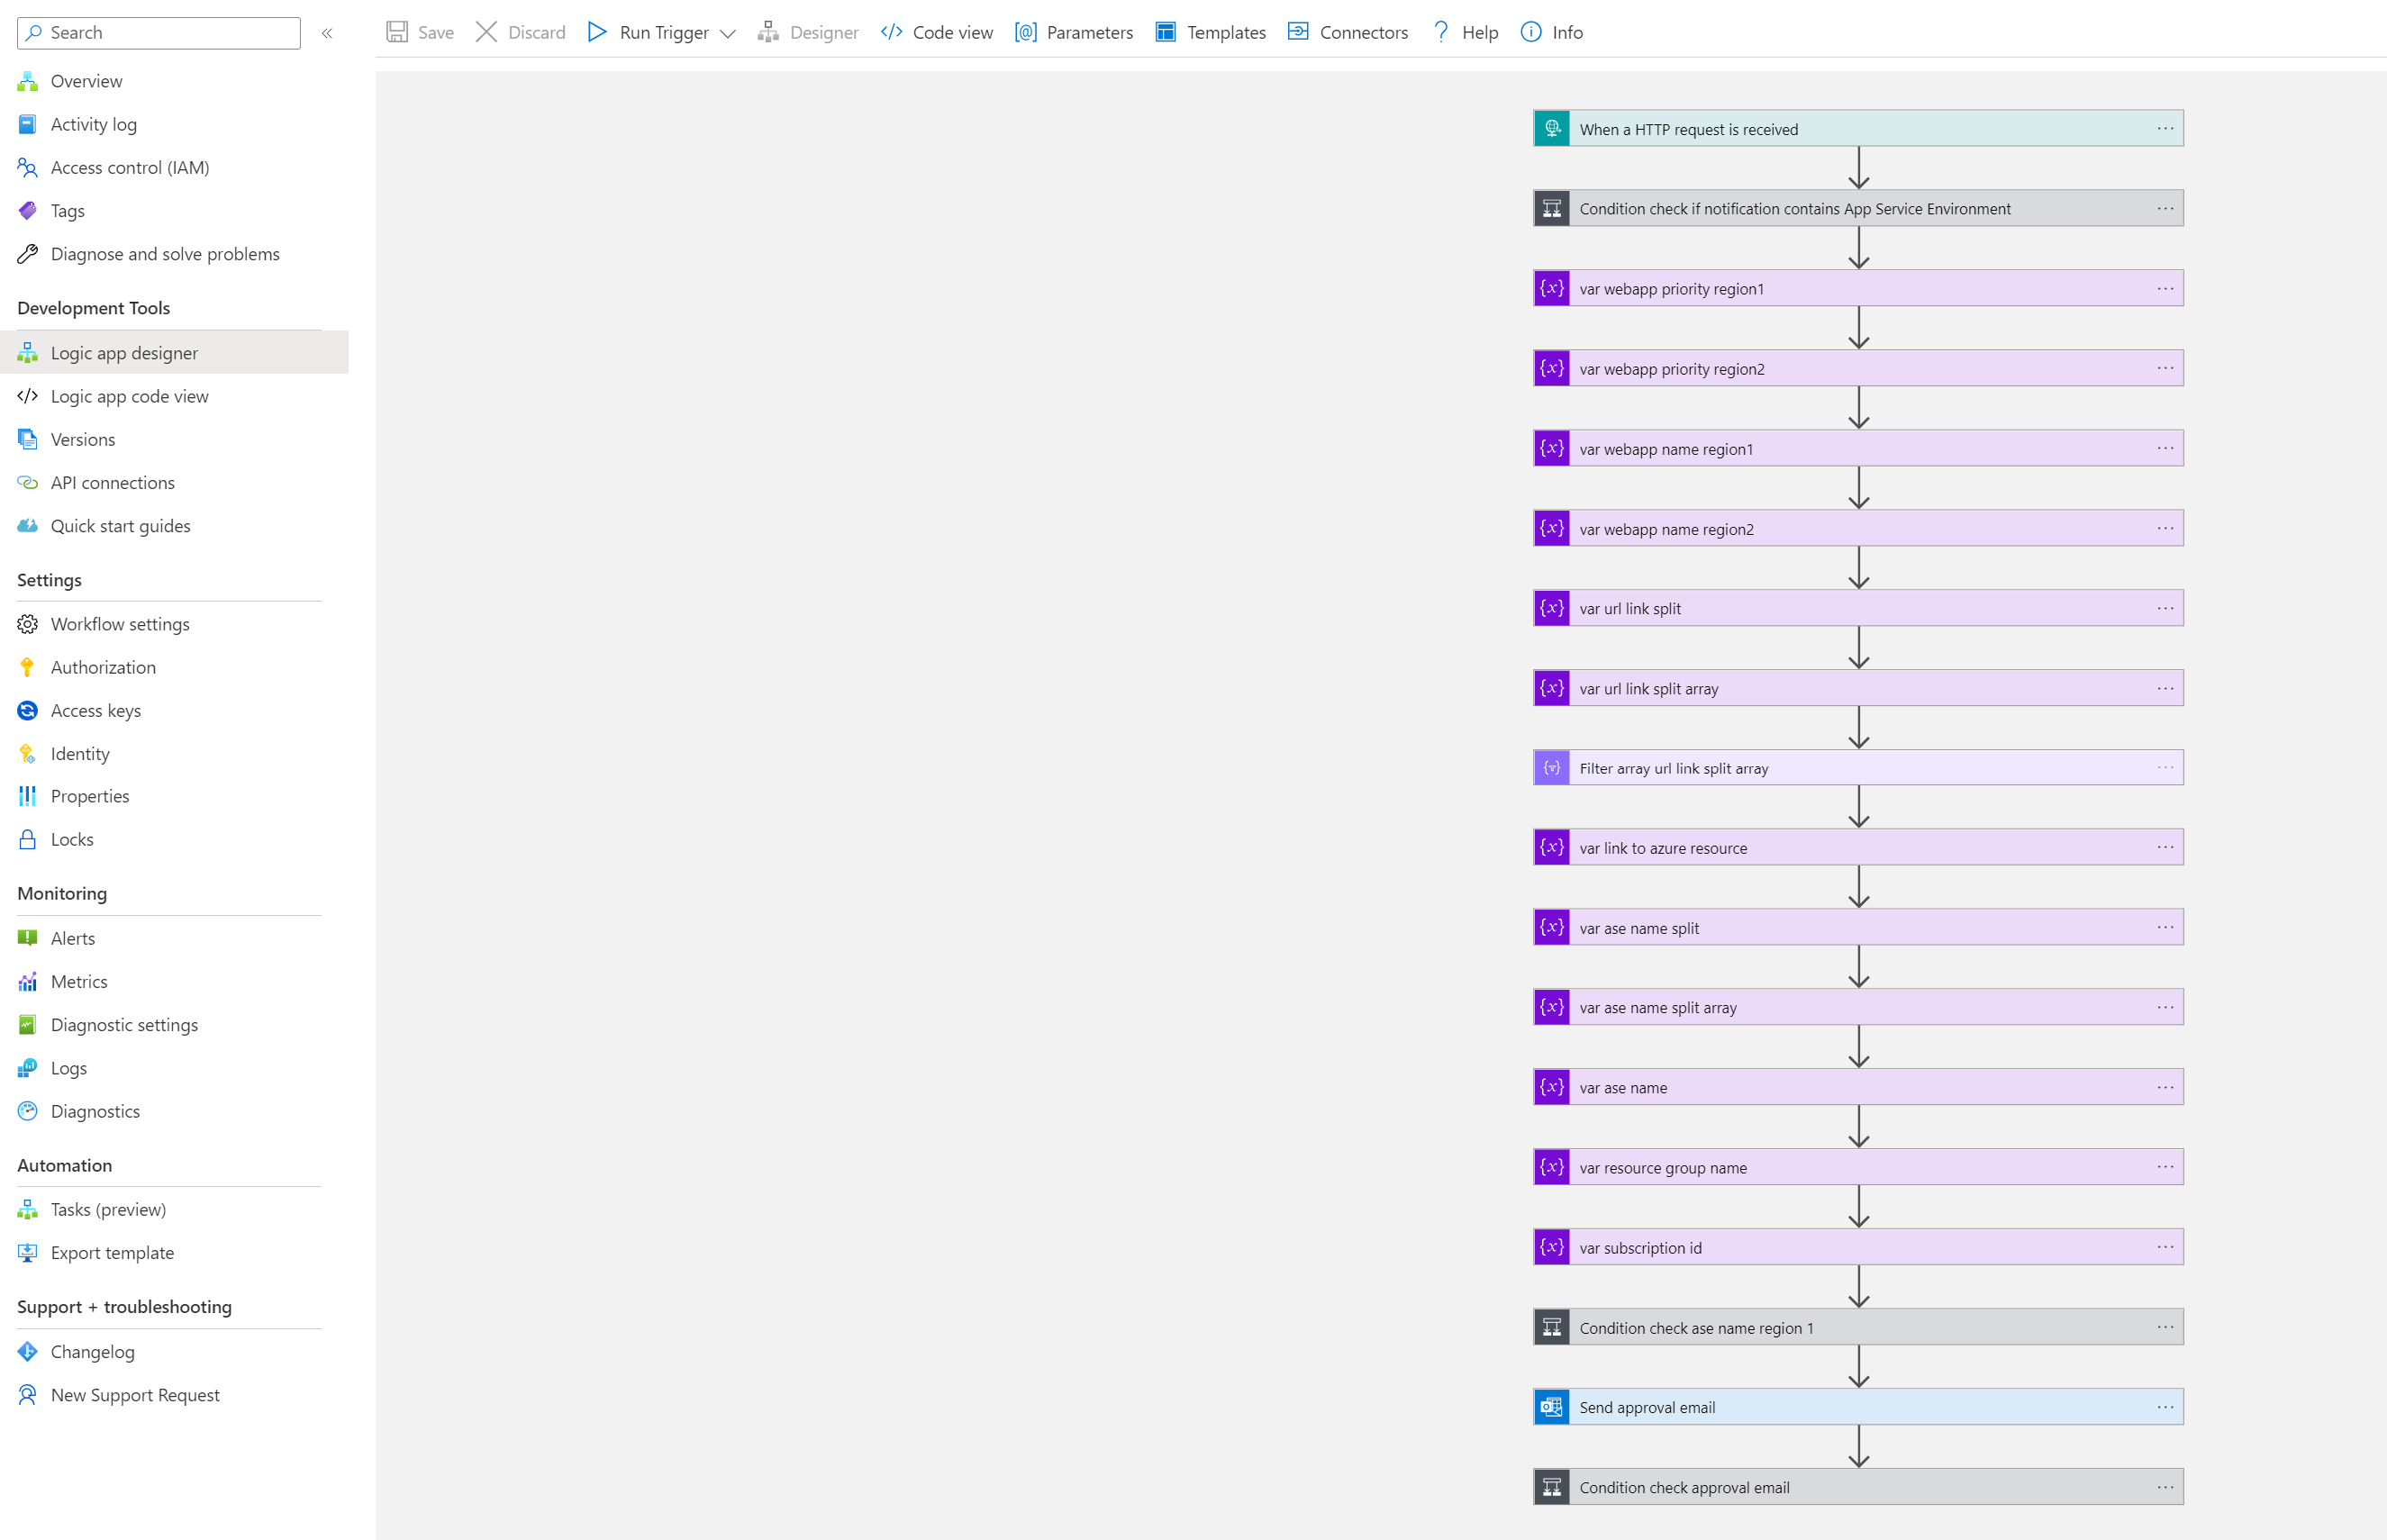
- Familiarize yourself with the individual steps of the Logic App workflow
Steps in Azure Logic App:
- The Logic App starts when an alert occurs. You will configure the alert later in this article.
- The Logic App verifies that the alert applies to the Azure App Service Environment.
- Using functions such as split, json and action such as Filter array, the Logic App will extract from the text, the information about the name of App Service Environment to which the alert relates and the URL of the App Service Environment.
- In the next step, the approval email is sent.
- If the Approve option is selected, the Logic App will go further. If the Reject option is selected the Logic App will send second approval email, more information about this in point 8.
- After selecting Approve, the Logic App will check for an upgrade for the App Service Environment.
- If an upgrade is available, a http requests will be sent which redirect the traffic from the primary region to the secondary region and initiates the upgrade. As well, an e-mail will be sent with the information that the traffic has been redirected and the upgrade has started.
- If the upgrade is not available, the second approval email is sent.
- If the Approve option is selected, the Logic App will continue. If the Reject option is selected the Logic App will stop working.
- After selecting Approve, the Logic App will only redirect the traffic from the primary region to the secondary region without starting upgrade process of App Service Environment. As well, an e-mail will be sent with the information that traffic has been redirected.
For more information about Logic Apps, visit Logic App Overview.
Steps to assign a contibutor RBAC role to App Service Environment instance:
Your Logic App will be deployed with system assigned managed identity. Before you can use your Logic App you must give your Logic App identity permission to your App Service Environment and Azure Front Door. Permissions are required to:
- Checking if an upgrade is available
- Starting the upgrade process
- Redirect traffic from the primary region to the secondary region
If you want to know more about managed identities please go to this page Managed identities for Azure resources. Information about permissions that you need to configure managed identity can be found on this page Managed identities for Azure resources frequently asked questions.
Step 1: Determine who needs access
LogicAppIdentity=$(az resource show --name $LogicAppName --resource-group $ResourceGroupNameSHARED --resource-type "Microsoft.Logic/workflows" --query identity.principalId -o tsv)
Step 2: Assign contributor role
az role assignment create --assignee $LogicAppIdentity --role "Contributor" --scope /subscriptions/$ASEsubscriptionID/resourceGroups/$ASEResourceGroupNamePROD/providers/Microsoft.Web/hostingEnvironments/$ASENamePROD

az role assignment create --assignee $LogicAppIdentity --role "Contributor" --scope /subscriptions/$ASEsubscriptionID/resourceGroups/$ASEResourceGroupNameDR/providers/Microsoft.Web/hostingEnvironments/$ASENameDR

az role assignment create --assignee $LogicAppIdentity --role "Contributor" --scope /subscriptions/$ASEsubscriptionID/resourceGroups/$ResourceGroupNameSHARED/providers/Microsoft.Cdn/profiles/$FDName
If you are at this stage, you have successfully created the demo environment. Now you need to change an alert that will trigger the new Logic App.
Change an Alert
- Open Azure portal, sign in with your credentials.
- Go to Monitor using for example the search box at the top.
- From the menu, click Alerts.
- Click Alert rules.
- Search for your alert alert-asedemo-planned-maintenance - please change asedemo to your environment name, open the alert rules.
- Click Edit button.
- In the Action section, click name of your Action group name ag-asedemo - please change asedemo to your environment name.
- In the Action section, change Selected logic app to you new Logic App using edit button.
- In field Select a logic app choose your new Logic App with name logic-asedemo-prod-02 - please change asedemo to your environment name.
- Click OK.
- Click Save changes.
Send test notifications
As you build your automation and notification logic, you may want to test it before the actual upgrade is available. The Azure portal and rest api has the ability to send a special test upgrade available notification, which you can use to verify your automation logic. The message will be similar to the real notification, but the title will be prefixed with “[Test]” and the description will be different. You can send test notifications after you’ve configured your upgrade preference to Manual. The test notifications are sent in batches every 15 minutes.
To send a special test upgrade available notification, use this command:
ASEidPROD=$(az appservice ase show --name $ASENamePROD --resource-group $ASEResourceGroupNamePROD --query id --output tsv)
az rest --method POST --uri "${ASEidPROD}/testUpgradeAvailableNotification?api-version=2022-03-01"
You can also use Azure portal to send test notifications. You can find more information about test notifications at Send test notifications.
Check your mailbox and approve the redirection traffic from the primary region to the secondary region and upgrade process
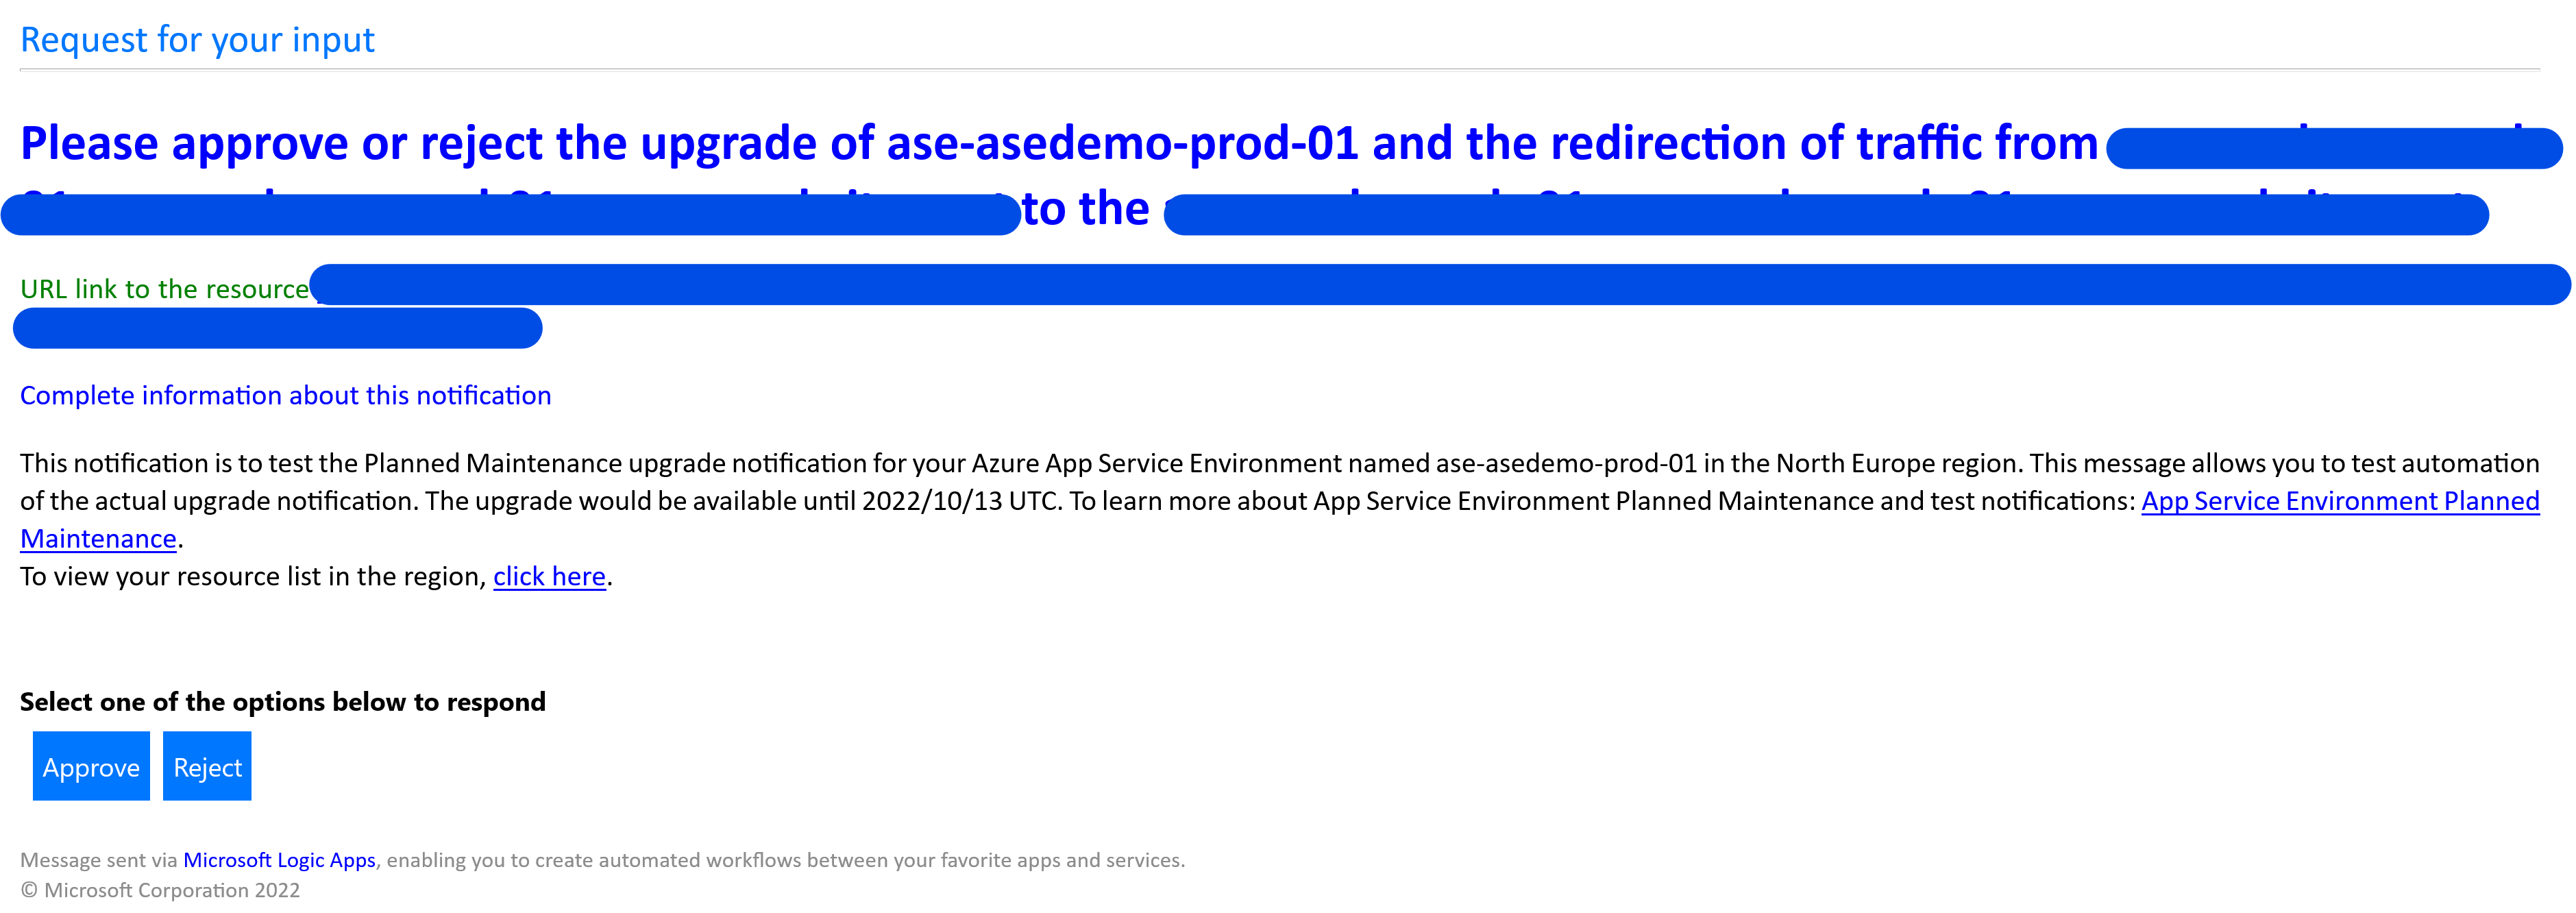
Because this is a test notification your Logic App will send you a second email asking you to confirm only the traffic redirection. Information from email App Service Environment NameOfYourASE does not currently have an upgrade available but you can redirect the traffic without upgrade using approve button. In a real-world scenario when an upgrade will be available your Logic App will send you information that The traffic from NameOfYourWebAppPrimaryRegion to the NameOfYourWebAppSecondaryRegion has been redirected and the upgrade of NameOfYourASE has started.
Tip: You can also send a test notification from the App Service Environment in the second region, the Logic App will redirect traffic from the second region to the primary region.
Logic App run history blade
Familiarize yourself with the Logic App run using Run history blade.
- Open Azure portal, sign in with your credentials.
- Go to your Logic App using for example the search box at the top, search for logic-asedemo-prod-02 - change asedemo to your environment name.
- Click Overview.
- Click Run history.
- Select last Succeeded Logic App run.
- Familiarize yourself with the Logic App run.
You successfully completed the second scenario.