Solution Authoring
Tutorial
- Learning objectives
- Before we begin
- The Samples
- Essential components of a CIQS solution
- Deep dive
- Chicken and egg on steroids (hands-on exercise)
- Copy 011-chickenandegg sample into the Solutions directory
- Update
<Title>and<Description> - Update the first
<Manual>step - Remove the second
<AzureFunctionApp>provisioning step from theManifest - Incorporate (and slightly tweak) stuff from 008-solutiondashboard into your new solution
- Modify the
hatchfunction to hatch eggs into the SQL database - Final touches
- Appendix
Learning objectives
- Create an authoring account and learn how to use SAW
- Explore the Samples and get familiar with the essential components of a CIQS Solution
- Build a new Solution by reusing the code from multiple SAW samples
Before we begin
If you don’t have an authoring account yet, please create one following these instructions. For the remainder of this tutorial, we will be using the in-browser solution authoring environment. Of course, local environment can be used as well.
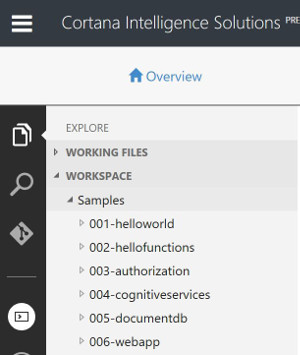
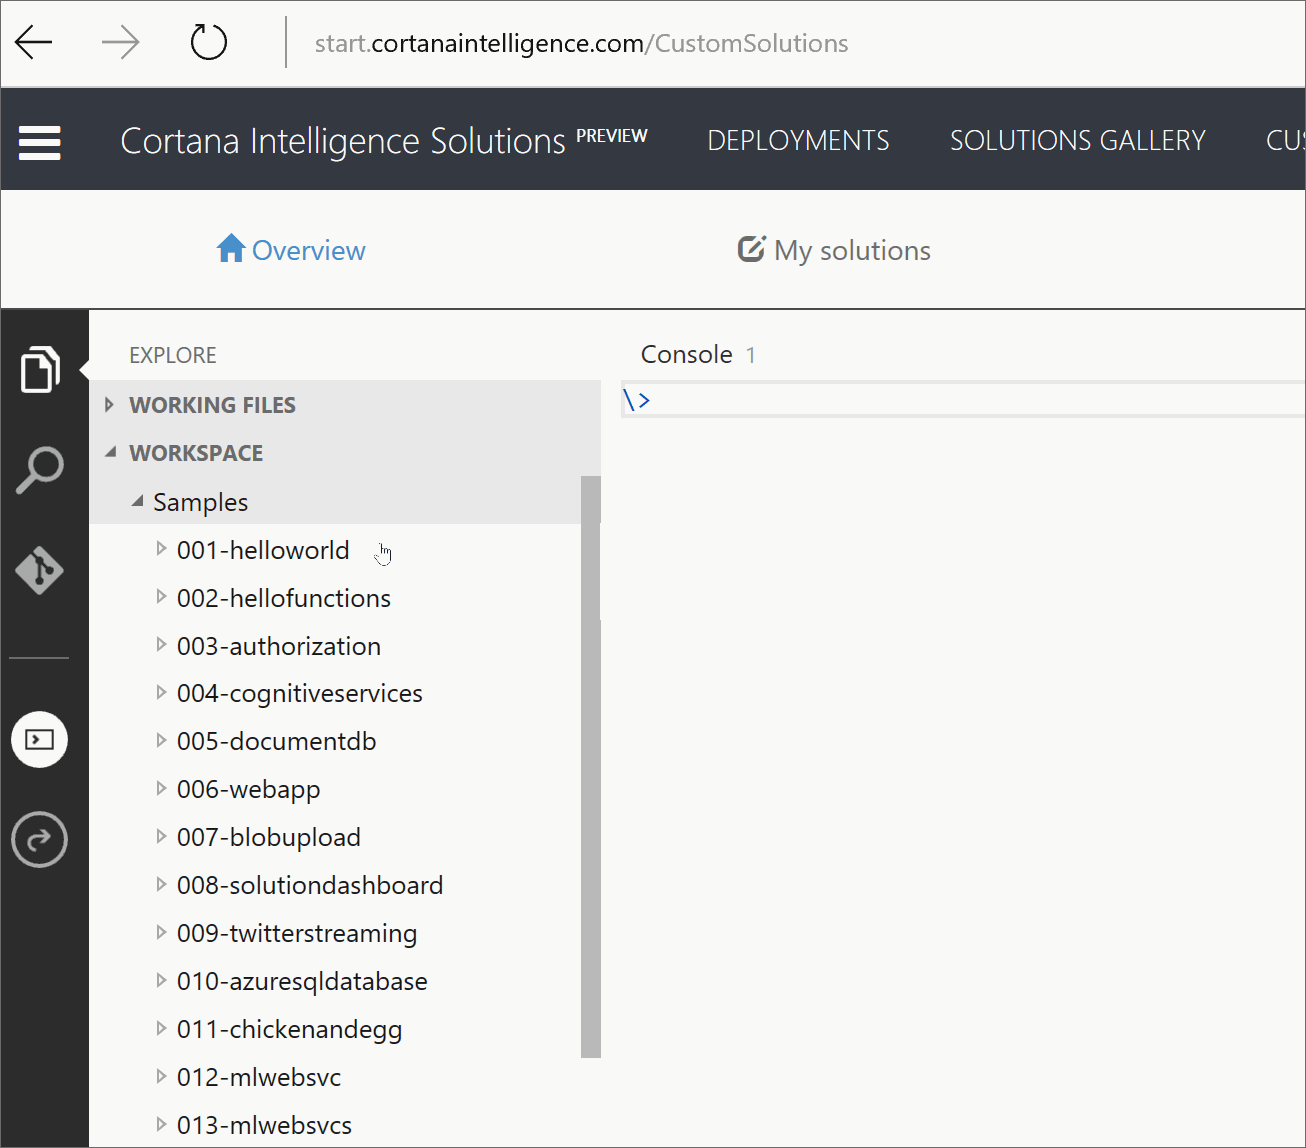
The Samples
SAW comes with a collection of Samples. Most of them (with a few exceptions) aren’t full-fledged solutions, but rather small reusable pieces that come in handy when building something real.
In your in-browser environment, expand the Samples directory and take a quick look at what’s available.
Trying out a sample
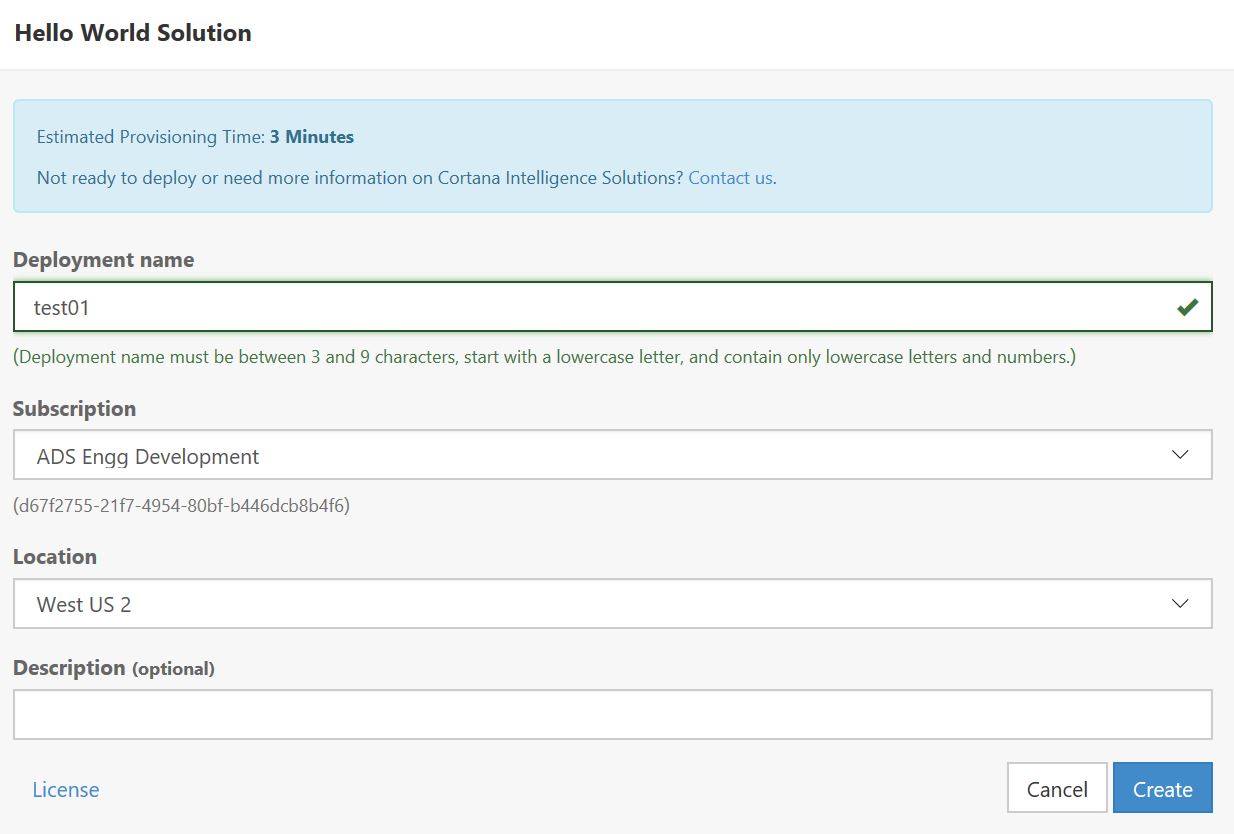
Say, you want to create a solution from a sample. Since this is our first solution, 001-helloworld seems like a good choice.
Copy the sample into the Solutions directory and run saw push in the console to upload the solution into your private gallery (My Solutions):
Now the solution is ready to be deployed! Clicking the Deploy link on its thumbnail will initiate a CIQS deployment.
What happens during a CIQS deployment?
Each CIQS deployment (even the simplest one we just kicked off) can be broken down into 3 main stages.
Deployment creation
This is where you choose deployment’s name, subscription and location. The name of the deployment corresponds to the name of the resource group that is created in the selected subscription/location immediately after clicking Create.
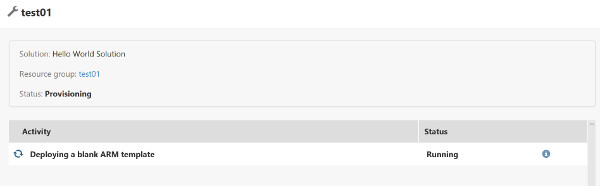
Resource provisioning
This is a sequence of fully automated provisioning steps, which sometimes (quite rarely) may be interrupted by manual steps if automation is not possible (we try really hard to avoid disruptive manual steps).
Post-deployment instructions
Technically, this is optional, but hardly any solution goes without it.
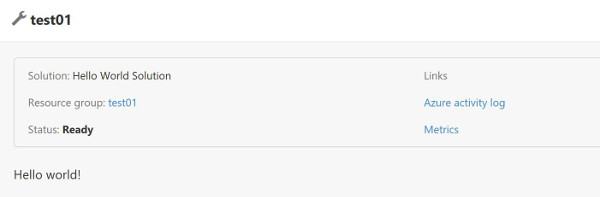
Clicking the Resource group link opens the resource group created during the deployment in the Azure Portal.
![]()
The “Hello World” deployment didn’t create any resources, which can be seen in the snapshot above. However, a resource group with the same name as the CIQS deployment (test01) has been created. In addition, there was also one successful Azure Resource Manager (ARM) deployment into this resource group. Now, it’s a good time to find out what triggered that ARM deployment.
Essential components of a CIQS solution
Let’s take a look inside the solution we just deployed, the 001-helloworld sample.
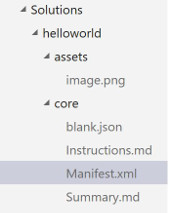
Manifest.xml is the core components of each CIQS solution. It defines basic attributes that describe the solution and a sequence of <ProvisioningSteps> necessary to perform a deployment. For example, here’s the Manifest from 001-helloworld:
<?xml version="1.0" encoding="utf-8"?>
<Template>
    <Title>Hello World Solution</Title>
    <Owner displayname="John Doe" email="john.doe@contoso.com"/>
    <PublishedOn>12/31/2016</PublishedOn>
    <ImageUrl>{PatternAssetBaseUrl}/image.png</ImageUrl>
    <Description>Something awesome.</Description>
    <Summary src="Summary.md" format="markdown"/>
    <EstimatedTime>1 Minute</EstimatedTime>
    <ProvisioningSteps>
        <ArmDeployment source="blank.json" title="Deploying a blank ARM template" />
        <Manual title="Done">
          <Instructions src="Instructions.md" format="markdown" />
        </Manual>
    </ProvisioningSteps>
</Template>
It should now be clear what was the source of the ARM deployment into the resource group created when we deployed this solution earlier. blank.json is an empty ARM template that creates nothing, yet it is valid and sufficient to perform a successful ARM deployment:
{
    "$schema": "https://schema.management.azure.com/schemas/2015-01-01/deploymentTemplate.json#",
    "contentVersion": "1.0.0.0",
    "parameters": {
    },
    "variables": {
    },
    "resources": [
    ],
    "outputs": {
    }
}
The <ArmDeployment> provisioning step is followed by a <Manual> step which references a Markdown file, Instructions.md, containing the post-deployment instructions. In this example, it’s the traditional
Hello world!
Needless to say, a solution can have as many provisioning steps as necessary. We have already seen <ArmDeployment> and <Manual>. Let’s examine a couple of slightly more complex samples and discover more!
Deep dive
Let’s exampine two samples and learn how to execute custom provisioning code via Azure Functions (<Function>), configure Azure Function App (App Service) with the management provisioning step <AzureFunctionApp> and, finally, how to incorporate a Power BI dashboard into a solution.
Chicken and egg (011-chickenandegg)
Solution dashboard (008-solutiondashboard)
Chicken and egg on steroids (hands-on exercise)
Copy 011-chickenandegg sample into the Solutions directory
Optionally, rename it and replace the image.
Update <Title> and <Description>
Refer to the diff below for some ideas.
Update the first <Manual> step
- edit parameter descriptions
-
add a new parameter with the name
experimentCount; this parameter will determine the number of generated daily data pointsOptionally, add instructions (and an image) to this manual step describing what’s this all about. E.g.:
You are running a private egg incubator. 
Remove the second <AzureFunctionApp> provisioning step from the Manifest
We will be using a SQL database to store the solution data, so AppSettings are no longer needed.
Incorporate (and slightly tweak) stuff from 008-solutiondashboard into your new solution
- copy
sqlserver.jsoninto thecoredirectory of the new solution - copy
prepsqlfunction as is undercore/functions - open the .sql file included with the
prepsqlfunction and remove the entireINSERTstatement along with everything underneath it (we will be generating our own data instead) - copy the
<ArmDeployment>,<Function>and<SolutionDashboard>provisioning steps into theManifestof the new solution (again, refer to the diff if not sure where to place them, but it’s also fine to use your best judgement and even make mistakes)
Modify the hatch function to hatch eggs into the SQL database
- copy
project.jsonfromprepsqlto make sure SQL dependencies are available - create a new C# file (.csx) inside the
hatchfunction and give it the nameSolutionDataTable.csx; copy this code into the new fileThis class encapsulates a few simple database table operations and should be self-explanatory.
- make sure
experimentCountandsqlConnectionStringare passed as parameters to thehatchfunction (see the diff if need a hint) - make changes to
run.csxto read the input parameters, hatch eggs on a daily basis and write the counts in the the database table viaSolutionDataTable(see sugested changes).
Final touches
- create a solution dashboard (.pbix) file.
For now, you can take this one and upload put it inside the
assetsdirectory of your new solution. -
add the dashboard link to the post-deployment instructions; e.g.:
You can see your dashboard [here]({Outputs.solutionDashboardUrl}).
Appendix
Manifest.xml changes (diff)
 <?xml version="1.0" encoding="utf-8"?>
 <Template>
-    <Title>Hatching eggs with CIQS</Title>
+    <Title>Egg incubator simulation</Title>
     <ImageUrl>{PatternAssetBaseUrl}/chicken.jpg</ImageUrl>
-    <Description>This sample demonstrates how to update AppSettings of the FunctionApp in a safe and reliable way.</Description>
+    <Description>Generating fictitious data and visualizing it with Power BI.</Description>
     <Summary src="Summary.md" format="markdown"/>
     <EstimatedTime>3 Minutes</EstimatedTime>
     <ProvisioningSteps>
         <Manual title="Count your eggs">
             <Parameters>
-                <Parameter name="eggCount" defaultValue="500" description="How many fertilized chicken eggs to you have?" />
+                <Parameter name="eggCount" defaultValue="500" description="How many fertilized chicken eggs to you get each day?" />
                 <Parameter name="sexRatio" defaultValue="1:1" description="What's the sex ratio (rooster:hen) of this chicken breed?" />
+                <Parameter name="experimentCount" defaultValue="10000" description="How long have you been running this business?">
+                    <ExtraDescription>(expressed in days)</ExtraDescription>
+                </Parameter>
             </Parameters>
         </Manual>
+        <ArmDeployment source="sqlserver.json" title="Creating a SQL Server">
+            <Parameters>
+                <Credential type="sql" username="sqlServerUsername" password="sqlServerPassword" />
+            </Parameters>
+        </ArmDeployment>
         <AzureFunctionApp alwaysOn="false" use32BitWorkerProcess="false" servicePlanSku="B2" servicePlanTier="Basic" createStorageAccount="false">
             <AppSettings>
             <!-- Uncomment the below settings and set createStorageAccount to true to enable Azure Functions debugging features -->
@@ -23,14 +31,27 @@
                 <Add key="SexRatio" value="{Inputs.sexRatio}" />
             </AppSettings>
         </AzureFunctionApp>
-        <Function name="hatch" title="Hatching the eggs" retriable="true" />
-        <AzureFunctionApp title="Updating chicken headcount in the AppSettings">
-            <AppSettings>
-                <Add key="Roosters" value="{Outputs.roosters}" />
-                <Add key="Hens" value="{Outputs.hens}" />
-                <Remove key="EggCount" />
-            </AppSettings>
-        </AzureFunctionApp>
+        <Function name="prepsql" title="Preparing the SQL Database">
+            <Parameters>
+                <Parameter hidden="true" name="sqlConnectionString"
+                    defaultValue="Server=tcp:{Outputs.sqlServer}.database.windows.net,1433;Database={Outputs.sqlDatabase};User ID={Inputs.sqlServerUsername};Password={Inputs.sqlServerPassword};Trusted_Connection=False;Encrypt=True;Connection Timeout=30" />
+            </Parameters>
+        </Function>
+        <Function name="hatch" title="Hatching the eggs" retriable="true">
+            <Parameters>
+                <Parameter name="experimentCount" hidden="true" defaultValue="{Inputs.experimentCount}" />
+                <Parameter name="sqlConnectionString" hidden="true" defaultValue="{Inputs.sqlConnectionString}" />
+            </Parameters>
+        </Function>
+        <SolutionDashboard>
+            <Parameters>
+                <Parameter hidden="true" name="pbixFileUrl" defaultValue="{PatternAssetBaseUrl}/dashboard.pbix" />
+                <Parameter hidden="true" name="sqlServer" defaultValue="{Outputs.sqlServer}" />
+                <Parameter hidden="true" name="sqlDatabase" defaultValue="{Outputs.sqlDatabase}" />
+                <Parameter hidden="true" name="sqlServerUsername" defaultValue="{Inputs.sqlServerUsername}" />
+                <Parameter hidden="true" name="sqlServerPassword" defaultValue="{Inputs.sqlServerPassword}" />
+            </Parameters>
+        </SolutionDashboard>
         <Manual title="Done">
           <Instructions src="Instructions.md" format="markdown" />
         </Manual>
         ...
SolutionDataTable.csx
using Microsoft.SqlServer.Management.Smo;
using Microsoft.SqlServer.Management.Common;
using System.IO;
using System.Data;
using System.Data.SqlClient;

public class SolutionDataTable
{
    private DataTable table;
    private string sqlConnectionString;

    public SolutionDataTable(string sqlConnectionString)
    {
        this.sqlConnectionString = sqlConnectionString;
        this.table = this.MakeTable();
    }

    public void AddMetric(DateTime timestamp, string metricName, Decimal metricValue)
    {
        DataRow newRow = table.NewRow();
        newRow["InputTimestamp"] = timestamp;
        newRow["MetricName"] = metricName;
        newRow["MetricValue"] = metricValue;
        this.table.Rows.Add(newRow);
    }

    public void Commit()
    {
        this.table.AcceptChanges();

        using (var connection = new SqlConnection(sqlConnectionString))
        {
            connection.Open();
            using (SqlBulkCopy bulkCopy = new SqlBulkCopy(connection))
            {
                bulkCopy.DestinationTableName = "dbo.SolutionData";
                bulkCopy.WriteToServer(table);
            }
        }
    }

    private DataTable MakeTable()
    {
        DataTable solutionDataTable = new DataTable("SolutionData");

        DataColumn inputTimestamp = new DataColumn();
        inputTimestamp.DataType = System.Type.GetType("System.DateTime");
        inputTimestamp.ColumnName = "InputTimestamp";
        solutionDataTable.Columns.Add(inputTimestamp);

        DataColumn metricName = new DataColumn();
        metricName.DataType = System.Type.GetType("System.String");
        metricName.ColumnName = "MetricName";
        solutionDataTable.Columns.Add(metricName);

        DataColumn metricValue = new DataColumn();
        metricValue.DataType = System.Type.GetType("System.Decimal");
        metricValue.ColumnName = "MetricValue";
        solutionDataTable.Columns.Add(metricValue);

        DataColumn[] keys = new DataColumn[] { inputTimestamp, metricName };
        solutionDataTable.PrimaryKey = keys;

        return solutionDataTable;
    }
}
functions/hatch/run.csx changes (diff)
+#load "..\CiqsHelpers\All.csx"
+#load "SolutionDataTable.csx"
+
 using System;
 using System.Configuration;
 using System.Net;

 public static async Task<object> Run(HttpRequestMessage req, TraceWriter log)
 {
+    var parametersReader = await CiqsInputParametersReader.FromHttpRequestMessage(req);
+    string sqlConnectionString = parametersReader.GetParameter<string>("sqlConnectionString");
+
     var eggCount = int.Parse(ConfigurationManager.AppSettings.Get("EggCount"));
     var sexRatioString = ConfigurationManager.AppSettings.Get("SexRatio");
+    var experimentCount = int.Parse(parametersReader.GetParameter<string>("experimentCount"));

     double sexRatio = 0;

@@ -20,10 +27,15 @@ public static async Task<object> Run(HttpRequestMessage req, TraceWriter log)
         return req.CreateResponse(HttpStatusCode.BadRequest, $"Invalid sex ratio provided: {sexRatioString}");
     }

-    var roosterCount = 0;
+    var dataTable = new SolutionDataTable(sqlConnectionString);
+    var now = DateTime.Now;

     Random rnd = new Random();

+    while (experimentCount-- > 0)
+    {
+        var roosterCount = 0;
+
         for (int i = 0; i < eggCount; i++)
         {
             var r = rnd.NextDouble();
@@ -33,9 +45,14 @@ public static async Task<object> Run(HttpRequestMessage req, TraceWriter log)
             }
         }

-    return new
-    {
-        roosters = roosterCount,
-        hens = eggCount - roosterCount
-    };
+        var henCount = eggCount - roosterCount;
+        var metricTimestamp = now.AddDays(-experimentCount);
+
+        dataTable.AddMetric(metricTimestamp, "Hens", henCount);
+        dataTable.AddMetric(metricTimestamp, "Roosters", roosterCount);
+    }
+
+    dataTable.Commit();
+
+    return null;
 }