Creating an Avere Cluster
This section walks step by step through the process of creating the Avere cluster.
Before starting this procedure, make sure at least one of the FXT nodes is powered on and has network connectivity. Follow the procedures in the FXT 5000 Series Installation Guide.
Boot the First Node
If you have not already done so, power on at least one of the FXT nodes for your cluster, and make sure it has a network connection and an IP address.
To turn on the node, press the node’s power button. Make sure that no alarms are audible from the node (these can indicate a misinstalled or failed power supply).
To check the network connection, make sure that the node’s network link LEDs are illuminated (and, if necessary, the indicators on the network switch to which it is attached). Indicator LEDs are described in the monitoring chapter of the FXT 5000 Series Installation Guide.
When the node boots, it will request an IP address. If it is connected to a DHCP server, it accepts the IP address provided by DHCP. (This is a temporary IP address that you will change when you configure the cluster.)
If it is not connected to a DHCP server or does not receive a response, the node will use Bonjour software to set a self-assigned IP address in the form 169.254.*.*. However, Avere Systems recommends that you set a temporary static IP address on one of the node’s network cards before using it to create a cluster. Read Appendix A: Setting a Static IP Address on an FXT Node for instructions.
Connect to the First Node
You can connect to any of the installed FXT nodes and use its Avere OS software to set up the cluster.
Find an IP Address
To determine the IP address of the node you want to use, connect to it by using a serial cable, direct connection, or through a KVM switch. For more information, read Connecting to the Physical Node in Appendix A: Setting a Static IP Address on an FXT Node.
When connected, log in with the username root and the default password tiered2010
After logging in, you need to determine the node’s IP address.
Use the command ifconfig to see the addresses assigned to this system.
For example, the command ifconfig | grep -B5 inet searches for ports with internet addresses and gives five lines of context to show the port identifier.
Write down any IP address shown in the ifconfig report. Addresses listed with port names like e0a or e0b are good options. Do not use any IP addresses listed with e7* names, since those names are only used for IPMI ports, not regular network ports.
Load the Configuration Wizard in a Web Browser
Enter the IP address for the node in a web browser. If the browser gives a message about the site being untrusted, proceed to the site anyway. (Individual FXT nodes do not have CA-provided security certificates.)
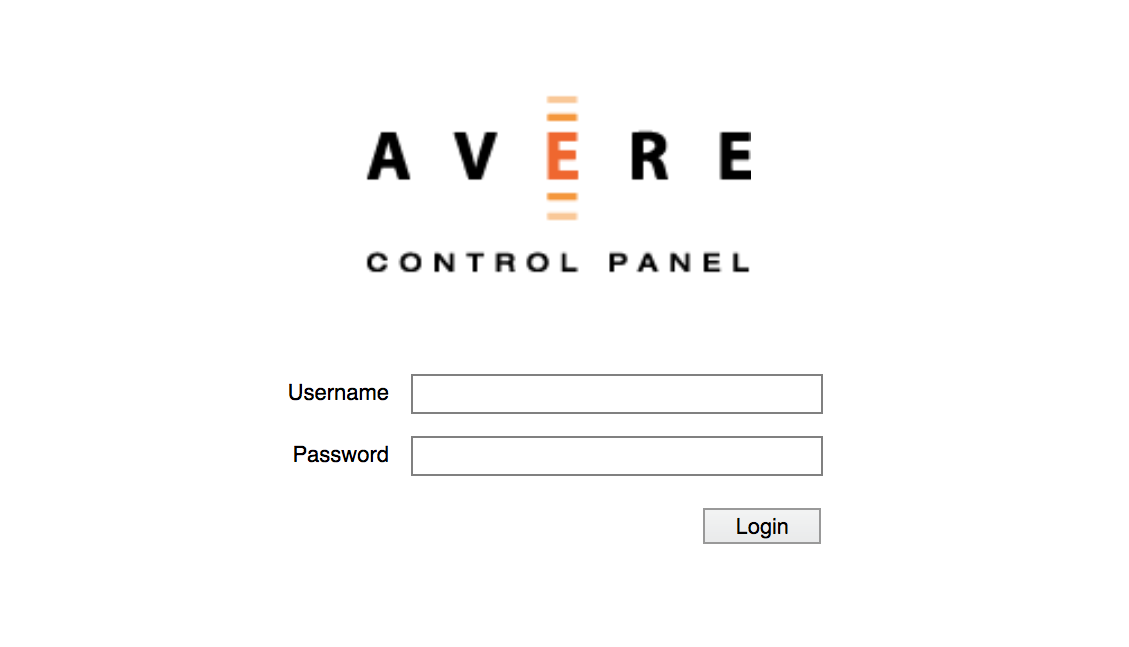
Leave the Username and Password fields blank. Click Login to load the cluster creation page.
The next sections in this document walk you through cluster configuration steps.
Creating the Cluster
A set of configuration screens helps you specify all of the information needed to create your Avere cluster.
Be sure that you have the information ready before starting. Read Preparing To Create an Avere Cluster to learn what names and IP address ranges you will need.
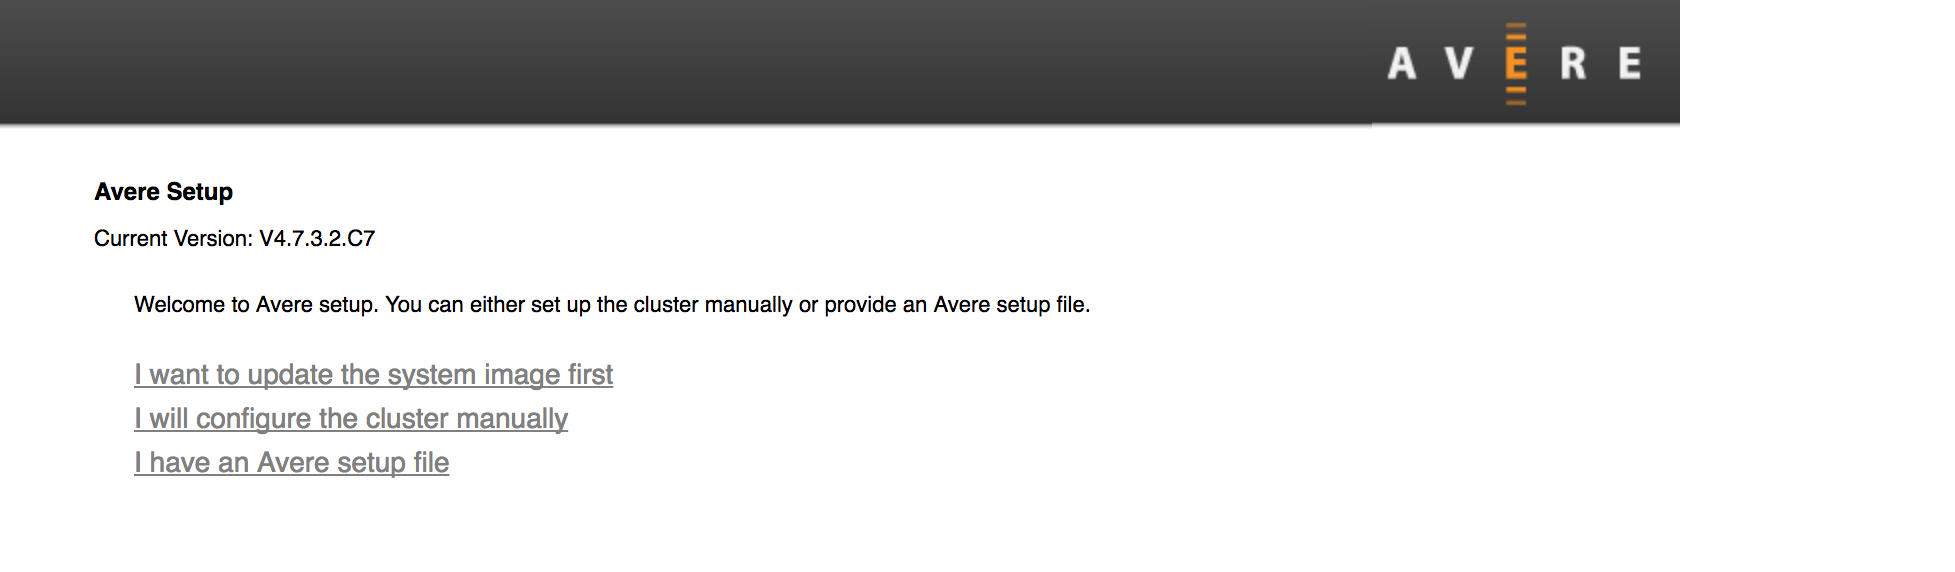
Initial Options
The first screen gives three options. Most users can go directly to the “configure a new cluster manually” option.
Options are:
Update the system image
Choose this option if you need to install new Avere OS software before creating the cluster. (The currently installed software version is listed at the top of the screen.)
If you click this link, you are prompted to specify the package file to use. You can provide a URL and username/password, or upload a file from your computer.
Configure the cluster manually
Choose this option to create a new cluster.
Use an Avere setup file
Use this option only if directed to do so by Avere Global Services.
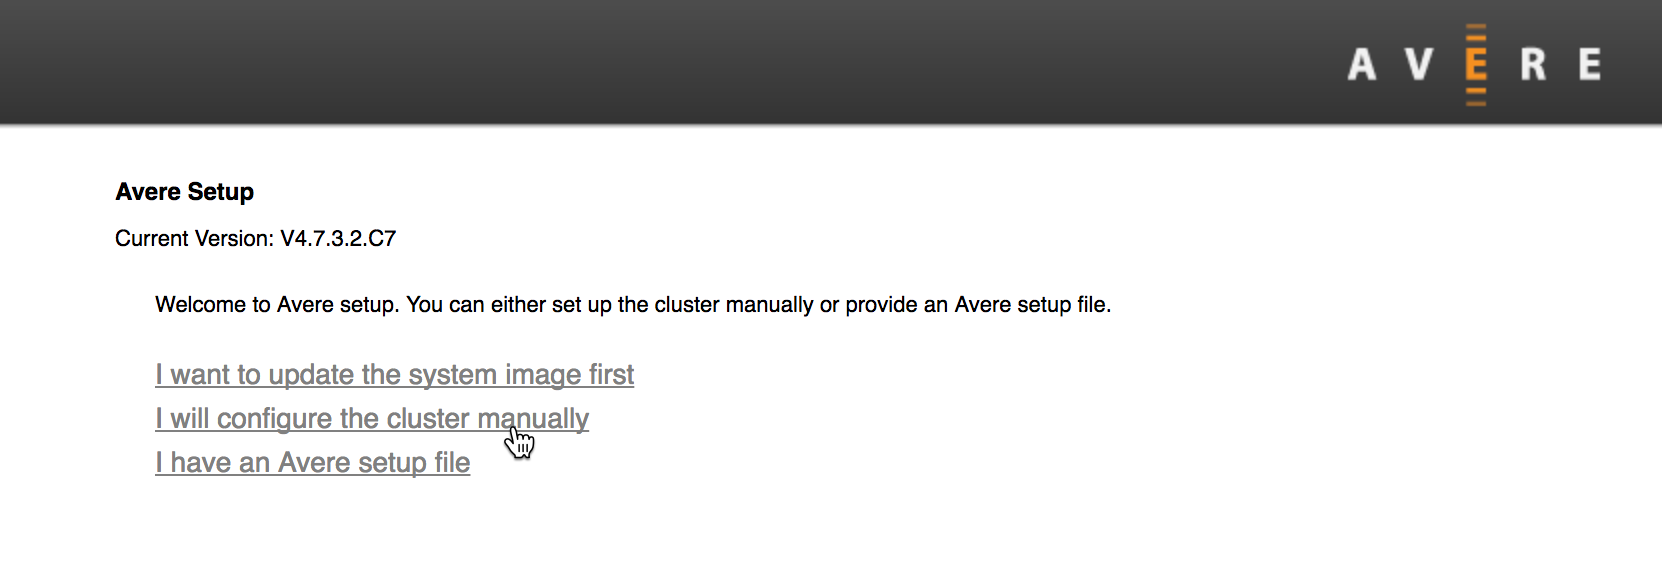
Click I will configure the cluster manually to load the new cluster configuration options screen.
New Cluster Configuration Options
The next screen prompts you to configure options for the new cluster.
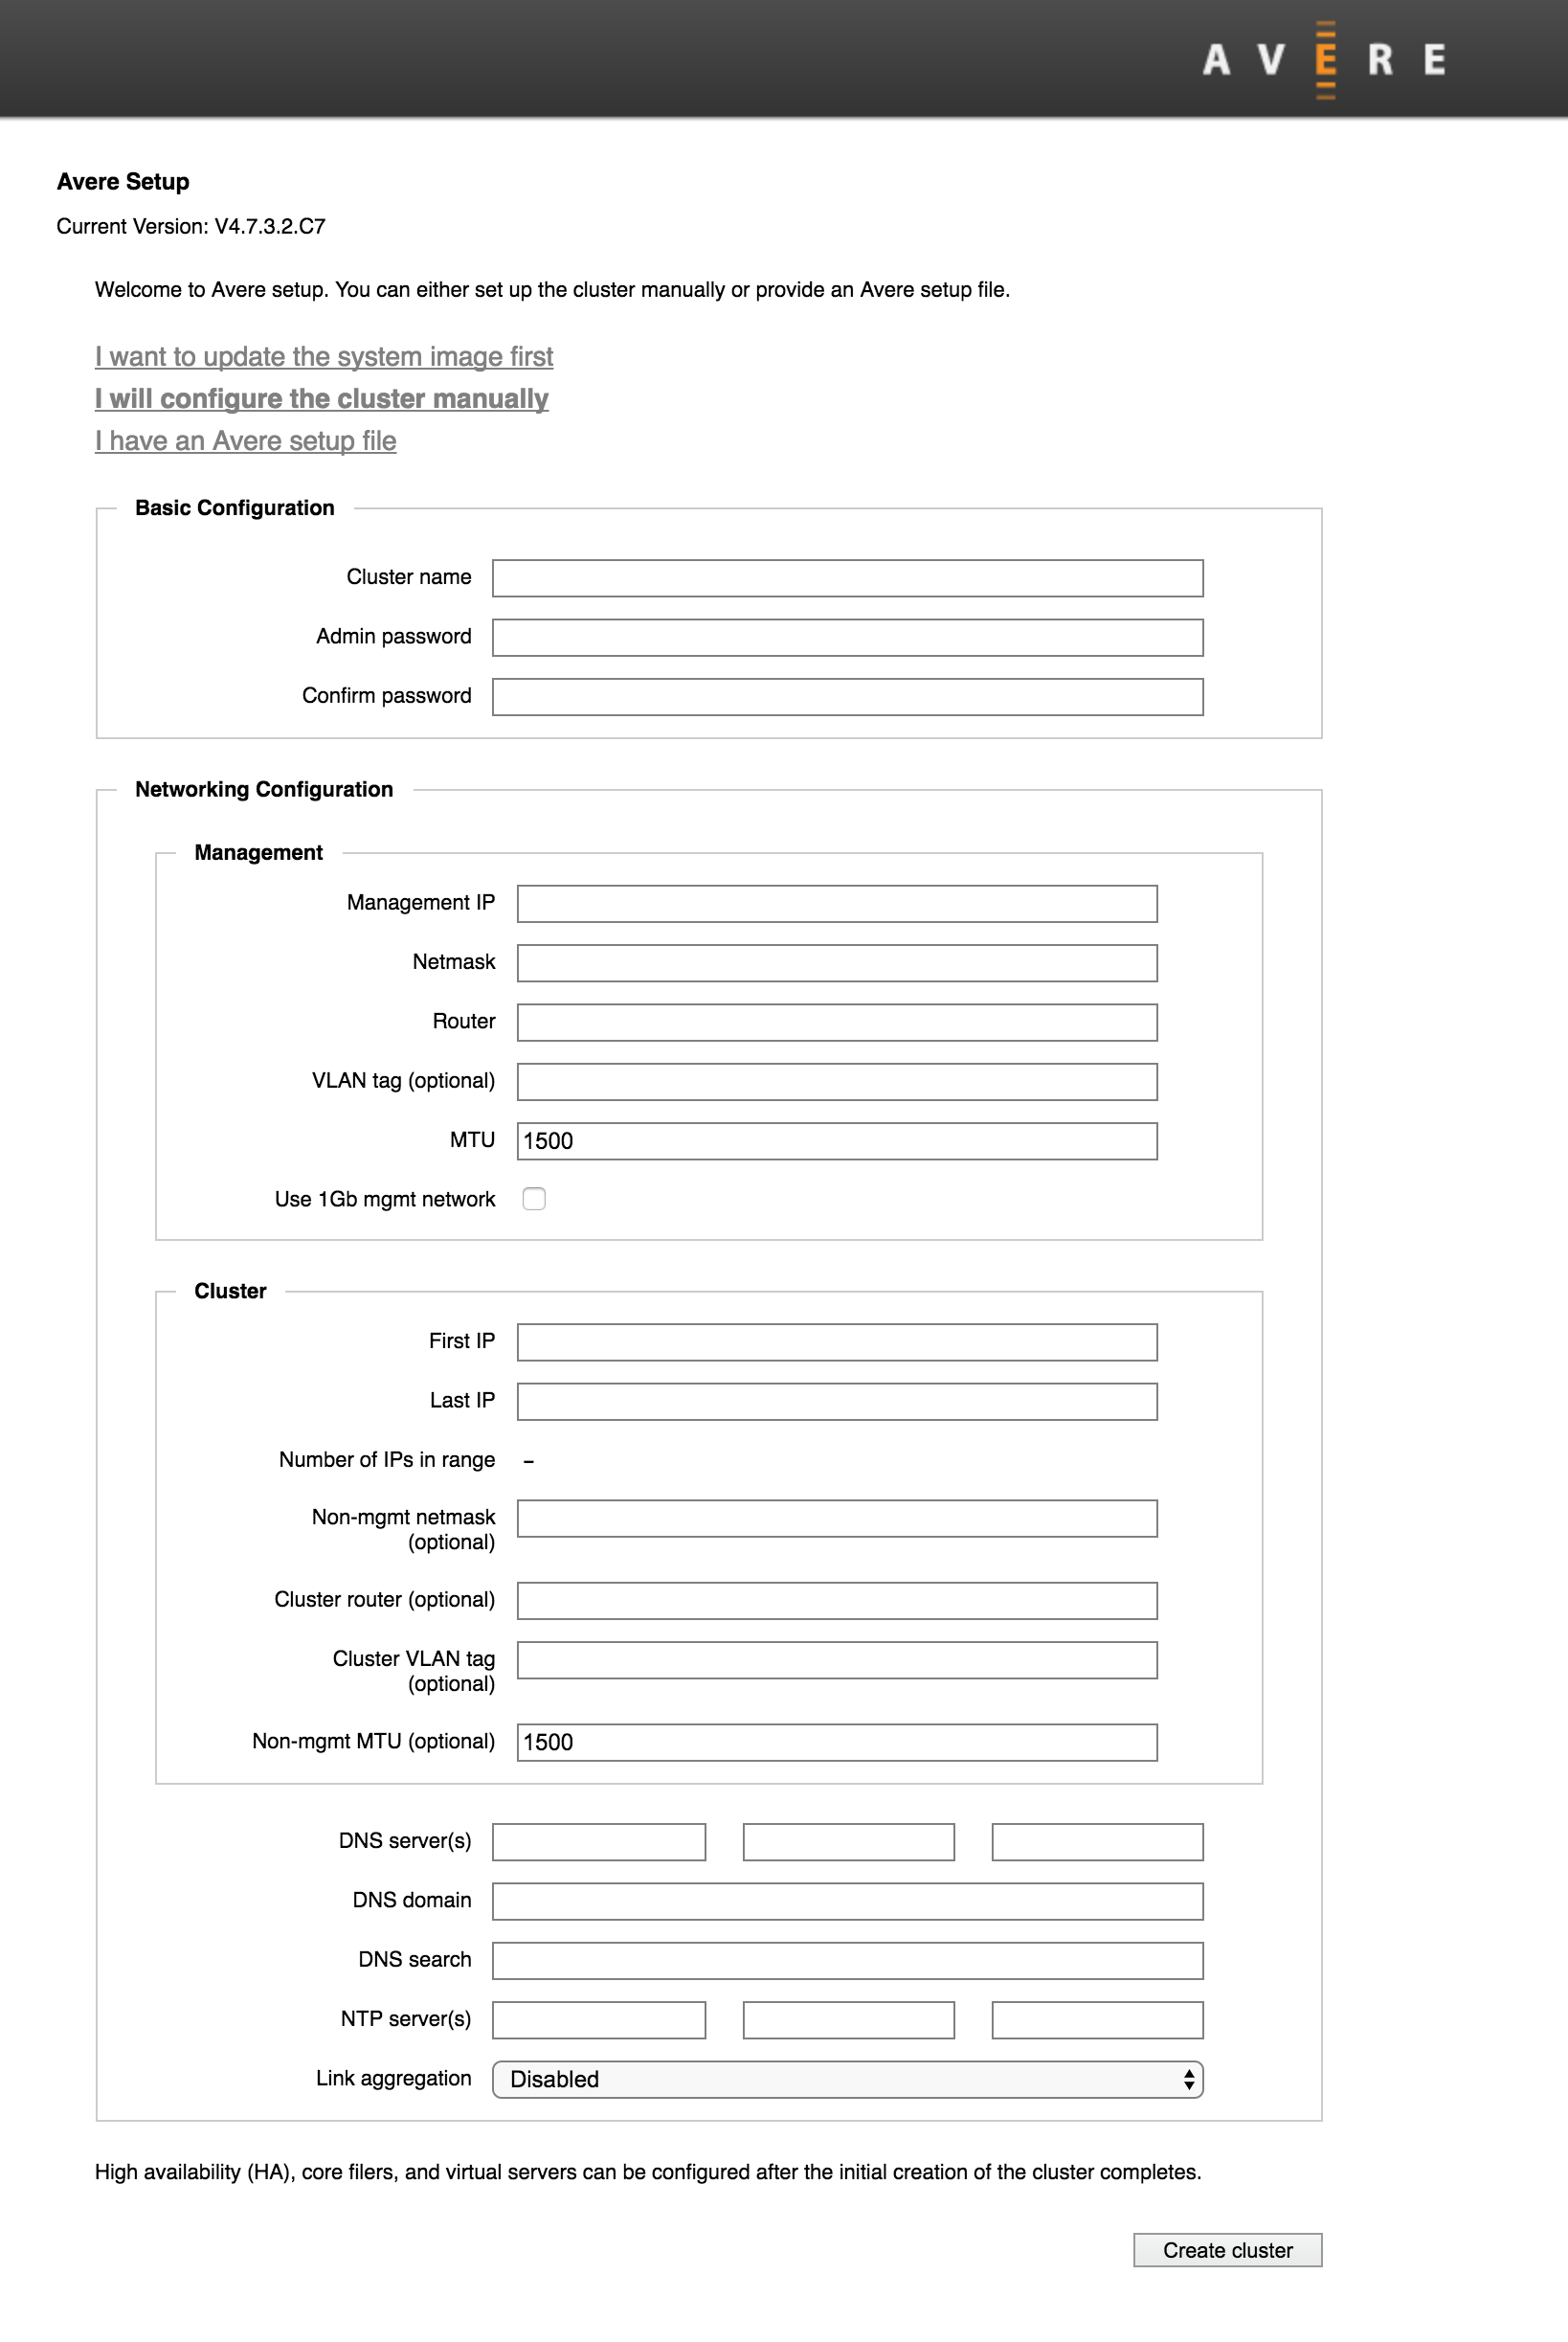
This page is divided into two main sections, Basic Configuration and Networking Configuration. The networking configuration section also has subsections for the Management network and the Cluster network.
Click a link below if you want to jump directly to the description of that particular section:
- Basic Configuration
- Networking Configuration
- Management Network Configuration
- Cluster Network Configuration
Basic Configuration
In the top section, fill in basic information for the new cluster.
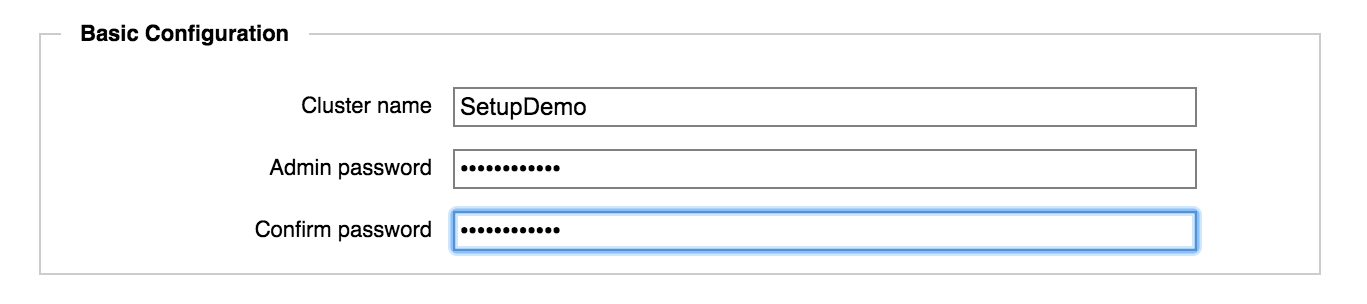
Cluster Name - Enter a unique name for the cluster.
You can change this name later on the Cluster > General Setup configuration page.
A cluster name must meet these criteria:
- Length of 1 to 16 characters
- Can include letters, numbers, and the dash (-) and underscore (_) characters
- Must not include other punctuation or special characters
Note
Your cluster name will be used to identify your files if you need to upload system information to Avere Global Services for troubleshooting or monitoring, so it’s helpful to include your company name.
Admin password - Set the password for the default administrative user, admin.
Although you should specify individual administrative user accounts for each person who configures or administers the cluster, the user admin must exist for the cluster. Log in as admin if you need to create additional users.
You can change the password for admin in the Administration > Users settings page in the Avere Control Panel. Read Administration > Users in the Cluster Configuration Guide for details.
Networking Configuration
The Networking section prompts you to specify the network infrastructure that the cluster will use.
There are two separate networks to configure:
- The management network provides administrator access to the cluster for configuration and monitoring. The IP address specified here is used when connecting to the Avere Control Panel or for SSH access. Most clusters use only a single management IP address, but if you want to add interfaces you can do so after creating the cluster.
- The cluster network is used for communication among cluster nodes and between cluster nodes and backend storage (core filers).
(The client-facing network is configured later, after the cluster has been created.)
This section also includes configuration for DNS and NTP servers that are used by both networks.
Management Network
The settings in the Management section are for the network that provides administrative access to the cluster.
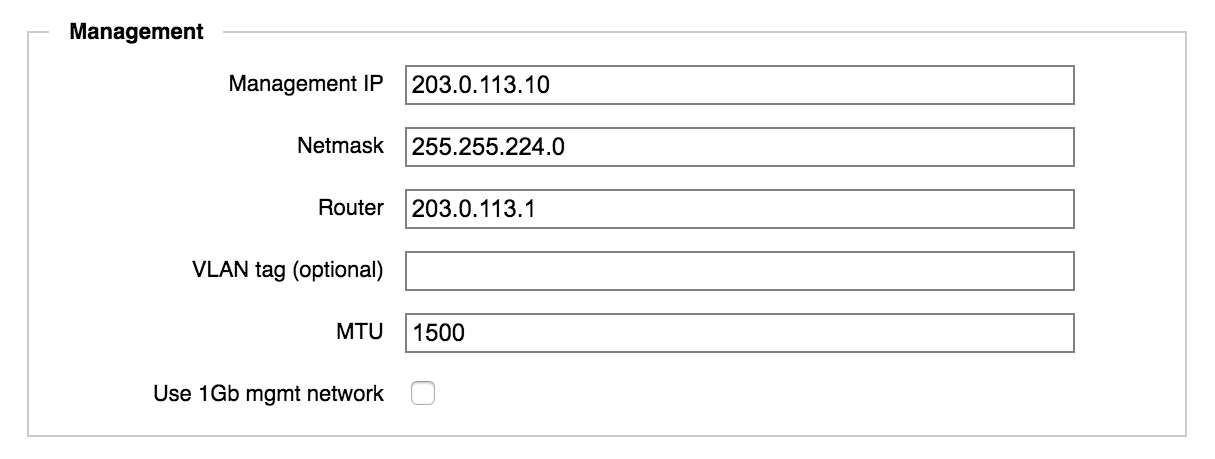
Management IP - Specify the IP address that you will use to access the Avere Control Panel. This address will be claimed by the cluster’s primary node, but it automatically moves to a healthy node if the original primary node becomes unavailable.
After the cluster has been created, you have the option to configure a range of management network IP addresses by using the Cluster > Administrative Network settings page. However, most clusters use only one management IP address. Read Cluster > Administrative Network in the Cluster Configuration Guide for details.
Netmask - Specify the netmask for the management network.
Router - Enter the default gateway address used by the management network.
VLAN tag (optional) - If your cluster uses VLAN tags, specify the tag for the management network.
Read Working with VLANs in the Cluster Configuration Guide to learn more.
Additional VLAN settings are configured in the Cluster > VLAN settings page - read Cluster > VLAN in the Cluster Configuration Guide for details.
MTU - If necessary, adjust the maximum transmission unit (MTU) for your cluster’s management network.
Use 1Gb mgmt network - Check this box if you want to assign the 1GbE network ports on your FXT nodes to the management network only.
FXT 5000 Series hardware has four built-in 1GbE ports (e0a, e0b, e0c, and e0d), and all four are included in the management network if this box is checked.
Cluster Network
The cluster network settings apply to traffic among cluster nodes, and between cluster nodes and core filers.
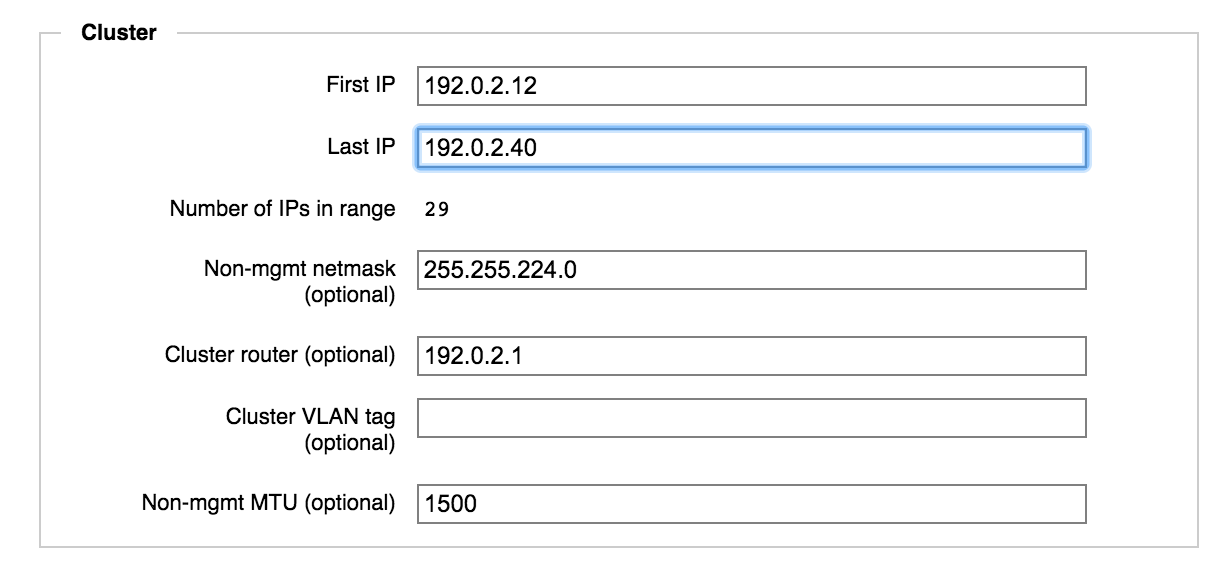
First IP and Last IP - Enter the IP addresses that define the range of addresses to be used for internal cluster communication. The IP addresses used here must be contiguous and not assigned by DHCP.
You can add more IP addresses after creating the cluster. (Use the Cluster > Cluster Networks settings page, documented in the Cluster Configuration Guide - read Cluster > Cluster Networks.)
The value in Number of IPs in Range is calculated and shown automatically.
Non-mgmt netmask (optional) - Specify the netmask for the cluster network. (The system automatically suggests the netmask value that you entered for the management network; change it if needed.)
Cluster router (optional) - Specify the default gateway address used by the cluster network. The system automatically suggests the same gateway address that you supplied for the management network.
Cluster VLAN tag (optional) - If your cluster uses VLAN tags, specify the tag for the cluster network.
Read Working with VLANs in the Cluster Configuration Guide to learn more.
Non-mgmt MTU (optional) - If necessary, adjust the maximum transmission unit (MTU) for your cluster network.
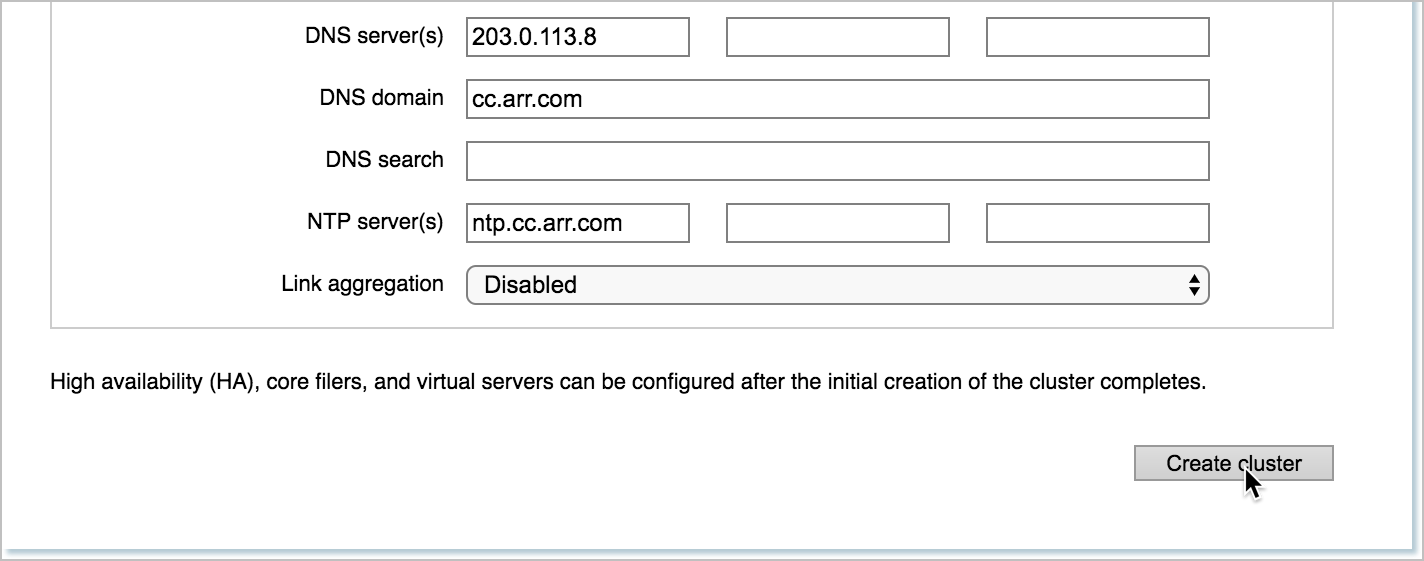
DNS and NTP Settings
Below the Cluster section there are fields for specifying DNS and NTP servers, and for enabling link aggregation. These settings apply to all networks that the cluster uses.
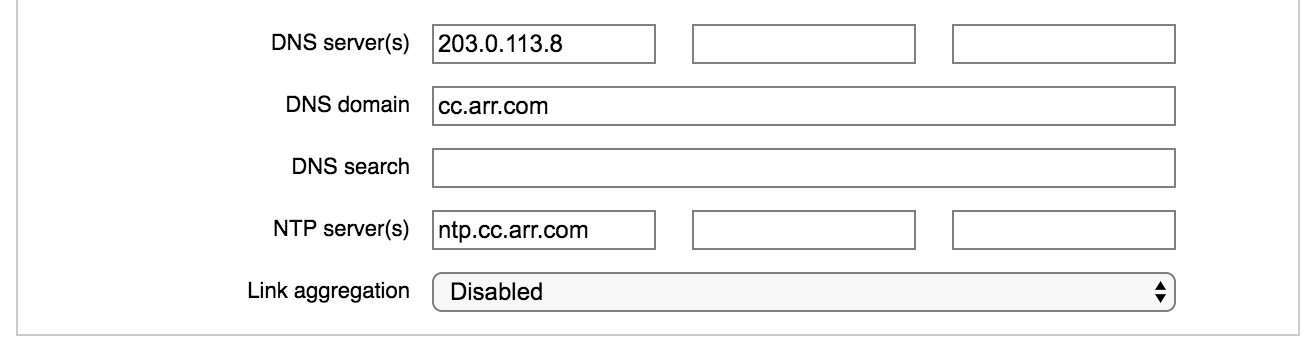
DNS server(s) - Enter the IP address of one or more domain name system (DNS) servers.
DNS is recommended for all clusters, and required if you want to use SMB, AD, or Kerberos. For optimal performance, configure the cluster’s DNS server for round-robin load balancing as described in Configuring DNS for the Avere Cluster.
DNS domain - Enter the network domain name the cluster will use.
DNS search - Optionally, enter additional domain names that the system should search to resolve DNS queries. You can add up to six domain names, separated by spaces.
NTP server(s) - Specify either one or three network time protocol (NTP) servers in the fields provided. You can use hostnames or IP addresses.
Link aggregation - Link aggregation allows you to customize how the ethernet ports on the cluster FXT nodes handle various types of traffic. Read Link Aggregation in the Cluster Configuration Guide for more information.
Creating the Cluster
After supplying all the required elements in the form, click the Create Cluster button.
The system displays a message while creating the cluster.
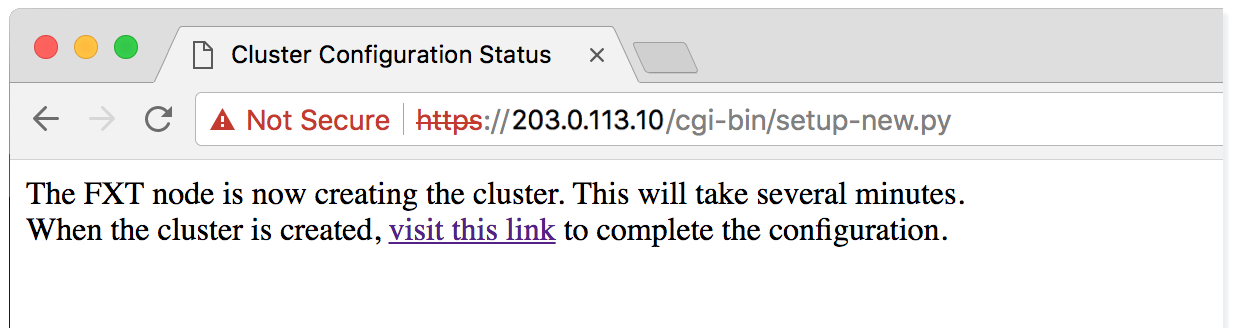
After a few moments, you can click the link in the message to go to the Avere Control Panel. This link takes you to the IP address that you specified in Management IP. The link will be active about 15 seconds to one minute after you click the Create cluster button; if the web interface does not load, wait several seconds and then retry the link.
Cluster creation takes a minute or more, but you can log in to the Avere Control Panel while the process is going on. It is normal for the Dashboard to show warnings until the cluster creation process is finished.
Read Initial Cluster Configuration Steps for more information about logging in and to learn what steps you need to take to get your newly created cluster ready for users.