03 - Add Managed MCP tools to your agentic workflow
Prerequisites
- An Azure account and subscription. If you don't have a subscription, sign up for a free Azure account.
- Existing Logic Apps Standard workflow app (or create one): Create a single-tenant workflow app.
- Deployed Azure OpenAI model (for example a GPT -family chat/completions model): Azure OpenAI models.
Overview
In this lesson we will continue to explore the agent's capabilities to configure MCP server tools. We will use the same conversational flow from the previous lesson and expand on it by adding managed MCP servers to the agent. We will configure the new MCP servers including configuring OBO authentication on one of the servers, interact with the agent, and then go through the monitoring view to inspect the agent and tool execution.
Step 1 - Update the agent's system prompt
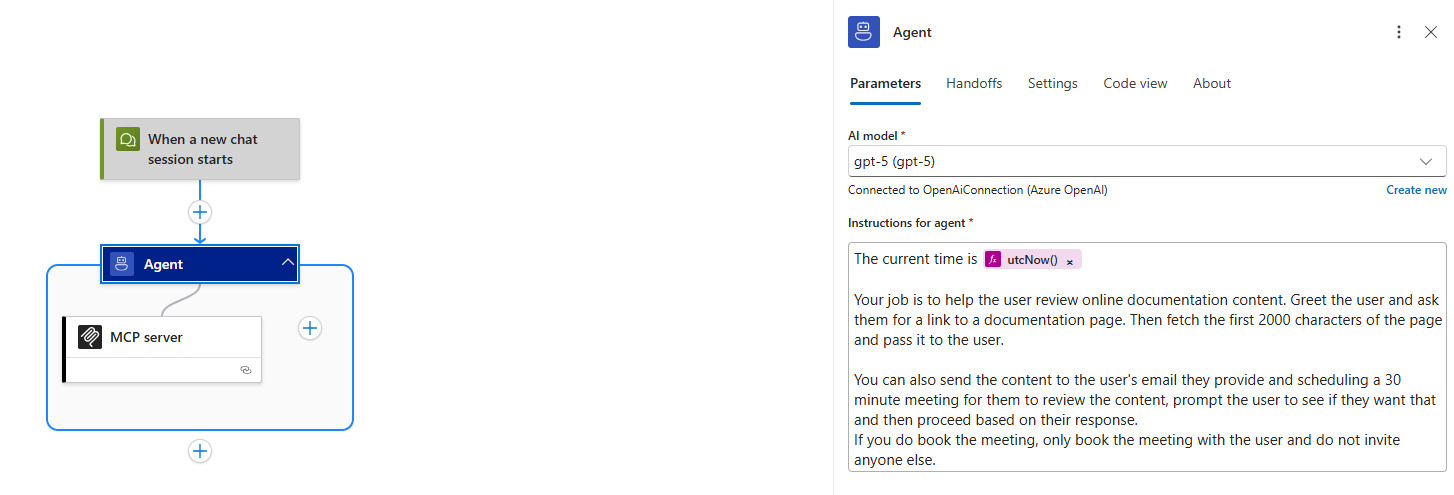
Configure the AI model your agent will use and pass the following as the system prompt:
The current time is @{utcNow()}

Your job is to help the user review online documentation content. Greet the user and ask them for a link to a documentation page. Then fetch the first 2000 characters of the page and pass it to the user.

You can also send the content to the user's email they provide and scheduling a 30 minute meeting for them to review the content, prompt the user to see if they want that and then proceed based on their response.
If you do book the meeting, only book the meeting with the user and do not invite anyone else.
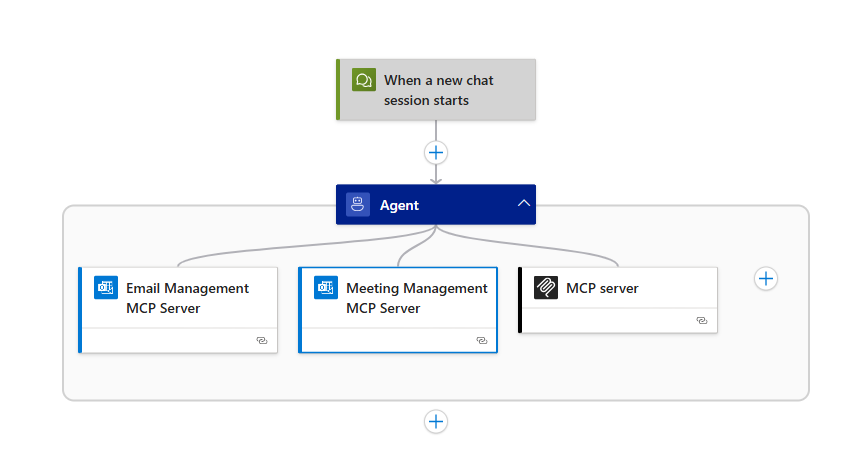
Step 2 - Add the managed MCP Server for email
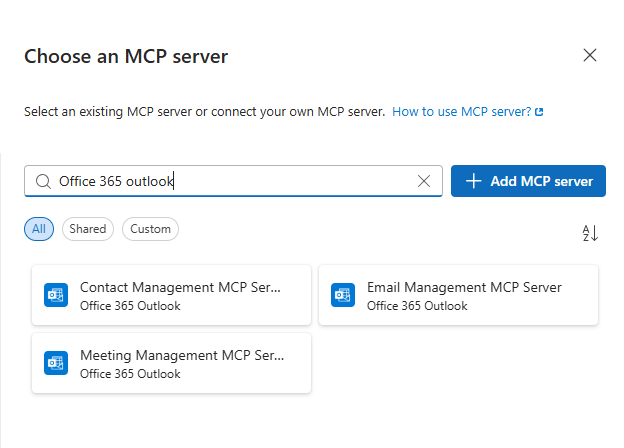
- Click on the "+" icon and add an MCP tool. The MCP server pane will show up on the right side of your screen.
- Find and select the "Email Management MCP Server" for "Office 365 Outlook" connector.
- In this case we will use an email that we want the message to go from, like a "non-person account", so we would just finish configuring the connection by signing in to the account.
- Make sure you do not select the "Create as per-user connection?" checkbox since we always want to use this email.
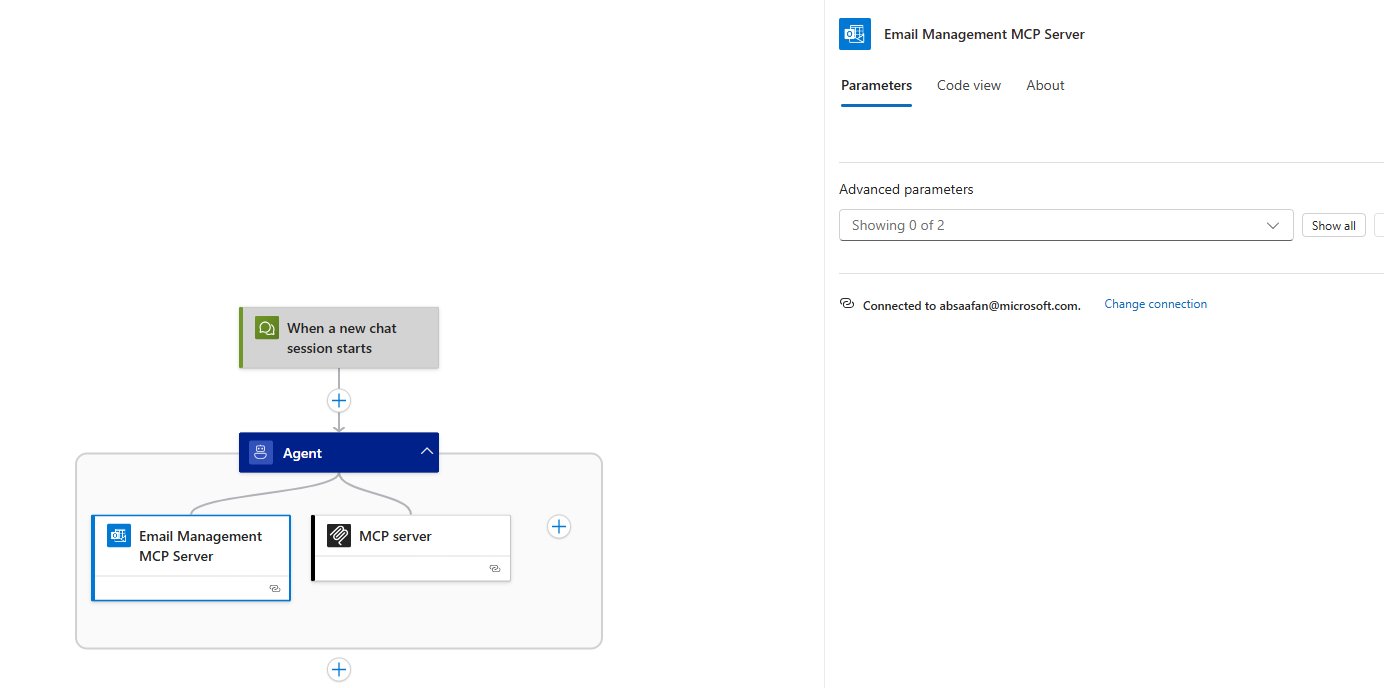
You have now configured the agent to use the managed MCP server and it will be able to use tools to perform actions such as sending an email.
Step 3 - Add the managed MCP Server for meetings
- Click on the "+" icon and add an MCP tool. The MCP server pane will show up on the right side of your screen.
- Find and select the "Meeting Management MCP Server" for "Office 365 Outlook" connector.
- In this case we want to use the account of the user chatting to the agent, so we would select "Change connection" and then "Add new" to add a new connection.
- The "Create as per-user connection?" checkbox should be checked so that the signs in happens when the user is chatting to the agent.
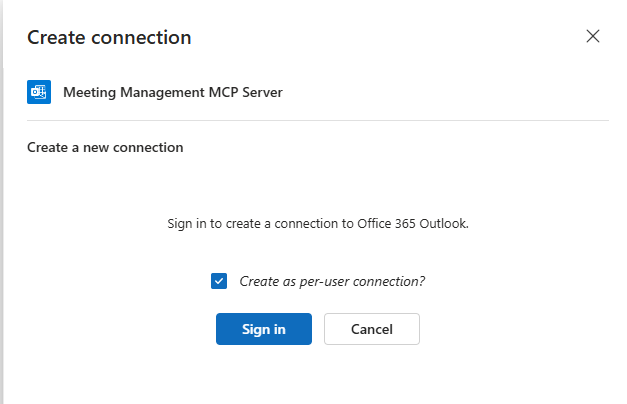
- Finish signing in so that the connection is created for the managed MCP server.
This MCP server will allow the agent to schedule meetings on behalf of the user as the system prompt asks for.
Step 3 - Use MCP server in agent
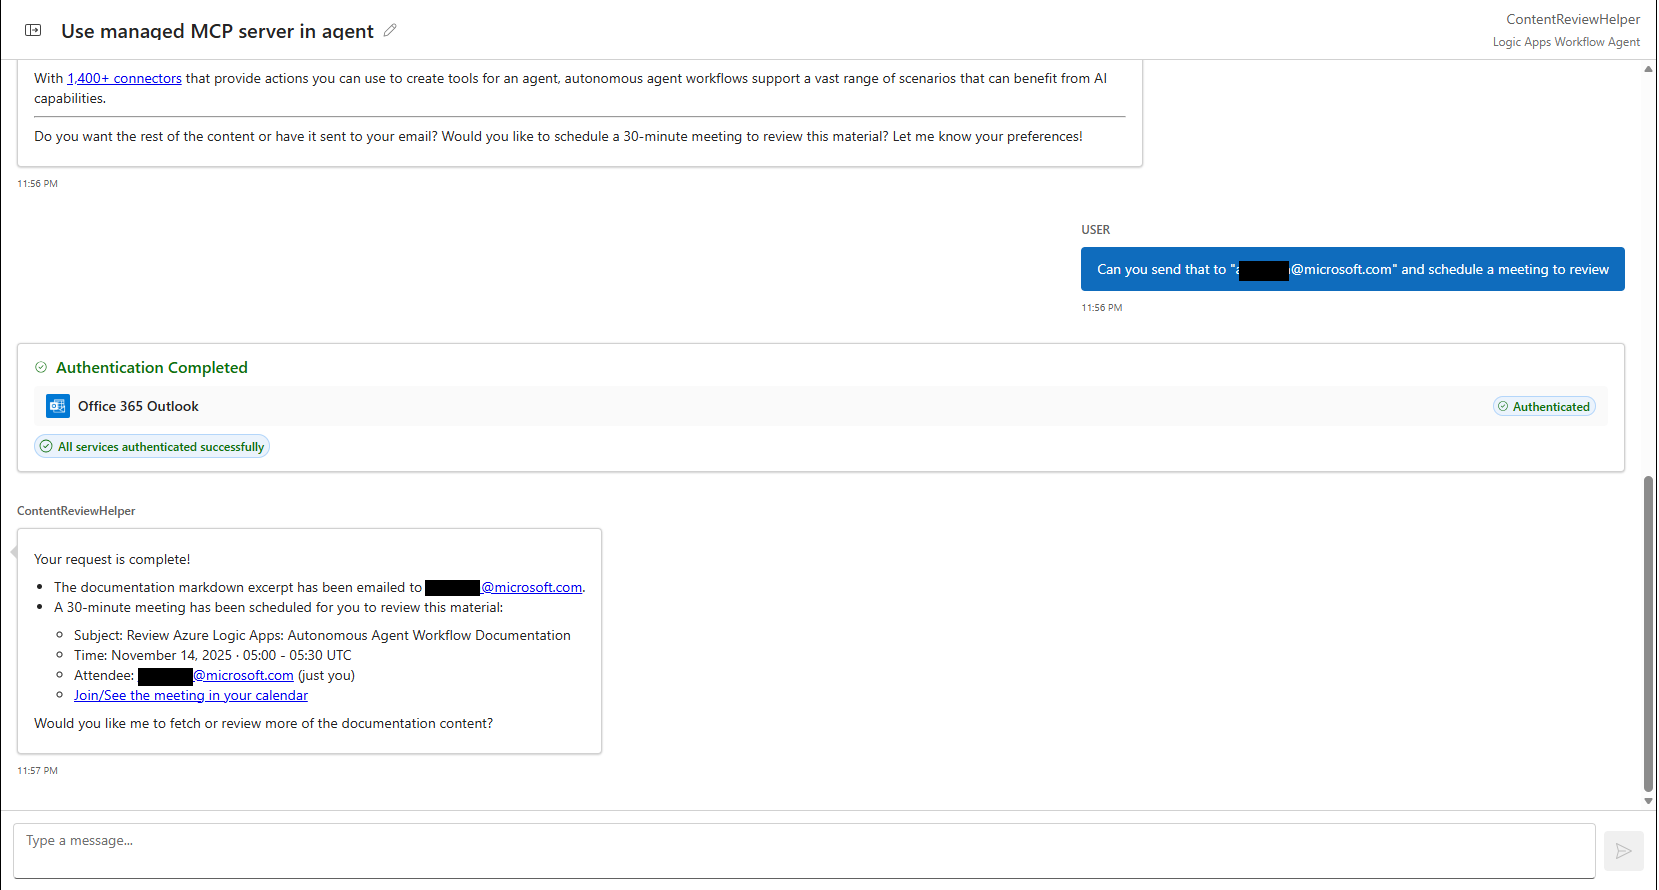
You have successfully added the managed MCP servers to your agent! Start a new chat session with the agent to test out this new capabilities, you can use the following prompt as an example:
> [User]: Hello
> [Agent]: [Greeting]
> [User]: Please fetch the page https://learn.microsoft.com/en-us/azure/logic-apps/create-autonomous-agent-workflows and give me only the markdown content
> [Agent]: [Content Response]
> [User]: Can you send that to "(email here)" and schedule a meeting to review
> [Agent]: *Prompt to sign in*
When the agent prompts you to sign in, follow the prompt and sign in to your account. Once the login is successful, the agent will continue to perform the tasks. The agent might ask for more clarification on the meeting so provide it any details you want for the meeting. After doing so, the agent should confirm that it has scheduled the meeting.
Step 4 - Monitor & Debug
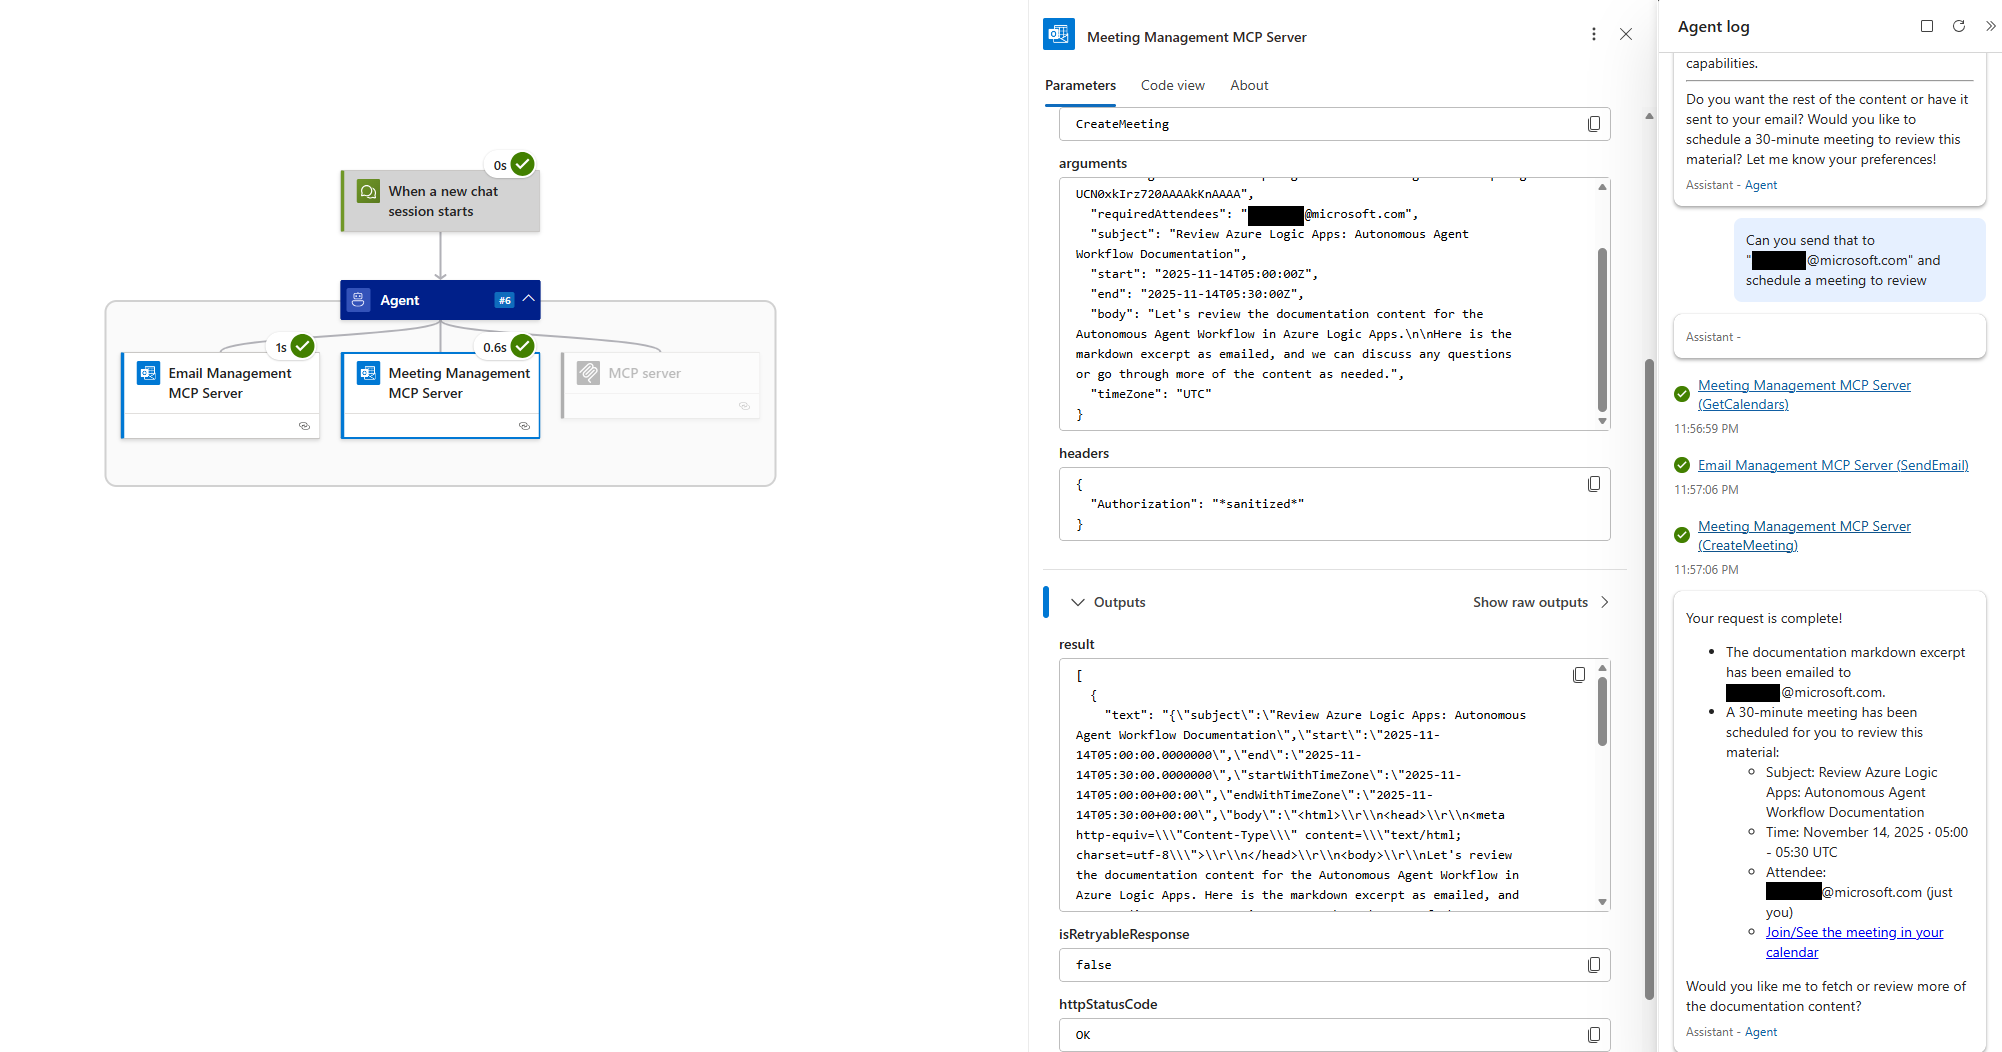
- Navigate to the workflow's run history and select the latest run. This will load the run of the chat session you just had.
- Similar to the manner in which we went through the chat session in the last lesson, we will use the agent log to navigate to the MCP tools.
- This time we can focus on the managed MCP serer tools. The first one to look for is the "SendEmail".
- You can now inspect the inputs of the MCP tool execution which includes the tool from the MCP server that the agent decided to use and the arguments that the agent passed into the tool.
- The outputs of the tool are the ones returned by the MCP tool itself and should include the content from the documentation page above.
- In this case, the inputs should include the tool "SendEmail" and the arguments should include the email (to, subject, body).
- Navigate to the meeting MCP call, there might be multiple (such as get calendar) but you want to look for the "CreateMeeting" call.
- You can inspect the inputs and outputs as you have with the previous action.
Run History & Monitoring for MCP Tools
| Pane Element | Description |
|---|---|
| Agent Log | Shows assistant messages and tool call directives. |
| Tool call detail | Contains raw LLM completion that requested the MCP tool; review for argument fidelity. |
| Action result | Underlying connector/custom action output; expand only necessary fields. |
| Error propagation | Non-2xx responses surfaced; model can self-correct if prompted (“If tool fails, summarize error and ask clarifying question”). |
Common Troubleshooting
| Issue | Resolution |
|---|---|
| Tool not invoked | Refine description; ensure no overlapping semantics with other tools; check Allowed tools filter. |
| Wrong parameters | Add agent parameters with clearer names & descriptions; show expected examples in system instructions. |
| Auth failure (401/403) | Recreate per-user connection; verify scopes; confirm Easy Auth or developer key for chat client. |
| Throttling (429) | Add retry (built-in), instruct model to narrow request, or consolidate batch operations. |
Best Practices Recap
- Use the "Allowed Tools" parameter on the MCP tool for times where you want to limit the tools that the agent can use on that MCP server.
- Monitor early runs to validate system prompt and the accuracy of MCP server tool names and descriptions.
Clean Up Resources
- Remove unused per-user connections; rotate app secrets (custom connector) per policy.
- Decommission experimental BYO MCP endpoints if no longer required.
- Archive run history exports if used for prompt tuning and then purge per retention standards.