Extract APIM artifacts in Azure DevOps from extractor tool
The extractor tool will be required under Scenario A (Users Who Build APIs Using the Azure Portal). Under Scenario B you don’t need to utilize the extractor tool to generate the artifacts as the artifacts will be created in the IDE. Having said that, nothing prevents you from utilizing the extractor tool to generate the initial artifacts if you are introducing the tool to an existing APIM instance.
- Make sure the Azure DevOps service principal has read access to your Azure APIM instance.
- Create a new pipeline based on run-extractor.yaml in your repository. Always refer to the specific run-extractor.yaml file that you downloaded as part of your release and not the one hosted on the repo.
- Run the pipeline. When prompted for parameters, specify the instance name, resource group name, the APIM artifacts repository name, folder where the artifacts will be extracted to, and the main branch where artifacts will live. The pipeline will use the extractor tool to download instance artifacts, then it will create a pull request to the main branch of your APIM artifacts repository.
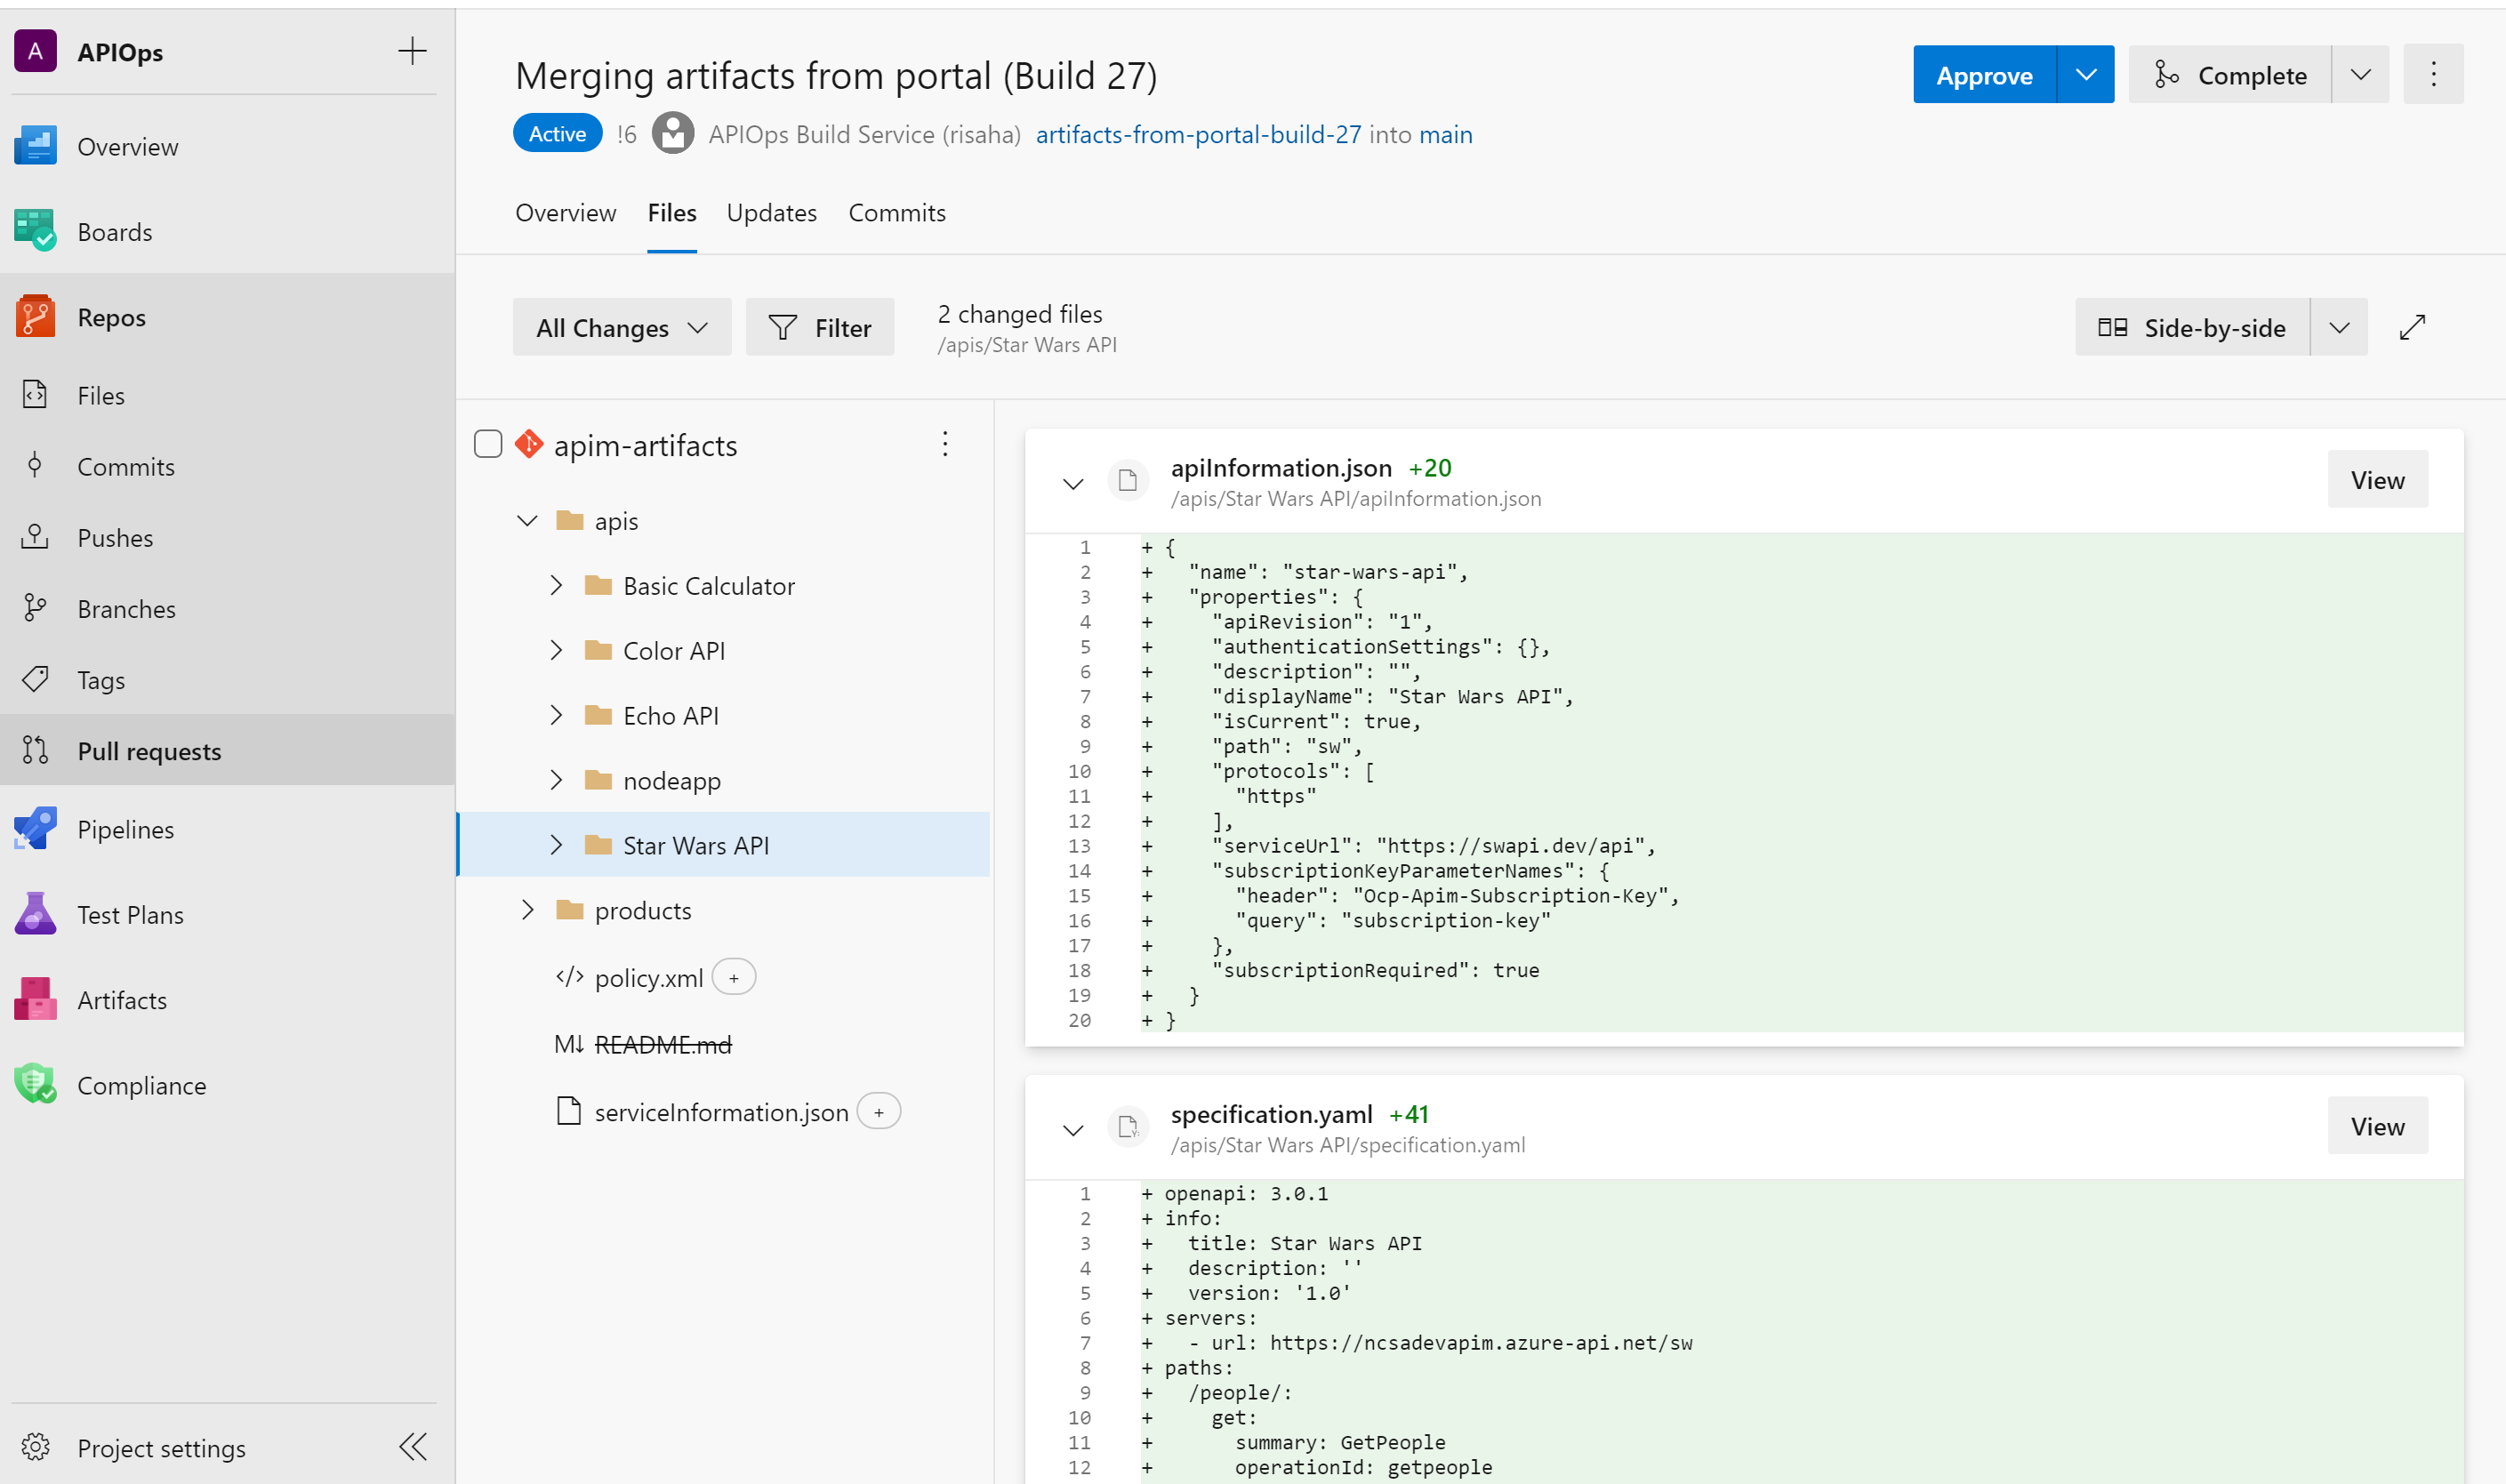
- Under Pull requests -> Active, you should see a new pull request with the extracted artifacts. Don’t merge the Pull Request yet as we still need to configure the Run-publisher.yaml file in the next section before we merge.
You can always rerun the pipeline to refresh your repository with the latest Azure changes. Now that we have artifacts in our repository, let’s create a pipeline to push changes back to Azure.