redis-on-azure-workshop
Pub/Sub in Azure Cache for Redis
Learning Objective
Execute Redis pub/sub commands for event-based messaging at scale in Azure Cache for Redis. Next you’ll build two .NET Core applications that will publish and subscribe to messages using Azure Cache for Redis.
- Subscribe to and publish messages using Azure Cache for Redis.
- Subscribe to and publish messages using Azure Cache for Redis from a .NET Core application.
Prerequisites
- Azure Cache for Redis instance - If you deleted your instance from the previous lab, please follow the steps here to create a new one.
Publish and subscribe to events from the Redis Console
Redis’ Pub/Sub exhibits at-most-once message delivery semantics. As the name suggests, it means that a message will be delivered once if at all. Once the message is sent by the Redis server, there’s no chance of it being sent again. If the subscriber is unable to handle the message (for example, due to an error or a network disconnect) the message is forever lost.
Observe two separate clients sending and receiving messages by using two unique browser instances. Each browser instance will have the Redis console to help illustrate real-time Pub/Sub functionality.
-
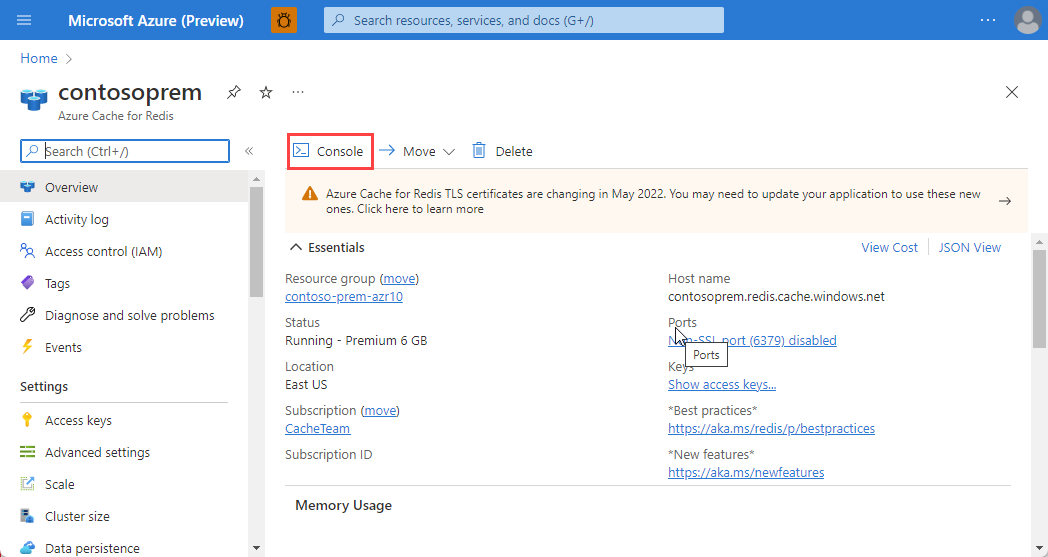
Open the Azure portal in the first browser session. Navigate to your Azure Cache for Redis instance.
-
In the Overview pane, select Console. This will open a Redis Console, which enables you to enter low-level Redis commands.
-
Leave the console open to complete subsequent tasks in this exercise.
-
Open a second browser session and navigate to the Azure portal. Navigate to your Azure Cache for Redis instance.
Be sure to sign in with the same account as the first browser session.
-
In the resource blade, select Console to open the Redis console. Leave the console open to complete subsequent tasks in this exercise.
-
At this point, you should have two browser instances open each with an instance of the Redis console.

If your operating system supports it, we recommend docking the browser windows side-by-side to simplify the remainder of this exercise.
-
Subscribe to channels using the
SUBSCRIBEcommand and then publish messages using thePUBLISHcommand. -
In the console of the first browser instance, perform the following actions:
a. Enter the following command and use the ENTER key to begin listening for messages on the
org.shipping.alertschannel.SUBSCRIBE org.shipping.alertsb. Observe the response from the console indicating that it is now listening on the
org.shipping.alertschannel.Reading messages... (press ENTER to quit) 1) "subscribe" 2) "org.shipping.alerts" 3) (integer) 1The first element is the kind of message:
subscribe: means that we successfully subscribed to the channel given as the second element in the reply. The third argument represents the number of channels we are currently subscribed to.
unsubscribe: means that we successfully unsubscribed from the channel given as second element in the reply. The third argument represents the number of channels we are currently subscribed to. When the last argument is zero, we are no longer subscribed to any channel, and the client can issue any kind of Redis command as we are outside the Pub/Sub state.
message: it is a message received as a result of a PUBLISH command issued by another client. The second element is the name of the originating channel, and the third argument is the actual message payload.
-
In the console of the second browser instance, perform the following actions:
a. Enter the following command and use the ENTER key to send a new message with the content “labelprint-sdf9878” to the
org.shipping.alertschannel.PUBLISH org.shipping.alerts labelprint-sdf9878b. Enter the following command and use the ENTER key to send a new message with the content “labelprint-sdf9878” to the
org.shipping.alertschannel.PUBLISH org.shipping.alerts packagesent-sdf9878 -
Back in the console of the first browser instance, perform the following actions:
a. Observe the first response from the console indicating that it has received a new message on the
org.shipping.alertschannel.1) "message" 2) "org.shipping.alerts" 3) "labelprint-sdf9878"b. Observe the second response from the console indicating that it has received a new message on the
org.shipping.alertschannel.1) "message" 2) "org.shipping.alerts" 3) "packagesent-sdf9878"
c. Use the ENTER key to stop the console from listening to events.
d. Enter the following command and use the ENTER key to clear the console output.
clear -
Back in the console of the second browser instance, perform the following actions:
a. Enter the following command and use the ENTER key to clear the console output.
clear
Publish and subscribe to events from .NET Core applications
-
We’ll create two .NET Core applications. The first, called
redis-puband the second calledredis-sub. We’ll add theStackExchange.RedisNuGet package to both projects.mkdir redis-pubsub cd redis-pubsub dotnet new console --name redis-pub dotnet new console --name redis-sub cd redis-pub dotnet add package StackExchange.Redis cd ../redis-sub dotnet add package StackExchange.Redis cd .. code . -
Both applications will require the same setup and boilerplate code. Update
Program.csto create aConnectionMultiplexerin both .NET Core projects:using StackExchange.Redis; var connectionString = "[cache-name].redis.cache.windows.net:6380,password=[password-here],ssl=True,abortConnect=False"; var redis = ConnectionMultiplexer.Connect(connectionString);You can obtain the
connectionStringfrom Access keys section of the Azure Cache for Redis instance in the Azure portal. -
Let’s first setup the
dotnet-subproject to listen for messages on theorg.shipping.alertschannel. Get an instance ofISubscriberfrom theConnectionMultiplexer:ISubscriber sub = redis.GetSubscriber();The object returned from
GetSubscriberis a pass-thru object that does not need to be stored. The pub/sub API has no concept of databases, but as before we can optionally provide an async-state. Note that all subscriptions are global: they are not scoped to the lifetime of theISubscriberinstance. -
Subscribe to the
org.shipping.alertschannel and handle messages using theOnMessagemethod:sub.Subscribe("org.shipping.alerts").OnMessage(channelMessage => { Console.WriteLine((string) channelMessage.Message); }); -
It’s also possible to use asynchronous handlers:
sub.Subscribe("org.shipping.alerts").OnMessage(async channelMessage => { await Task.Delay(1000); Console.WriteLine((string) channelMessage.Message); }); -
To prevent the application from terminating, we’ll use the
Console.ReadKey()method to wait for user input:Console.WriteLine("Listening for messages. Press any key to exit."); Console.ReadKey();This will prevent the application from terminating and allow us to listen for messages on the
org.shipping.alertschannel. -
Run the
redis-subproject and leave it running in the background.dotnet run --project redis-subLeave this running in the background and open a new terminal window to continue.
-
Return to the Azure Portal and open the Redis Console for the Azure Cache for Redis instance. While the subscriber is running in the background, enter the following command and use the ENTER key to publish messages on the
org.shipping.alertschannel.PUBLISH org.shipping.alerts packagesent-sdf9878You should see the message “packagesent-sdf9878” printed twice to the console of the running
redis-subapplication. Once for each subscriber configured. -
Next let’s setup the
dotnet-pubproject to publish messages on theorg.shipping.alertschannel. In thedotnet-pubget an instance ofISubscriberfrom theConnectionMultiplexer:ISubscriber sub = redis.GetSubscriber(); -
Create a
forloop to publish messages on theorg.shipping.alertschannel:for (int i = 0; i < 10; i++) { sub.Publish("org.shipping.alerts", $"labelprint-sdf9878-{i}"); Thread.Sleep(1000); } -
In a new terminal running the
dotnet-pubapplication:dotnet run --project redis-pubYou should see the message “labelprint-sdf9878-{i}” printed twice to the console of the running
redis-subapplication for each increment ofi. -
Stop the
redis-pubapplication by pressingCTRL+Cin the terminal window. -
Stop the
redis-subapplication by pressingCTRL+Cin the terminal window.