redis-on-azure-workshop
Explore Azure Cache for Redis
Learning Objective
Learn how to configure Azure Cache for Redis, interact with the cache, and connect an application to Azure Cache for Redis using .NET.
After completing this module, you’ll be able to:
- Explain the key scenarios Azure Cache for Redis covers and its service tiers.
- Identify the key parameters for creating an Azure Cache for Redis instance and interact with the cache.
- Connect an application to Azure Cache for Redis using .NET Core.
Prerequisites
- An Azure subscription - https://azure.microsoft.com/en-gb/free/
- Visual Studio Code - https://code.visualstudio.com
- .NET 6 - https://dotnet.microsoft.com/en-us/download
- Azure CLI - https://learn.microsoft.com/en-us/cli/azure/install-azure-cli
Create an Azure Cache for Redis using the Azure CLI
In this scenario, you learn how to create an Azure Cache for Redis. You then learn to get details of an Azure Cache for Redis instance, including provisioning status, the hostname, ports, and keys for an Azure Cache for Redis instance. Finally, you learn to delete the cache.
-
Open a shell with Azure CLI installed. If you don’t have Azure CLI installed, follow the instructions in Install the Azure CLI.
Note: If you are using the Azure Cloud Shell, you can skip this step.
-
Log in to your Azure account by running the following command:
az login -
Verify you’re authenticated using the correct Azure subscription:
az account showNote: If you’re not authenticated using the correct Azure subscription, run the following command to set the correct subscription:
az account set --subscription <subscription-id>. -
Create a resource group
az group create --resource-group redis-cache-rg --location "UK South" -
Create a Basic C0 (256 MB) Redis Cache
az redis create --name msdocs-redis-cache --resource-group redis-cache-rg --location "UK South" --sku basic --vm-size C0There are three pricing tiers available for an Azure Cache for Redis.
- Basic: An OSS Redis cache running on a single VM. This tier has no service-level agreement (SLA) and is ideal for development/test and noncritical workloads.
- Standard: An OSS Redis cache running on two VMs in a replicated configuration.
- Premium: High-performance OSS Redis caches. This tier offers higher throughput, lower latency, better availability, and more features. Premium caches are deployed on more powerful VMs compared to the VMs for Basic or Standard caches.
- Enterprise: High-performance caches powered by Redis Inc.’s Redis Enterprise software. This tier supports Redis modules including RediSearch, RedisBloom, RedisJSON, and RedisTimeSeries. Also, it offers even higher availability than the Premium tier.
- Enterprise Flash: Cost-effective large caches powered by Redis Inc.’s Redis Enterprise software. This tier extends Redis data storage to nonvolatile memory, which is cheaper than DRAM, on a VM. It reduces the overall per-GB memory cost.
-
Get the details of the Azure Cache for Redis instance
az redis show --name msdocs-redis-cache --resource-group redis-cache-rg -
Use the following
bashscript to retrieve the hostname, ports, and keys for an Azure Redis Cache instance:redis=($(az redis show --name msdocs-redis-cache --resource-group redis-cache-rg --query "[hostName,enableNonSslPort,port,sslPort]" --output tsv)) keys=($(az redis list-keys --name msdocs-redis-cache --resource-group redis-cache-rg --query "[primaryKey,secondaryKey]" --output tsv)) # Display the retrieved hostname, keys, and ports echo "Hostname:" ${redis[0]} echo "Non SSL Port:" ${redis[2]} echo "Non SSL Port Enabled:" ${redis[1]} echo "SSL Port:" ${redis[3]} echo "Primary Key:" ${keys[0]} echo "Secondary Key:" ${keys[1]}If you’re using PowerShell, you can use the script below…
$redis=(az redis show --name msdocs-redis-cache --resource-group redis-cache-rg --query "[hostName,enableNonSslPort,port,sslPort]" --output tsv)

$keys=(az redis list-keys --name msdocs-redis-cache --resource-group redis-cache-rg --query "[primaryKey,secondaryKey]" --output tsv)

# Display the retrieved hostname, keys, and ports
echo "Hostname:" $redis[0]
echo "Non SSL Port:" $redis[2]
echo "Non SSL Port Enabled:" $redis[1]
echo "SSL Port:" $redis[3]
echo "Primary Key:" $keys[0]
echo "Secondary Key:" $keys[1]
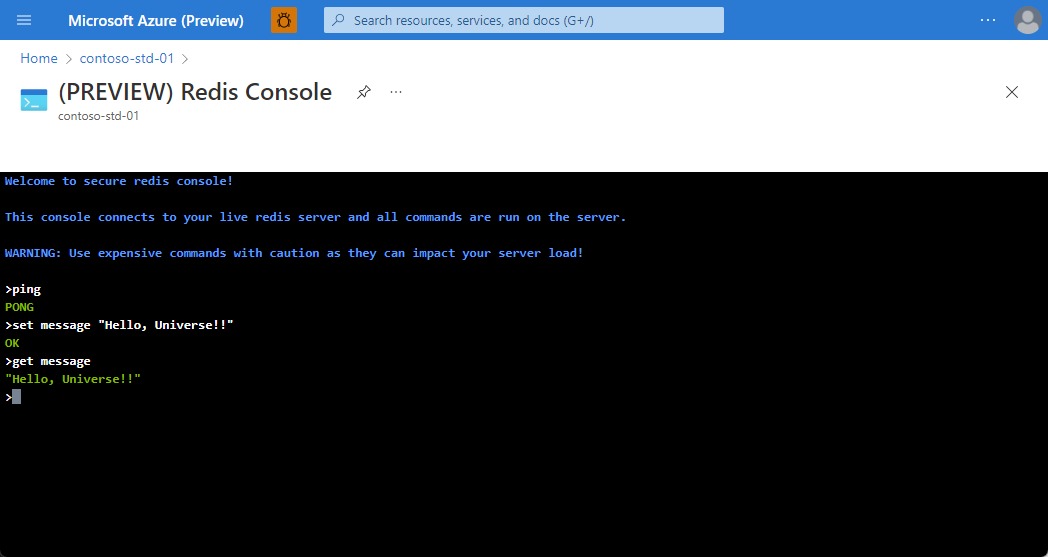
Accessing the Redis instance using the Redis Console
You can securely issue commands to your Azure Cache for Redis instances using the Redis Console, which is available in the Azure portal for all cache tiers.
-
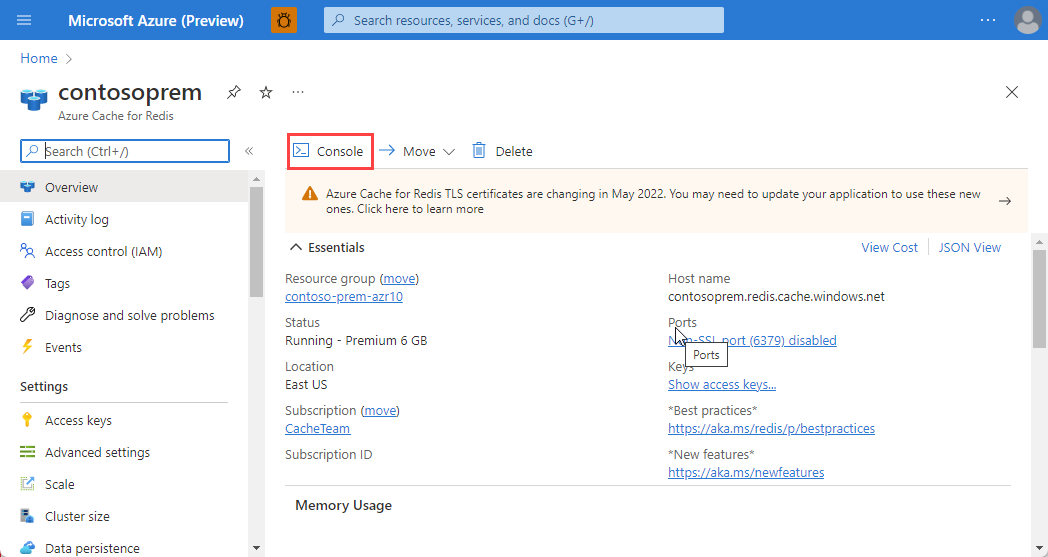
Open the Redis instance in the Azure portal.
-
To access the Redis Console, select Console tab in the working pane of Resource menu.
-
Issue the following commands against your cache instance, and review the results. To issue commands against your cache instance, type the command you want into the console:
 > set somekey somevalue
 OK
 > get somekey
 "somevalue"
 > exists somekey
 (string) 1
 > del somekey
 (string) 1
 > exists somekey
 (string) 0
To issue commands against your cache instance, type the command you want into the console.
-
Redis supports a set of known commands. A command is typically issued as
COMMAND parameter1 parameter2 parameter3. Spend some time experimenting with the commands below:ping: Ping the server. Returns “PONG”.set [key] [value]: Sets a key/value in the cache. Returns “OK” on success.get [key]: Gets a value from the cache.exists [key]: Returns ‘1’ if the key exists in the cache, ‘0’ if it doesn’t.del [key]: Deletes the value associated with the key.
Adding an expiration time to values
Caching is important because it allows us to store commonly used values in memory. However, we also need a way to expire values when they are stale. In Redis this is done by applying a time to live (TTL) to a key.
-
Follow the steps in the script below to add a time to live of 15 seconds to
counterkey:> set counter 100 OK > expire counter 15 (integer) 1 > get counter 100 ... wait ... > get counter (nil)
Interact with Azure Cache for Redis by using .NET
Typically, a client application will use a client library to form requests and execute commands on a Redis cache. You can get a list of client libraries directly from the Redis clients page.
A popular high-performance Redis client for the .NET language is StackExchange.Redis. The package is available through NuGet and can be added to your .NET code using the command line or IDE. Below are examples of how to use the client.
-
Create a new .NET Core console application and open the project in Visual Studio Code.
Please note: Do not run these commands in the Redis Console.
dotnet new console --name redis-cache-dotnet cd redis-cache-dotnet code . -
Add the NuGet package
StackExchange.Redisusing the terminal shell.:dotnet add package StackExchange.RedisThe main connection object in
StackExchange.Redisis theStackExchange.Redis.ConnectionMultiplexerclass. This object abstracts the process of connecting to a Redis server (or group of servers). It’s optimized to manage connections efficiently and intended to be kept around while you need access to the cache. -
Update
Program.csto create aConnectionMultiplexer:using StackExchange.Redis; var connectionString = "[cache-name].redis.cache.windows.net:6380,password=[password-here],ssl=True,abortConnect=False"; var redisConnection = ConnectionMultiplexer.Connect(connectionString);You can obtain the
connectionStringfrom Access keys section of the Azure Cache for Redis instance in the Azure portal. -
The Redis database is represented by the
IDatabasetype. You can retrieve one using theGetDatabase()method:IDatabase db = redisConnection.GetDatabase(); -
Once you have a
IDatabaseobject, you can execute methods to interact with the cache. Here is an example of storing a key/value in the cache:bool wasSet = db.StringSet("favourite:flavor", "i-love-rocky-road"); -
We can then retrieve the value with the
StringGetmethod:string value = db.StringGet("favourite:flavor"); Console.WriteLine(value); // displays: ""i-love-rocky-road"" -
The
IDatabaseobject has anExecuteandExecuteAsyncmethod which can be used to pass textual commands to the Redis server. For example:var executeResult = db.Execute("ping"); Console.WriteLine(executeResult.ToString()); // displays: "PONG" -
Once you are done with the Redis connection, you can
DisposetheConnectionMultiplexer. This will close all connections and shutdown the communication to the server.redisConnection.Dispose(); redisConnection = null;
Storing more complex values
Redis is oriented around binary safe strings, but you can cache off object graphs by serializing them to a textual format - typically XML or JSON.
-
Create a new file called
GameStat.csand update accordingly:public class GameStat { public string Id { get; set; } public string Sport { get; set; } public DateTimeOffset DatePlayed { get; set; } public string Game { get; set; } public IList<string> Teams { get; set; } public IList<(string team, int score)> Results { get; set; } } -
Returning to
Program.cswe can usingSystem.Text.Jsonto serialize to and deserialize from JSON. UpdateProgram.csto include the following:using StackExchange.Redis; using System.Text.Json; var connectionString = "[cache-name].redis.cache.windows.net:6380,password=[password-here],ssl=True,abortConnect=False"; var redisConnection = ConnectionMultiplexer.Connect(connectionString); IDatabase db = redisConnection.GetDatabase(); bool wasSet = db.StringSet("favourite:flavor", "i-love-rocky-road"); string value = db.StringGet("favourite:flavor"); Console.WriteLine(value); // displays: ""i-love-rocky-road"" var executeResult = db.Execute("ping"); Console.WriteLine(executeResult.ToString()); // displays: "PONG" // Use the System.Text.Json to turn an instance of this object into a string: var stat = new GameStat { Id = "1950-world-cup", Sport = "Football", DatePlayed = new DateTime(1950, 7, 16), Game = "FIFA World Cup", Teams = new[] { "Uruguay", "Brazil" }, Results = new[] { ("Uruguay", 2), ("Brazil", 1) } }; string jsonString = JsonSerializer.Serialize(stat); bool added = db.StringSet("event:1950-world-cup", jsonString); // Use the System.Text.Json to turn the string back into an instance of the object: var result = db.StringGet("event:1950-world-cup"); var statResult = JsonSerializer.Deserialize<GameStat>(result.ToString()); Console.WriteLine(statResult.Sport); // displays "Football" redisConnection.Dispose(); redisConnection = null;
Delete the Azure Cache for Redis instance
If you’re going to continue with the next lab, don’t delete the Redis instance.
-
Use the following script to delete the Azure Cache for Redis instance:
az group delete --resource-group redis-cache-rg -y