07 - Deploy your agentic workflows to Microsoft Teams
This module demonstrates how to deploy Logic Apps conversational agents to Microsoft Teams, enabling users to interact with intelligent agents directly through Teams chat interface.
When finished with this module, you'll have gained the following knowledge:
- Teams Integration Architecture: Understanding the three-component architecture involving Microsoft Teams, Azure Bot Service, and Logic Apps
- Azure Bot Service Configuration: How to create and configure Azure Bot Service as a proxy between Teams and Logic Apps
- Custom Proxy Implementation: Building a web application that implements the bot activity protocol to bridge Teams and Logic Apps
- Teams App Manifest Creation: Creating and configuring Teams app manifests for sideloading custom agents
- End-to-End Deployment: Complete workflow from local development to Teams production deployment
Architecture Overview
The integration between Microsoft Teams and Logic Apps involves three key components:
- Microsoft Teams - The client interface where users interact with the agent
- Azure Bot Service - Intermediate service that handles authentication, schema validation, and message routing
- Custom Proxy Application - Web application that implements the bot activity protocol and communicates with Logic Apps via A2A (Application-to-Application)
noteAzure Bot Service acts as an intermediary between Microsoft Teams and Azure Logic Apps. It manages authentication, validates schemas, and routes messages. This ensures that communication flows through the service, with no direct interaction between Microsoft Teams and the agentic workflow..
Prerequisites
- Azure subscription with Logic Apps Standard
- Microsoft Teams with tenant admin permissions
- Visual Studio or VS Code
- Logic Apps agent already created and configured
- GitHub repository access (sample code available)
Step 1: Create Logic App Agent
-
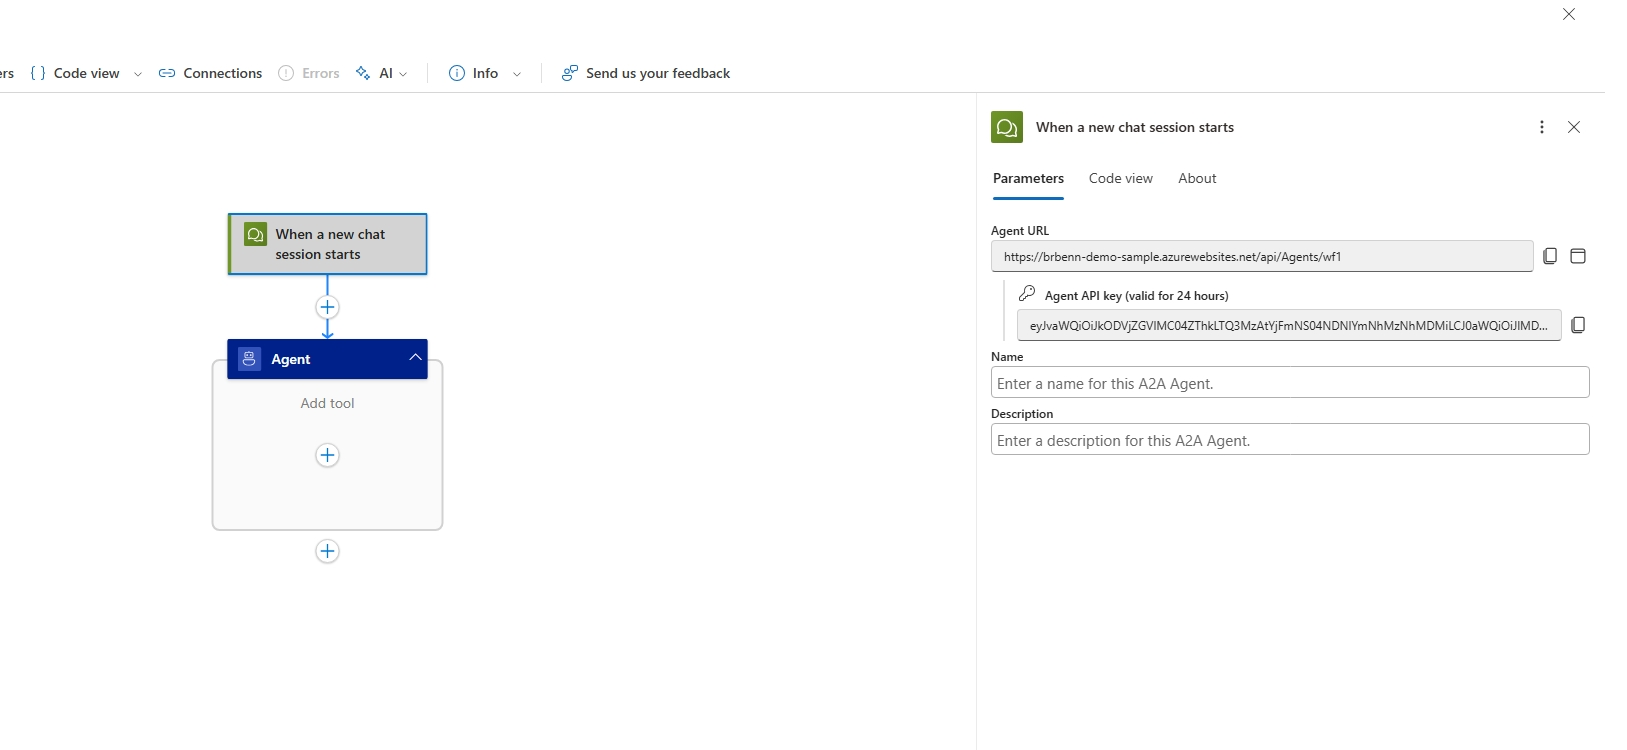
In the Azure portal, find or create a Standard conversational agent workflow.
- Ensure you have a Logic Apps agent configured with an Agent workflow with conversation handling
- Open our workflow in the Designer, click on the Chat session trigger and make note of the Agent URL - this will be used later when configuring the Proxy app
-
Configure your app's Easy Auth settings
- Go to the Authentication settings page under the Settings* menu
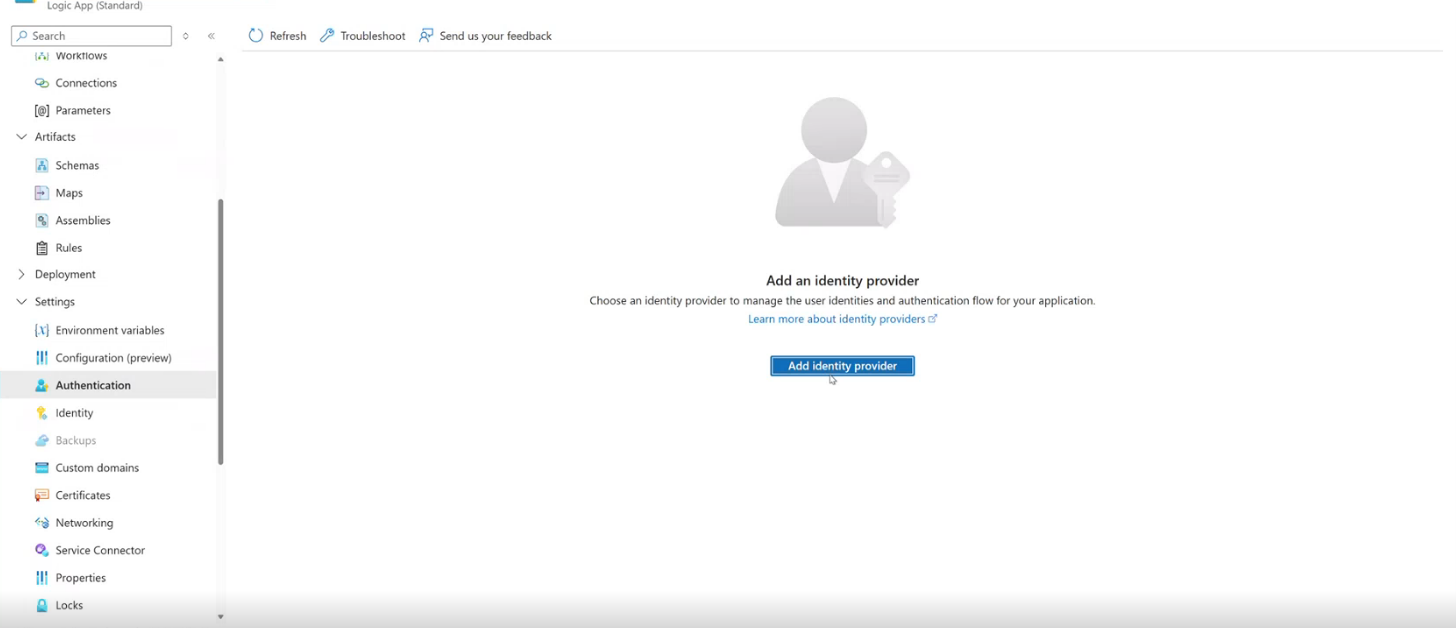
- Click Add an Identity Provider
- On the Identity provider drop down select Microsoft
- For App registration type select Create new app registration
- For Name use a name similar to your Logic App's name
- For Client secret expriation select Recommended: 180 days
- For Supported account types select Current tenant - Single tenant
- All items under Additional checks can be left as their default value
- All items under App Service authentication settings can be left as their default value
- Click Add
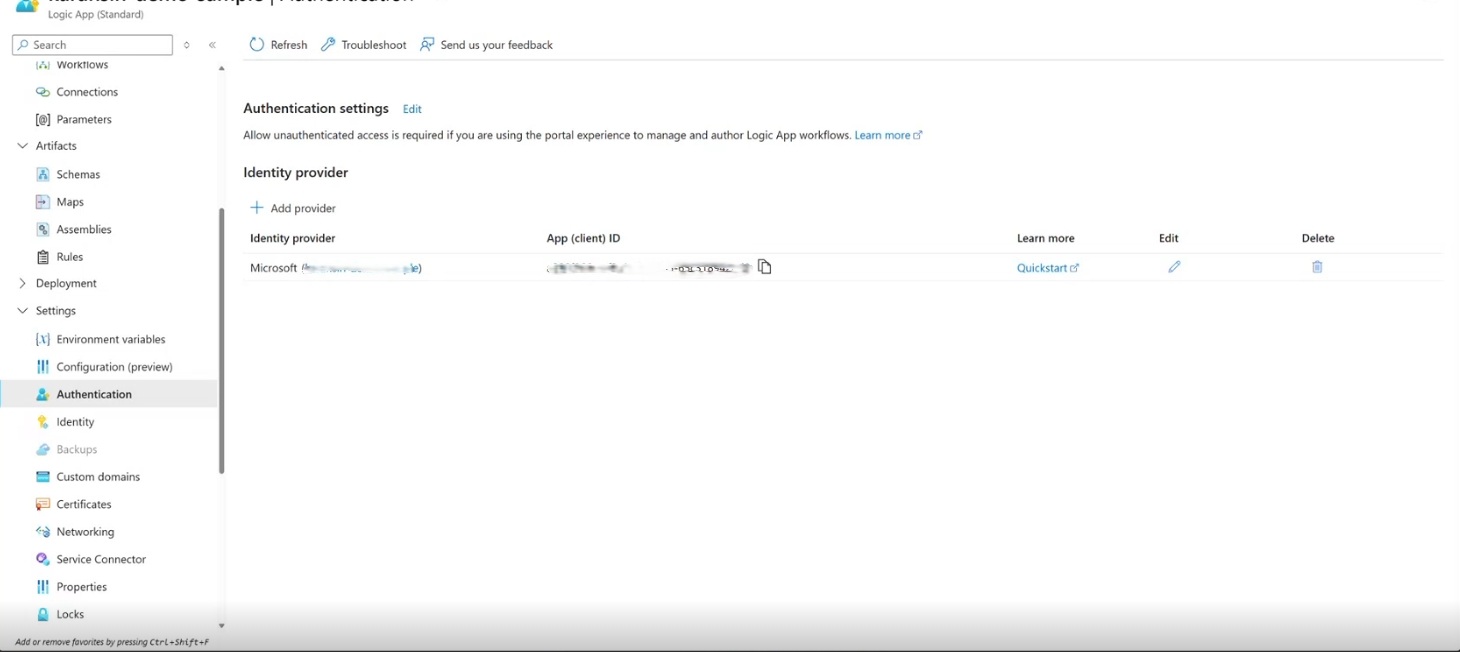
- Go to the Authentication settings page under the Settings* menu
-
Confiure the workflow's AAD App settings
- From the Authentication page, click the link to the AAD app (this will have the name you used in the Add an Identity Provider step)
- From the AAD App, click the Authentication page under the Manage menu group
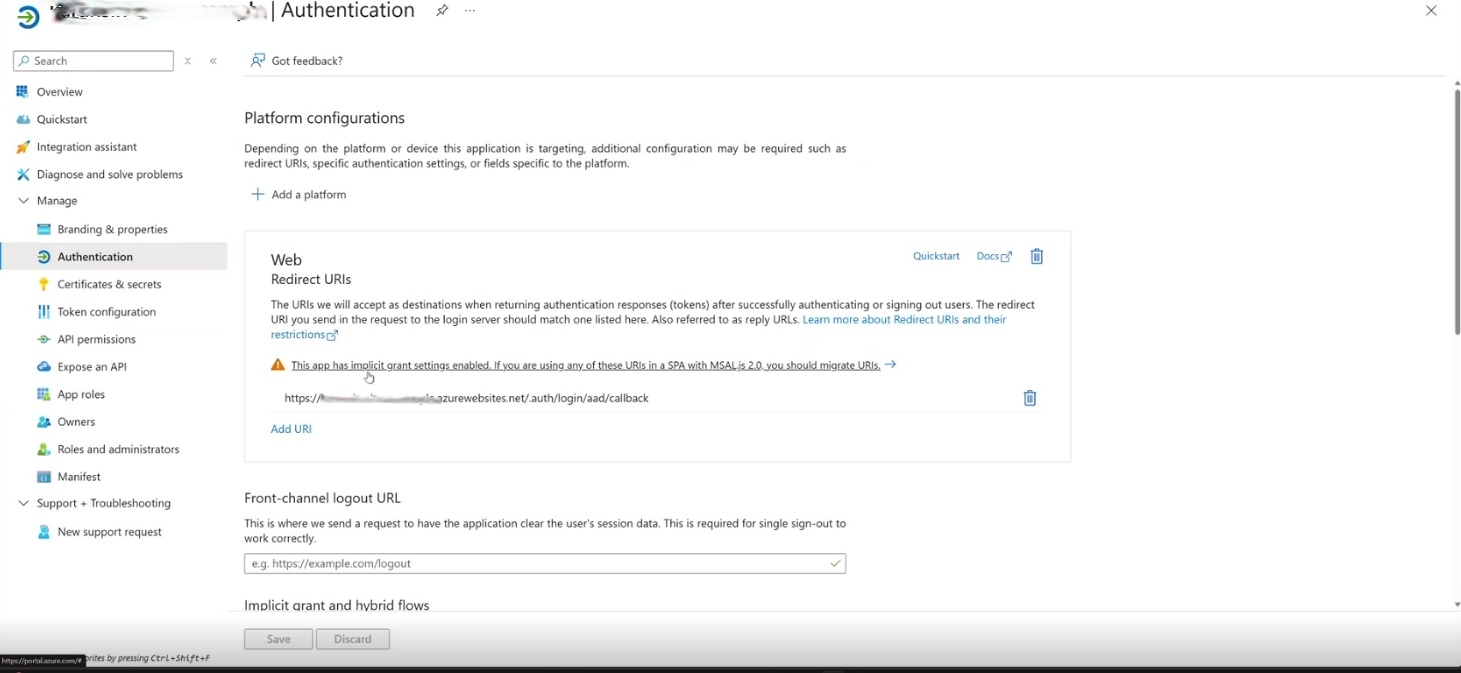
- Under Web click Add URI
- Add the value https://token.botframework.com/.auth/web/redirect
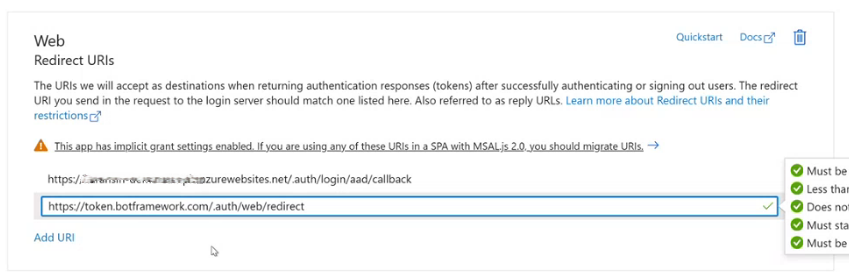
- Click Save
- Go to the Expose an API page under the Manage menu group
- Note the Scopes value - this will be used later for the Bot service authentication
- Note the App (client) ID, and Tenant ID - these will be used later for the Bot service authentication
tipTest your Logic Apps agent in the portal first using the agent URL before proceeding with Teams integration.
Step 2: Create Azure Bot Service
-
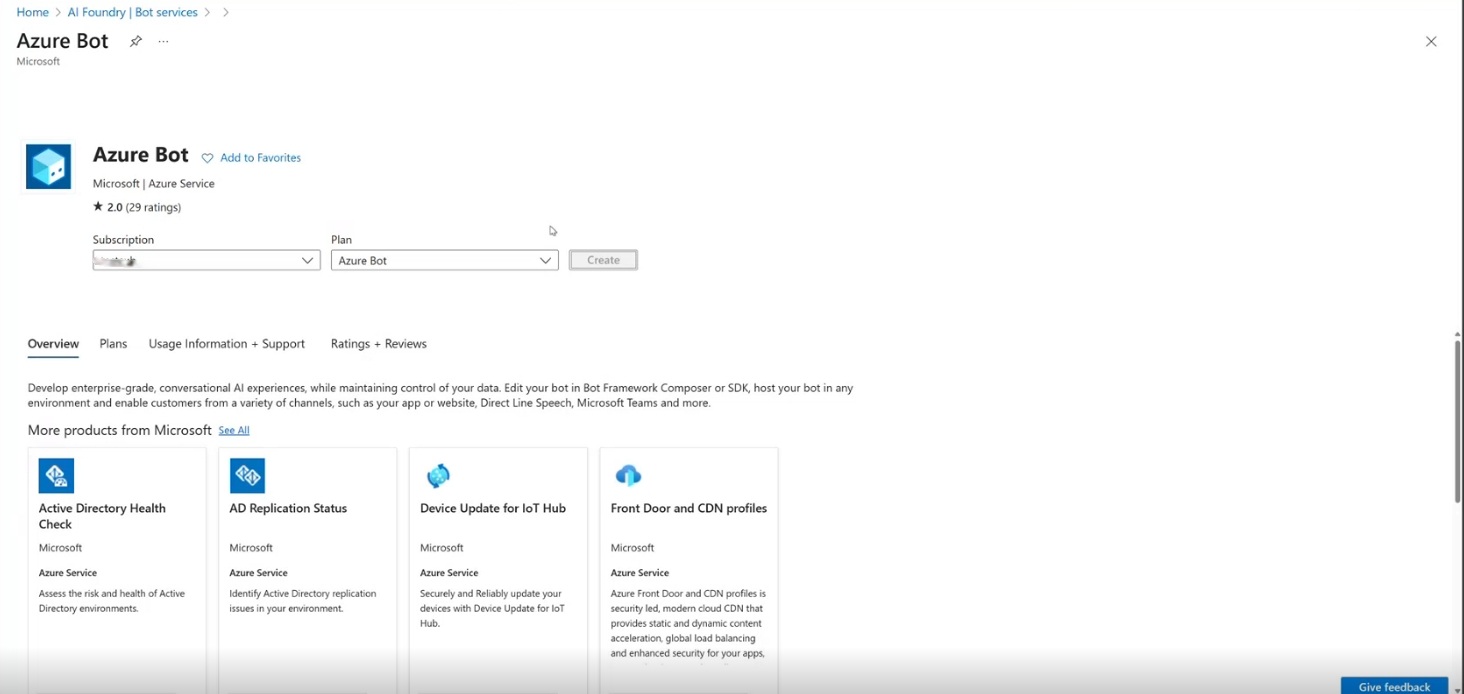
In the Azure portal, create a new Azure Bot
- Add a Bot handle, Subscription, and Resource group, all other properties can remain set to their default values
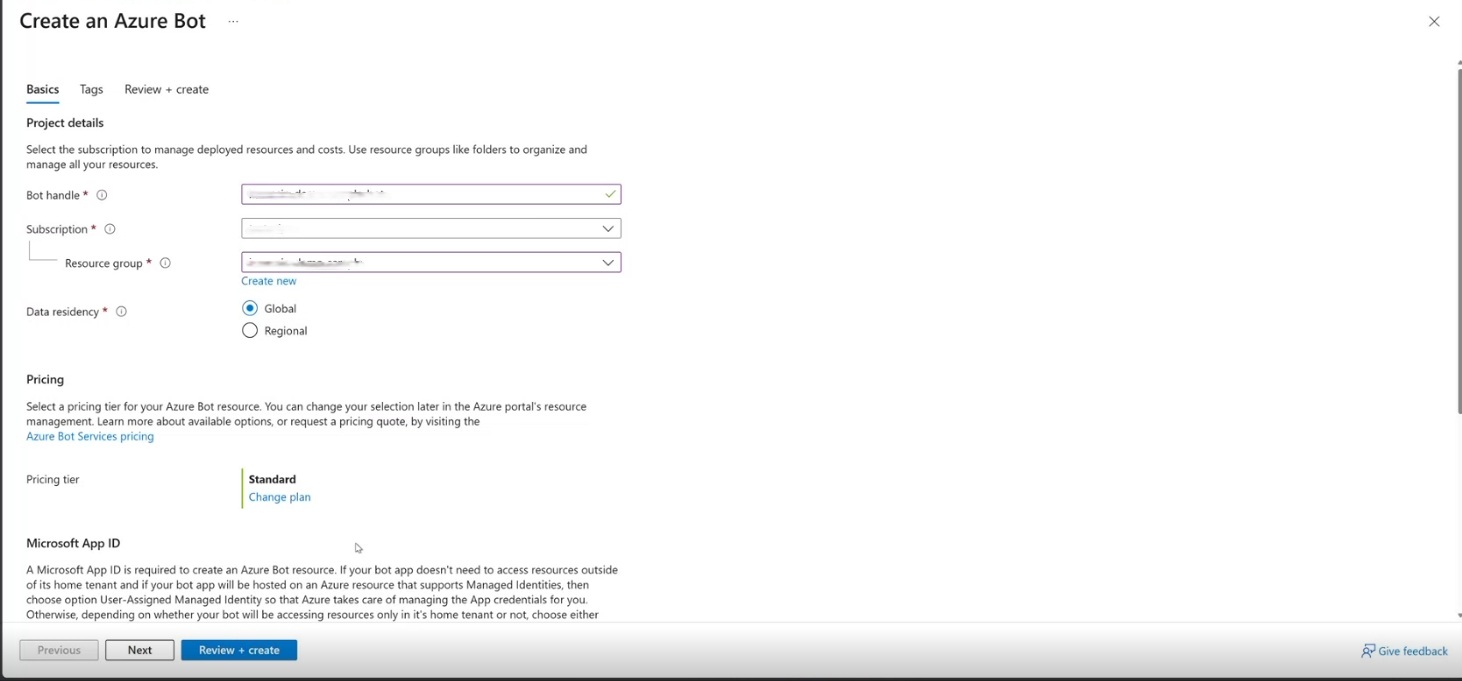
- Add a Bot handle, Subscription, and Resource group, all other properties can remain set to their default values
-
Configure Bot Settings
- Once the Bot resource is create navigate to the Configuration page under the Settings
- Click Manage Password next to Microsoft App ID
- Now on the Certificates and secrets page
- Click + New client secret. Add a Description and keep Expires set to its default value.
- Click Add
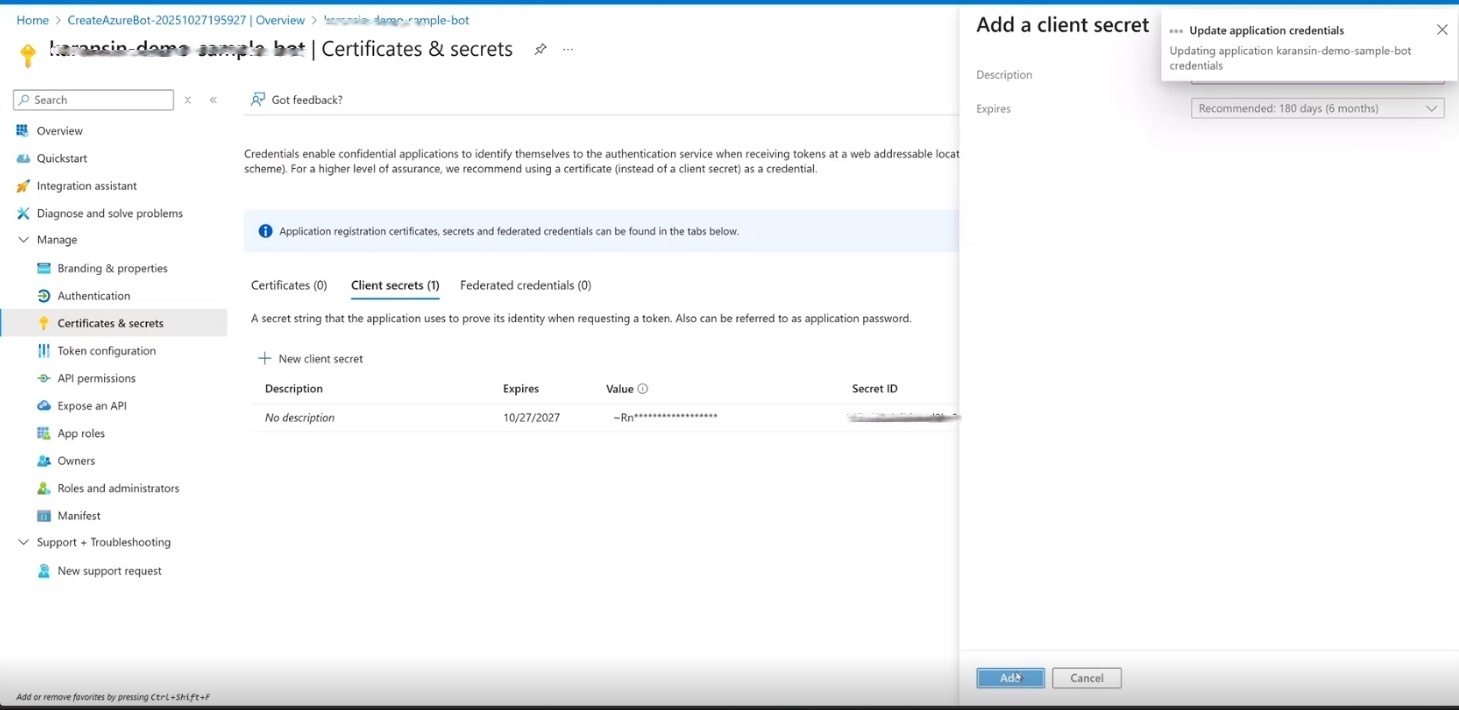
- Note the Bot Secret value. This will be used later during the Teams manifest update
- Back on the Bot resource Configuration page, note the Bot ID (Microsoft App ID), and Tenant ID - you'll need these for Teams manifest later
- Create the OAuth connection
- From the Configuration page click Add OAuth Connection Settings
- For Name use the value logicapp
- For Provider select Azure Active Directory v2
- For Client ID use the App (client) ID you noted from the Logic Apps AAD App
- For Client secret, use the secret value you noted from the Logic Appsw AAD App
- The Token exchange URL can be left blank
- For Tenant ID, use the Tenant ID value you noted from the Logic App AAD App
- For Scopes, use the Scopes value you noted frorm the Logic App AAD App
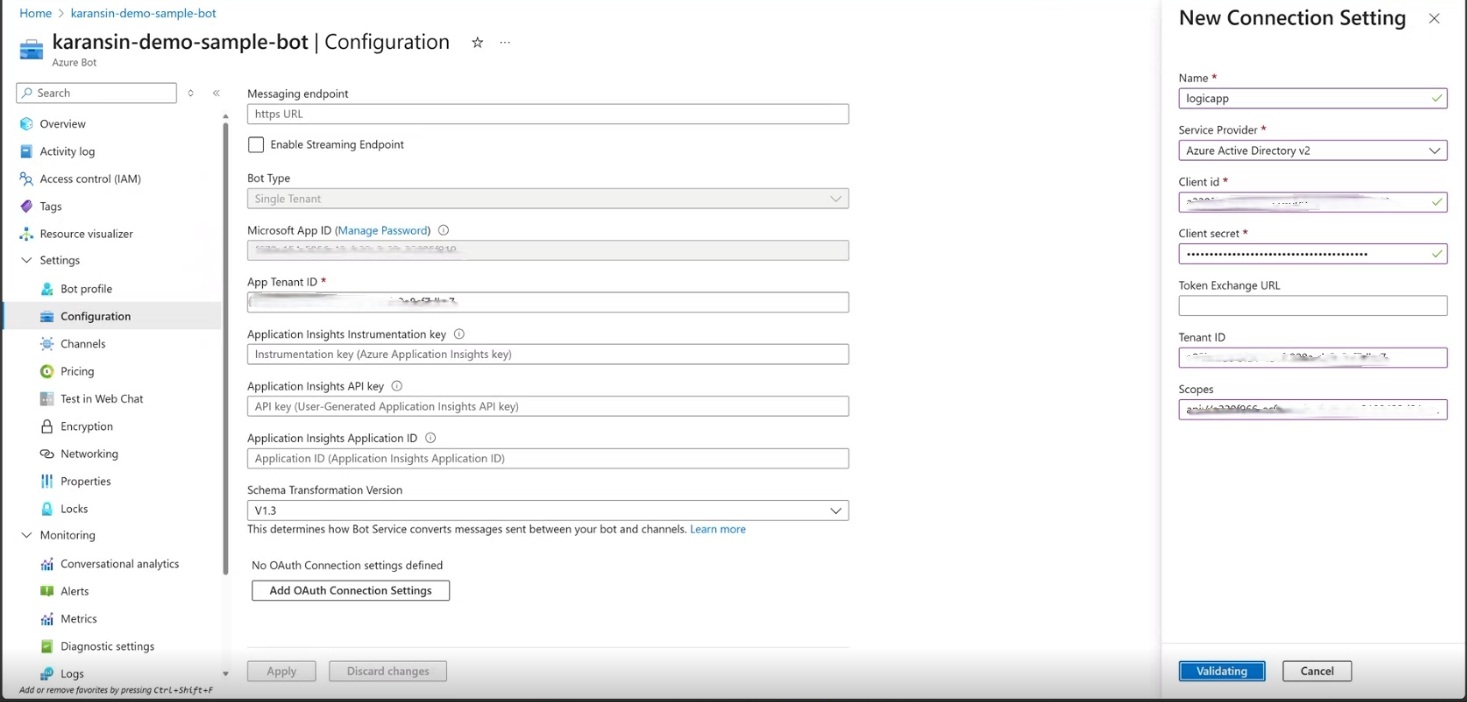
- Click Save
- Test the connection
- Click the newly created OAuth connection link
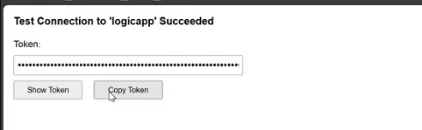
- On the opened tab, click Test Connection
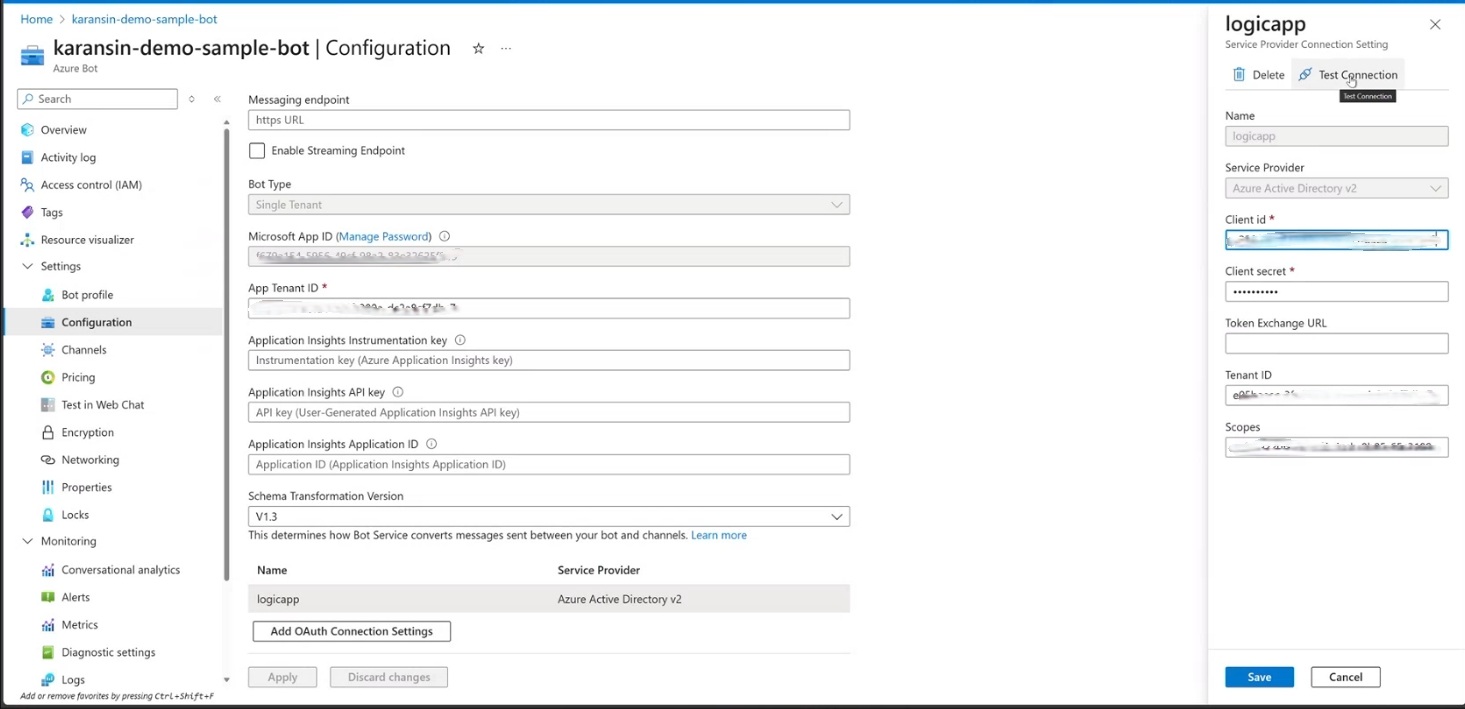
- This will open a page showing a successful connection was made. This the connection fails, review the OAuth connection setup instructions.
Step 3: Setup Custom Proxy App and Deploy
The proxy application bridges the gap between Azure Bot Service and Logic Apps since Logic Apps doesn't directly support the bot activity protocol.
Key Components:
-
Bot Activity Protocol Implementation
- Handles incoming messages from Azure Bot Service
- Implements proper message formatting and response handling
-
A2A Integration with Logic Apps
- Converts bot messages to Logic Apps A2A format
- Manages conversation context and state mapping
- Handles authentication tokens and headers
-
Conversation ID Mapping
- Maps Teams conversation IDs to Logic Apps context IDs
- Enables stateless operation without requiring custom storage
- Handles conversation lifecycle and error recovery
The .NET proxy app can be found here: link to custom dotnet proxy app The TypeScript app can be found here: link to custom typescript proxy app This guide will use the dotnet app.
- Clone the link to custom proxy app to your local machine
- Open the solution in Visual Studio
- Open the appsettings.json file
- Replace BOT_CLIENT_ID with the Bot ID you noted from the Bot setup section
- Replace BOT_TENANT_ID with the Tenant ID you noted from the Bot setup section
- Replace BOT_SECRET with Bot secret you noted from the Bot setup section
- Replace LOGICAPP_AGENT_URL with the agent URL you noted from the Logic App
- Be sure to replace the brackets "" as well
- Save the file
Deploy to Azure:
-
Deploy to Azure App Service
# Deploy using Azure CLI or Visual Studio publish
az webapp deployment source config-zip --resource-group myResourceGroup --name myAppServiceName --src myapp.zip
To publish in Visual Stuio, right-click on the solution and select Publish. In the Publish dialog: Choose Azure as the target. Select the specific deployment target (Windows). Follwing the wizard to deploy the application to Azure App Service.
Once deployed, go to the Azure portal and navigate to your App Service resource. Find and note the default domain - this values will be used in the next section.
Update the Bot Service:
- Update Bot Service Configuration
- In the Azure portal, navigate to your Bot service.
- Go to the Configuration page under the Settings menu
- Update the Messaging endpoint with the default domain values from the previous set and append the following to the URL: "/api/messages"
- The URL should have the following structure:
https://your-app-service.azurewebsites.net/api/messages - Click Save
- Navigate to the Channels page under the Settings menu group
- Click Microsoft Teams channel
- Accept terms of service
- Click Apply
Step 5: Configure Teams Integration
Upload Teams App Manifest:
-
Required Files:
manifest.json(configuration file)color.png(192x192 color icon)outline.png(32x32 outline icon)
-
Update files
- Go back to your Visual Studio solution
- Open the manifest.json file under the appManifest folder
- Replace BOT_CLIENT_ID with your Bot client ID
- Replace BOT_TENANT_ID
- Replace AGENT_DISPLAY_NAME_SHORT with Test Logic App Agent
- Replace AGENT_DISPLAY_NAME_LONG with Test Logic App Agent
- Be sure to replace the brackets "" as well
- Save the file
-
Package Creation:
- Compress all files under appManifest into a ZIP archive
- Ensure ZIP contains files at root level (not in subfolder)
Sideload Teams App:
- Upload in Teams
- In Teams client: Apps > Manage your apps > Upload a custom app
- Select Upload for [your organization]
- Choose your ZIP file
Step 6: Testing and Validation
Test Scenarios:
A new chat will appear in you chat list with the name of your bot. Open this chat and type hello to being your chat session with your Logic Apps agent.
-
Basic Conversation
- Send simple messages and verify responses
- Check authentication flow (OAuth sign-in)
- Verify conversation continuity
-
Error Handling
- Test with invalid inputs
- Verify graceful error recovery
- Check conversation reset functionality
Troubleshooting:
- Authentication Issues: Check OAuth configuration and token handling
- Message Delivery: Verify Azure Bot Service messaging endpoint
- Conversation State: Ensure conversation ID mapping is working correctly
- Teams Manifest: Validate JSON schema and required fields