Home | Deploy | User Guide | Tutorials | Administrator Guide | Application Integration | Support
Marketplace deployment
AzHop is now available in the Azure Marketplace allowing you to deploy the solution utilizing the installation process that you are familiar with like any other package in the Azure Marketplace. With this tutorial you will deploy the necessary architecture for AzHop to work in Azure. This tutorial with create the following resources.
- An Open OnDemand Portal for a unified user access, remote shell access, remote visualization access, job submission, file access and more,
- An Active Directory for user authentication and domain control,
- An Open PBS or SLURM Job Scheduler,
- Azure CycleCloud to handle autoscaling of nodes thru job scheduler integration,
- A Jumpbox to provide admin access,
- Azure Netapp Files for home directory and data storage,
- Grafana dashboards to monitor your cluster.
Deployment steps
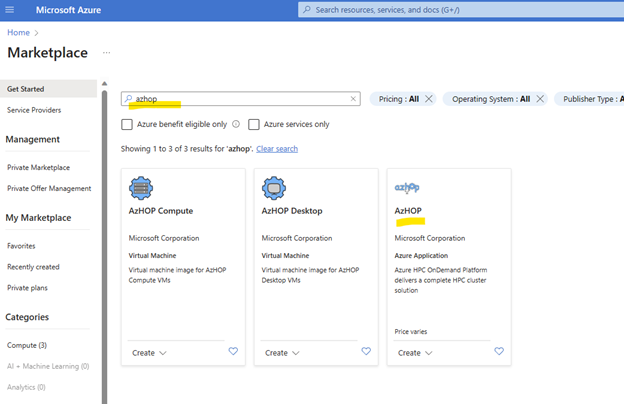
Open your Microsoft Azure account and then go to the Azure Marketplace and type “Azhop” then Enter. From the search results select AzHop and then click on Create.
Basics
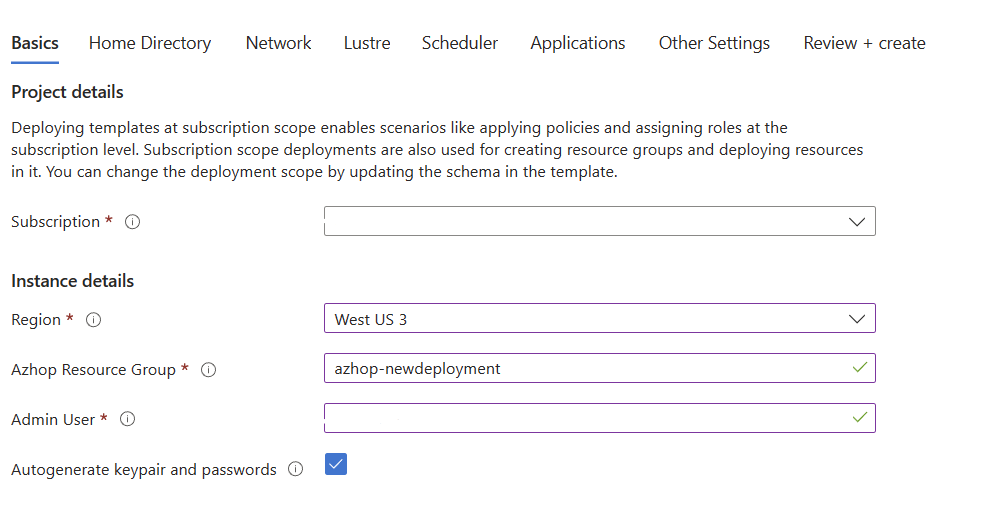
In the basics tab input the following parameters:
- AzHop Resource Group – Name of the resource where it is going to be deployed.
- Admin User – Username for the cluster admin.
By default, this deployment will pull the latest version available of AzHOP and deploy it.
The auto generate feature will generate a new SSH key pair and save it in the KeyVault, if you would like to use your own pair of keys, uncheck this option and provide the key.
Next
Home Directory
The Home Directory is where the files from the High Performance Computing projects will live. AzHop has the capability of using the power of Azure Files and Azure NetApp Files for your projects.
- Storage Type - Review the Azure Files and Azure NetApp Files comparison. For this tutorial the recommendation is to use Azure Files.
- Mount point - Is where the drive will be mounted. Default value is “/nfshome”.
- Capacity - Size of the drive that will be mounted. Defauilt value is “1024GB”.

Next
Network
AzHop have the option to allow access through public IP as well as to customize the CIDR Prefix to use and the Base IP address.
- Enable Public IP address - Default value is “checked”, this will create a new Public IP to access the OnDemand platform and provide you access to the dashboard. In case you would like to keep it private and access the resources through an Azure VNET, “unchek” this option and select a VNET to peer.
- CIDR Prefix - This will determine the amount of nodes available. Default value is “/24”
- Base IP Address - Address space to use in the VNET hosting AzHop. Default value is “10.0.0.0”.

Next
Lustre
Azure Managed Lustre is a managed, pay-as-you-go file system for high-performance computing (HPC) and AI workloads, its installation is optional.
- Deploy an Azure Managed Lustre Filesystem. - Check this option.
- Lustre Tier - Select the tier for Lustre, the default is “AMLFS Durable Premium 40”
- Capacity - Is the size of the Manage file system.

Next
Scheduler
The scheduler will dictate how the workload is going to operate. AzHop offers Open PBS and SLURM with SLURM Accounting as optional.
- Scheduler - Default value is “SLURM”
- SLURM version - Latest version is 22.05.3
- SLURM accounting - Default value is “Checked”

Next
Applications
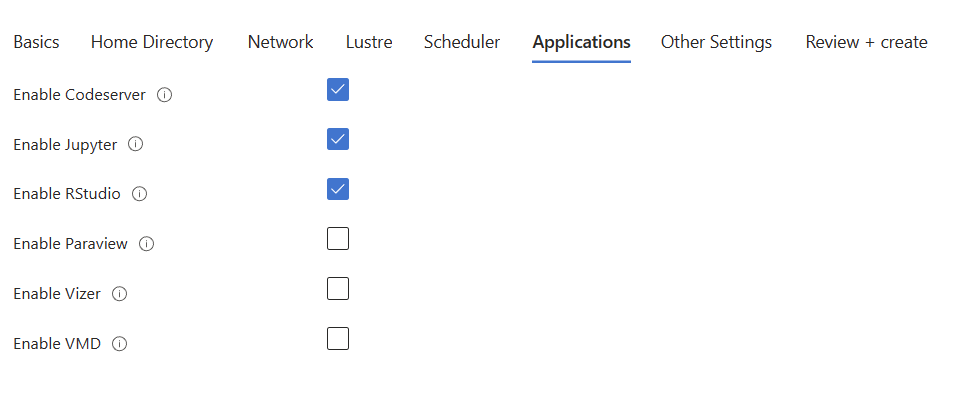
In addition to the default applications, AzHOP Marketplace deployment offers a variety of applications supported in the HPC environment, select the ones that are more appropriate to your needs by checking the boxes next to the option.
Next
Other Settings
- Additional Keyvault Reader - This will allow you to configure access to the KeyVault to a user. Input the your “Object ID” from your user or the user that will have access to read the KeyVault.
- Branch Name - This will pull automatically the latest version available for AzHOP but you can install another version and configure it here.

Next
Review
Validate that the sumnmary configuration is looking as expected and select “Create” to initiate the installation process.
Access OnDemand
Retrieve credentials
During the deployment process, AzHop created a secure password to access the OnDemand VM which will serve as your HPC Hub.
Granting Permissions
1.- Go to the resource group created and open the KeyVault. 2.- Once in the KeyVault select “Access Policies” from the sidebar and then Create.
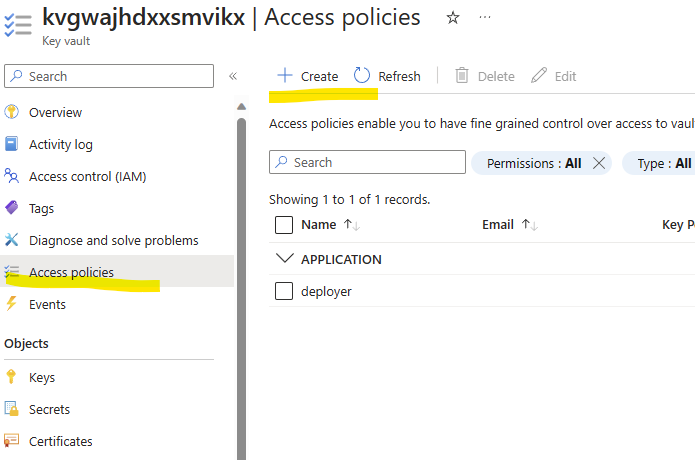
3.- From the dropdown-list select “Key, Secret & Certificate Management” to create a policy with those permissions and click “Next” 4.- Under the Principal Tab search for the account you are using to access the Azure environment. Once that you find it, select it and click “Next”. 5.- Skip the “Application” tab by clicking “Next”. 6.- Review the policy details and click “Create”.
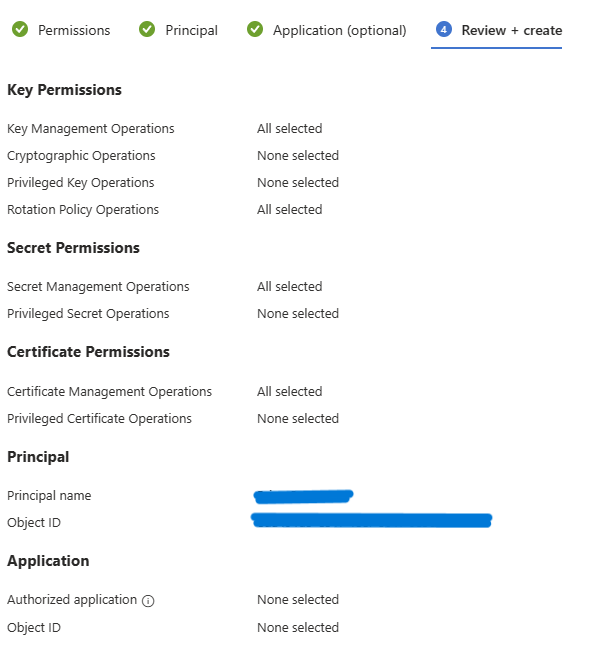
This process will create a KeyVault policy and grant you access to read the “Secrets” which is where the credentials got save during the installation.
Read password
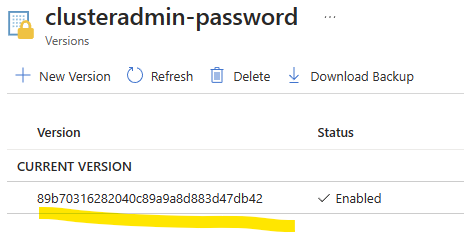
In the same KeyVault go to Secrets and then look for the item “clusteradmin-password” which contain the password for the account “clusteradmin” and select it.
1.- Select the item under “CURRENT VERSION”.
2.- That will open the secret details, now select “Show Secret Value” to visualize the secure password and click on the copy icon to “Copy” the password.
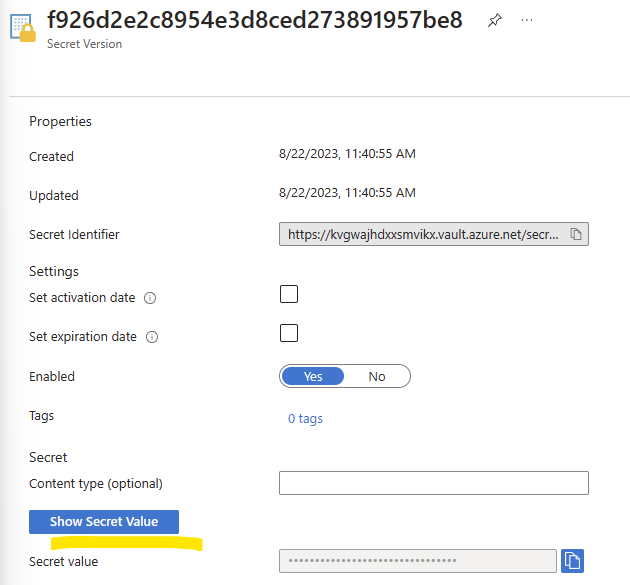
3.- Select “Close” to exit this view securely.
Retrieve URL
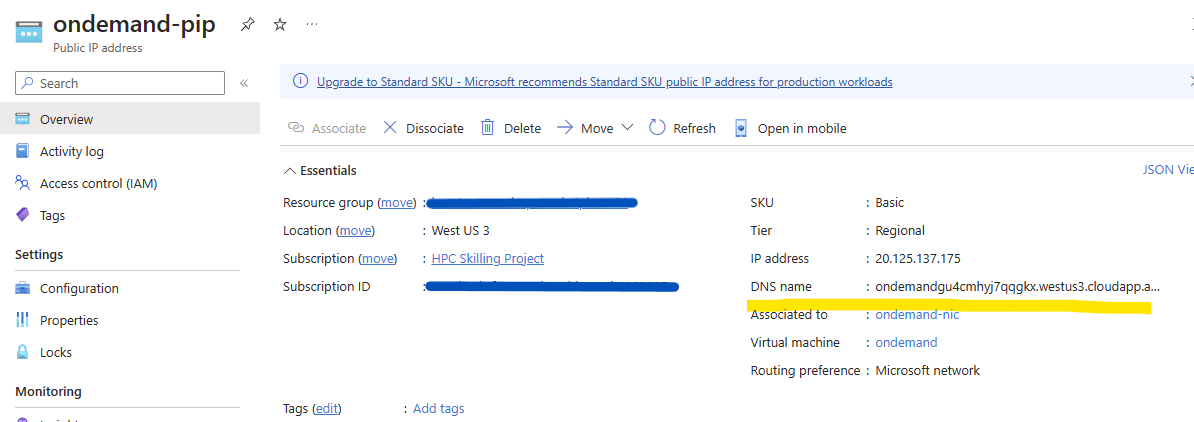
As instructed during the configuration process, AzHop create a Public IP to access the OnDemand platform.
1.- Go back to the resource group for AzHop and find the “ondemand-pip” Public IP address item. 2.- The URL will be under the essentials section next to the “DNS Name”.
Testing
With this steps you should have:
- Username - “clusteradmin” for OnDemand
- Password - Retrieved from the KeyVault.
- OnDemand URL - Retrieved from the PIP.
Which is all you need to access the OnDemand platform. Go to your WebBrowser and insert the OnDemand URL and enter the credentials to access.
Note: It may take a few minutes to finish the installation process, after that the system should work as expected.
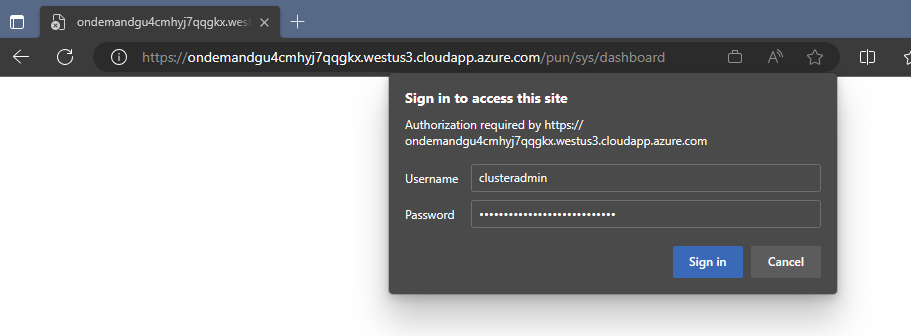
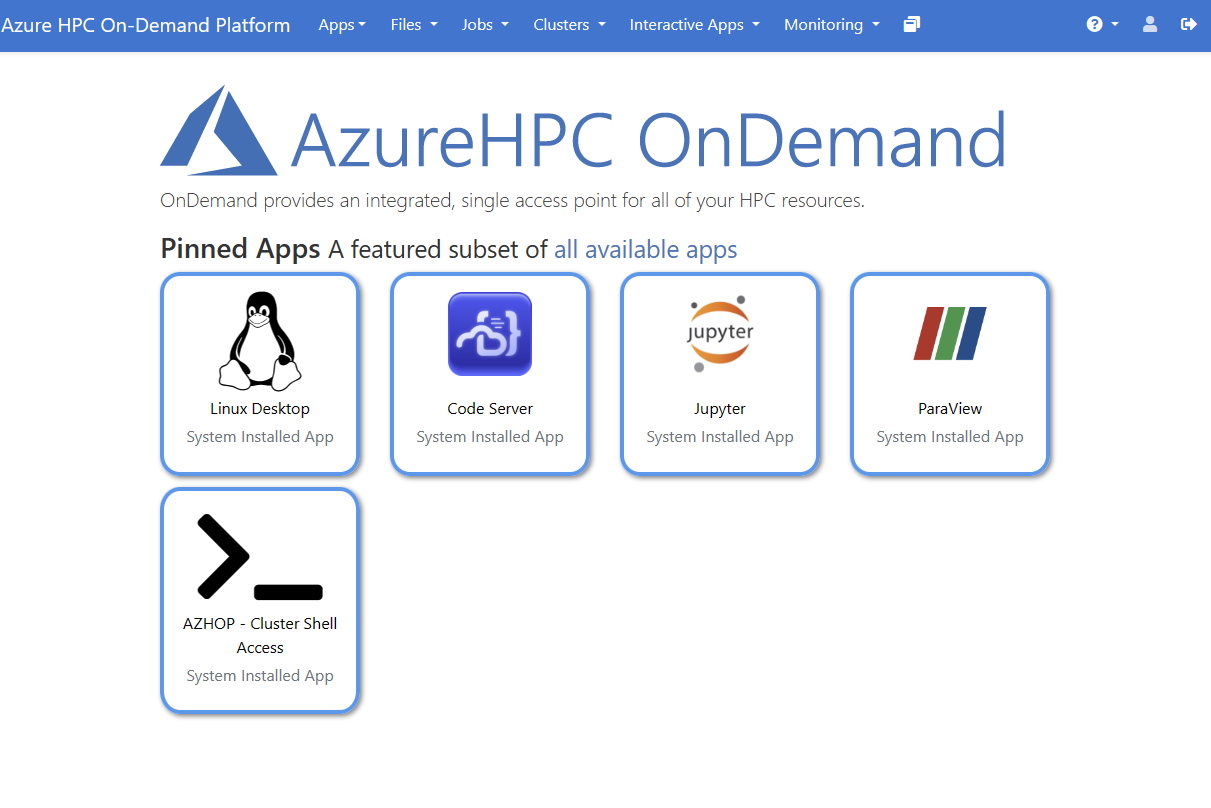
Voila! AzureHPC OnDemand should be ready to use.
