kubernetes-hackfest
Delivering modern cloud-native applications with open source technologies on Azure Kubernetes Service
Lab: Jenkins CI/CD
This workshop will guide you through building Continuous Integration (CI) and Continuous Deployment (CD) pipelines with Jenkins. The pipeline will utilize Azure Container Registry to build the images and Helm for application updating.
Prerequisites
- Complete previous labs:
Instructions
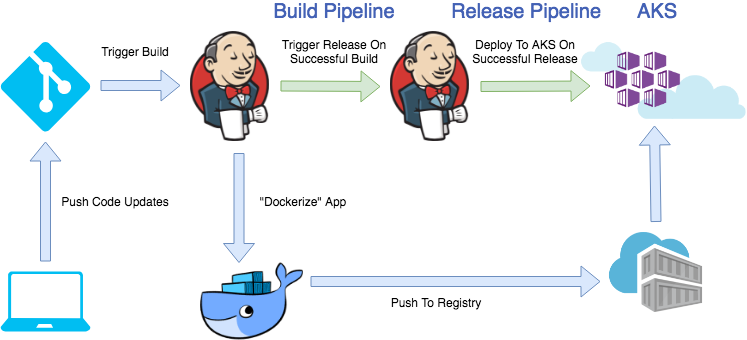
The general workflow/result will be as follows:
- Push code to source control (Github)
- Trigger a continuous integration (CI) build pipeline when project code is updated via Git
- Package app code into a container image (Docker Image) created and stored with Azure Container Registry
- Trigger a continuous deployment (CD) release pipeline upon a successful build
- Deploy container image to AKS upon successful a release (via Helm chart)
- Rinse and repeat upon each code update via Git
- Profit
Setup Github Repo
In order to trigger this pipeline you will need your own Github account and forked copy of this repo. Log into Github in the browser and get started.
-
Broswe to https://github.com/azure/kubernetes-hackfest and click “Fork” in the top right.

-
Modify the Jenkinsfile pipeline Within Github Fork (Needs to be done from Github)
The pipeline file references your Azure Container Registry in a variable. Edit the
labs/cicd-automation/jenkins/Jenkinsfilefile and modify line 4 of the code:def ACRNAME = 'youracrname'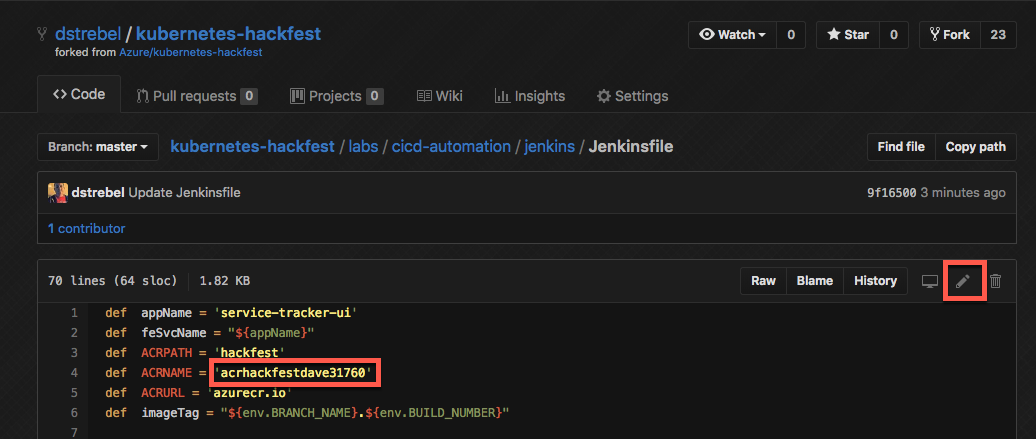
-
Your newly forked repo will have the default ACR URL hardcoded in the Helm chart for the service-tracker-ui app (which was manually updated locally in step 4 of the ‘Lab: Helm Setup and Deploy Application’ lab). This needs to be updated on line 10 of ./charts/service-tracker-ui/values.yaml in your fork of the repo.
acrServer: "<update this with your acr name>.azurecr.io" -
Grab your clone URL from Github which will look something like:
https://github.com/thedude-lebowski/kubernetes-hackfest.git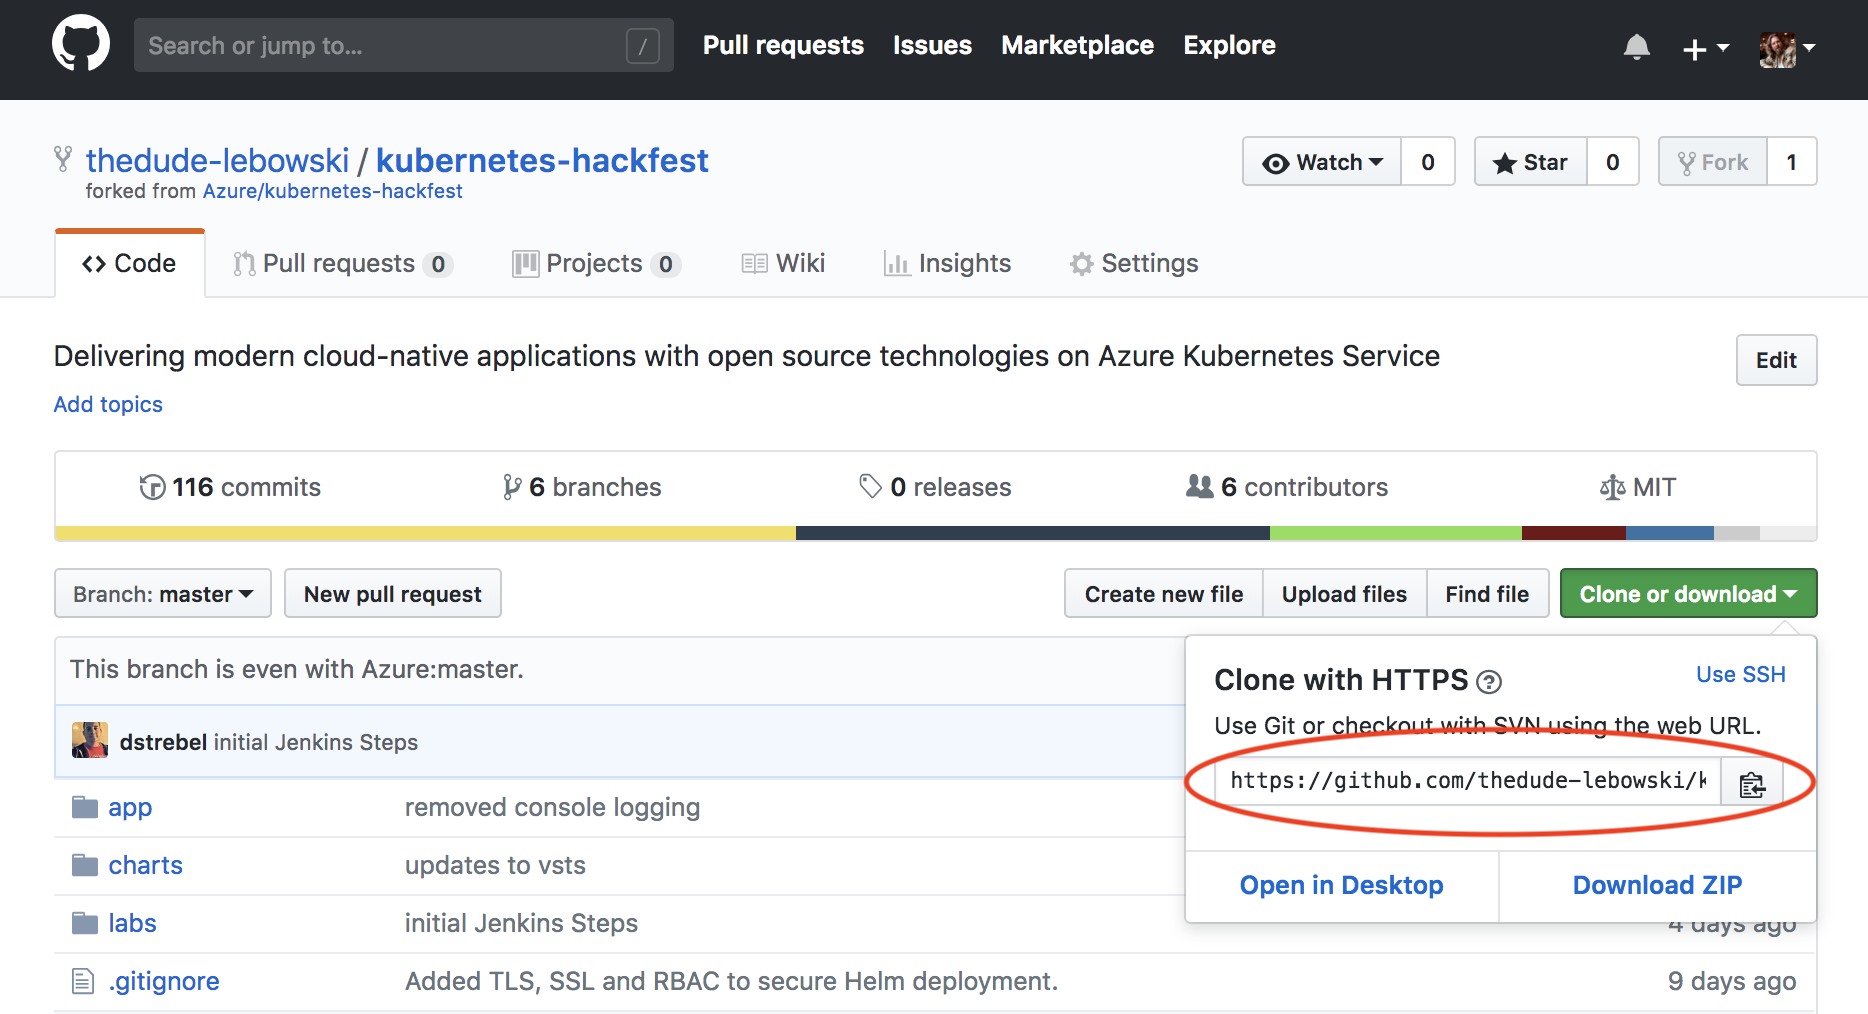
-
Clone your repo in Azure Cloud Shell.
Note: If you have cloned the repo in earlier labs, the directory name will conflict. You can either delete the old one or just rename it before this step.
 git clone https://github.com/<your-github-account>/kubernetes-hackfest.git

 cd kubernetes-hackfest/labs/cicd-automation/jenkins
Deploy Jenkins Helm Chart
-
Validate helm. Helm was configured in the lab 3.
helm version version.BuildInfo{Version:"v3.0.0", GitCommit:"e29ce2a54e96cd02ccfce88bee4f58bb6e2a28b6", GitTreeState:"clean", GoVersion:"go1.13.4"} -
Deploy Jenkins
kubectl create namespace jenkins
helm repo add jenkinsci https://charts.jenkins.io
helm repo update
helm install jenkins -n jenkins -f jenkins-values.yaml jenkinsci/jenkins
This will take a couple of minutes to fully deploy
-
Get credentials and IP to Login To Jenkins
printf $(kubectl get secret --namespace jenkins jenkins -o jsonpath="{.data.jenkins-admin-password}" | base64 --decode);echo

export SERVICE_IP=$(kubectl get svc --namespace jenkins jenkins --template "")

echo http://$SERVICE_IP:8080/login
Login with the password from previous step and the username: admin
Note: The Jenkins pod can take a couple minutes to start. Ensure it is
Runningprior to attempting to login. You can run the following to watch the pod creation: watch kubectl get pods
Configure Azure Integration In Jenkins
-
Browse to Jenkins Default Admin Screen
-
Click on
Credentials -
Select
Systemunder Credentials -
On the right side click the
Global Credentialsdrop down and selectAdd Credentials - Enter the following: Example Below
- Kind = Azure Service Principal
- Scope = Global
- Subscription ID = use Subscription ID from cluster creation
- Client ID = use Client/App ID from cluster creation
- Client Secret = use Client Secret from cluster creation
- Tenant ID = use Tenant ID from cluster creation
- Azure Environment = Azure
- Id = azurecli
- Description = Azure CLI Credentials
-
Click
Verify Service Principal -
Click
Save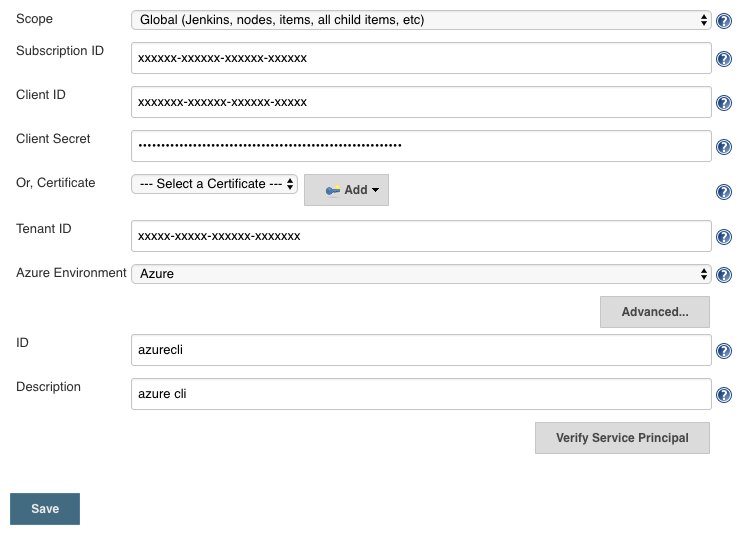
Verify Updated ACRNAME in Jenkinsfile
-
Within Azure Cloud Shell edit Jenkinsfile with the following command
code Jenkinsfile -
If not updated, replace the following variable with the Azure Container Registry created previously
- def ACRNAME = ‘
'
- def ACRNAME = ‘
Create Jenkins Multibranch Pipeline
-
Open Jenkins Main Admin Interface
-
Click
New Item -
Enter “aks-hackfest” for Item Name
-
Select
Multibrach Pipelineand then click Ok -
Under Branch Sources
Click Add->Single repository & branch -
Name the repo and branch ‘Master’ and then in ‘Replository URL’ enter
your forked git repo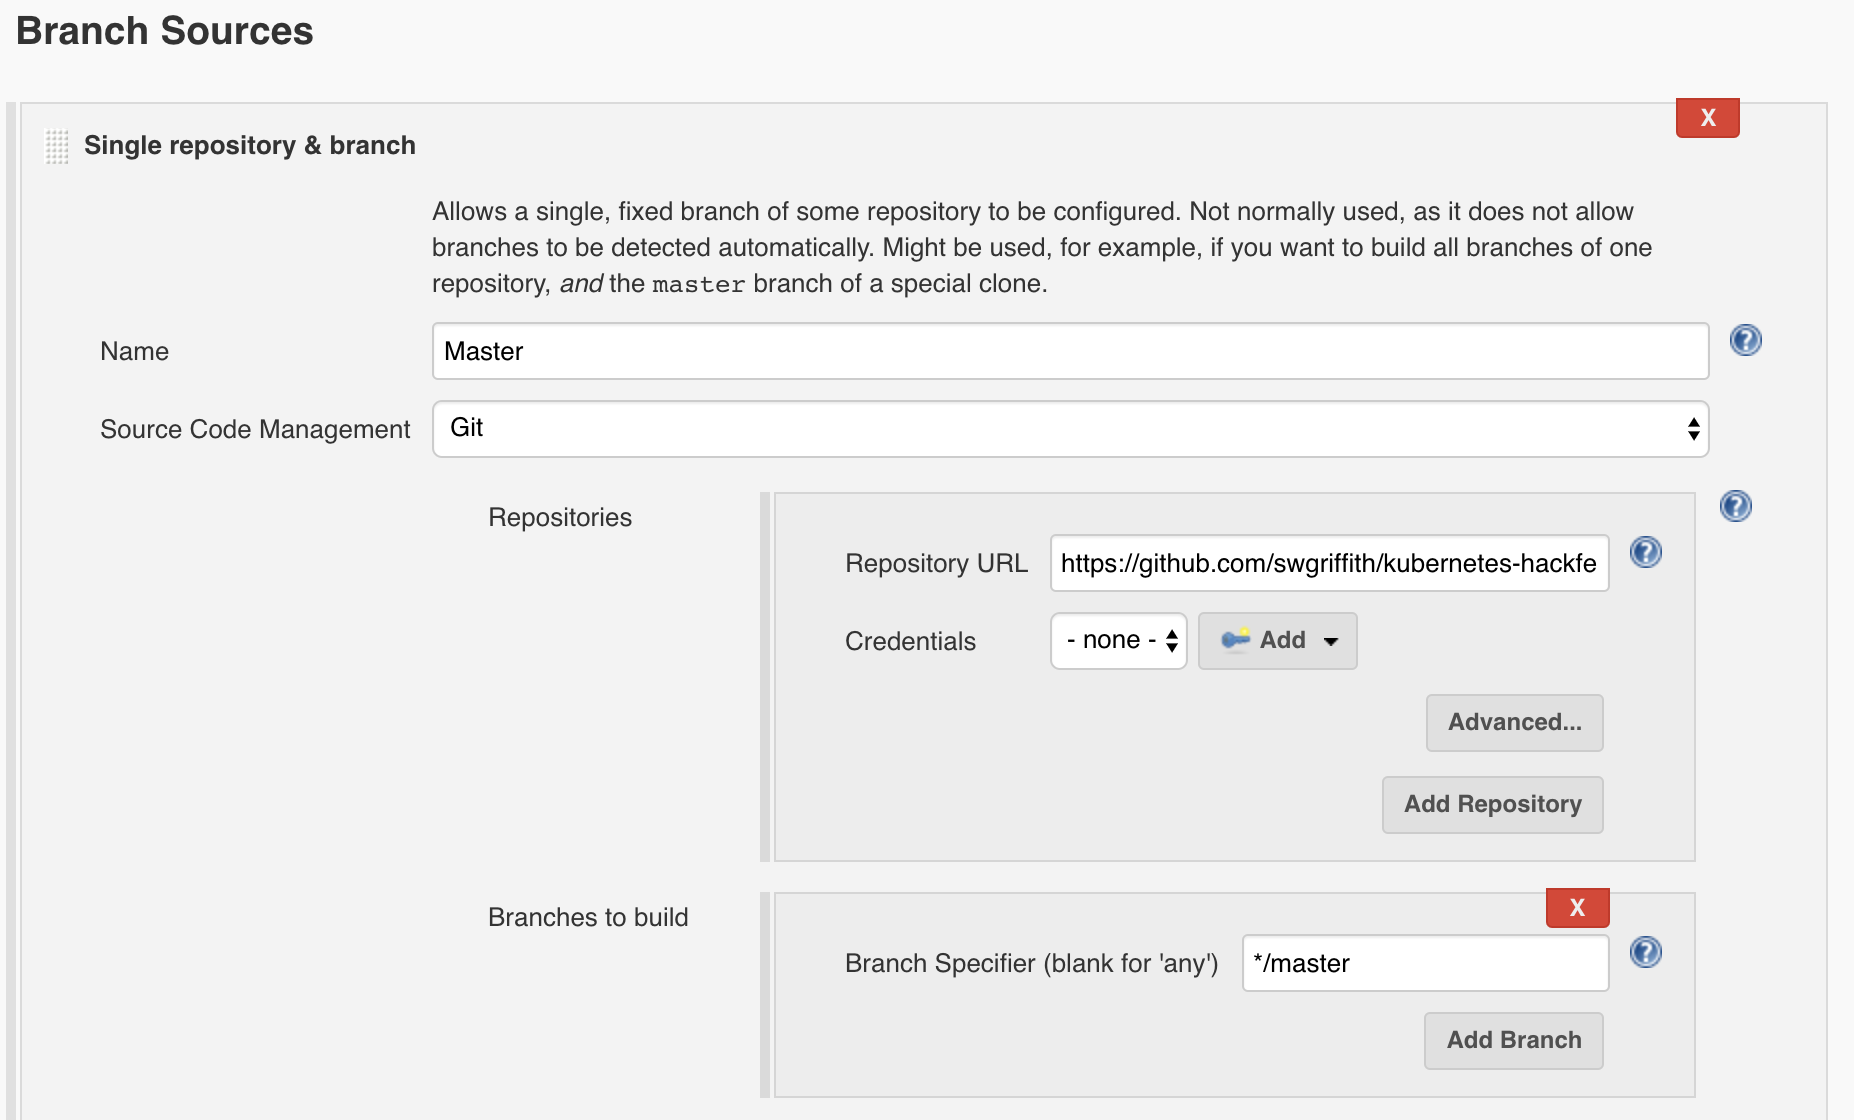
-
Leave the ‘Branch Specifier’ as ‘*/master’
-
In Build Configuration -> Script Path -> use the following path
labs/cicd-automation/jenkins/Jenkinsfile
-
Scroll to bottom of page and click
Save
Run Jenkins Multibranch Deployment
-
Go back to Jenkins main page
-
Select the newly created pipeline
-
Select
Scan Multibranch Pipeline Now
This will scan your git repo and run the Jenkinsfile build steps. It will clone the repository, build the docker image, and then deploy the app to your AKS Cluster.
View Build Console Logs
-
Select the
masterunder branches
-
Select
build #1under Build History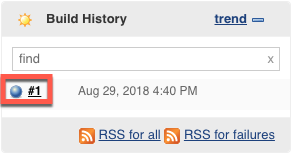
-
Select
Console Output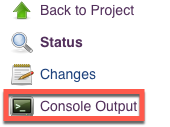
-
Check streaming console output for any errors
Verify Deployed Application
-
Confirm pods are running
kubectl get pods -n hackfest -
Get service IP of deployed app
kubectl get service/service-tracker-ui -n hackfest -
Open browser and test application
EXTERNAL-IP:8080
Troubleshooting / Debugging
Docs / References
- Docs. https://docs.microsoft.com/en-us/azure/aks/jenkins-continuous-deployment