Universal Decoder
This project gives access to decoders in the TTN repo through a HTTP REST interface compliant with the LoraWan implementation in this repository.
Codecs provided by TTN are stored in a well defined folder structure. The universal decoder copies the codec files into its docker image at build time for later use from the web application. As currently codecs are not implemented as node modules (see open issue), these files were patched accordingly after being copied so that they can be imported and reused.
Quick start
Install node dependencies and copy/patch codecs from the TTN repository:
npm install
npm run codecs
Create docker image (replace amd64 with the architecture of your choice)
docker build . -f Dockerfile.amd64 -t universaldecoder
Run docker image:
docker run --rm -d -p 8080:8080 universaldecoder
Call the built-in DecoderValueSensor decoder at the following url. You should see the result as JSON string.
http://localhost:8080/api/DecoderValueSensor?devEui=0000000000000000&fport=1&payload=QUJDREUxMjM0NQ%3D%3D
Finally list all available decoders with the following url:
http://localhost:8080/decoders
You can finally call any other supported decoder at:
http://localhost:8080/api/<decoder>?devEui=0000000000000000&fport=<fport>&payload=<payload>
Local development
Start local server
npm start
You can access the universal decoder at the url available in the output of the previous command.
Run tests
npm test
Universal Decoder REST API
The url accepted by the universal decoder follows the pattern:
/api/<decoder>?devEui=<devEui>&fport=<fport>&payload=<payload>
decoder
This path parameter identifies the TTN decoder that will be used. You can get a list of all available decoders by calling the /decoders endpoint.
devEui
LoRaWan unique end-device identifier.
fport
LoRaWan Port field as integer value.
payload
Base64 and URL encoded payload to decode.
For example, to test a payload of ABCDE12345, you:
- Convert it to a base64 encoded string:
QUJDREUxMjM0NQ== - Convert the result to a valid URL parameter:
QUJDREUxMjM0NQ%3D%3D - Add this to your URL as the payload query parameter.
Deploying to Azure IoT Edge
Push docker image to registry
Create a docker image from your finished solution based on the target architecture and host it in an Azure Container Registry, on DockerHub or in any other container registry of your choice.
Install the Azure IoT Edge for Visual Studio Code extension to build and push the Docker image.
Make sure you are logged in to the Azure Container Registry you are using. Run docker login <mycontainerregistry>.azurecr.io on your development machine, or az acr login -n mycontainerregistry if the Azure CLI is available.
Edit the file module.json to contain your container registry address, image name and version number:

We provide the Dockerfiles for the following architectures:
To build the Docker image, right-click on the module.json file and select "Build IoT Edge Module Image" or "Build and Push IoT Edge Module Image". Select the architecture you want to build for from the drop-down menu.
To temporarily test the container running you decoder using a webbrowser or Postman, you can manually start it in Docker and bind the container's port 8080 to a free port on your host machine (8080 is usually good).
docker run --rm -it -p 8080:8080 --name universaldecoder <container registry>/<image>:<tag>
````

Call the built-in `DecoderValueSensor` decoder at the following url:
### Deploy to IoT Edge
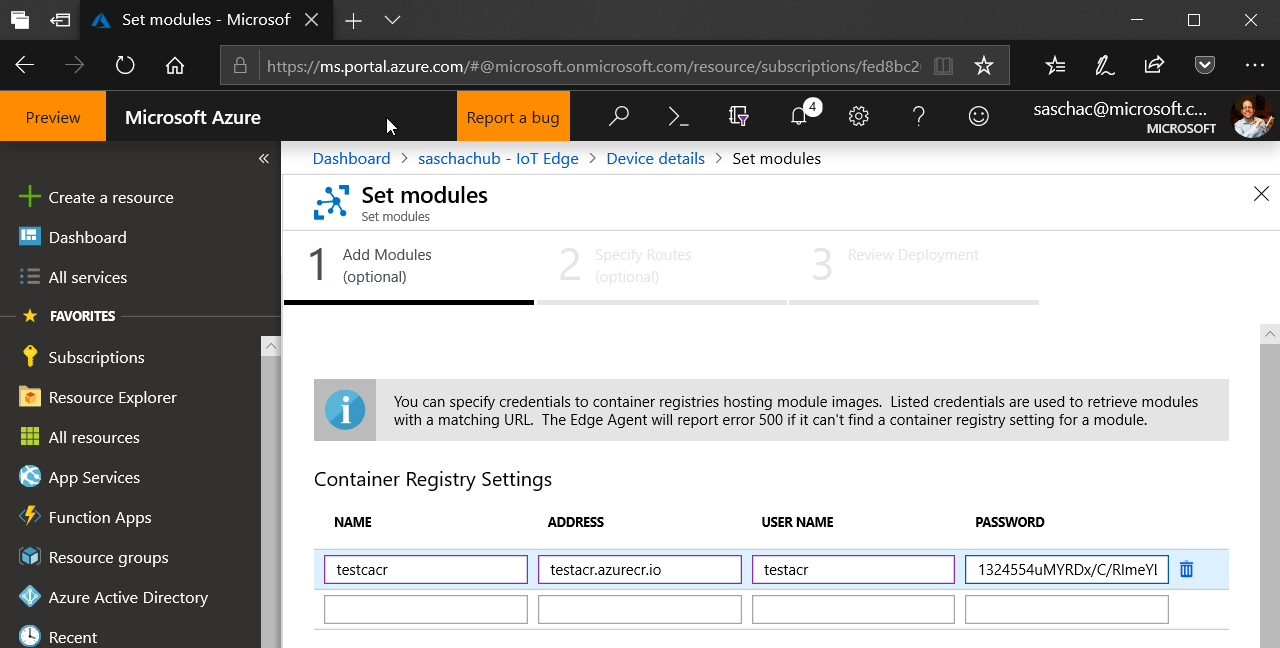
If required, add credentials to access your container registry to the IoT Edge device by adding them to IoT Hub → IoT Edge → Your Device → Set Modules → Container Registry settings.

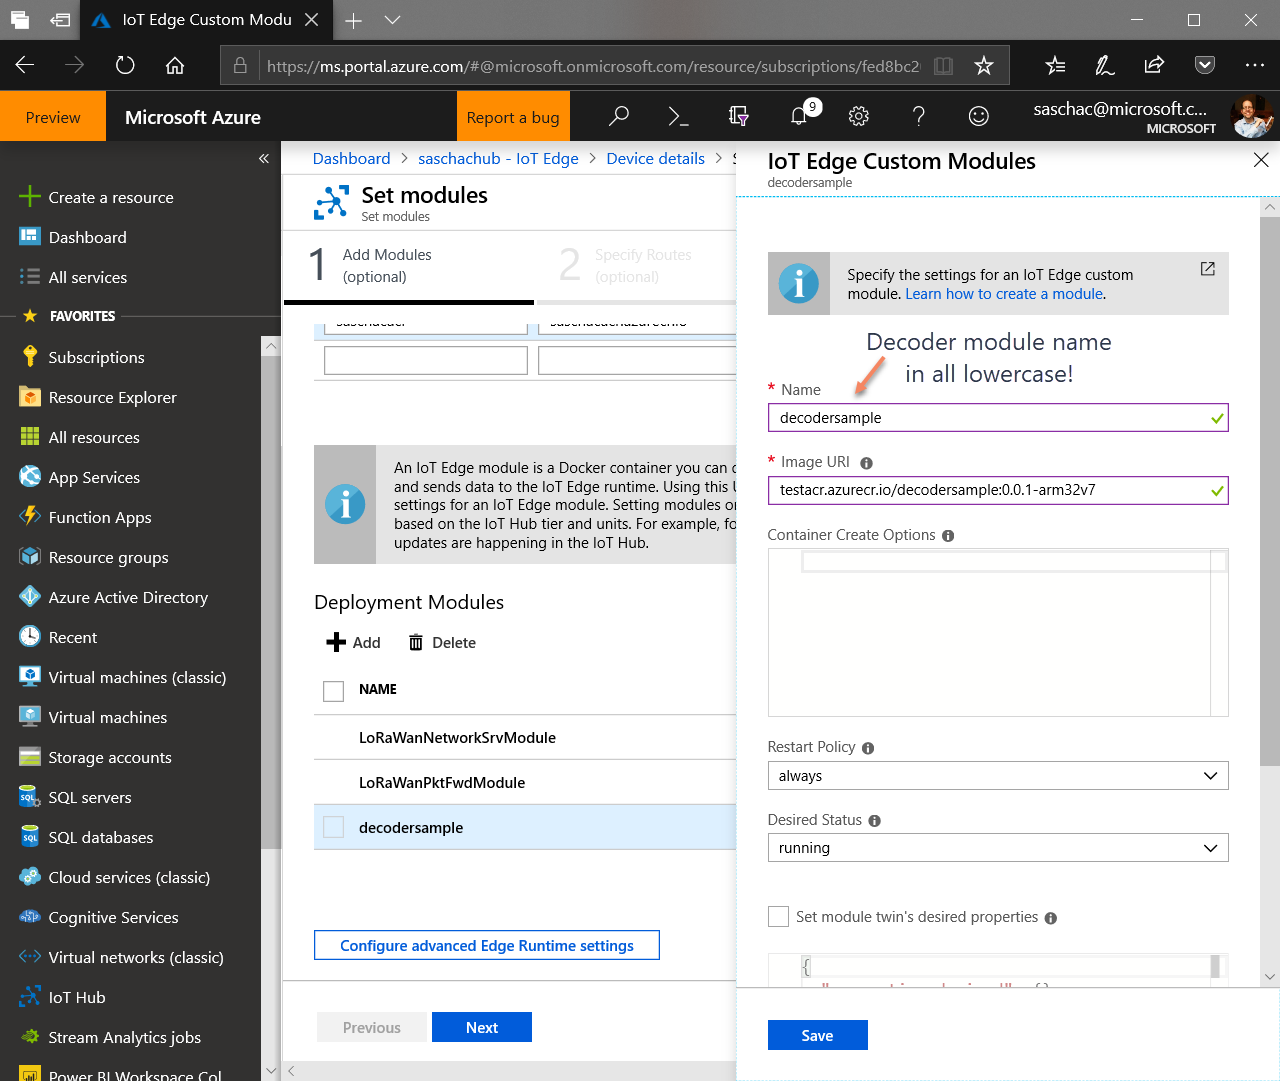
Configure your IoT Edge gateway device to include the custom container. IoT Hub → IoT Edge → Your Device → Set Modules → Deployment Modules → Add → IoT Edge Module. Set the module Name and Image URI, pointing to your image created above.
**Make sure to choose all lowercase letters for the Module Name as the container will be unreachable otherwise!**

To activate the decoder for a LoRa device, navigate to your IoT Hub → IoT Devices → Device Details → Device Twin and set the ```SensorDecoder``` value in the desired properties to:
A list of all available decoders can be retrieved by calling the endpoint:
Again make sure to choose all lowercase letters for the module name to make sure it is reachable.

In case the custom decoder is unreachable, throws an error or return invalid JSON, the error message will be shown in your device's messages in IoT Hub.