Azure Verified Modules
New content: AI-Assisted IaC Solution Development
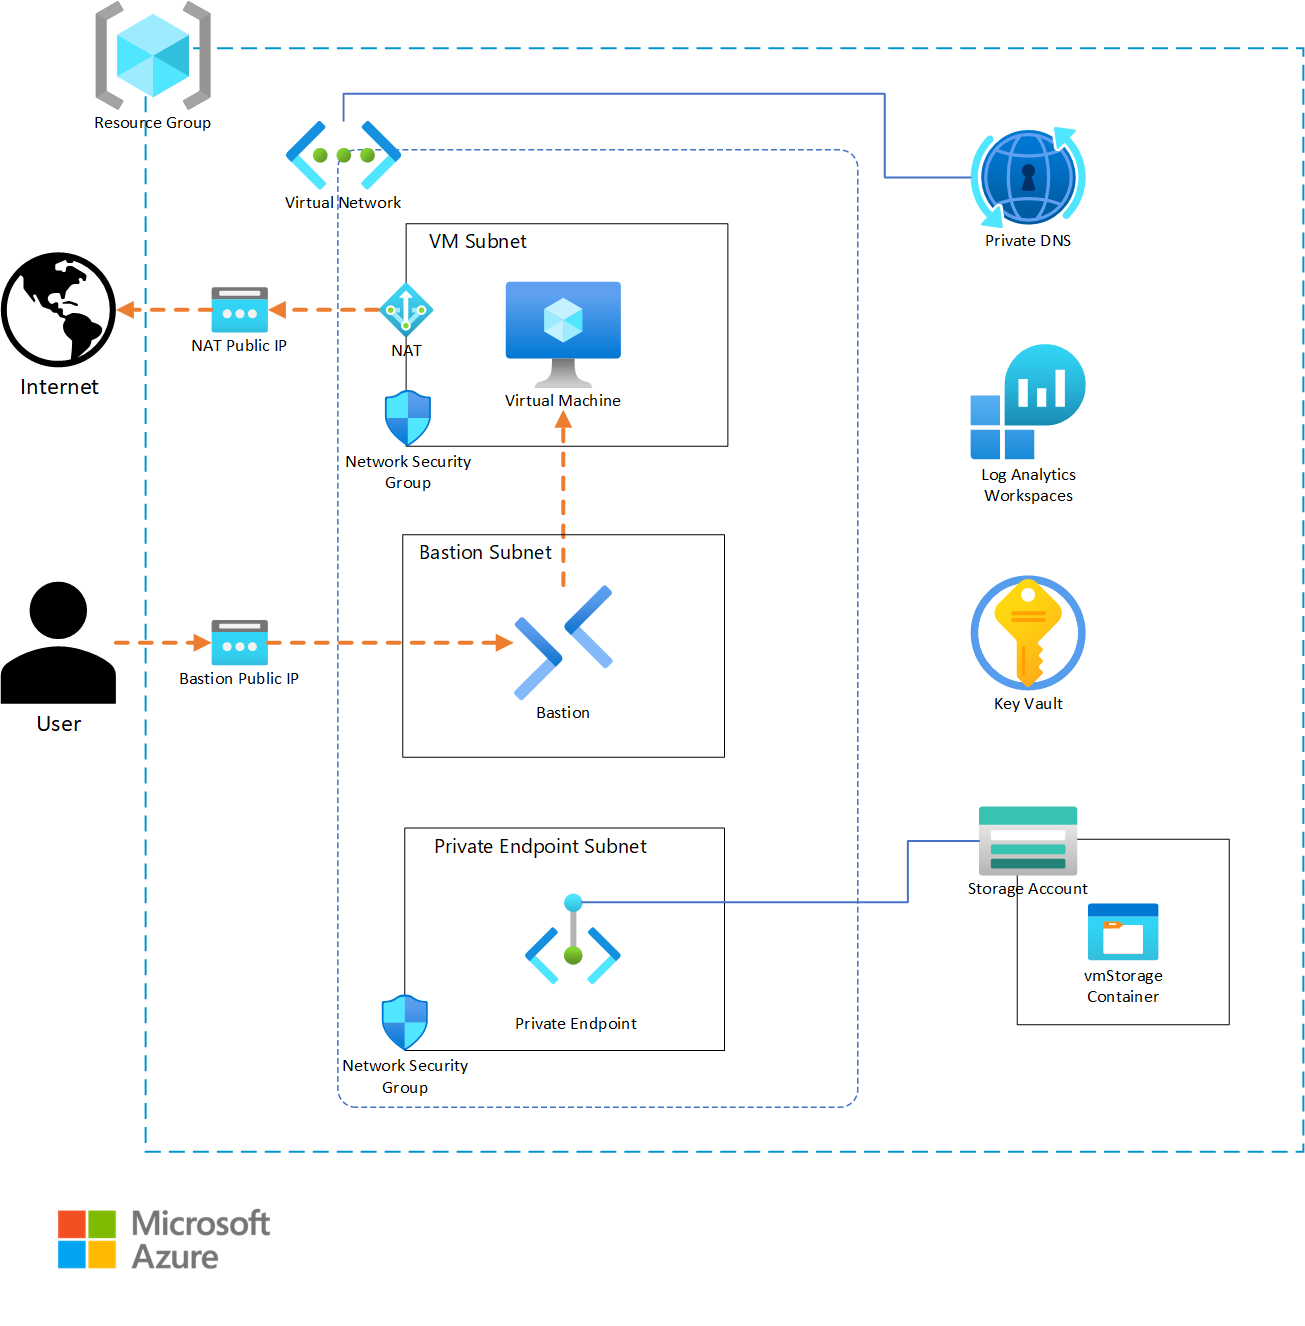
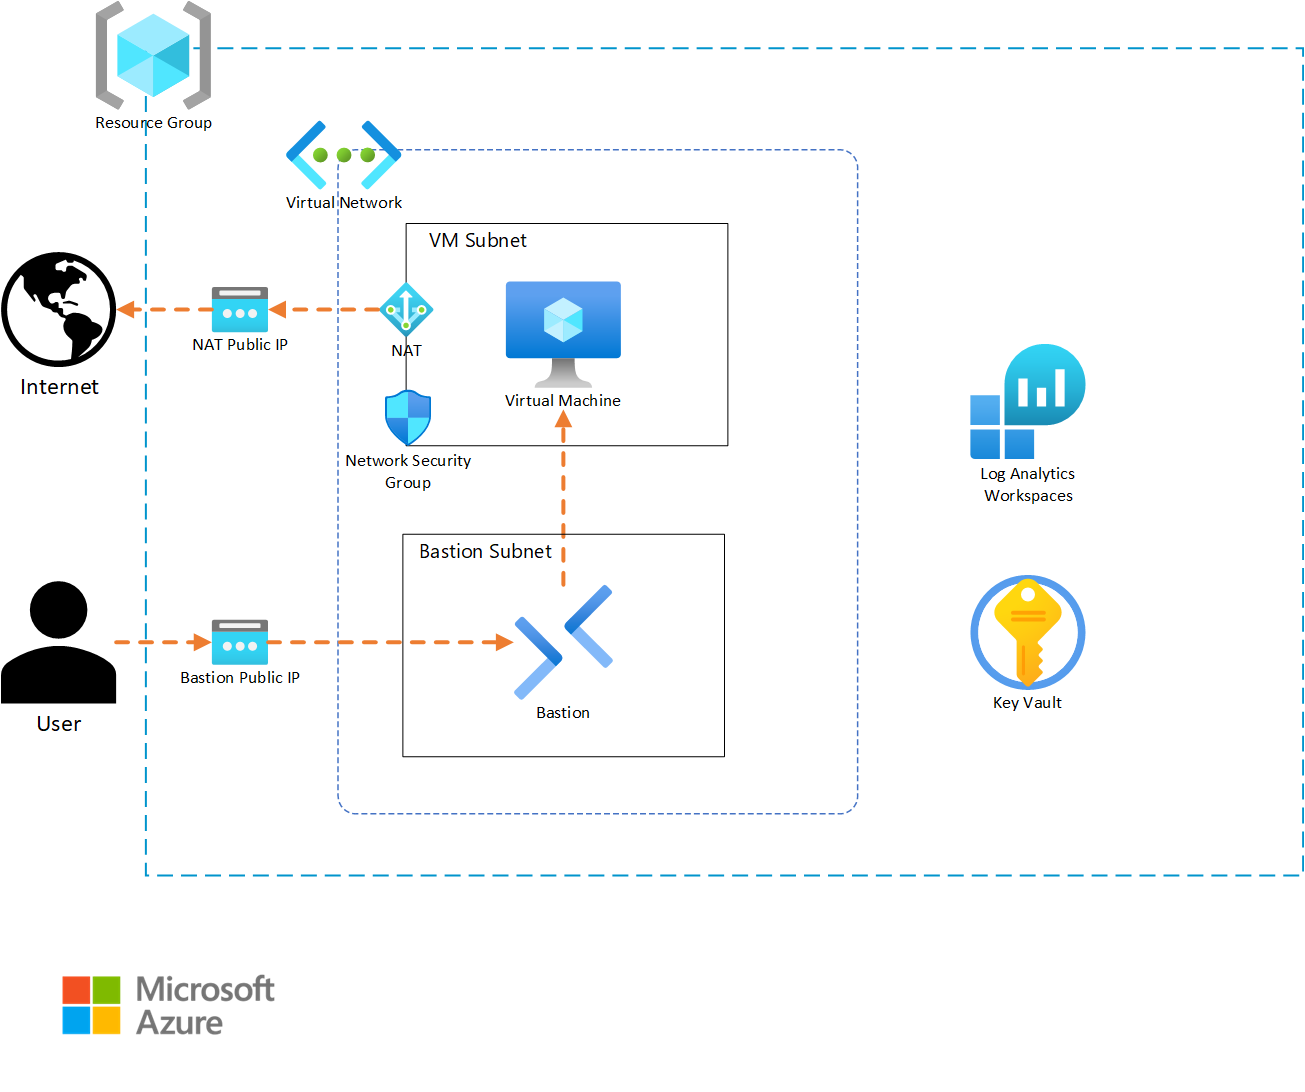
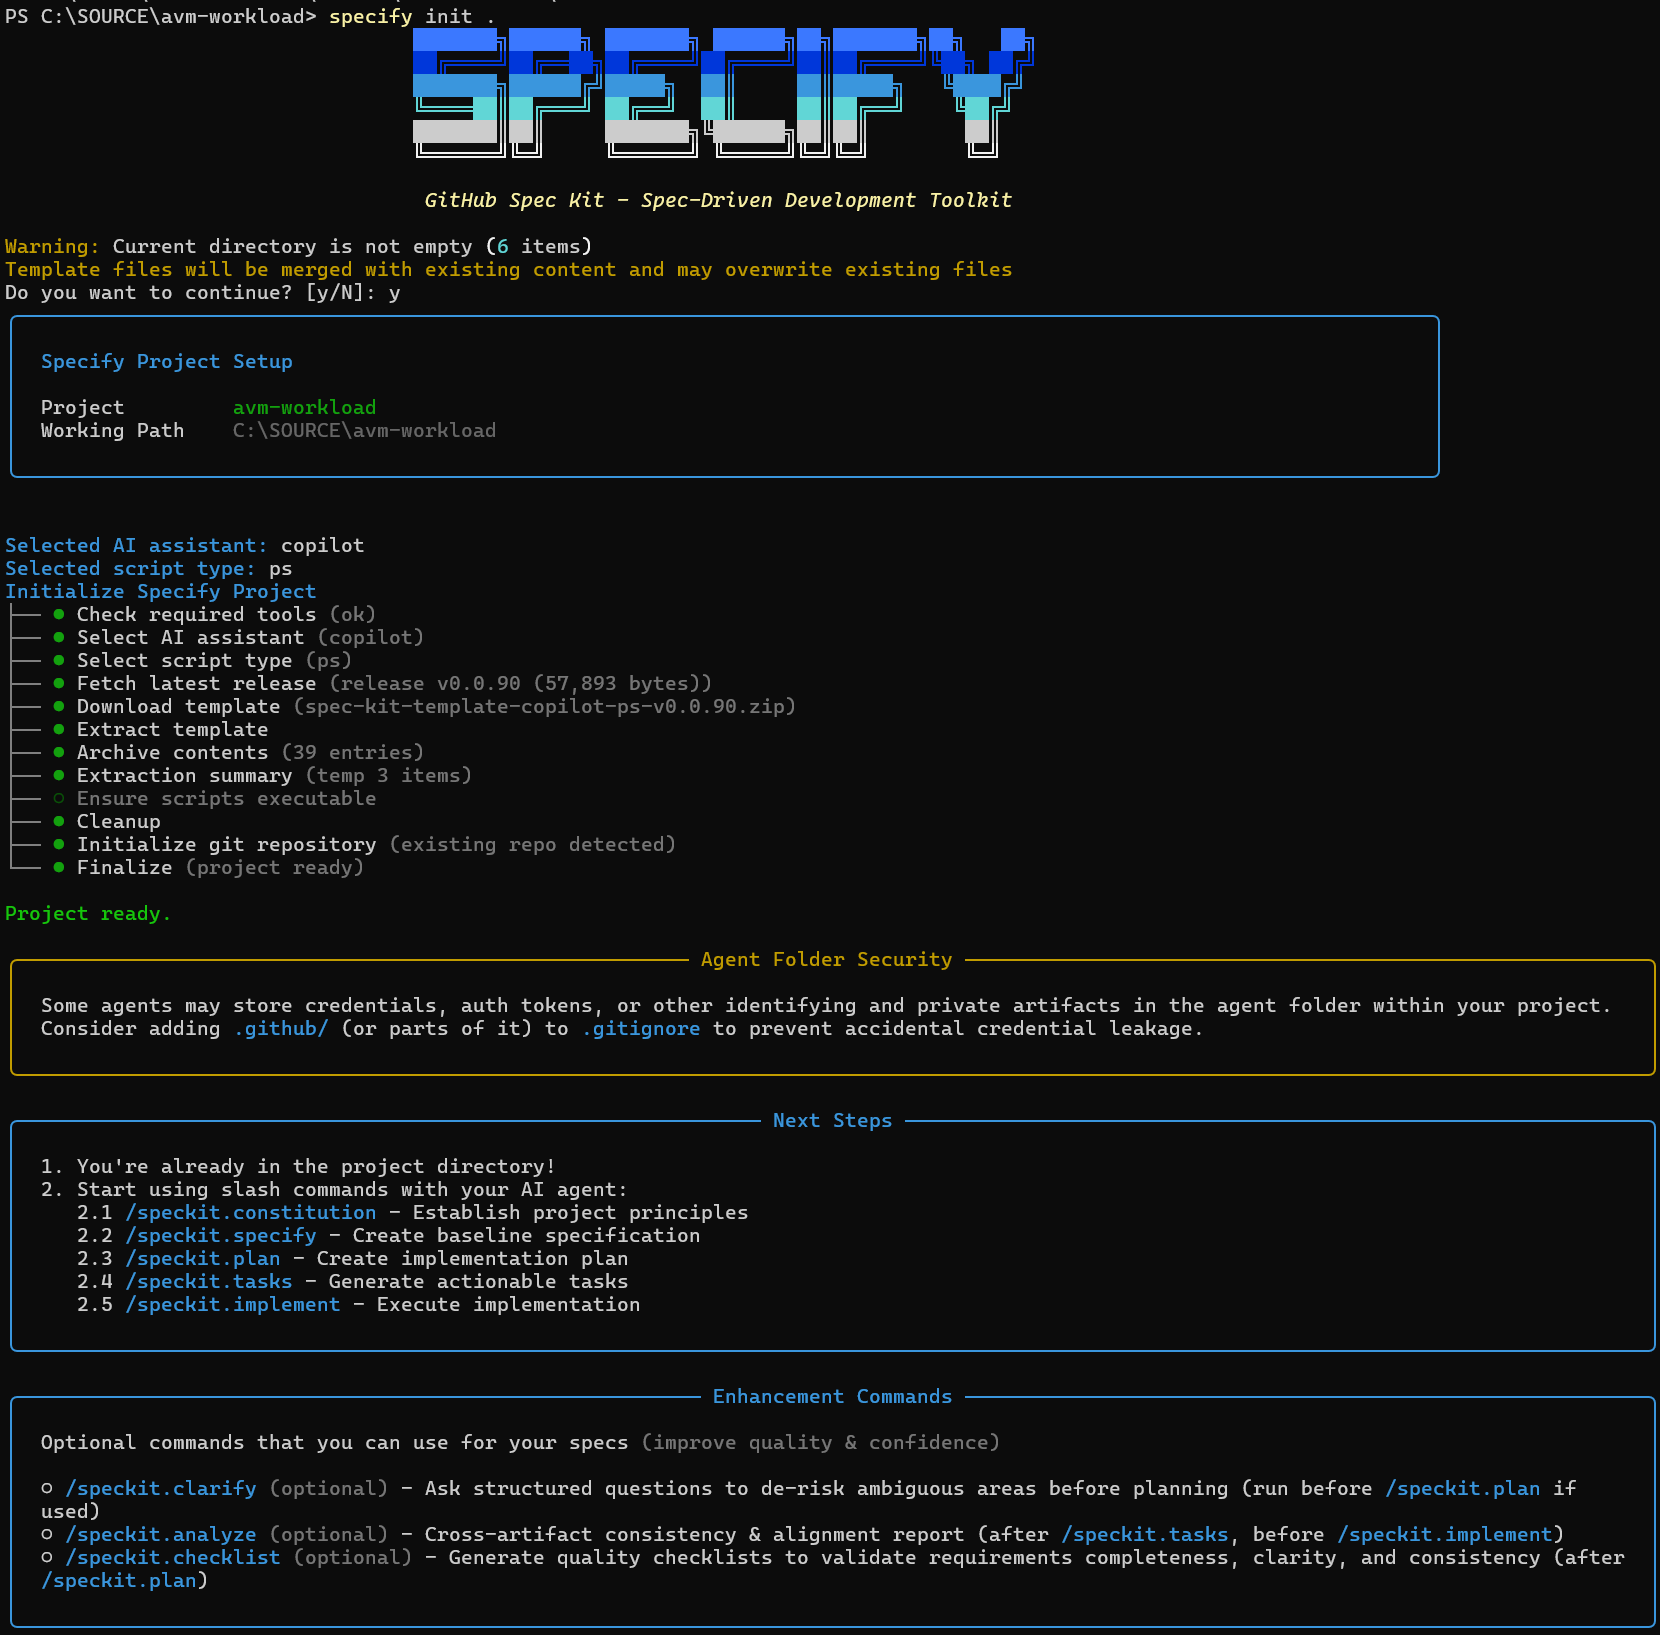
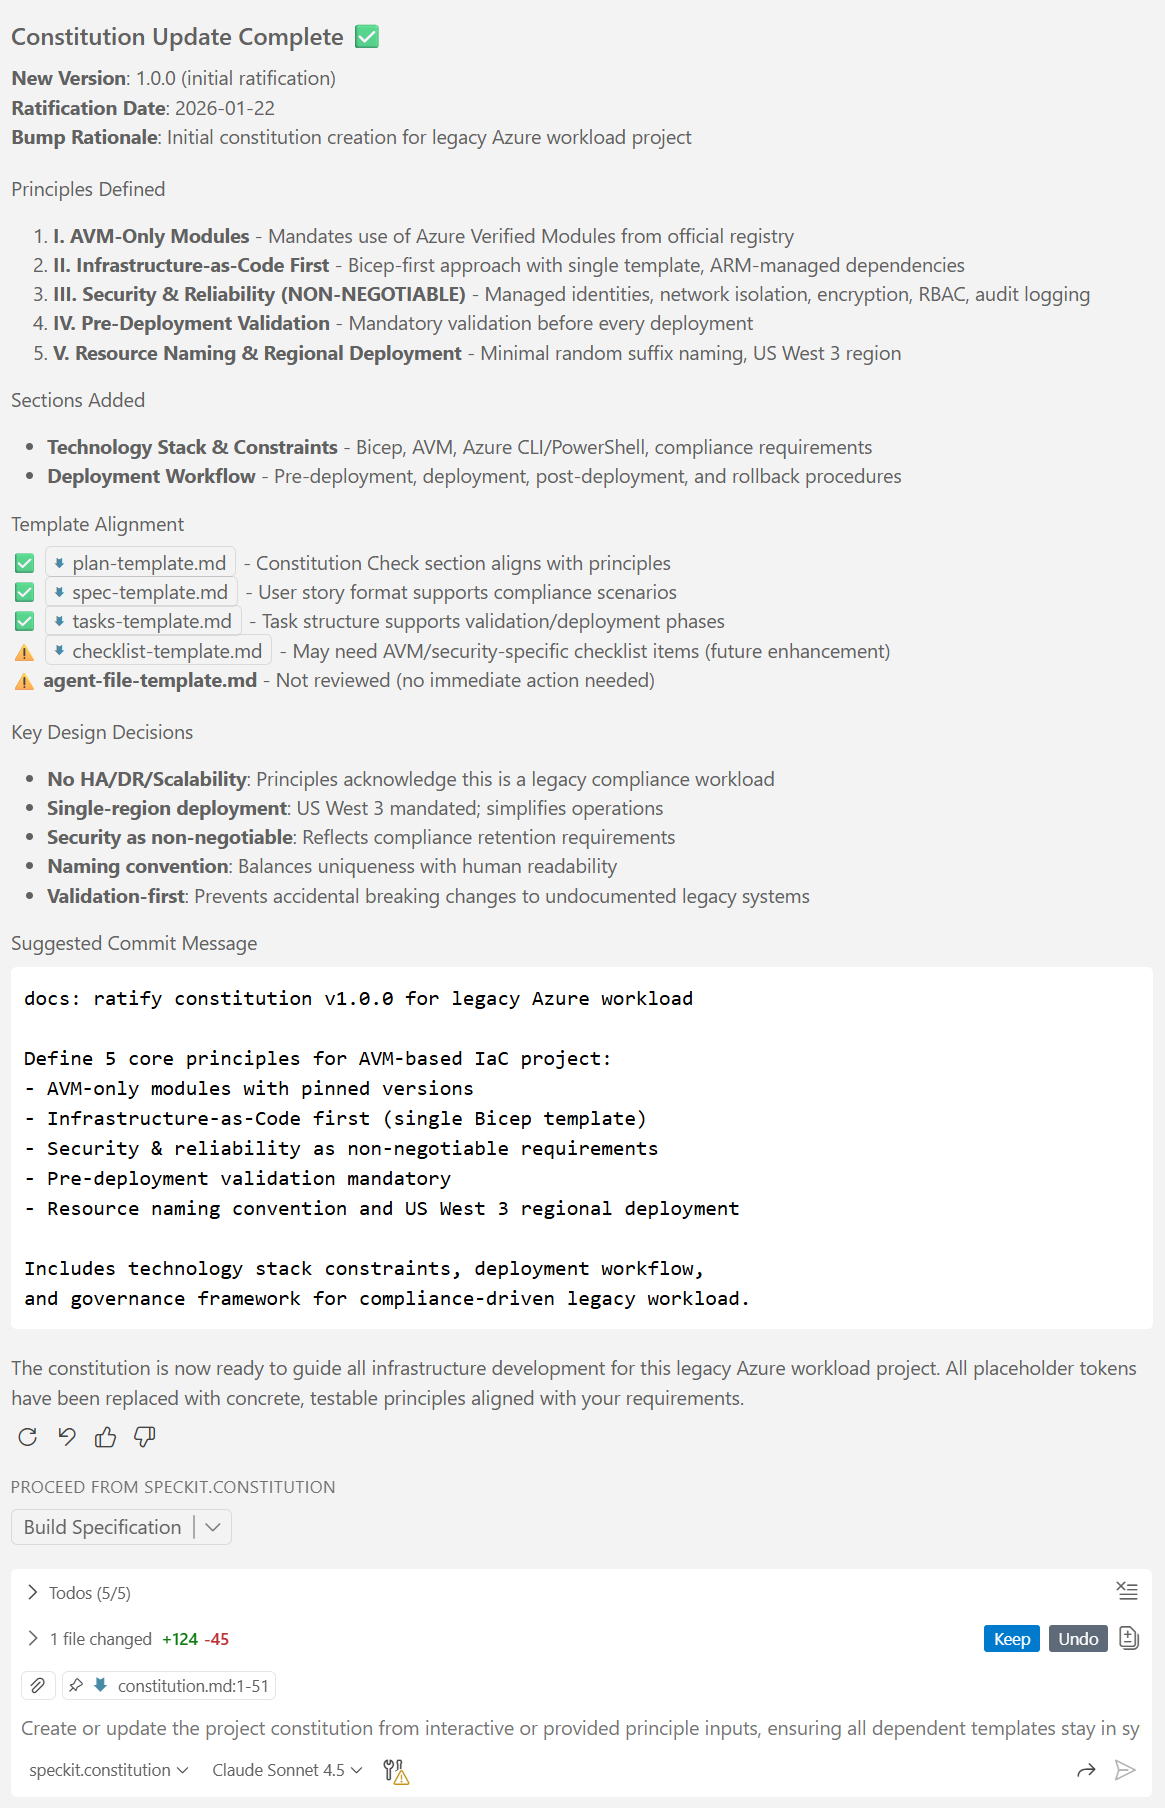
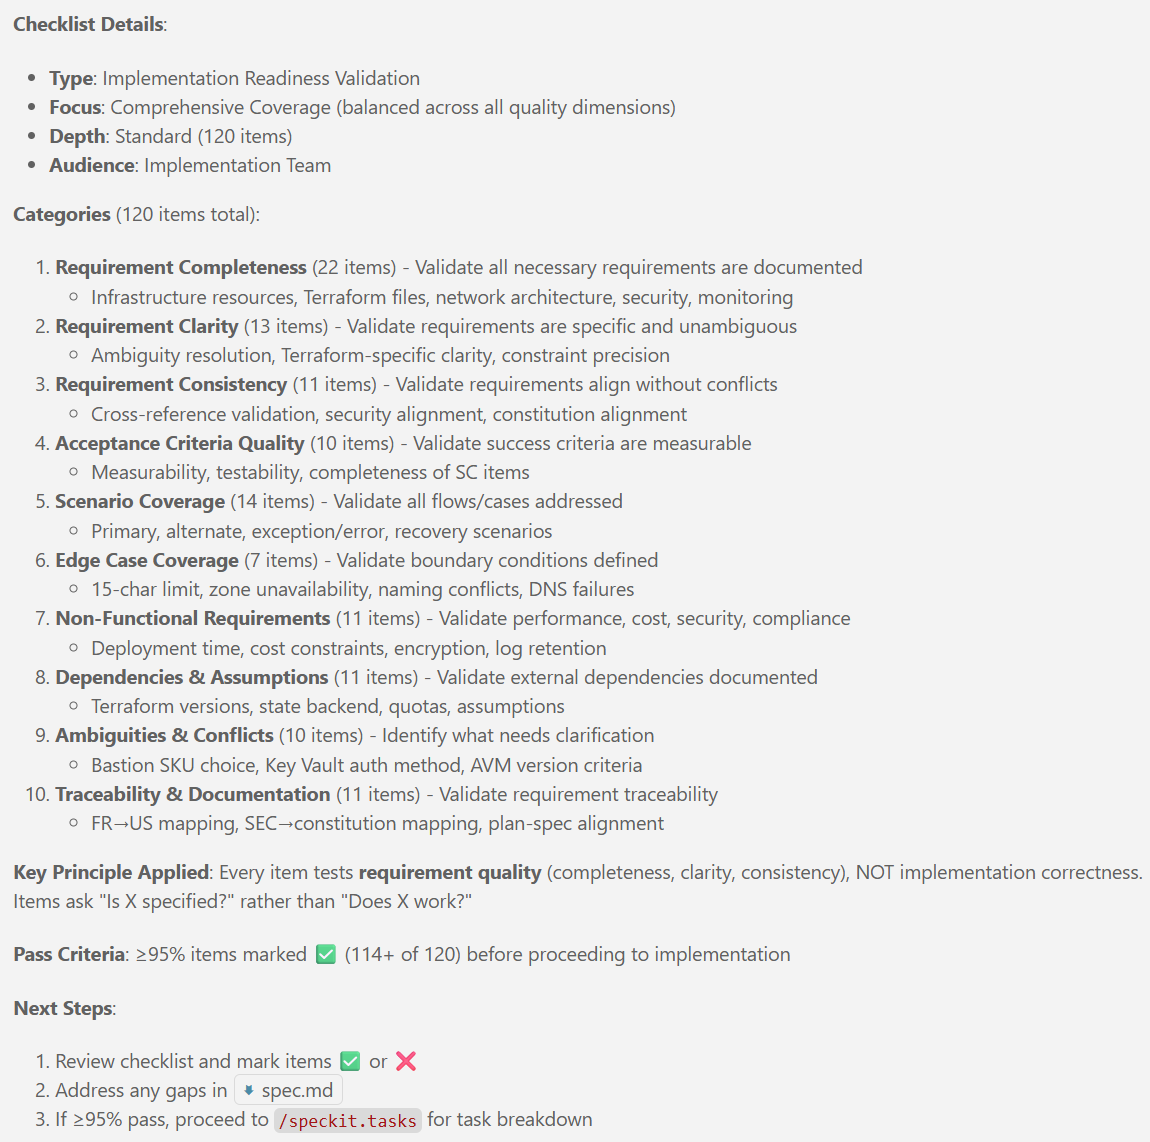
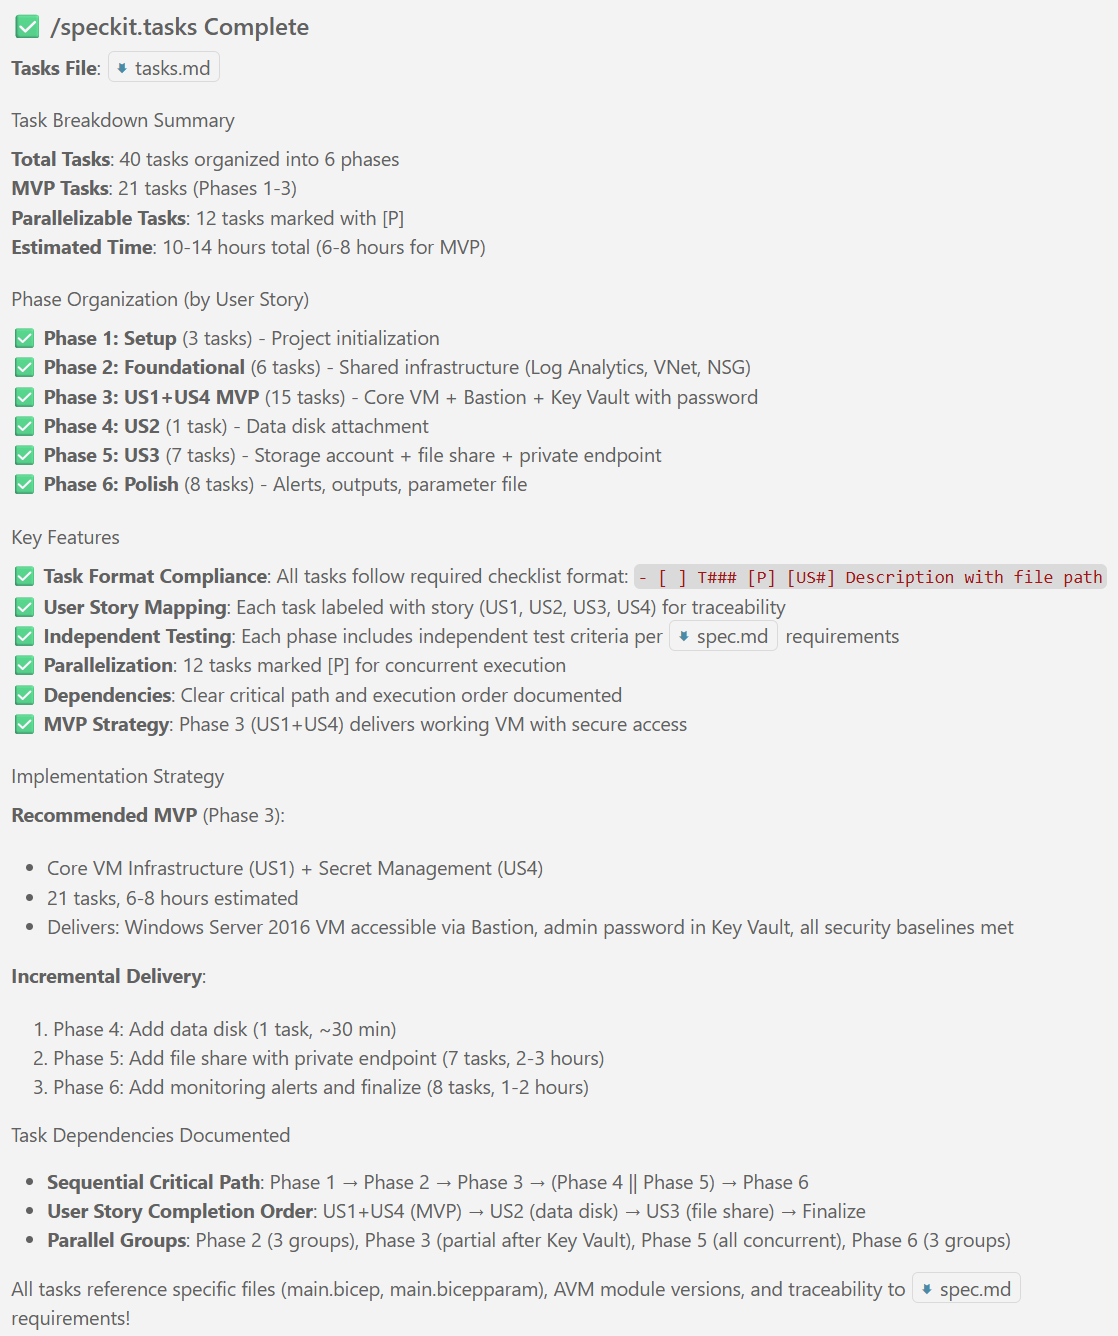
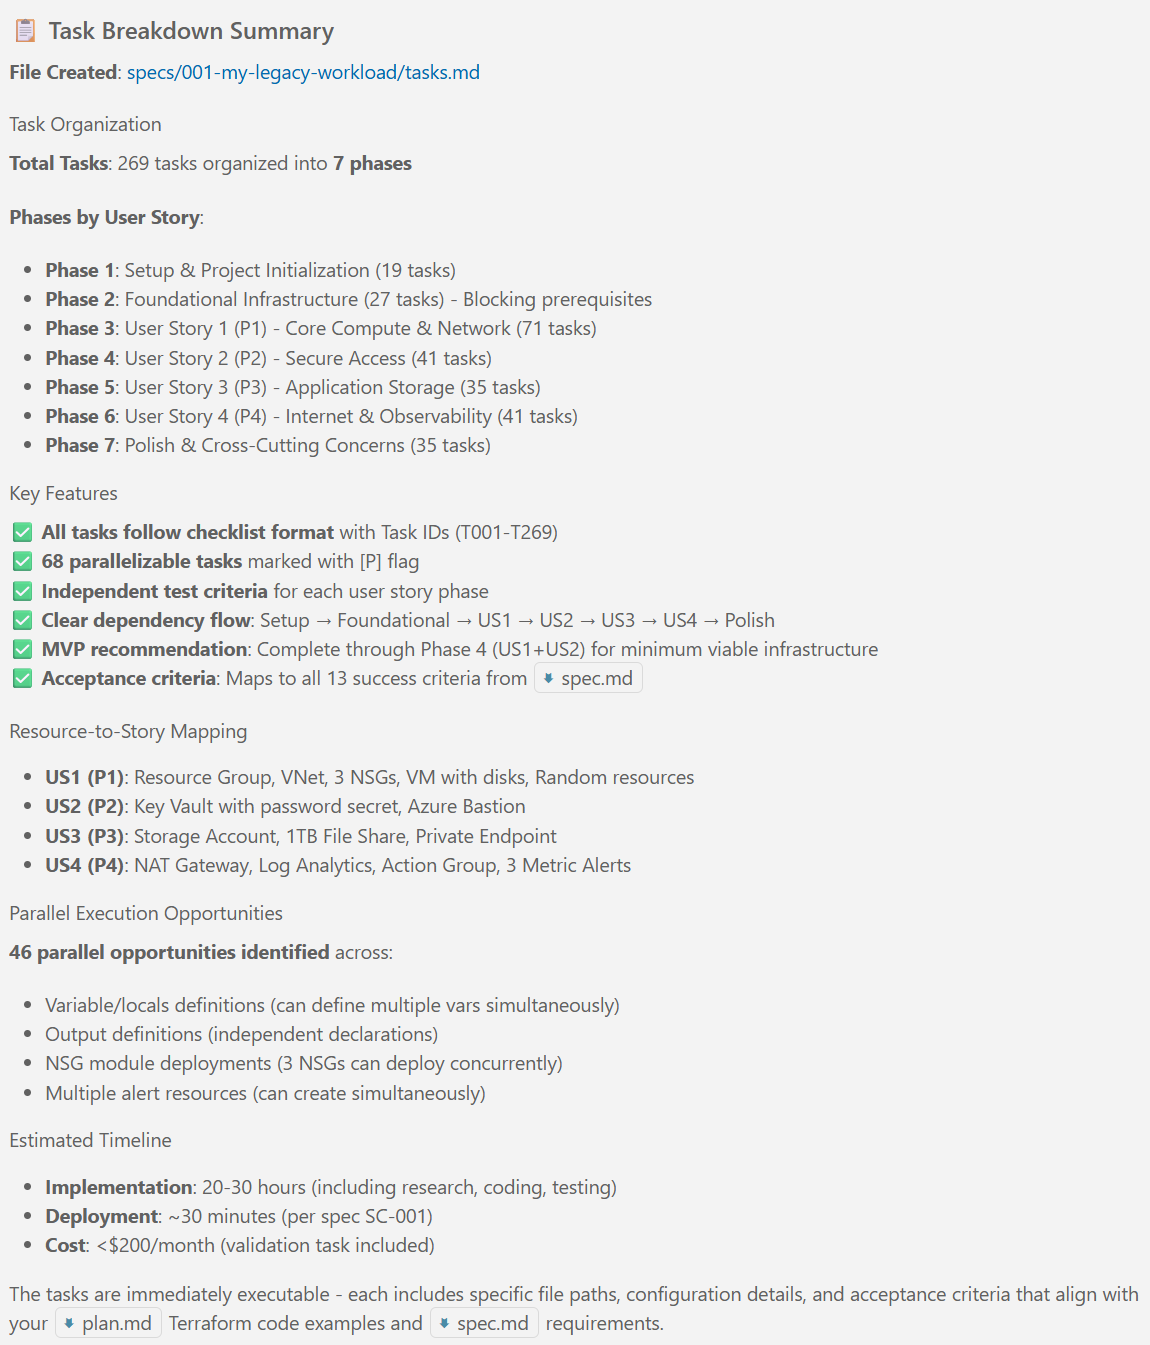
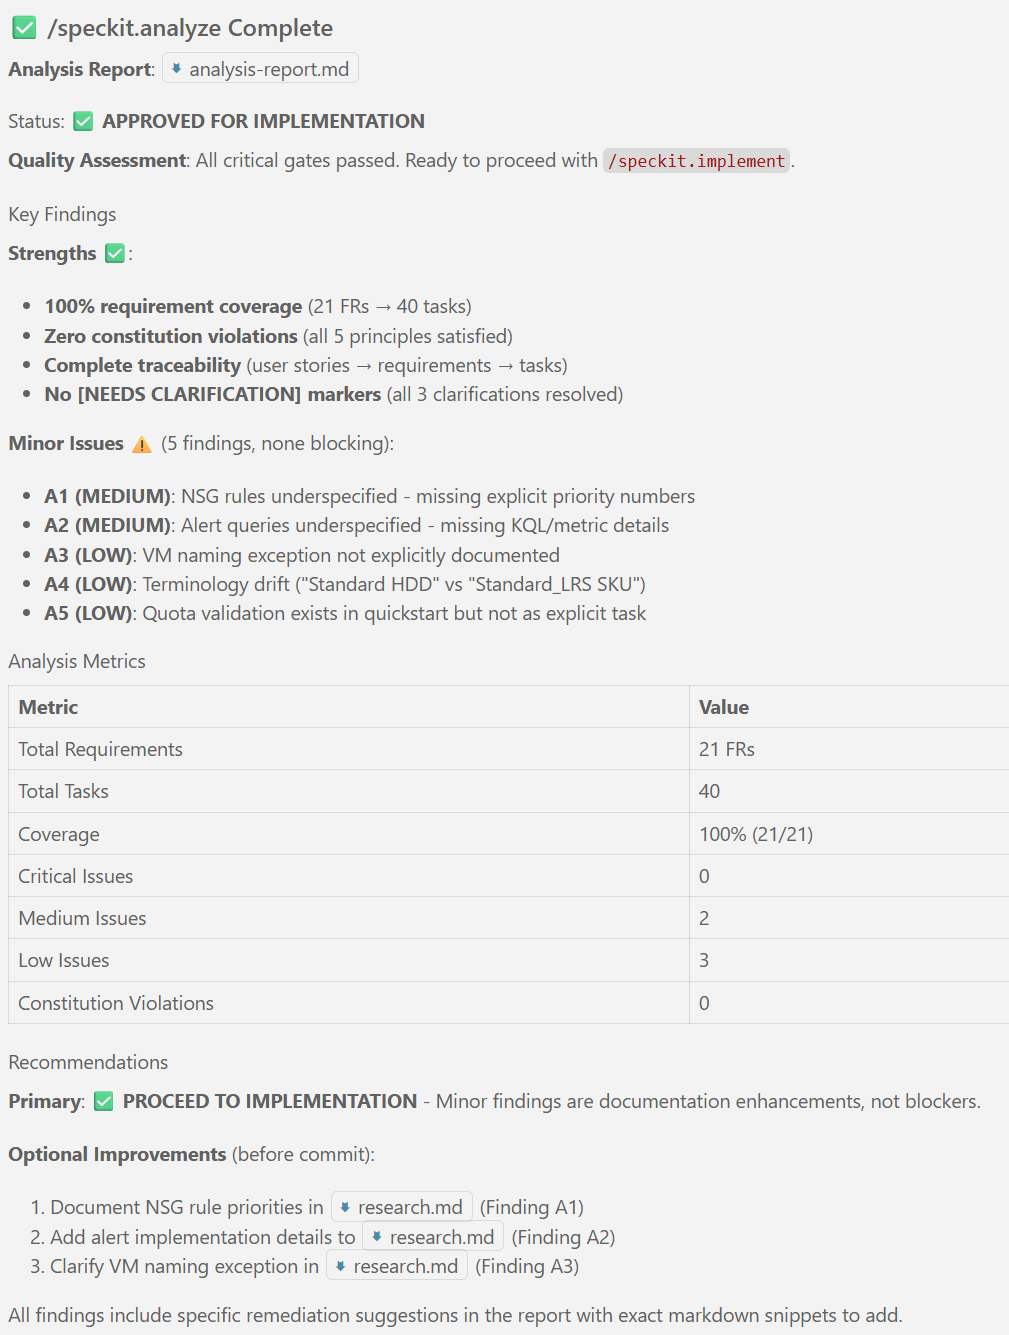
New articles available on specification-driven development with AVM modules! Learn how to use GitHub Copilot and Spec Kit to accelerate the development of Azure infrastructure solutions with AVM. See end-to-end examples for both Bicep and Terraform.
Introduction
Value Proposition
Azure Verified Modules (AVM) is an initiative to consolidate and set the standards for what a good Infrastructure-as-Code module looks like. Modules will then align to these standards, across languages (Bicep, Terraform etc.) and will then be classified as AVMs and available from their respective language specific registries. AVM is a common code base, a toolkit for our Customers, our Partners, and Microsoft. It’s an official, Microsoft driven initiative, with a devolved ownership approach to develop modules, leveraging internal & external communities. Azure Verified Modules enable and accelerate consistent solution development and delivery of cloud-native or migrated applications and their supporting infrastructure by codifying Microsoft guidance (WAF), with best practice configurations. | 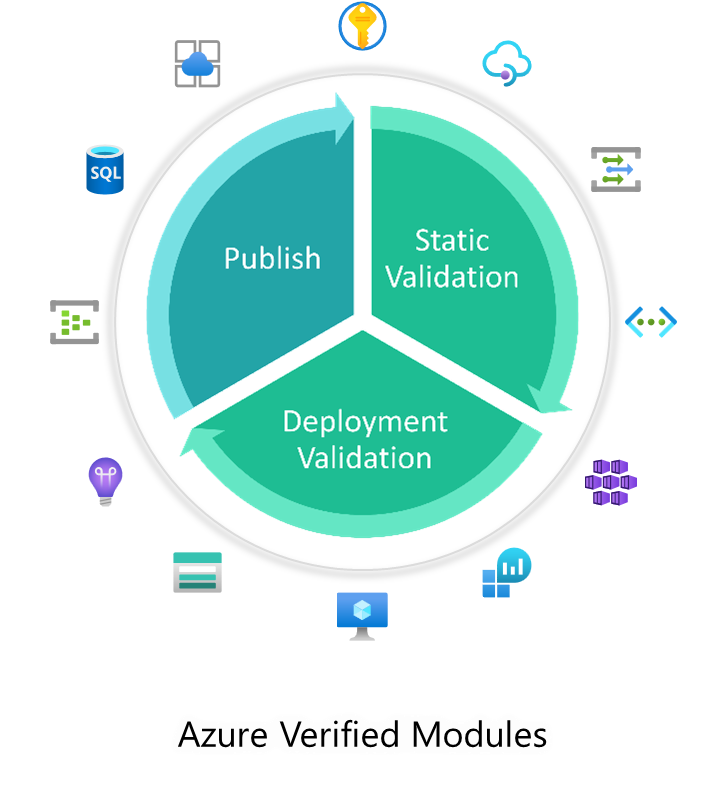 |
Modules
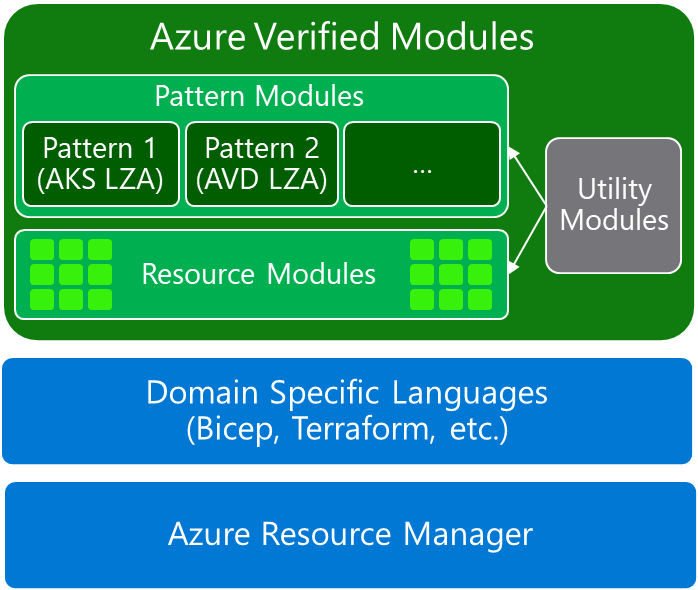 | Azure Verified Modules provides two types of modules: Resource and Pattern modules. AVM modules are used to deploy Azure resources and their extensions, as well as reusable architectural patterns consistently. Modules are composable building blocks that encapsulate groups of resources dedicated to one task.
AVM improves code quality and provides a unified customer experience. |
Important
AVM is owned, developed & supported by Microsoft, you may raise a GitHub issue on this repository or the module’s repository directly to get support or log feature requests.
You can also log a support ticket and if the issue is not related to the Azure platform, you will be redirected to submit a GitHub issue for the module owner(s) or the AVM team.
See Module Support for more information.
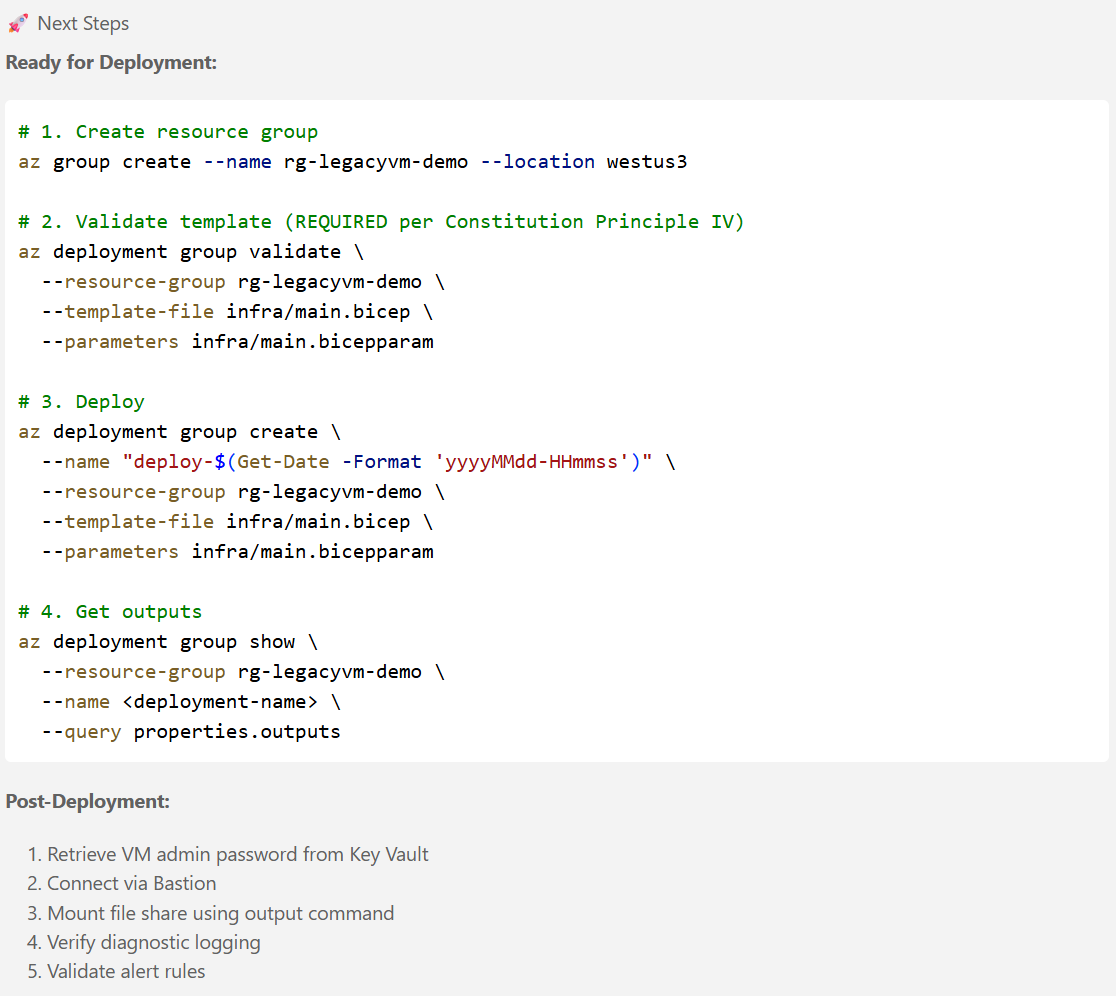
Next Steps
|
|